*Manipulate toolbar
Show selection
|
|
*Manipulate toolbar |
| View menu > Show selection |
This function is used to show a certain selection.
If there is no current selection, everything is shown.
Hide selection
|
|
*Manipulate toolbar |
| View menu > Hide selection |
This function is used to hide a certain selection.
Everything is re-assembled with the SHOW SELECTION function.
Tip
If you use the F5 key (Show storey filter), you only show objects from the previous storey filter.
Move selection
|
|
*Manipulate toolbar |
| Edit menu > Selection > Move selection |
This function is used to move a certain selection.
When the function has been selected, you can select the point to move and the new position.
Once the selection has been placed at the new point, the function remains active, so that the end point can be placed elsewhere until the selection is in the required location. The function is exited with Esc .
Additional functions
When the selection being moved is "attached" to the cursor (after the points of the selection to be moved have been determined), a property bar appears with additional manipulation functions.

Rotate
![]()
![]()
Rotates the selection clockwise or anticlockwise by the value entered in the "rotation angle" field.
3D rotate
![]()
This function can be used to rotate objects about an axis in the space.
Once the function is activated, the second point of the rotation axis must be digitised. This point must not be identical to the first point. The two points describe the rotation axis. The value for the desired angle must then be entered in the input line.
Rotate on x-axis
![]()
This function rotates the selection by 90° around the x-axis.
Tip
This option is useful if you have drawn a cross-section on the floor plan and wish to convert it to 3D.
Rotate on y-axis
![]()
This function rotates the selection by 90° around the y-axis.
Tip
This option is useful if you have drawn a cross-section on the floor plan and wish to convert it to 3D.
Mirror vertical
![]()
This additional function mirrors the selection vertically. No additional input is required. The axis of symmetry is placed through the current reference point.
Mirror horizontal
![]()
This additional function mirrors the selection horizontally. No additional input is required. The axis of symmetry is placed through the current reference point.
Mirror over arbitrary axis
![]()
This additional function mirrors the selection along an axis of your choosing. Once the function is activated, the angle of the symmetry axis must be entered in the input line. The axis of symmetry is placed through the current reference point.
Mirroring 3D
![]()
This additional function mirrors the selection along the current work plane. The work plane corresponds to the axis (plane) of symmetry.
When the function is activated, the selection made is mirrored along the current work plane. No additional input is required.
Scale
![]()
This additional function allows you to also make the selection larger (>1) or smaller (>0 and <1).
Once the function is activated, the scaling factor must be entered in the input line. The factor is greater than 1 to increase the size or less than 1 to make it smaller.
Move on circle
![]()
This additional function allows you to rotate a selection around a certain point without it being rotated itself. After the function is activated, you are prompted to enter the rotation point. The selection is then moved through the previously entered rotation angle. This may be positive or negative.
Free selection of reference point
![]()
The reference point is the point to which the selection is "attached". If you notice that you have selected an incorrect point as you make your entry, you can redefine the reference point using this additional function.
When this function is activated, a new window opens containing the selection. A new reference point can now be defined by clicking with the mouse. Once you click, the window disappears and the selection is "attached" to the new reference point.
Copy selection
|
|
*Manipulate toolbar |
| Edit menu > Selection > Copy selection |
This function is used to copy a certain selection.
When the function has been selected, you can select the point to copy and the new position for this point.
Once the selection has been placed at the new point, the function remains active, so that the selection can immediately be copied multiple times. The function is exited with Esc .
Additional functions
When the selection being copied is "attached" to the cursor (after the points of the selection to be copied have been determined), a property bar appears with additional manipulation functions.

Rotate
![]()
![]()
Rotates the selection clockwise or anticlockwise by the value entered in the "rotation angle" field.
3D rotate
![]()
This function can be used to rotate objects about an axis in the space.
Once the function is activated, the second point of the rotation axis must be digitised. This point must not be identical to the first point. The two points describe the rotation axis. The set angle is adopted. Then the desired placement point must be entered.
Rotate on x-axis
![]()
This function rotates the selection by the set angle about the x-axis.
Tip
This option is useful if you have drawn a cross-section on the floor plan and wish to convert it to 3D.
Rotate on y-axis
![]()
This function rotates the selection by the set angle about the y-axis.
Tip
This option is useful if you have drawn a cross-section on the floor plan and wish to convert it to 3D.
Mirror vertical
![]()
This additional function mirrors the selection vertically. No additional input is required. The axis of symmetry is placed through the current reference point.
Mirror horizontal
![]()
This additional function mirrors the selection horizontally. No additional input is required. The axis of symmetry is placed through the current reference point.
Mirror over arbitrary axis
![]()
This additional function mirrors the selection along an axis of your choosing... Once the function is activated, the angle of the symmetry axis must be entered in the input line. The axis of symmetry is placed through the current reference point.
Mirroring 3D
![]()
This additional function mirrors the selection along the current work plane. The work plane corresponds to the axis (plane) of symmetry.
When the function is activated, the selection made is mirrored along the current work plane. No additional input is required.
Scale
![]()
This additional function allows you to make the selection larger or smaller.
Once the function is activated, the scaling factor must be entered in the input line. The factor is greater than 1 to increase the size or less than 1 to make it smaller.
Move on circle
![]()
This additional function allows you to rotate a selection around a certain point without it being rotated in itself. After the function is activated, you are prompted to enter the rotation point. The selection is then copied through the previously entered rotation angle. This may be positive or negative.
Free selection of reference point
![]()
The reference point is the point to which the selection is "attached". If you notice that you have selected an incorrect point as you make your entry, you can redefine the reference point using this additional function.
When this function is activated, a new window opens containing the selection. A new reference point can now be defined by clicking with the mouse. Once you click, the window disappears and the selection is "attached" to the new reference point.
Multiple copy
![]()
This function is used to repeat a manipulation.
After you activate the function, you are prompted to specify the number of copies required in the input line.
Tip
"Multiple copy" can be combined with any number of additional functions. For example, a selection can be rotated and copied multiple times.
Rotate Selection
|
|
*Manipulate toolbar |
| Edit menu > Selection > Rotate selection |
This function is used to rotate a certain selection.
When this function is selected, you define the point about which the selection will be rotated.
You can then enter a rotation angle in the input line or enter "0" to define two points, the starting direction and the end direction.
Additional functions
When the selection being rotated is "attached" to the cursor (after the points of the selection to be rotated have been determined), a property bar appears with additional manipulation functions.

Rotate
![]()
![]()
Rotates the selection clockwise or anticlockwise by the value entered in the "rotation angle" field.
Rotate around X-axis or Y-axis
![]()
![]()
Rotates the selection by the value entered in the "rotation angle" field around the X- or Y-axis.
Rotate around a free 3D axis
![]()
Rotates the selection by the value entered in the "rotation angle" field around a free 3D axis. The second point of the axis must be entered.
Rotate by point entry
![]()
This additional function allows you to determine the angle of rotation through an starting and end direction.
Copy

Activating the additional COPY function rotates a copy and leaves the original as it is. You can also rotate and copy a selection multiple times simultaneously by entering a number.
Mirror selection
|
|
*Manipulate toolbar |
| Edit menu > Selection > Mirror selection |
This function is used to mirror a certain selection.
When this function is selected, you define the point along which the selection will be mirrored.
The angle of the symmetry axis can now be entered in the input line.
Additional functions
When the selection being mirrored is "attached" to the cursor (after the point of the axis of symmetry has been determined), a property bar appears with additional manipulation functions.

Mirror over arbitrary axis
![]()
Mirrors the selection by the value entered in the "Angle of the symmetry axis" field.
Mirror vertical
![]()
This additional function mirrors the selection vertically. No additional input is required. The axis of symmetry is placed through the specified point.
Mirror horizontal
![]()
This additional function mirrors the selection horizontally. No additional input is required. The axis of symmetry is placed through the specified point.
Symmetry axis by 2nd point
![]()
This additional function allows you to define the axis of symmetry through a second point.
Copy
Activating the COPY additional function mirrors a copy and leaves the original as it is.
Scale selection
|
|
*Manipulate toolbar |
| Edit menu > Selection > Scale selection |
This function is used to make a certain selection larger or smaller.
When this function is selected, you define the point from which the selection will be scaled up or down.
A scaling factor can now be entered in the input line. The factor is greater than 1 to increase the size or less than 1 to make it smaller.
Additional functions
When the selection being scaled is "attached" to the cursor (after the point from which it will be scaled has been determined), a property bar appears with additional manipulation functions.

Scale
![]()
Scales the selection by the value entered in the "Factor" field.
Scale by point entry
![]()
This additional function allows you to determine the scaling through a start and an end point.
Copy
Activating the COPY additional function scales a copy up or down and leaves the original as it is. You can also scale and copy a selection multiple times simultaneously by entering a number.
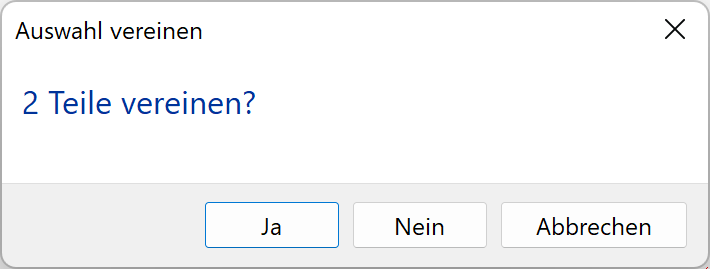
Join selection
|
|
*Manipulate toolbar |
| Edit menu > Selection > Join selection |
You can use this function to join individual lines or polygons to a polygon. The lines must result in a logical sequence. If the lines do not touch or are on a different work plane, they will not be taken into account.
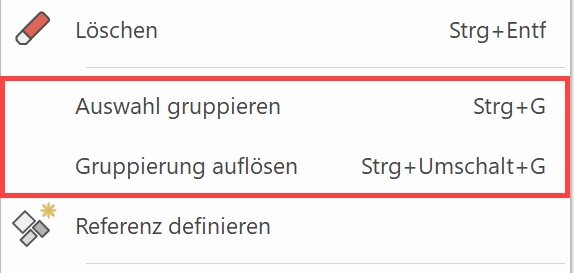
Grouping
|
|
Grouping toolbar |
| Edit menu > Grouping |
A selection of individually drawn parts can be grouped. This allows elements, text, hatches, etc. that belong together to be combined and manipulated as a group. The parts to be grouped must be in the same storey. Groupings can be nested.
The preset keyboard command for "Group selection" is Ctrl + G and for "Ungroup" it is Ctrl + Shift + G . Alternatively, the options are included in the context menu.
A selected group is highlighted in colour and given a frame with handles. The group can be moved or copied using the handles.

A group can either be edited using the property bar or by double-clicking. When a group is in editing mode, the individual objects can be changed or new parts added.
| Grouping selected | Edit group |
 |
 |
In the group editing mode, a selection of parts can be removed from the group using the REMOVE SELECTION FROM GOUP function in the context menu.
To incorporate a selection of parts into the group, the EXPAND GROUP function must be activated in the context menu. The selection can be made and then ended again with the context menu function CLOSE EXPANSION OF GROUP, or cancelled with the CANCEL EXPANSION OF GROUP function.
Remove selection from group
To remove elements from the group, a selection can be made in the group editing mode and confirmed in the context menu with REMOVE SELECTION FROM GROUP.
Expand group
If new parts are drawn in group editing mode, these automatically belong to the group. To incorporate a selection of elements that are already drawn into the group, the EXPAND GROUP function must be activated in the context menu and the required elements then selected. To exit, select the CLOSE EXPANSION OF GROUP function from the context menu. The function can be cancelled in the context menu.
Stretch at point or line
|
|
*Manipulate toolbar |
| Edit menu > Selection > Stretch selection |
This function applies to the current selection and stretches or compresses the elements enclosed in a polygon.
The stretch can be defined utilising a line or two points.
Via points
After activating the function, you are prompted to first specify a point in the current image and then a new position for this point. Then you are prompted to enclose the section of the current image that is to be moved in a polygon. The polygon chain is closed by clicking again on the last position. The polygon chain not only relates to the current work plane, but is actually a cuboid, which extends infinitely at right angles to the work plane. All the elements included in the cuboid are moved towards the new point by the distance between the two points – the connecting lines are "stretched" or "compressed" accordingly.
Stretching is according to the following criteria:
- If possible, the 2D objects are stretched in their work plane.
- Boxes, extrudes or surface definitions are stretched along the z-axis, their 3D definition parameters change.
- If the stretch vector is along the z-axis and the entire object is in the cuboid, the entire object will be moved.
- If only part of a 3D object is within the cuboid, the surfaces are stretched.
Via a line
When the function has been activated, you indicate the line that specifies the direction for the stretch. When you click on the line, the current length of the line appears in the input line. Entering the new line length determines the length of the stretch. Then you are prompted to enclose the section of the current image that is to be moved in a polygon. The polygon chain is closed by clicking again on the last position. All the elements included in the cuboid are moved along the line by the distance – the connecting lines are "stretched" or "compressed" accordingly.
Lengthen/Shorten at corner
|
|
*Manipulate toolbar |
The function connects either 2 elements or 2 walls to a corner.
Lengthen/shorten single element
|
|
*Manipulate toolbar |
The function lengthens or shortens either elements or walls to each other. When the function is called up, the delimiting object is clicked first and then the one to be lengthened. If elements or walls are crossed, the side that is clicked with the mouse remains in place.
For delimiting of elements, auxiliary-lines and circles can also be selected.
Lengthen/shorten multiple elements
|
|
*Manipulate toolbar |
The function lengthens or shortens either multiple elements or walls to each other. When the function is called up, the delimiting object is clicked first and then the objects to be lengthened one after another. The function is retained until it is cancelled with Esc . If elements or walls are crossed, the side that is clicked with the mouse remains in place.
Delete selection
|
|
*Manipulate toolbar |
| Edit menu > Selection > Delete selection |
This function is used to delete a selection.
The deletion must be confirmed.

Tip
Confirmation of the deletion process can be switched off under SETTINGS > OPTIONS > WORK PARAMETERS > GENERAL.