Position Numbers
|
|
Lay-out toolbar |
| Lay-out menu > Positioning |
The most important attribute is the position number. It represents the connection between the drawing and the bill of material. ELITECAD supports you with the POSITIONING function for assigning this position number. You can also use this function to set the depiction of the position number as an entry on the drawing.
When the function is opened, the property bar for positioning construction drawings appears. All functions for the placement, the depiction and the inspection of the correct assignment are available.
Before you start with the positioning, check the parameters for the position number depiction. With the POSITIONING PARAMETERS function, the parameter window appears for setting the position text and arrow parameters (see positioning parameters).
All position number designations are generated as separate objects and receive the same classification entries for model / group / class / level as the positioned component.
Positioning property bar

The property bar is visible as soon as the function LAY-OUT > POSITIONING is started or when an existing position is selected.
Positioning parameters
![]()
The PARAMETERS POSITIONING button opens the parameter window for the depiction parameters of the position number on the drawing.
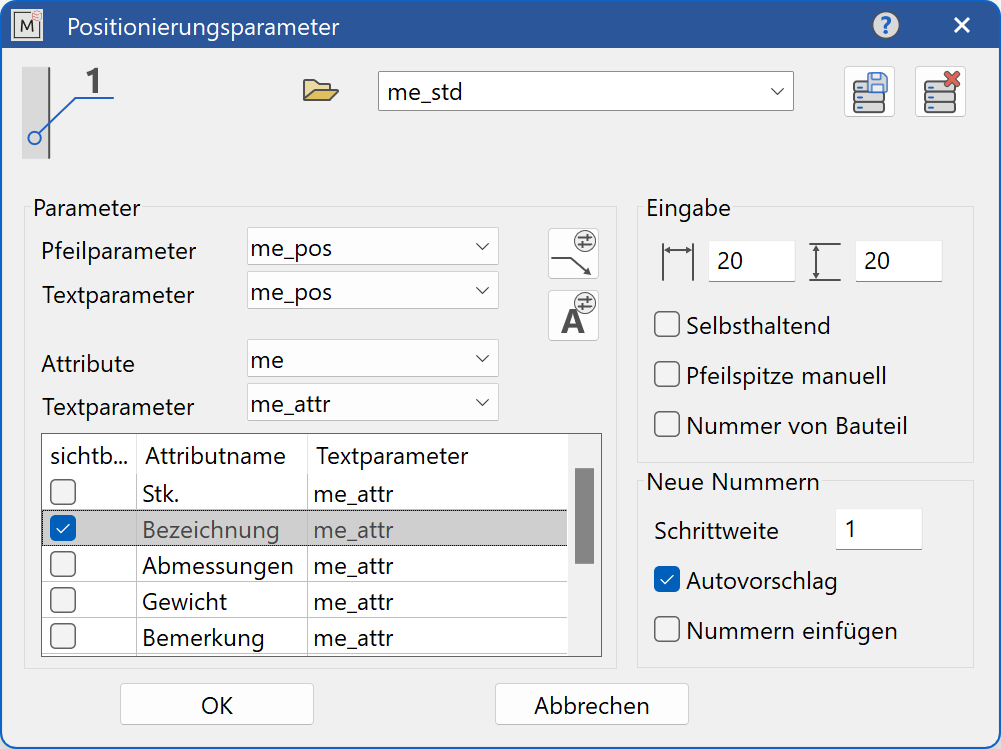
The dialog for the positioning parameters is divided into the areas: parameters, entry and new numbers.
Parameter
Arrow parameters and text parameters
Both texts and arrows can be adapted according to your requirements. The desired data record is selected for this. If a new data record is required, the relevant parameters dialog can be opened with the ![]() or
or ![]() button, where the data record can then be defined and saved.
button, where the data record can then be defined and saved.
Attributes
Here the data record is selected that contains the desired attributes, which can be selected for display and are available for selection in the table below.
Text parameters for attributes (default value)
The default value (parameter data record) is selected here, which is used by default if the user has not set different parameters. If no text parameters have yet been assigned for the individual attributes, they are given the default value.
Attributes table
All preselected attributes per data record under Attributes are displayed in this table. Furthermore, individual attributes can be activated here and the desired text parameter set can be set under text parameters. The attributes made visible will be displayed in the plan with the position number.
Input values
Distance
The DISTANCE X and Y is used to determine the position of the next position number if either the horizontal or vertical alignment option is active.
Self-retaining
The switch CONTINUOUS indicates whether a repeated, self-retaining launch of the command is necessary for the position functions ASSIGN AND DRAW A POSITION NUMBER and SELECT AND DELETE A POSITION NUMBER, or whether the function is retained.
Manual arrow tip
The switch MANUAL ARROW TIP enables a separate selection of the component and the arrow tip. If the switch is not set, the clicked point for the component is also used to position the tip of the arrow.
Number from component
If this function is activated , any existing position number will be overwritten with the current entry without confirmation. If the function is not activated, you will always be asked whether a new position number should be assigned.
New numbers
Increment
The INCREMENT indicates how much the current number (or sub-position number) is increased and then serves as the next suggested value.
Auto suggestion
The AUTO SUGGESTION switch indicates whether the next free and highest position number is searched and serves as the next suggested value.
Insert numbers
If INSERT NUMBERS is activated, the next free number from the current set is determined, whereby gaps in the numbering are taken into account.
Selected position number
![]()
If an existing position number is selected, the associated position number is displayed here.
Attributes
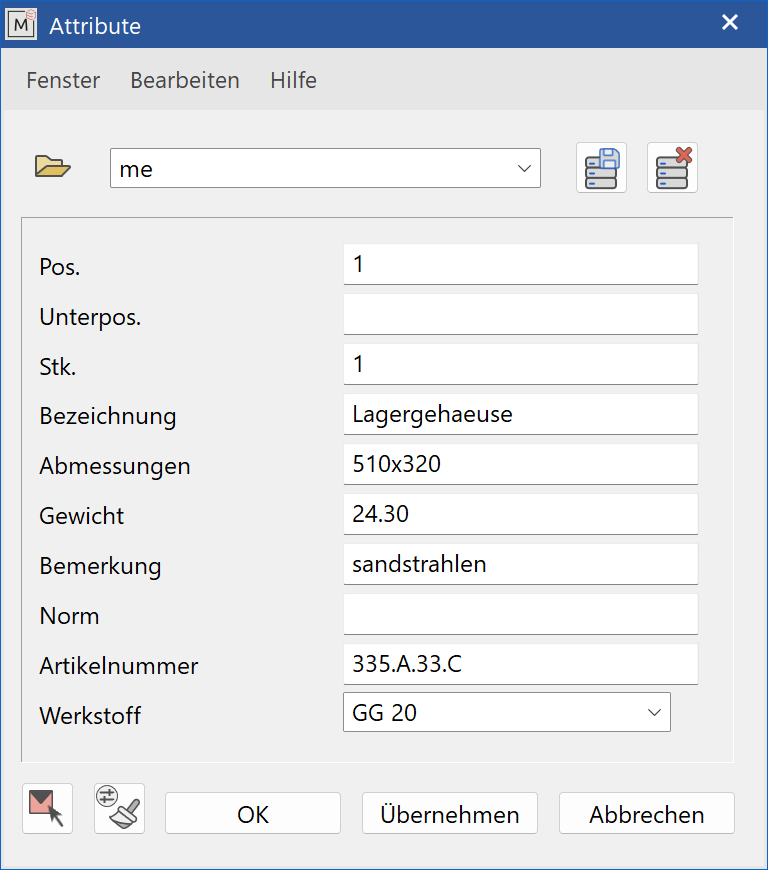
![]()
The ATTRIBUTES button opens the dialog window for further entry of non-graphic information for the component with the current position number. (These entries can also be made in the properties window.)
Search for the next number
![]()

The function SEARCH FOR THE NEXT NUMBER THAT IS NOT ASSIGNED TO A COMPONENT shows the next available position number and this is automatically suggested by ELITECAD and displayed in the NEXT POSITION NUMBER field. A value can also be entered in the NEXT POSITION NUMBER field, which is then used as the start value for the search and ultimately as the new position number.
This number depends on the settings for AUTO SUGGESTION, INSERT NUMBERS and INCREMENTS in the positioning parameters. The number entered in the field is always used as the basis for searching for the next number.
Arrange position numbers horizontally
![]()
If ARRANGE POSITION NUMBERS HORIZONTALLY is set, you will only be asked for the position of the first position number. The other position numbers are automatically arranged horizontally around the X distance from the positioning parameters.
Arrange position numbers vertically
![]()
If ARRANGE POSITION NUMBERS VERTICALLY is set, you will only be asked for the position of the first position number. The other position numbers are automatically arranged vertically around the Y distance from the positioning parameters.
Assign and draw a position number
![]()
In the NEXT POSITION NUMBER field, write the number with which you want to start the position number sequence on your drawing, or use SEARCH FOR THE NEXT NUMBER THAT IS NOT ASSIGNED TO A COMPONENT. In the case of new drawings, this is always the number 1. For drawings that contain components that have already been positioned, the suggested value is that which follows the numbering system as a consecutive number.
With ASSIGN AND DRAW A POSITION NUMBER, you can assign the number entered in the NEXT POSITION NUMBER field as the position number to the individual components on your drawing.
When asked Position which component? use the cursor to mark the point on the screen where you can clearly identify the selected component and where the end of the position reference (position arrow) should be.
With the following query Position of component number?, mark the point where you want to place the text with the position number on the drawing.
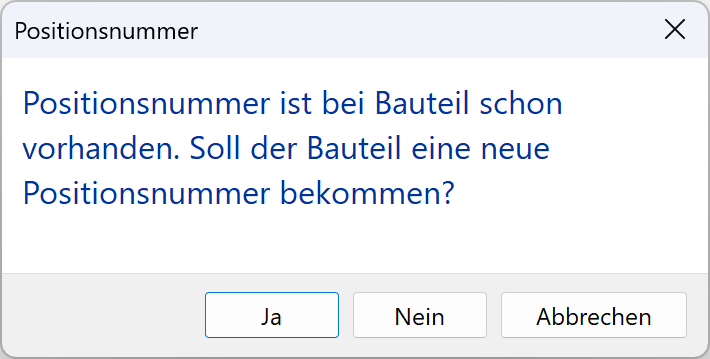
The assigned position numbers are automatically stored in the attribute (pos) of the selected component. Note that components with the same position number are usually added up in the bill of material. If a position number is already contained in the drawing, you will be asked whether the number should be assigned again (re-issued) or drawn as a dummy.
Draw a position number only
![]()
You can label a single component with multiple position number labels in different views or sections without this component being listed in the bill of material with the wrong quantity.
Select DRAW A POSITION NUMBER ONLY (dummy) and you position the selected component with only the graphic information in the drawing. The entry in the corresponding attribute is not carried out and the evaluation for the bill of material is therefore not supported. This means, for example, that a component that has already been positioned is shown several times with the same position number for better information in different views and nevertheless shown in the bill of material with the correct number of positions.
Position number ranges
![]()
In the POSITION NUMBER RANGES field, the position numbers to be displayed are specified. If you enter "5", only position 5 is displayed. If "6; 8" is entered, the numbers 6 and 8 are displayed. If you enter "4-8", the entire range with the numbers 4, 5, 6, 7 and 8 is displayed.
Show all
![]()
The SHOW ALL button corresponds to the basic CAD function SHOW ALL.
Show all with the specified position numbers
![]()
With SHOW ALL WITH THE SPECIFIED POSITION NUMBERS, all components that have been set under POSITION NUMBERS RANGES are displayed on the screen.
Show all with an assigned position number
![]()
With SHOW ALL WITH AN ASSIGNED POSITION NUMBER, all components are displayed on the screen that have already received a position number with ASSIGN AND DRAW A POSITION NUMBER or for which the position number has been assigned manually in the properties or attribute window (attribute pos, spos).
Show all without an assigned position number
![]()
With SHOW ALL WITHOUT AN ASSIGNED POSITION NUMBER, all components are displayed on the screen that have already received a position number with DRAW A POSITION NUMBER ONLY. (Dummy)
Show all without a position number
![]()
With SHOW ALL WITHOUT A POSITION NUMBER, all components that have not yet received a position are displayed on the screen. This means that both assigned item numbers and unassigned item numbers (dummies) are taken into account here. This will show the components that have not yet been processed.
Insert a range of free position numbers and increase the assigned position numbers
![]()
If you want to insert new components into an assigned position number series at a later point in time, you can rearrange the position numbers with INSERT A RANGE OF FREE POSITION NUMBERS AND INCREASE THE ASSIGNED POSITION NUMBERS.
With the query Insert will start at which position number?, enter the (first) position number. that is to be given a new higher value. With the next query To which position number should be moved?, enter the new position number for this component. This automatically changes this position number and all other higher numbers by shifting by this range to new values.
Select and delete a position number
![]()
Assigned position numbers can also be deleted and reassigned at a later point in time. Please note that this function SELECT AND DELETE A POSITION NUMBER deletes the position number from the plan or model and the associated pos or spos attribute is also removed. All other attributes are retained. No other position numbers are adjusted as a result.
Modify position number
In the properties window or with the MODEL INFORMATION function, you can check whether and with which position number a component is already designated. With the LAY-OUT > ATTRIBUTES function call, you receive current information about the selected component.
However, you should only make changes to the position number using the LAY-OUT > POSITIONING function.
If this position number needs to be changed for your construction, enter the desired new position number in the NEXT POSITION NUMBER input field and select ASSIGN AND DRAW A POSITION NUMBER. Select the component concerned and now confirm the message.
For this component the position attribute and the text of the position description are changed to the new value.
Positions with sub-positions
For the clear representation of welding groups or pre-assembled machine groups, the variant of position groups with sub-position numbers is often used. ELITECAD supports this position number system in the simplest possible way. When you enter a main position number and a sub-position number (separated by a period), ELITECAD recognizes that you are intending to make a position within the position group system. The number sequence of the sub-position is automatically adjusted to the next higher value after the component has been positioned. You can reset to a new main position number sequence by manually entering the new main position number. All other functions are then identical to standard positioning.
The assigned position numbers are automatically entered in the attribute (pos) for the main position number and in the attribute (spos) for the sub-position number of the selected component.
Tip
If components are positioned in a view, a position number is inserted or deleted, the component attributes are also updated in the model view.
Convert CAD400 position numbers
|
|
Special functions toolbar |
| Convert CAD400 position numbers |
With the CONVERT CAD400 POSITION NUMBERS function, position numbers in drawings that have been saved with CAD400 can be converted so that they can be processed with the ELITECAD positioning functions.