Dimension Parameters Dialog Window
|
|
Toolbar Dimension |
| Property bar dimension |
Here, you can define all dimension-specific parameters and save them as a custom parameter record.
Parameter name
All parameters for dimensioning are specified on the dimension parameter dialog window. These can also be saved under any parameter name.
The name of the selected parameter record can be found in the "Parameter name" selection box. It can be defined freely. By selecting various types, you can see how the values in all the other entry fields are automatically modified. This way, once you have saved a dimension type as a custom defined type, you can call it up repeatedly.
Record
To generate a new type, simply enter the new name in the text box and modify all the values in the dialog window as desired. Next, you can insert the new type into the selection list via the menu item RECORD > SAVE. To delete a type that is no longer needed, use the menu item RECORD > DELETE.
Detail parameter
The buttons ![]() and
and ![]() are used to set the Detail parameters. You can configure the Arrow parameters, the Text parameters and the Tolerance text parameters.
are used to set the Detail parameters. You can configure the Arrow parameters, the Text parameters and the Tolerance text parameters.
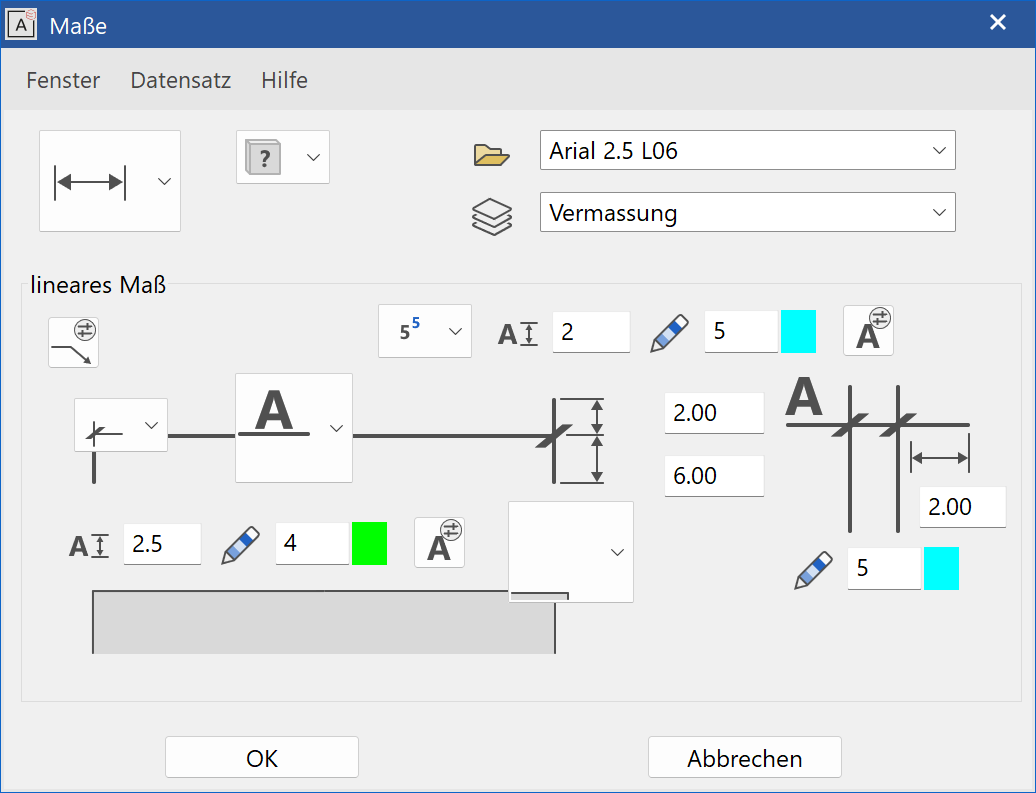
Linear dimension

Dimension limitation line
You can select from various dimension demarcations.
- without
- Arrow
- Circle
- Slash, pen like dimension line
- Slash, pen configurable
The dimensions are configured using the DIMENSION ARROW PARAMETERS detail parameter.
Dimension text
You have the following three options when setting the dimension figure.
 - Dimension text over dimension line
 - Dimension text on dimension line
 - Dimension text under dimension line

You can configure the dimension and pen colour directly on the parameter dialog window. You can configure other parameter settings for the dimension text in the DIMENSION TEXT PARAMETERS.
Dimension help line
There are two configuration options available for selection.
 Configure the length of the dimension help line.
 Configure the distance between the dimension help line and the dimension point.
Tolerance text

There are various depiction modes for the tolerance text. The text size and pen colour can also be configured directly. You can configure other settings for the tolerance text in the TOLERANCE PARAMETERS.
Tolerance text is not depicted.

After the dimension line is set, the user is prompted for the tolerance text.

After the dimension line is set, the user is prompted for the upper and lower tolerance text.


The tolerance text is written as a superscript.

When M,cm/mm dimensioning is active in the toolbar.

Dimension line

Pen colour for the dimension line and dimension help line are set here.
You must activate the dimension line overhang in the DIMENSION ARROW PARAMETERS detail parameter so that the value adjusts accordingly and the overhand is displayed.
Radius dimension
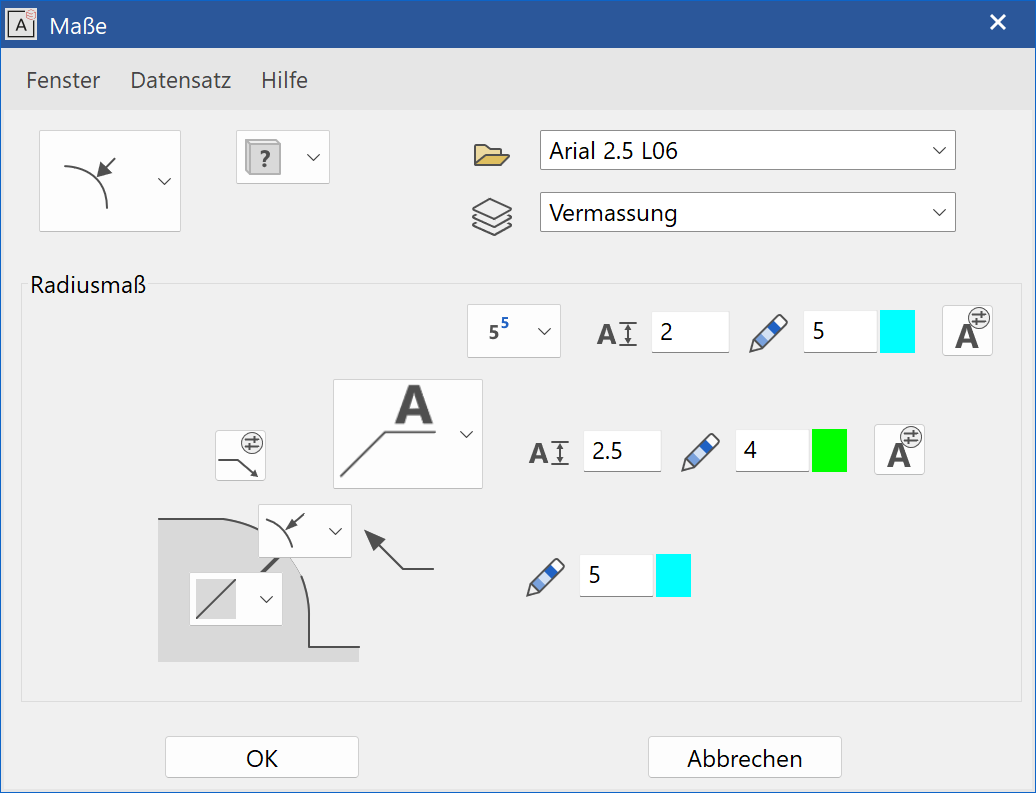
Dimension line

Pen colour for the dimension line is set here.
The dimension line can be lengthened up to the centre point of the circle.
Dimension limitation line
You can select from various dimension demarcations.
- without
- Arrow
- Circle
- Slash, pen like dimension line
- Slash, pen configurable
The dimensions are configured using the DIMENSION ARROW PARAMETERSdetail parameter.
Dimension text
You can select from various dimension demarcations.
- without
- Arrow
- Circle
- Slash, pen like dimension line
- Slash, pen configurable
The dimensions are configured using the DIMENSION ARROW PARAMETERSdetail parameter.
Tolerance text

Here you have the option to define the depiction type, size and pen colour of the tolerance text. You can find other parameter settings for the tolerance text in the TOLERANCE PARAMETERS.
Angle dimension
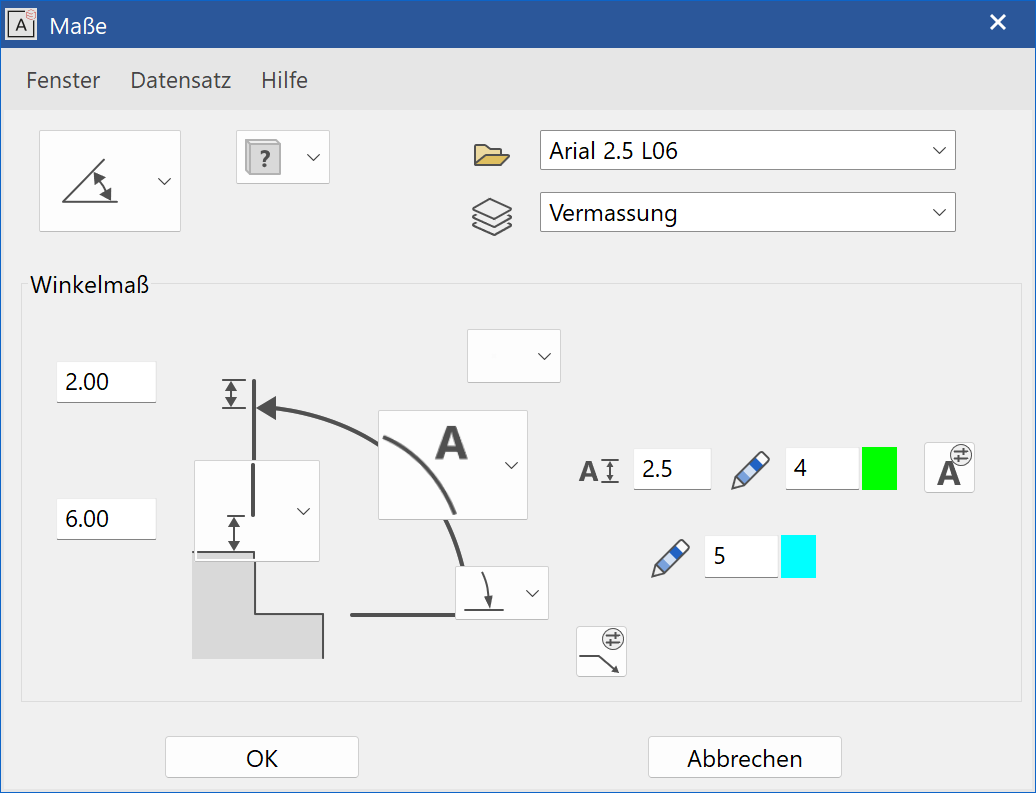
Dimension line
Pen colour for the dimension line is set here.
Dimension limitation line
You can select from various dimension demarcations.
- without
- Arrow
- Circle
- Slash, pen like dimension line
- Slash, pen configurable
The dimensions are configured using the DIMENSION ARROW PARAMETERSdetail parameter.
Dimension text
The following options are available when placing the dimension figure.
Dimension text orthogonal on dimension line
Dimension text tangential on dimension line
Dimension text tangential between dimension line
Dimension text tangential under dimension line

You can configure the dimension and pen colour directly on the parameter dialog window. You can find other parameter settings for the dimension text in the DIMENSION TEXT PARAMETERS.
Tolerance text

Here you have the option to define the depiction type, size and pen colour of the tolerance text. You can find other parameter settings for the tolerance text in the TOLERANCE PARAMETERS.
Dimension help line
You have two configuration options for the dimension help lines.
 With this option, you define the length of the dimension help line regardless of where the dimension point is placed.
 With this option, you define how far away the dimension help line is from the defined dimension point.
Reference value
Only supplemental parameters are located under the reference value. The general parameters are adopted from the linear dimension.
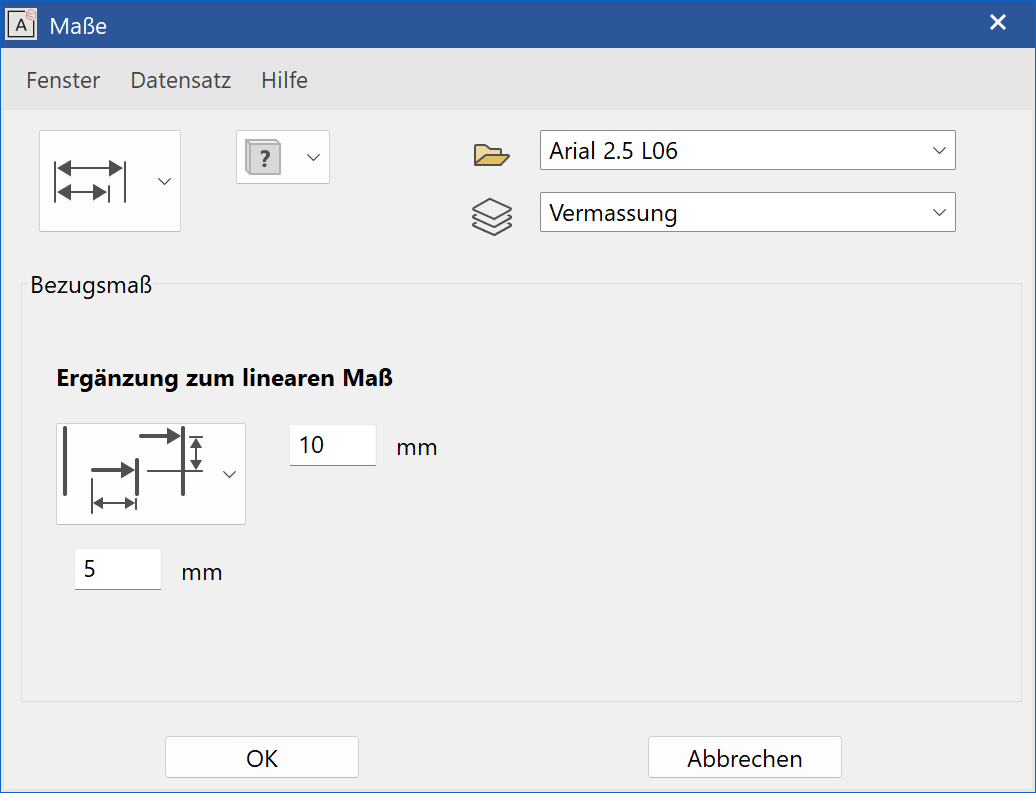
-
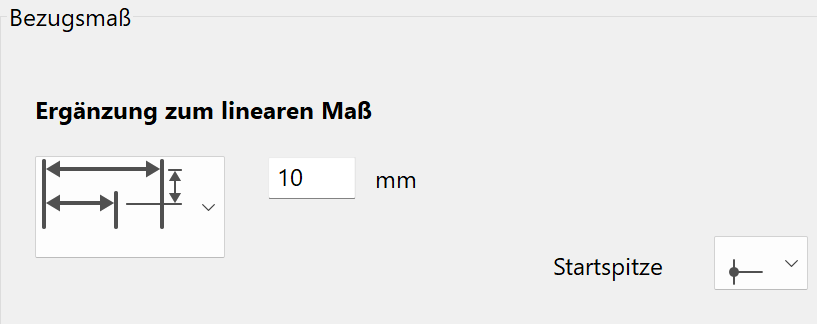
Distance of individual dimension lines and selection of the demarcation (start tip). Optionally, the position of the dimension text can be prompted.
-
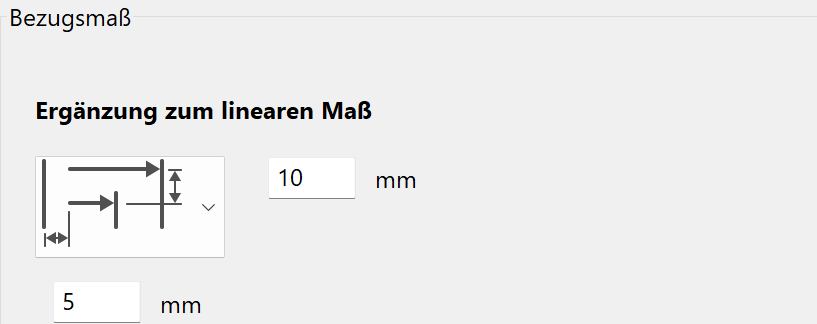
The distance between the individual dimension lines and their start offset. Optionally, the position of the dimension text can be prompted.
-
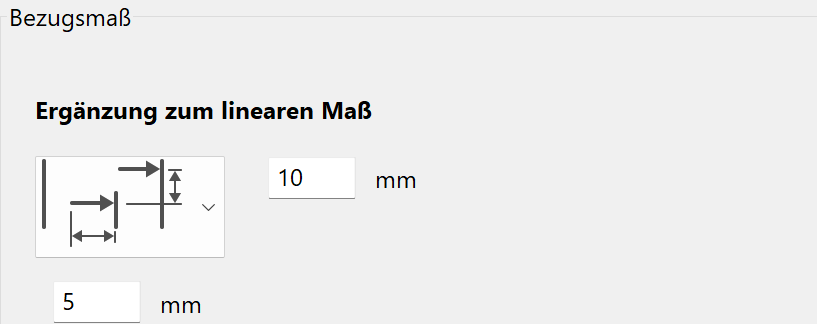
The distance between the individual dimension lines and their length. Optionally, the position of the dimension text can be prompted.
Coordinate dimension
Only supplemental parameters are located under the coordinate dimension. The general parameters are adopted from the linear dimension.
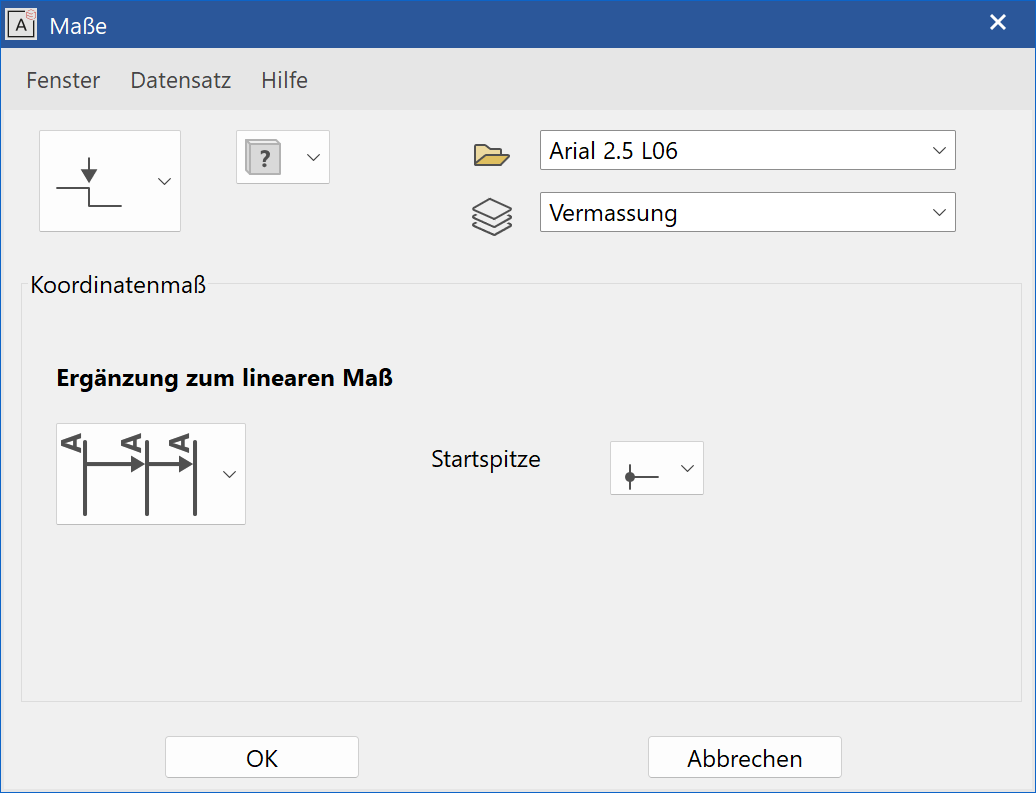
There are two additional options provided.


Place dimension
In the property bar, you can activate the PLACE DIMENSION function while defining the dimension points. By entering additional points, the dimension help line can be created in place.