Texts
General
The text is a supplemental element.
Visible/invisible
![]()
The text can be temporarily switched off using the image control functions.
Switch on/of
VIEW menu > SWITCHES
If you switch off the text using this check box, the text is not saved during "Save as" unless the subsequent dialog window is confirmed with "visible selection". That way you can create a plan without text.
Supplement scaling
SETTINGS menu > SUPPLEMENT SCALING on/off
If supplement scaling is switched off, the text is not enlarged or reduced when scaling or modifying the scale.
Create text
|
|
Toolbar * Create new |
| Lay-out menu > Texts |
Use this function to create texts. The line length is limited to 160 characters.
After activating the function, there are two options for positioning the text.
Entry by rectangle
![]()
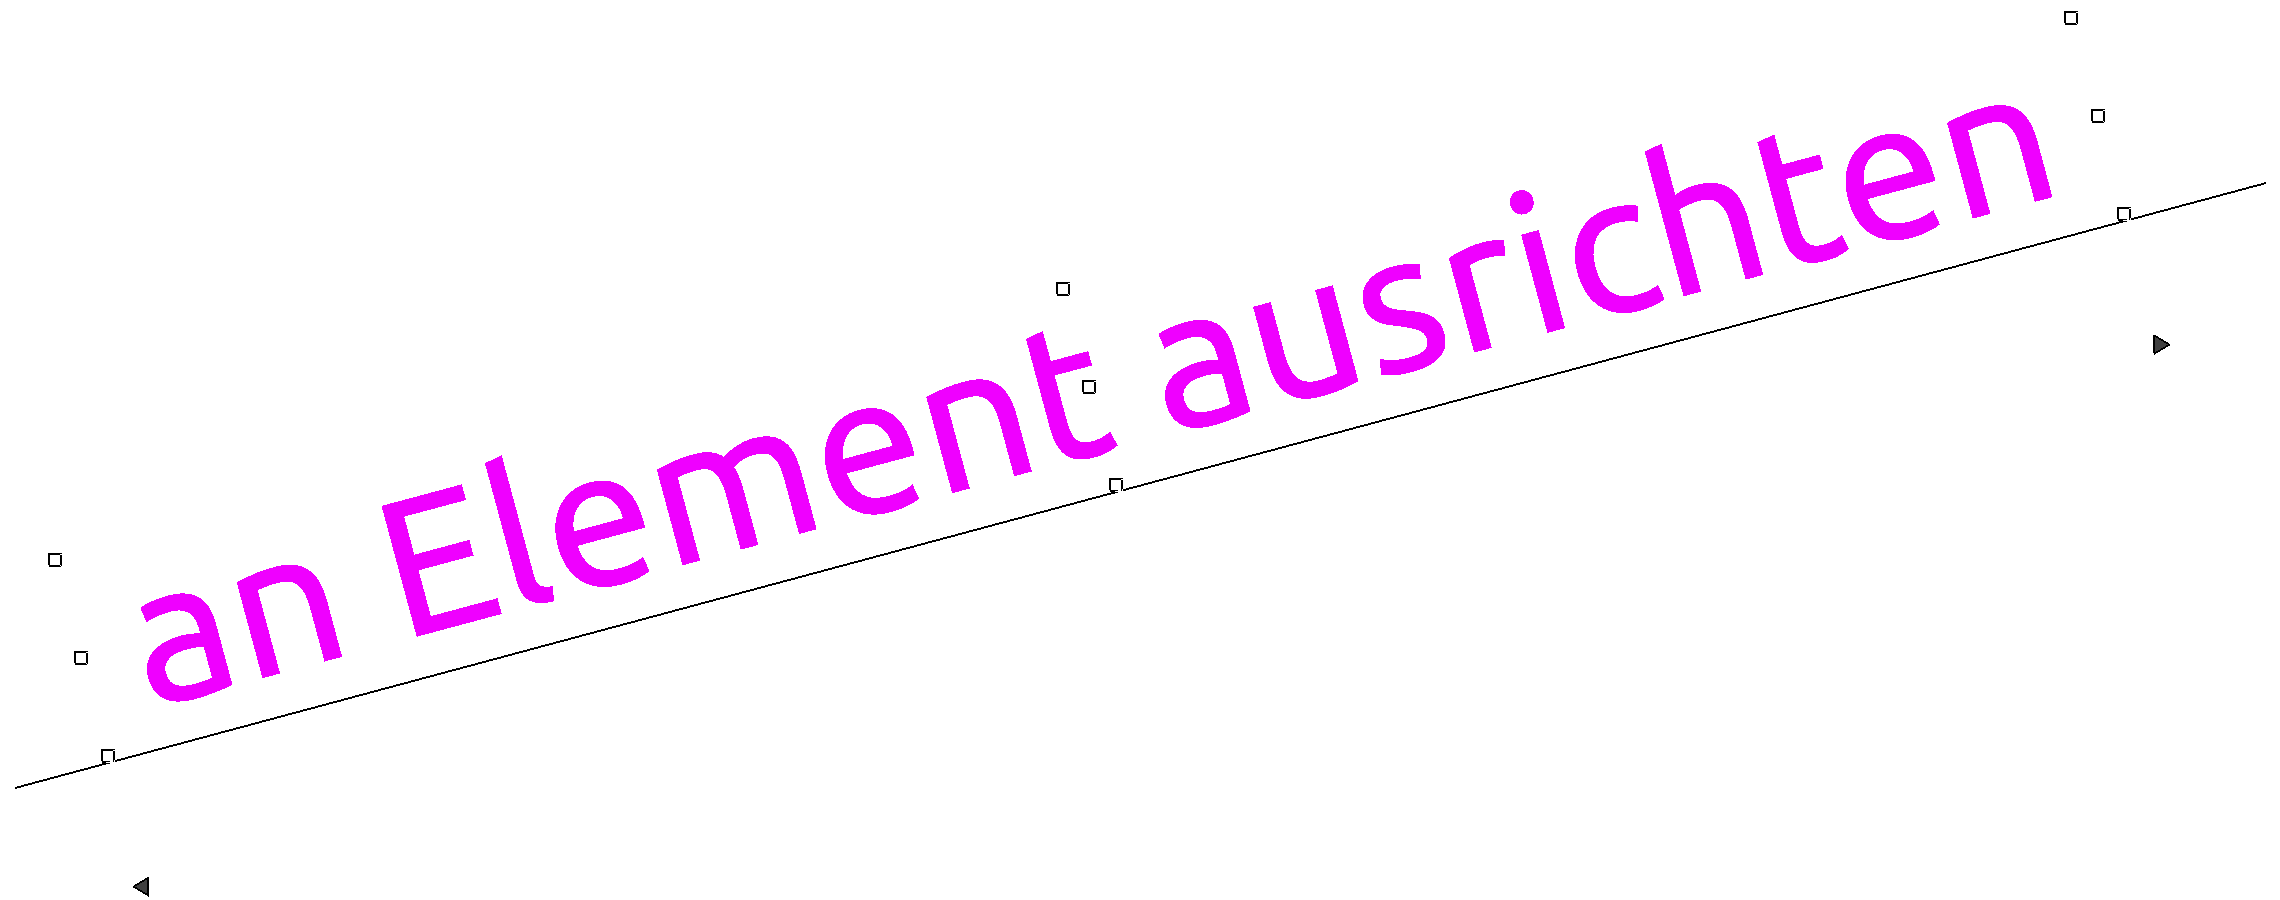
Expand a rectangle, where the first point placed becomes the reference point and a continuous text can be written. The text has automatic line breaks for the provided width.
If the width of the text box is changed using the handles, the line breaks are automatically adapted.
Tip
If you want to align the text to a slanted line, you must select the "To element" capture mode.

Entry by reference point
![]()
When setting the text's reference point, the line breaks must be manually added with Enter. If the width of the text box is modified using the handles, these line breaks are retained.
For an additional text, you do not need to call up the function again, but simply click the new position.
Automatic text enlargement
The text is displayed for entry and editing to be ideal for the screen, no matter the text size and text angle. A vertical text at 90° is written horizontally during entry, and then rotated once the text function has been exited. The same applies to the size and position of the text. If you do not want this effect, you can switch the option off under SETTINGS > OPTIONS > WORK PARAMETERS > GENERAL.
Tabulator (tabs)
You can use tabs to align the text to the left or right, centre it or align it to a decimal point.
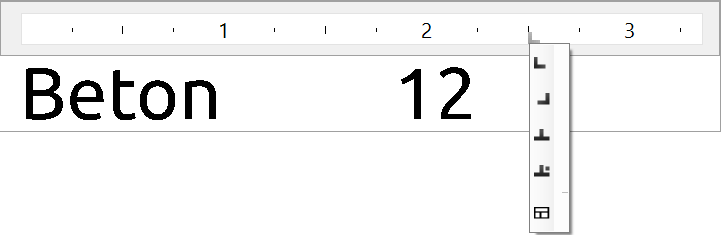
When text is being written or edited, the ruler appears above the text box, where you can set and view the tabs.
To set a tab, right-click the ruler in the desired position and select one of the four tabs from the context menu.
Tip
The type of an existing tab can be modified using the context menu.
You can open the settings dialog window either by selecting the last option in the dropdown list or by double-clicking the ruler.
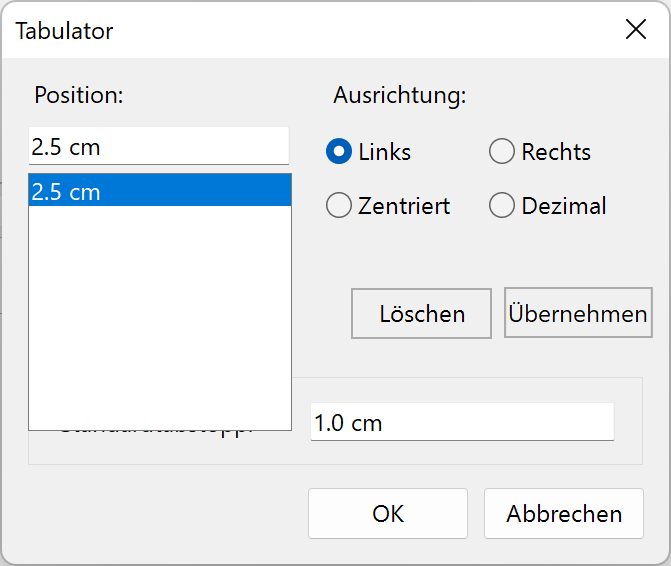
In order to specify new spacing, enter the value in the "Position" field and confirm it with "Apply".
To change an existing position, you must delete it and then recreate it. "Apply" always makes a new entry. The old position must therefore still be deleted.
Tip
You can also drag the tab symbol to the new position directly on the ruler. To delete a tab, simply drag the symbol down from the ruler.
Text property bar

The property bar appears when creating or editing a text.
| Function | Description |
|---|---|
| Text parameters | |
 |
Parameter type |
| Renovation planning state | |
| Font | |
| Pen type | |
| Text size | |
| Angle | |
| Entry style | |
| Reference point | |
| Bold | |
| Italic | |
| Underlined | |
| Strike-through | |
| Overlined | |
| Subscript | |
| Superscript | |
| Text alignment | |
| Background colour |
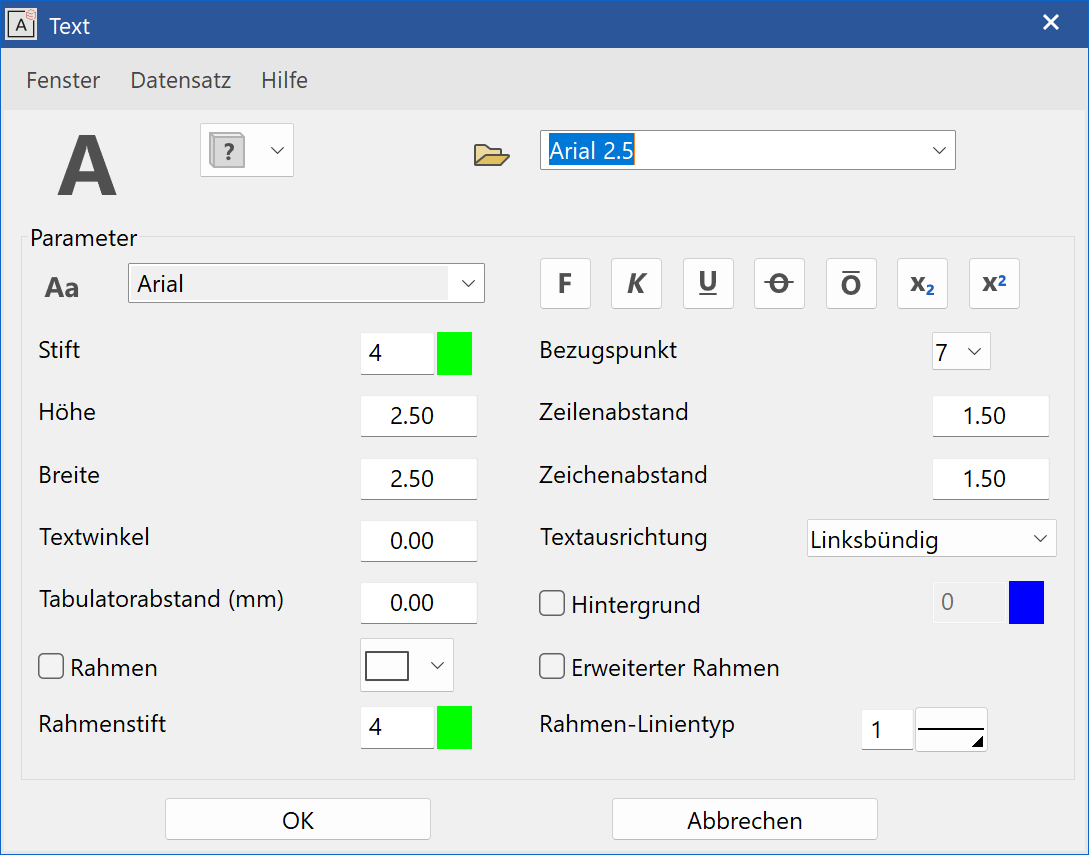
Text parameters
![]()
Defines all text-specific parameters. You can save your own parameter records in the RECORD menu.
Text
Font
All fonts installed on the PC are listed. The fonts are in the "Fonts" Windows directory. The number of fonts varies from PC to PC.
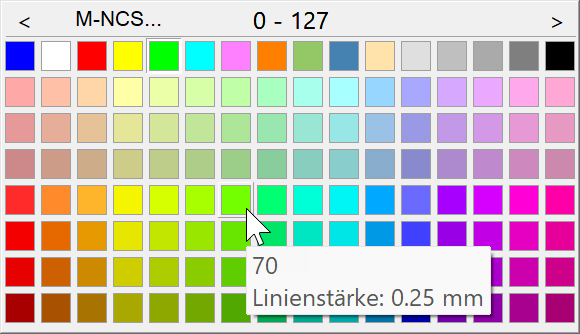
Pen
Select the pen type to be used to represent the text. The pen numbers range from 0 to 1023. The pen affects how the texts are printed. You can write with bold text by selecting a thicker pen.
Height (0.01 – 1000mm)

You can enter character heights from 0.01 – 1000 mm.
Width (0 – 1000)
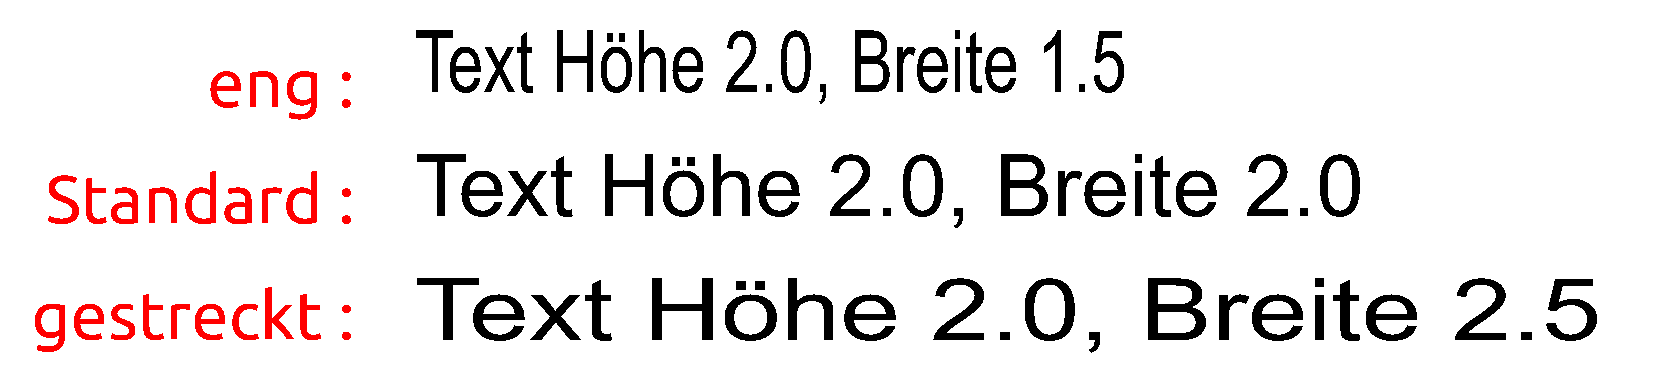

You can enter character widths from 0 – 1000 mm.
Text angle (-90 – 360)
Angle of texts from the horizontal.

Tab distance
Default tab stop is listed in mm of paper.
Formatting:
bold, italic, underline, strike-through, overlined, subscript, superscript
If desired, activate the respective switch.
Reference point
The reference point specifies how the text should be positioned relative to the digitised point. Specify this by entering a number from 1 to 9.
The reference point is displayed visually in the property bar.

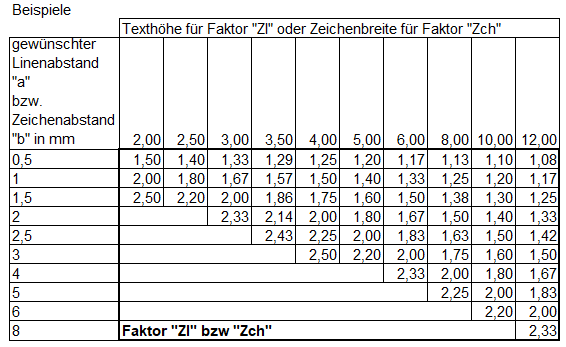
Line spacing (1.0 – 2.5)

This "LS" (line spacing) factor sets the distance from the text to the invisible baseline.
The vertical spacing between the characters is double the set distance because it is two lines both with distance "a" (see figure).
Formula to calculate the "LS" (line space) factor:
LS = 2 x text spacing (a) in mm + 1
text height in mm
Character spacing (1.0-2.5)

The character spacing can be enlarged up to a factor of 2.5.

This "CS" (character spacing) factor sets the character distance.
Formula to calculate the "CS" factor:
CS = 2 x character spacing (b) in mm + 1
character width in mm
Text alignment
Select one of the four available text alignments:
Left alignment, right alignment, centred or block style
 |
 |
|---|---|
 |
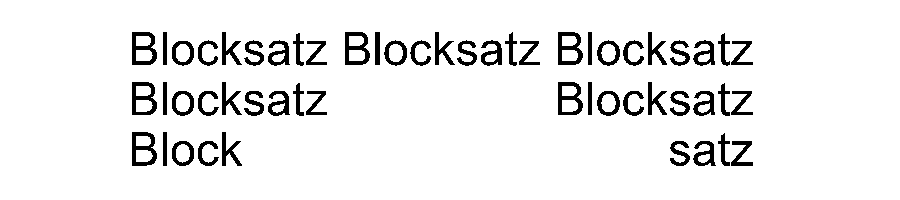 |
Tip
The block style only takes effect if there are spaces between words in the text.
Background
There is an option to set an infill hatch as the background.
The 0 pen is invisible and is used to cover things.
Tip
The background colour can also be controlled using the property bar.

Frames
If this check box is activated, the text is given a frame.
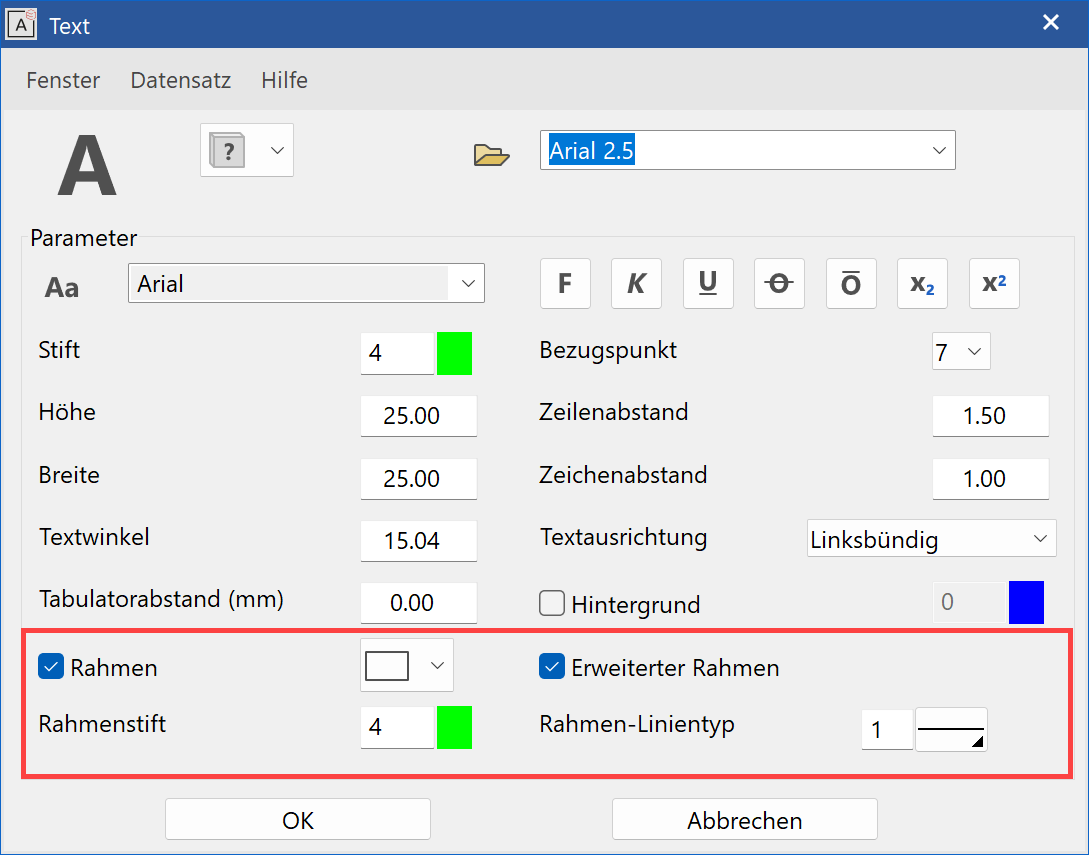
The pen type, line type and the shape of the text frame can be set. Whether a text frame is used depends on the setting of the "Frame" check box.
If the EXTENDED FRAME option is not selected, the frame is cut to fit the text only. Otherwise, the frame aligns to the size of the entire text box regardless of the text.


Vector fonts
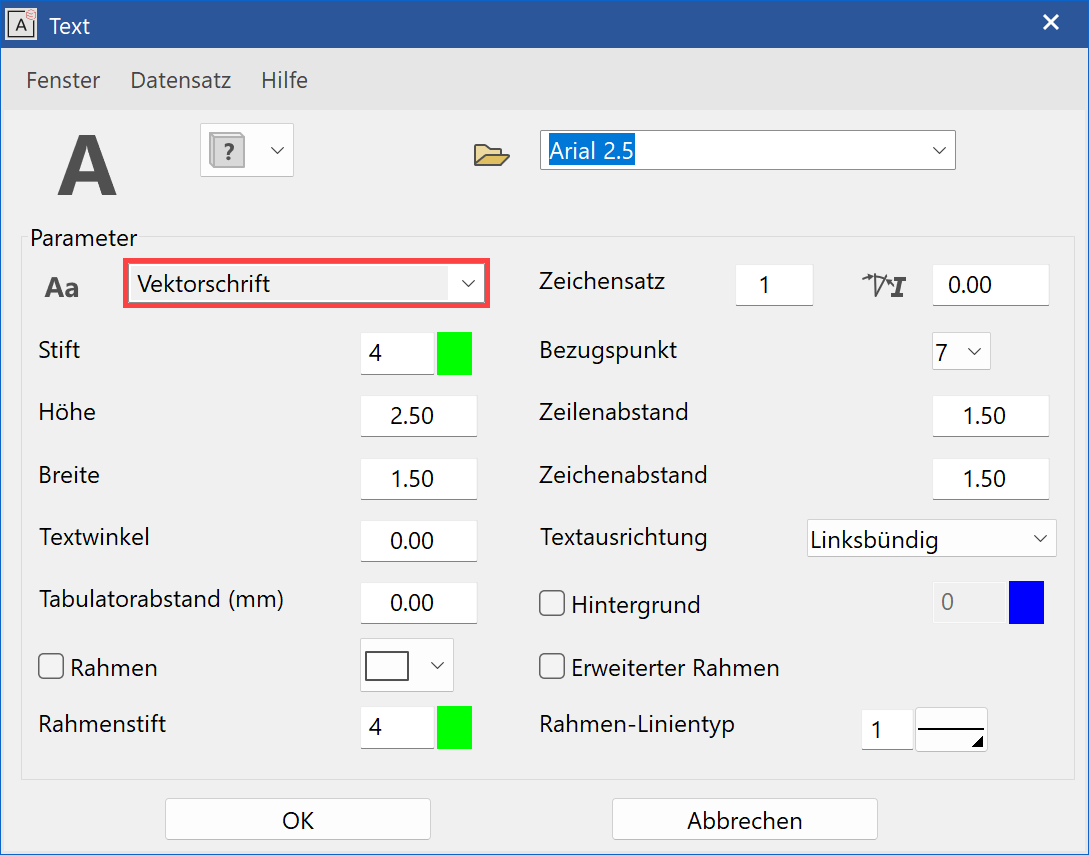
The font Vector font must be selected.
Difference between vector fonts and TrueType font
Vector fonts function in ELITECAD essentially the same as all other "TrueType fonts" but have two additional fields: Character set selection and Text slant. These fields appear in the regular text parameters menu as soon as the font “Vector font” is selected.
Note
All vector-based fonts are saved under "Text". Each of these fonts are made up of individual lines.
All fonts that are installed on your PC (C:\WINDOWS\Fonts) are saved under "TrueType font". TrueType fonts include Arial, Times New Roman, etc.
Character set
The most common character sets:

Text slant (-60 – 60)
Inclination angle of text, from -60° up to +60°.

Tip
The way the angle is measured depends on the setting of the check box "Entry of text slant" under SETTINGS > OPTIONS > WORK PARAMETERS > GENERAL.
Special characters
Insert symbol
If you right-click inside the text box while creating or editing a text, the item "Insert symbol" appears in the context menu. Selecting a character, inserts it at the current cursor position.
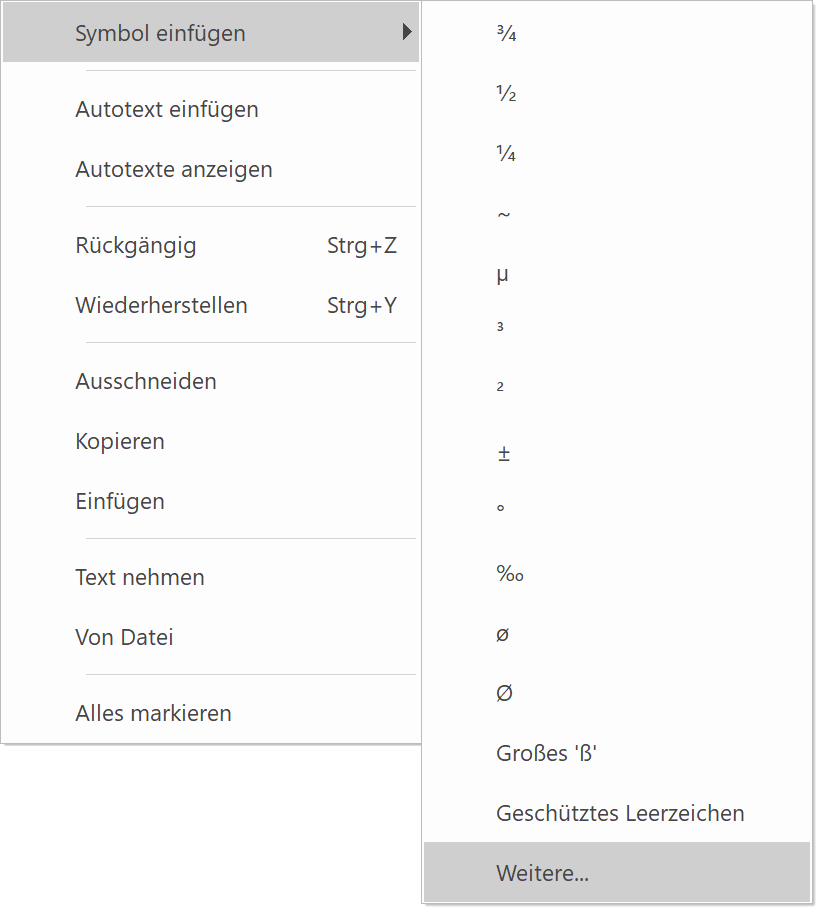
If you click on "Further...", the Windows Character Map appears.
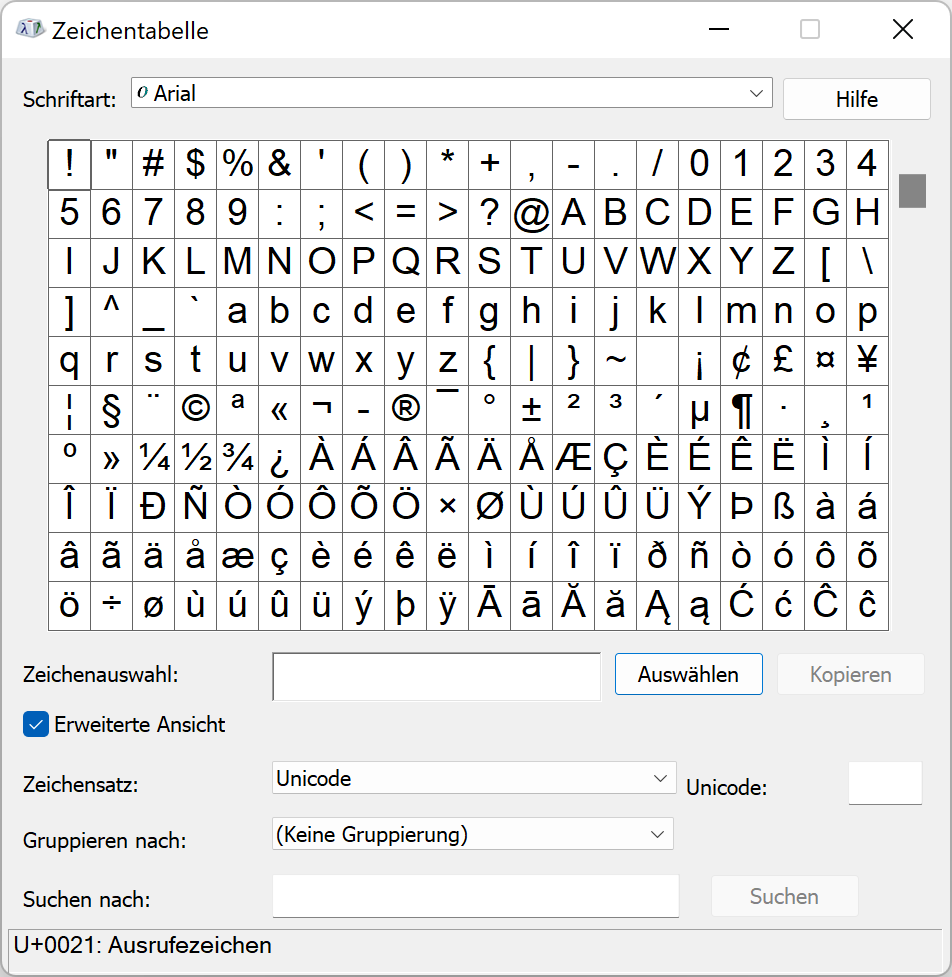
The character map shows characters that are available in the selected font. You can copy individual characters or a group of characters to the clipboard, and then paste them into ELITECAD.
Autotext
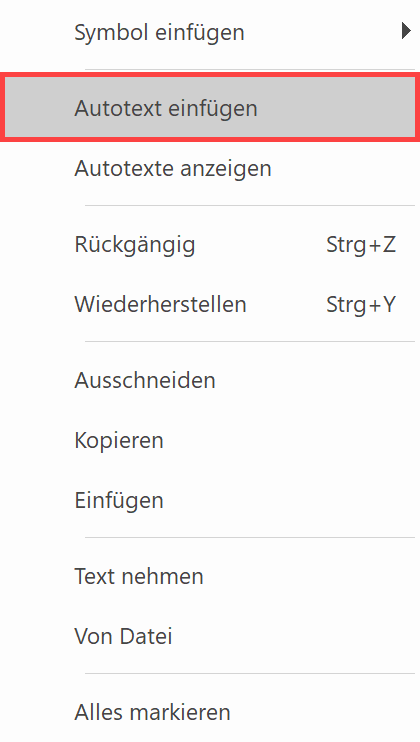
If you right-click inside the text box while creating or editing a text, the item INSERT AUTO TEXT appears in the context menu. An auto text item is a placeholder where ELITECAD displays data that is subject to change. Variable auto text items such as the date or time are not constantly refreshed, but they are updated when printing.
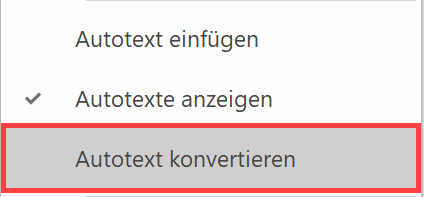
If the SHOW AUTO TEXT item is activated, auto text is displayed as normal text, not as placeholders.
An auto text item can be converted to normal text. While editing, an option appears in the context menu: CONVERT AUTO TEXT.
An easy example of auto text is the date. This generates text that automatically displays today's date. Various formats are possible.
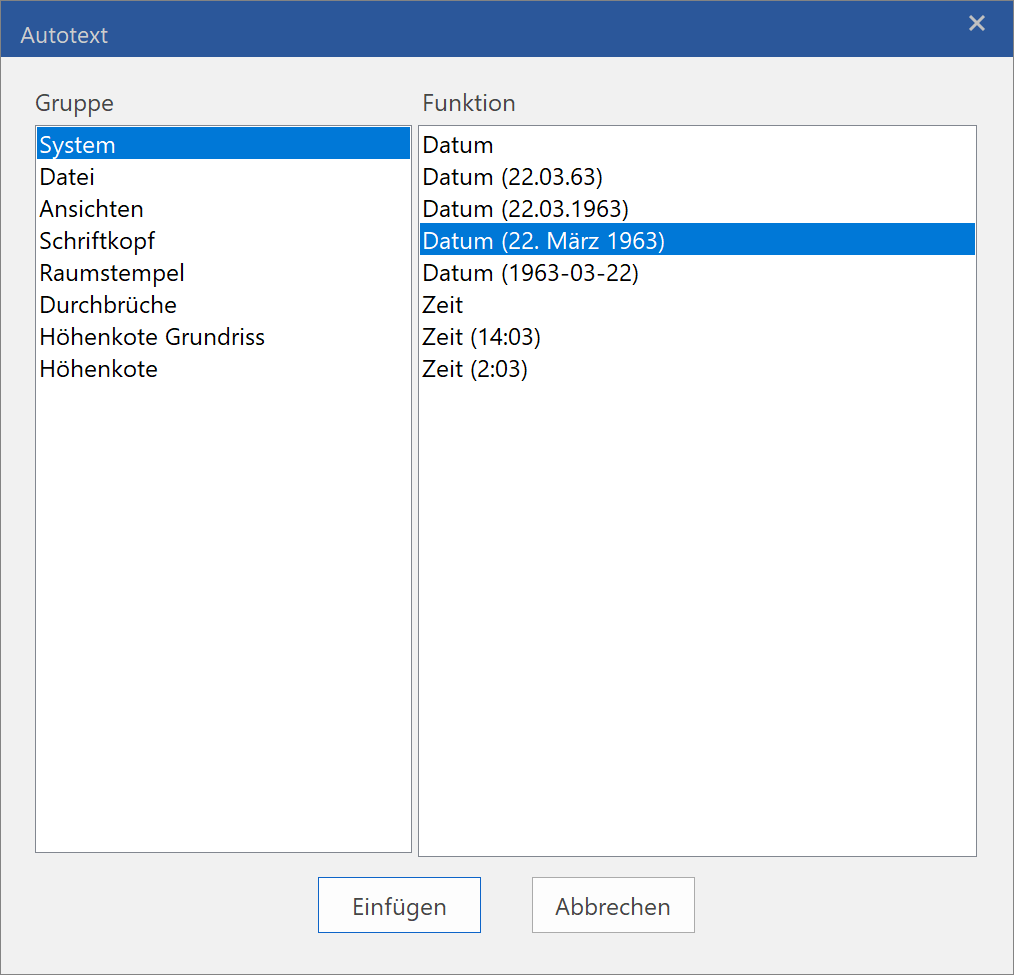
General auto text items can be found under the System, File and Views groups.
You can use the Title block, Room stamp, and Openings groups to create your own Library parts for each function.
Edit text
Modify text
You can modify the text by double-clicking it to edit it.
Move/copy text
If you click on a text, then right-click to open the context menu, you can move or copy the text using the respective functions shown here.
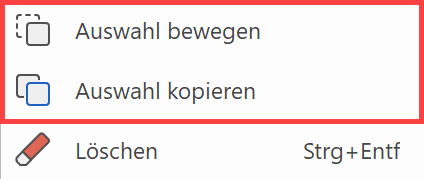
The query Move which point? appears.
After you click a point, the query Position where to? appears.
Place the text at the new location.
Handles
Alternatively, you can also move or copy the text by clicking on a handle around the selected text. The text now "sticks" to the cursor and can be placed in the new location. If you also click and hold the Ctrl key while dragging it, a copy is made.

You can modify the text box using the two handles underneath the text.
![]()
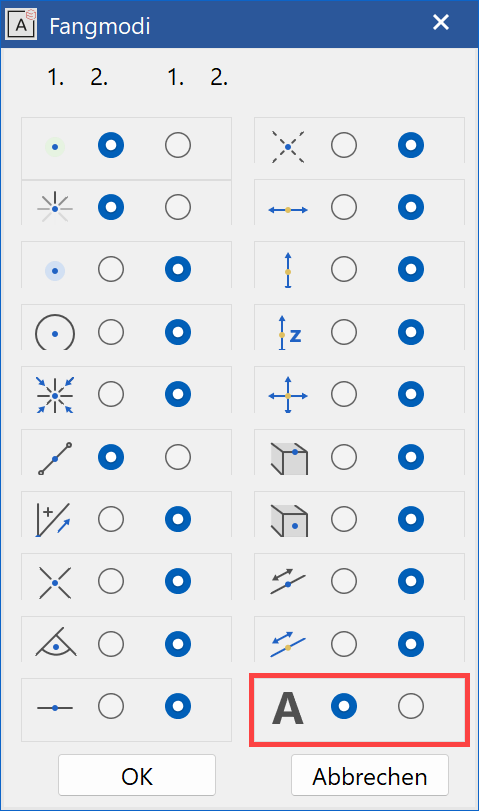
Capture mode for the text
If you right-click inside the graphic window, you can specify under CONFIGURE AUTO CAPTURE whether or not to snap to text reference points.
Context menu
If you right-click inside the text box while creating or editing a text, a context menu appears.
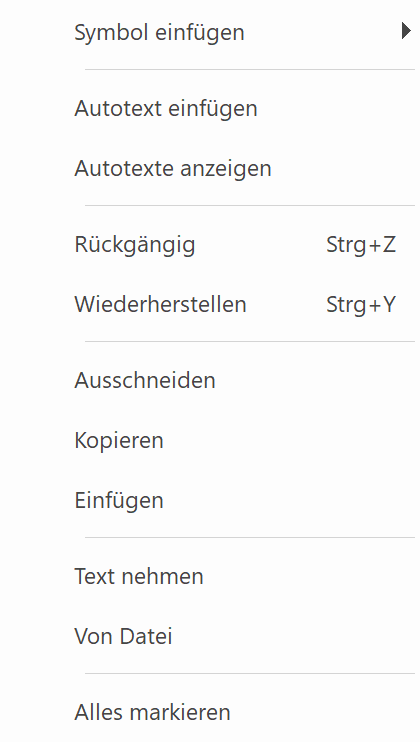
Take text
You can use this option to use any text that has already been placed. Instead of re- typing the text, you can paste existing text in the current text position. To do so, select a text by clicking on it after activating the function.
From file
This function enables you to import the alphanumeric text of an ASCII file into a CAD drawing. E.g., a text file with the ".txt" extension (file type). You cannot adopt formatting such as tabs, spacing, etc.
After activating the function, you can select the text file.
Modify text content globally
|
|
Modify menu > Modify text content globally |
You can use this function to search for a text string such as a word in all existing texts and replace it with another text string.
The text to be replaced and the new text can also be a part of a word or multiple words.
The search is case-sensitive and takes spaces at the start or end of the text into account.