Title block
Title blocks are ELITECAD drawings with prepared auto text items (project, plan name, etc.) that are saved in a separate folder. The PLACE TITLE BLOCK function opens the title block directory directly. You can use the COMPLETE TITLE BLOCK function to fill in the auto texts that are integrated in the title block.
The appendix to course unit "Basics: Foundations part 3" shows how to create your own title block.
Place title block
|
|
Lay-out toolbar |
| Lay-out menu > Place title block |
When you place a title block, a file selection window opens, where you can select and load the desired title block.
Tip
This first checks whether the current project directory has a "head" subfolder. If one is not found, the directory of the default title blocks (<ELITECAD installation path>\u\<version>\<ar|me>\glob\l\head) opens.
This way you can easily manage and load project-specific title blocks that include specific information or have a specific layout.
You can use this function to import any custom title blocks or parts of title blocks. However, you only have the option to fill in the title blocks automatically if the corresponding auto texts are in use.
Complete title block
|
|
Lay-out toolbar |
| Lay-out menu > Complete title block |
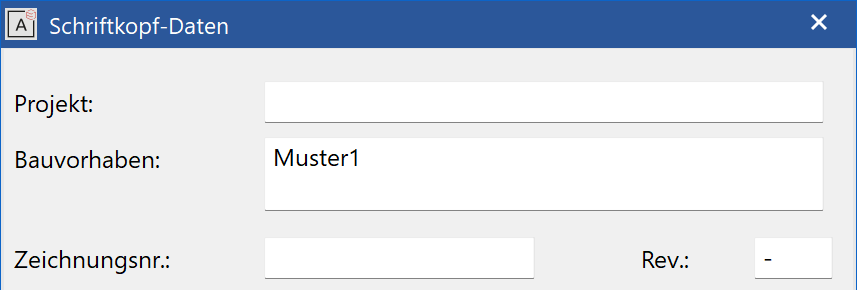
After you place a title block, a window opens where you can enter the information via the COMPLETE TITLE BLOCK function.
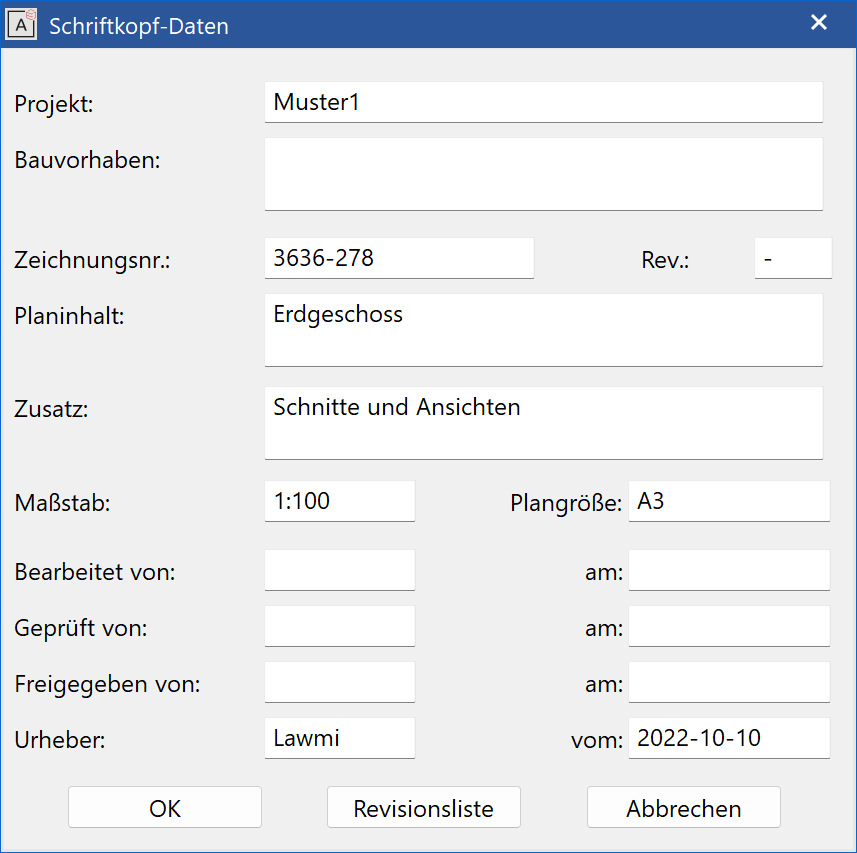
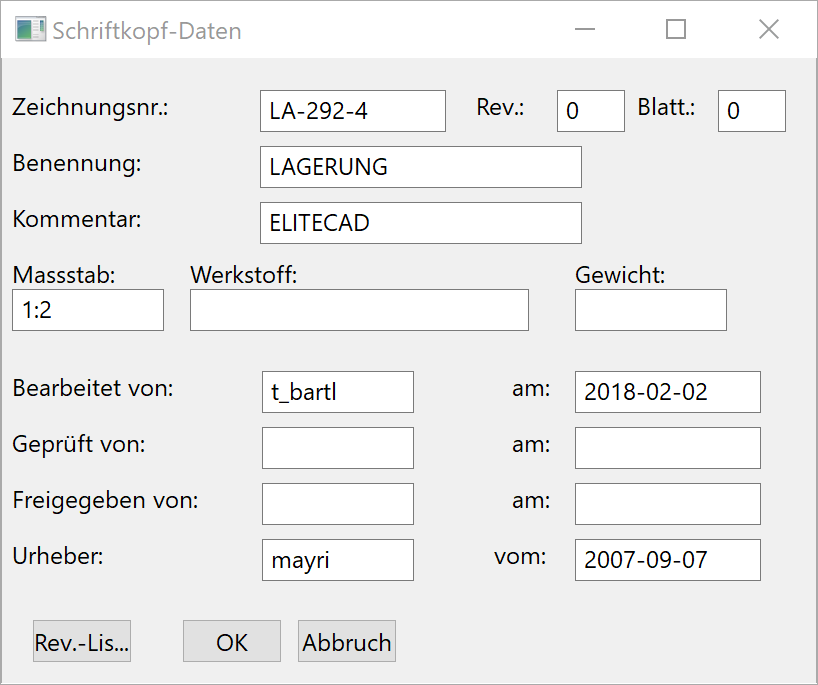
If there is already a filled-in title block on the plan, the information is copied over from it. The Scale, Page format, Editor (login) and Date are automatically filled in but can be changed.
Note
THE DATA IS ONLY WRITTEN INTO THE TITLE BLOCK IF IT WAS GENERATED WITH THE CORRESPONDING AUTO TEXTS.
see the chapter MODIFY TITLE BLOCK.
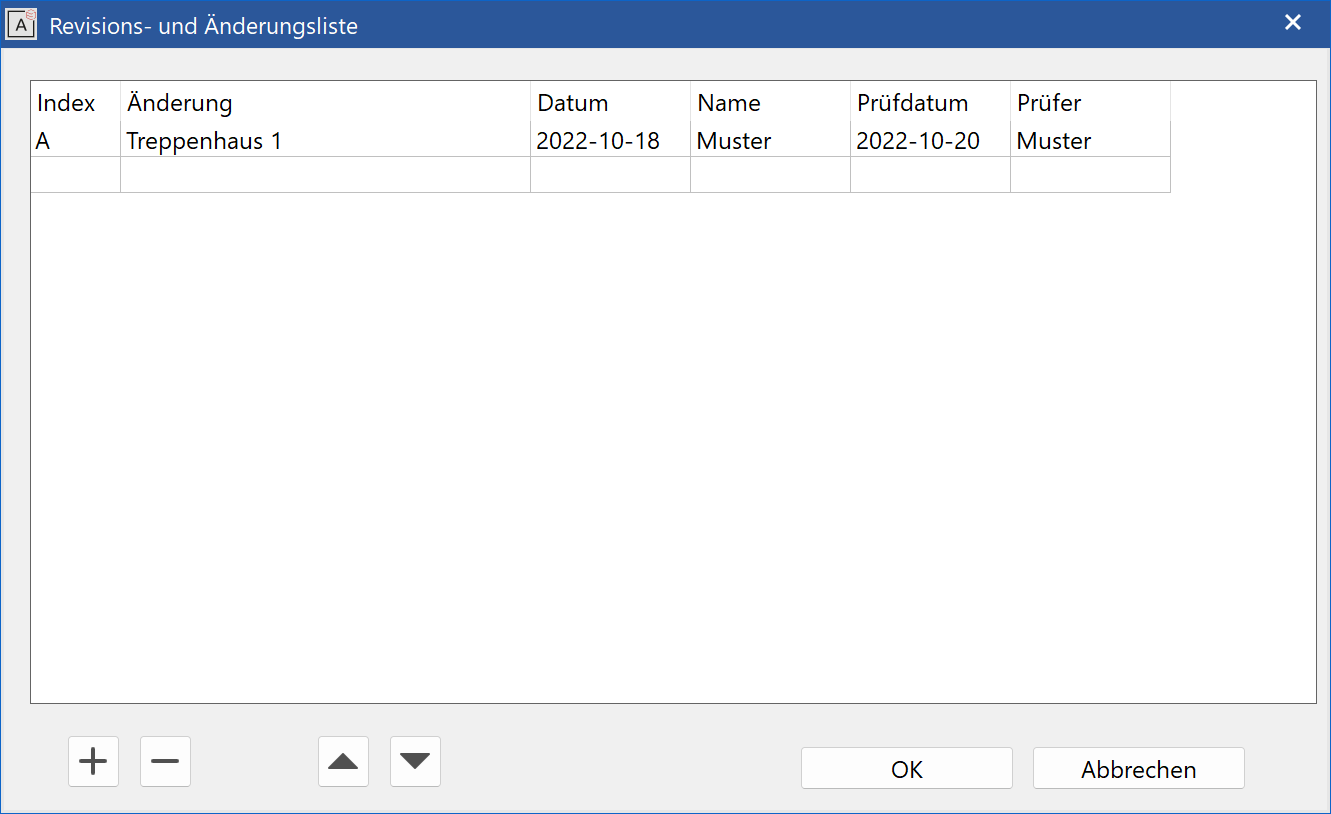
You can also call up or enter revision comments via the "Rev. list" button. These comments are also filled in automatically.
Improved · 16 R1 · Improvements
Configure classification title block
Up to ELITECAD version 12.0 the title block was defined by objects with specific classification structure. Classification title blocks can still be used in parallel to title blocks with auto texts.
In case you create your own classification title blocks, you have to consider that the text that is generated automatically by the function COMPLETE TITLE BLOCK, belongs to an object with a specific name.
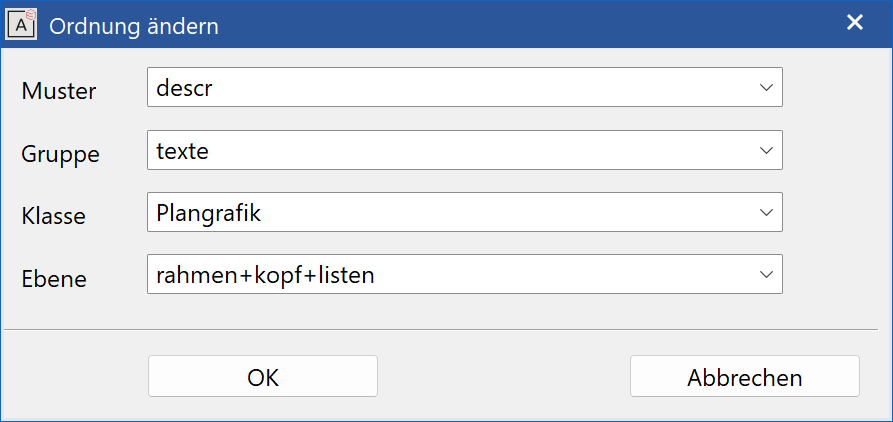
The title block needs a specific classification structure. You can modify the classification by the function CHANGE > CLASSIFICATION.
Select all objects of the title block and enter the following values.
Tip
Each of the texts that are filled out need to be an individual object with specific name. The easiest way to achieve this is to take an existing title block and copy single objects in your title block.
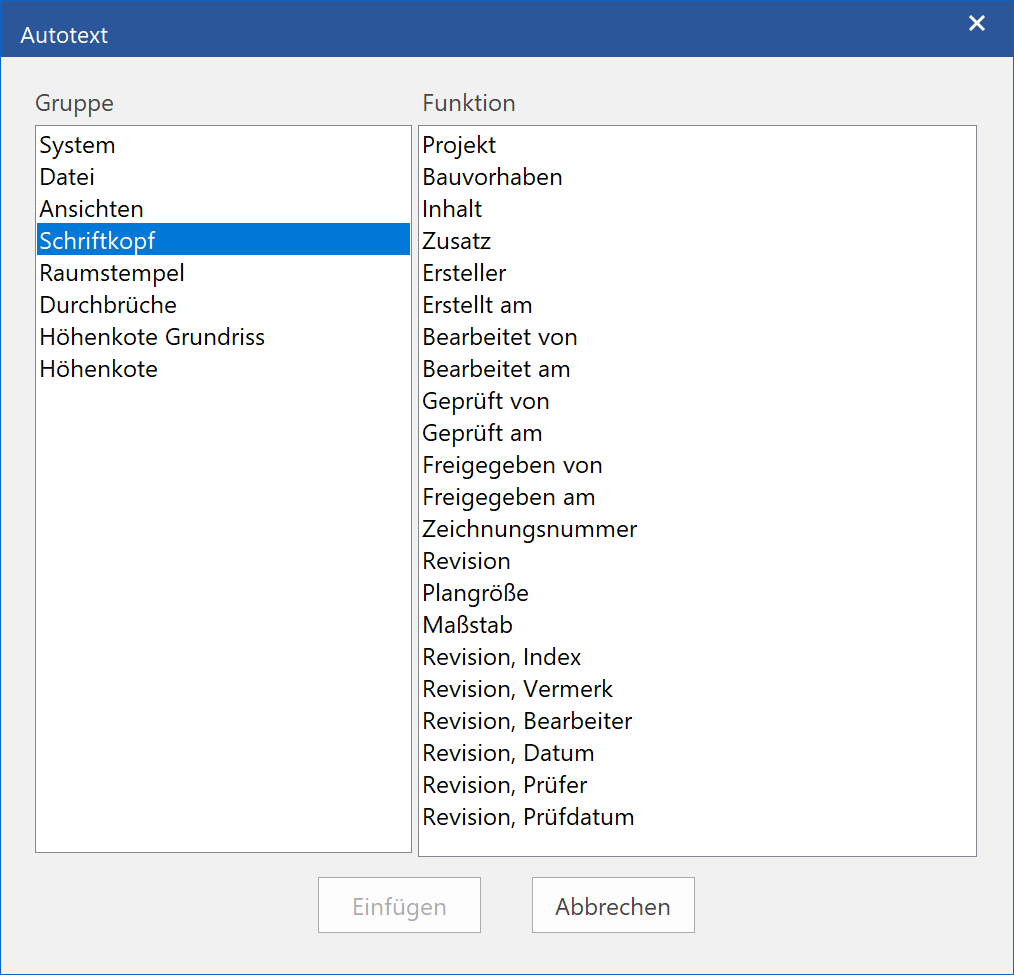
Following object names are defined for the title block:
| material | Material.pre-product |
| pageno | Page number |
| id | Drawing number |
| rev | Revision |
| descr | Plan description |
| comm | Comment |
| scale | Scale |
| weight | Weight |
| cre_usr | Edited by |
| cre_date | Edited on |
| chk_usr | Checked by |
| chk_date | Checked on |
| free_usr | Approved by |
| free_date | Approved on |
| ori_usr | Creator |
| ori_date | Creation date |
Following object names are defined for revision marks:
| *rev_rev | State (revision) |
| *rev_descr | Description |
| *rev_usr | User |
| *rev_date | Revision date |
| *rev_chk | Checked by |
| *rev_cdate | Checked on |
Enter the revision number instead of the asterisk at beginning of the object name (number between 1 and 8), e.g. 1rev_rev, 2rev_rev.
Modify auto text title block
Title blocks can be personalised. The AUTO TEXT function can be used to add fields.
If you right-click inside the text box while creating or editing a text, the item "Insert auto text" appears in the context menu.
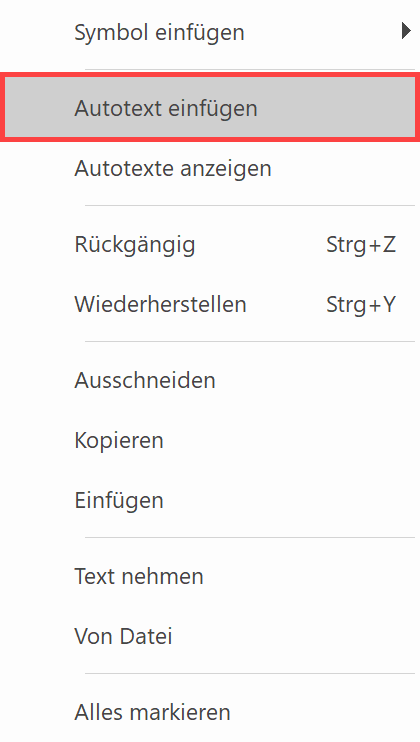
All the options are listed under the Title block group.
Create customer title block
Workshop
Start a new drawing
-
Select the function FILE NEW and change the scale to 1:1.

-
Draw the frames for the different fields, ensuring that all elements are in the Plan graphic layer.


-
Add text. To enable a text to be created vertically in the centre of a field, the text reference point must be set to Centre left.


-
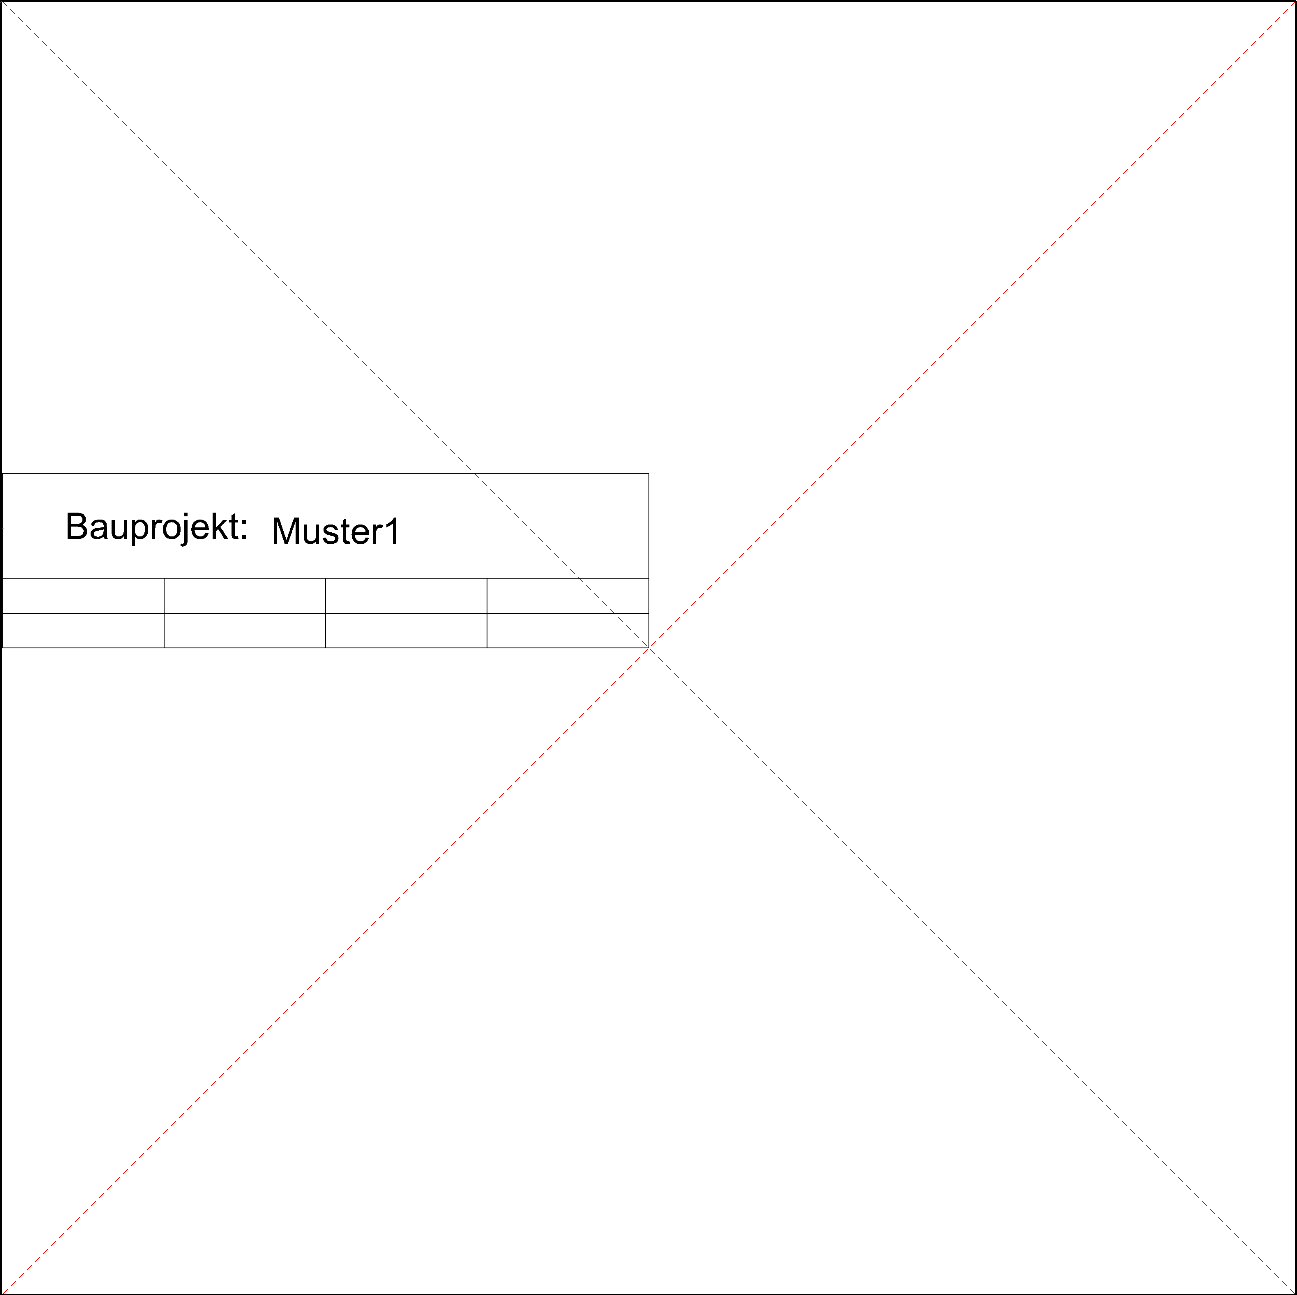
Auto texts can now be added to the title block. There are auto texts that are filled out directly by the program (project, MST, file name, etc.) and auto texts that are filled in via the screen Complete title block (plan content, building project, etc.).


-
As a test the title block can be filled out:
LAY-OUT MENU > COMPLETE TITLE BLOCK.

-
To enable the title block to be selected with a single click, it must be grouped together. Select the title block and from the context menu select GROUP SELECTION.


-
Move the title block in such a way that the point of the title block is located in the middle of the page; later on, the title block will be attached to this point when you locate it using your cursor.
-
Save the title block to your library.
FILE MENU > SAVE AS