Library
Library manager
|
|
Window toolbar |
| Window menu > Library… |
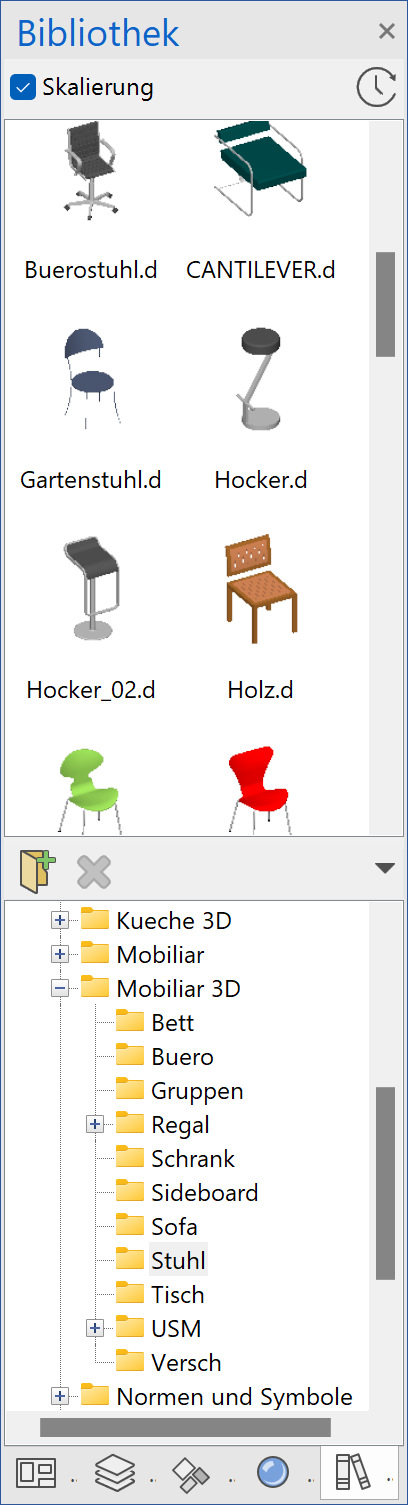
The library manager allows you to search for a library part via the file structure and offers you a graphic preview for selection (similar to the explorer). A library part can be selected by selecting the preview graphic. Not only the parts saved as a library part but also ELITECAD drawings and external 3D formats (i.e. SketchUp, 3DS) are displayed in manager.
The option SCALING enlarges or reduces the library part to the corresponding scale of the drawing (only valid for ELITECAD drawings). No scaling is required in most cases for plan elements graphics (header, north arrow).
If the option RECENTLY LOADED is selected, the most recently loaded library parts are loaded in the preview area and the background of the folder structure is set to grey.
The management window is divided into two areas. The preview of the library parts is displayed in the upper field. The folder structure is shown at the bottom. The folder structure is displayed from a root directory.
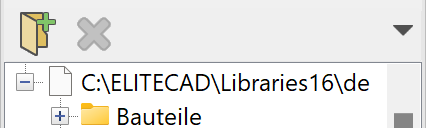
Root directories can be added, for example for the parts used in the office or for self-designed parts.
The drawing can be manipulated accordingly using the functions from the Load/positioning property bar before being placed.
Property bar for loading/positioning

The property bar becomes visible as soon as you insert a file, library part, graphic or data from the clipboard into the drawing. Data can be mirrored, rotated or scaled before they are placed in the drawing.
Align to area/terrain
![]()
The library parts are automatically aligned to a surface with this option. If this is a terrain surface, the library part retains its reference to this surface after modifications.
If the library part is located within a room and has the option ADJUST TO (FINISHED) FLOOR HEIGHT IN ADDITION, these parts are also adjusted to the new height of the room.
Align on a line
![]()
A start direction and then the end direction are defined after placing the library part with the function ALIGN ON A LINE. The library part is rotated on the positioning point from the start direction to the end direction.
Align automatically to element
![]()
The selected library part is rotated to match the element and a preview is displayed. The library part may be displayed on the other side depending on which side of the line the cursor is located. The position is confirmed with the left-hand mouse button.
Next positioning/exchange point
![]()
If a library part has been defined with various points of placement, users can switch to the next point of placement by pressing this function.
Select positioning/exchange point
![]()
This menu is used to select a specific positioning or exchange point in case multiple points are defined.
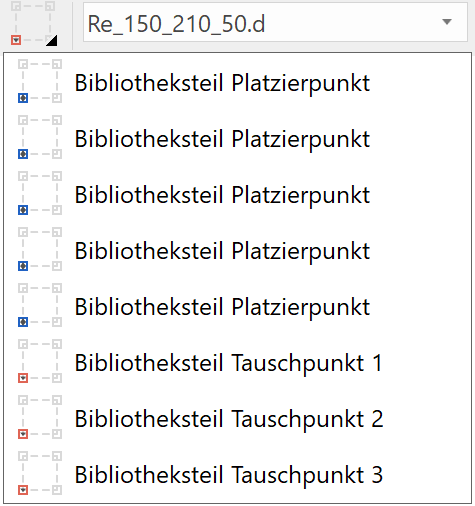
Current library part name

The file name of the library part to be set appears in this field.
Rotate
![]()
![]()
Having selected the angle in the "Combo box" or inputting an angle, the loaded part can be rotated clockwise or anticlockwise with the corresponding function.
Mirroring
![]()
The loaded part can be mirrored accordingly by selecting the function MIRROR HORIZONTAL or MIRROR VERTICAL or by entering the desired angle in the entry line.
Scale
![]()
Having selected the function, you will be prompted to enter the required scale factor. Following entry of the scale factor, the part is enlarged or reduced around the point of placement and can be placed with the usual crosshair positioning procedure.
Modify reference point
![]()
This function can be used to specify the reference point when positioning, moving or copying.
Activating this function opens a separate window "Modify reference point" with the current selection. The selection can be moved to the required location in this window (by zooming, rotating, etc.). The new reference point (reference point for the manipulation) is set by tapping on it. The window is closed automatically and the selection can be placed via the new reference point.
Rotate on X/Y axis
![]()
![]()
This function can be used to rotate objects on the X- or Y-axis before they are placed.
Property bar for library part

The property bar becomes visible as soon as you select a library part.
| Function | Description |
|---|---|
| Library part parameters | |
| Next positioning/exchange point | |
| Select positioning/exchange point | |
|
Current library part name |
| Renovation planning state |
Library part parameters
![]()
This function opens the dialog window to define or modify a library part. See DEFINE LIBRARY PART.
Exchange library part
In order to exchange a library part, it must be first selected in the graphics window. The library part is replaced as soon as a different file name is selected. The reference point remains the same during this process. If the reference point is an exchange point, then the exchange point of the new part is located on the exchange point of the existing part.
Exchange of library parts in renovation planning (only ELITECAD Architecture)
If renovation planning is active and the library part is assigned to the state existing construction, then the part is maintained and set to the state demolition. The new part receives the state new construction.
Insert library
|
|
Insert toolbar |
| Insert menu > Library… |
Instead of using the library manager, a library part can be called up and set directly via the Windows file selection. The parts adjust to the scale.
The library part can be manipulated accordingly using the functions from the Load/position property bar before being placed.
Insert symbol
|
|
Insert toolbar |
| Menu Insert > Symbol… |
This function is used for absolute loading and placing of symbols such as title blocks, location symbols, keys, etc. This means that symbols are always loaded in the same size regardless of the scale and format of the current drawing.
The symbol can be manipulated accordingly using the functions from the Load/position property bar before being placed.
Define library part
|
|
Extras toolbar |
| Extras menu > Define library part |
This function is only available in ELITECAD Architecture.
Multiple objects with 2D and 3D information can be combined with this function into a library part. All selected parts are summarised into a library part.
Following steps have to be executed:
- Enter data
- Define object
- Define positioning/exchange points
- Save object into a file if necessary
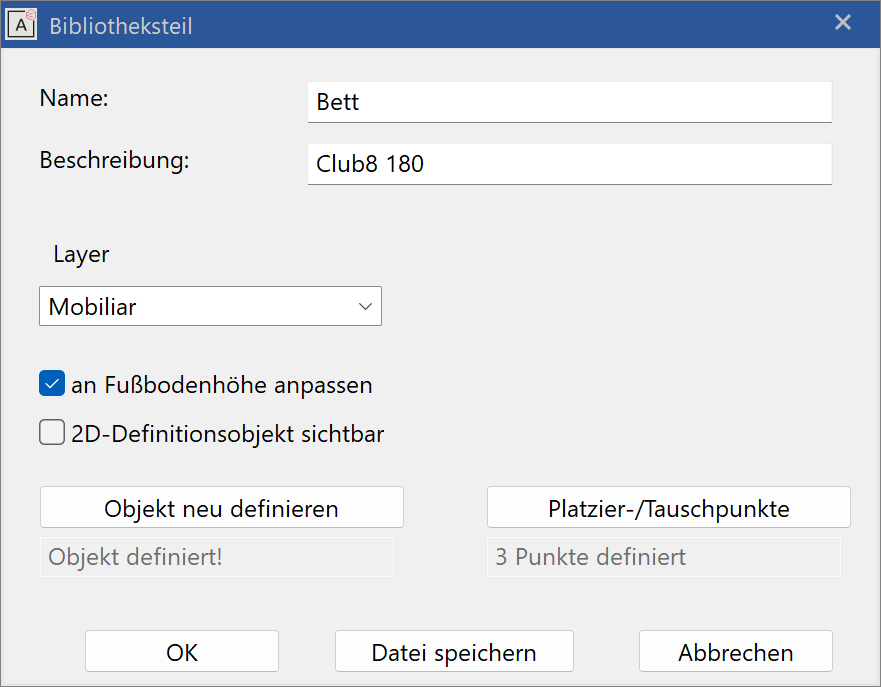
Name
The name of the library part becomes the file name.
Description
The description turns into quick info. Dimensions and article numbers can be entered here, for example.
Layer, group, class, level
The layer into which the library part is allocated when being applied can be entered.
If working with classification is active, then the classification (group, class, level) can be entered.
Adjust to finished floor height
If this option is selected, the Library part is adjusted to the height of the floor if it is standing on a floor. The 3D information is adjusted to the height. The 2D floor plan remains "lying" on the work plane applied.
Visibility of 2D-elements
The 2D elements can optionally also be made invisible.
Define object/Redefine object
When creating a new object, the library part is defined, when changing an existing one the object can be redefined. The current state is displayed in the window.
If only a pure 2D-graphic is present, you must specify one of the contours as a main model. In the case of 3D-data, three options are available to be selected for the 2D-display. A window offering three choices opens.
- Automatic contour
The current detail parameters of the 3D-objects are used for the views here. However, they are only displayed in plan views if the option AUTOMATIC HIDDEN LINE is selected in the plan parameters. The detail parameters are always applied in views and sections. - Generate contour
The 2D-display is generated using the visible parts and projected onto the floor plan. The 3D-object detail parameters are no longer used. - Select contour
A separate contour can be selected for 2D-display. The 3D-bject detail parameters are no longer used.
Define positioning/exchange points
You can move the library part precisely to the correct location in the drawing using placement points. When inserting the Library part, positioning and exchange points can be selected by the functions NEXT POSITIONING / EXCHANGE POINT and SELECT POSITIONING / EXCHANGE POINT from the property bar.
In the case of a table, it would be a good idea to set a point in each corner and in the middle of the table.
Tip
The point of reference is important for the height adjustments for the base. The 3D of the library part adjusts to the height if the reference point is within the room.
You can apply unlimited positioning points and up to 9 exchange points for each part. Exchange points are specific positioning points. When exchanging library parts, the exchange point of the new part is located on the same exchange point of the existing part. A useful exchange point is the connection point of a sink.
If the library part is selected in the drawing, various handles appear on the placement points, depending on the point type.
- Positioning point – square
- Exchange point – triangle
- Reference point – rhombus


The reference point is the point, which is used for placing a loaded library part. In addition, the reference point of a placed object is displayed as a blue circle (normal placement point) or as a red square (exchange point).
Save to file
The library part can be saved to a file.
Dissolve library part
|
|
Context menu in the graphics window |
If a library part is selected in the graphics window, then the function DISSOLVE LIBRARY PART is available in the context menu. The object thereby loses the properties of the library part and is available again as a normal object.