Functions in the Window
Left mouse button
The left mouse button can be used to draw, select and modify. If you move the mouse in the graphics window, crosshair appear on the cursor. The position of the point most recently clicked on in the graphics window is displayed with the marker in the shape of a crossed square " ".
".
Depending on which function is currently active, the cursor offers additional support by displaying information and help functions. These functions are described below using general examples. You will find further descriptions in the chapters for the respective functions.
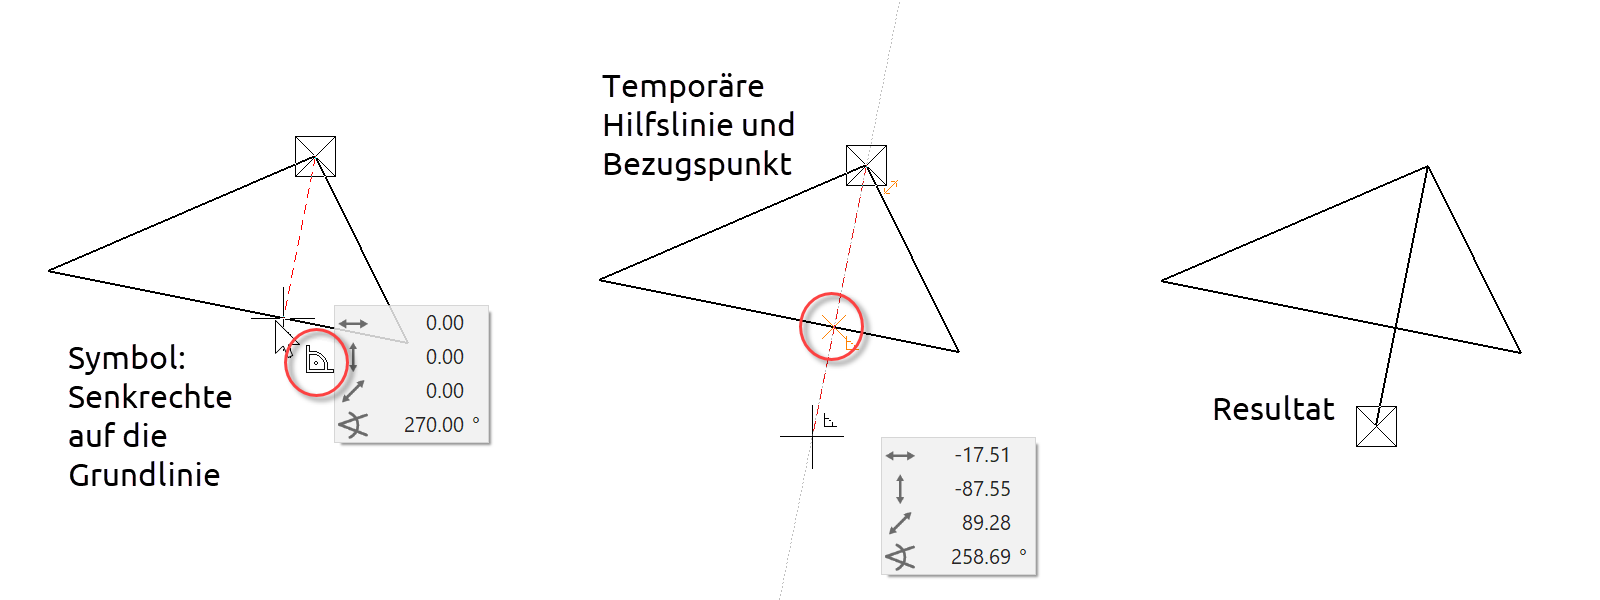
Temporary reference points and auxiliary-lines
If the system recognises a capturable point when drawing close to an element, it displays this with the capture symbol that is displayed beneath the cursor. The symbols are described in the "Right mouse button" chapter.
Example
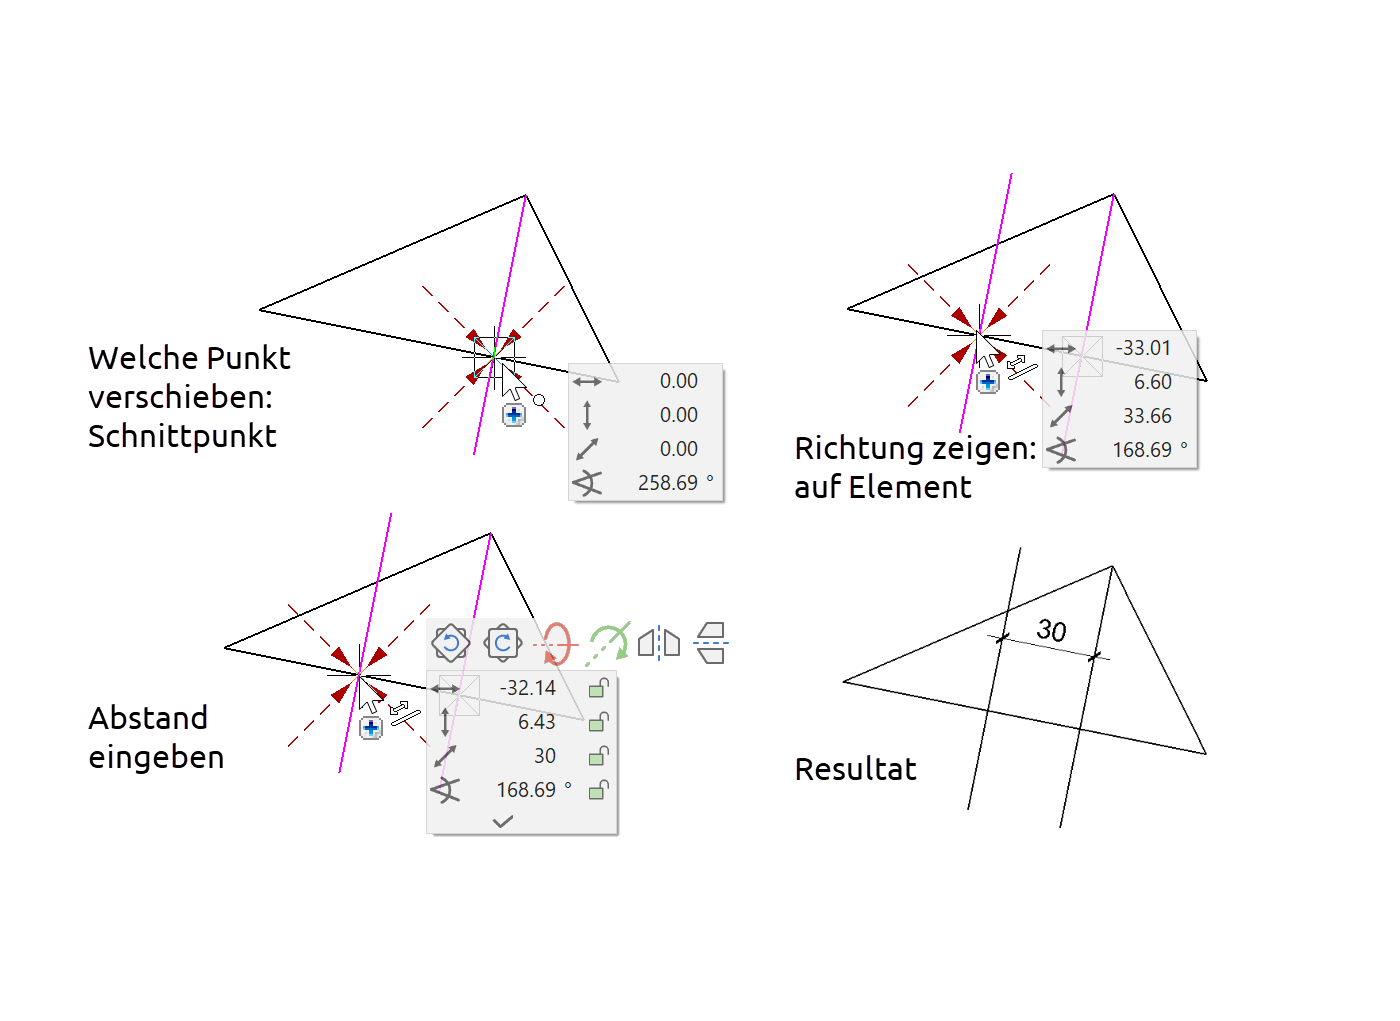
Values field
A distance from the most recently selected point can be entered in the value field. For example, a line is to be copied 50 cm from the other line, parallel and offset. After calling up the copy function and stating the direction, the alignment can be stated directly in the distance field.
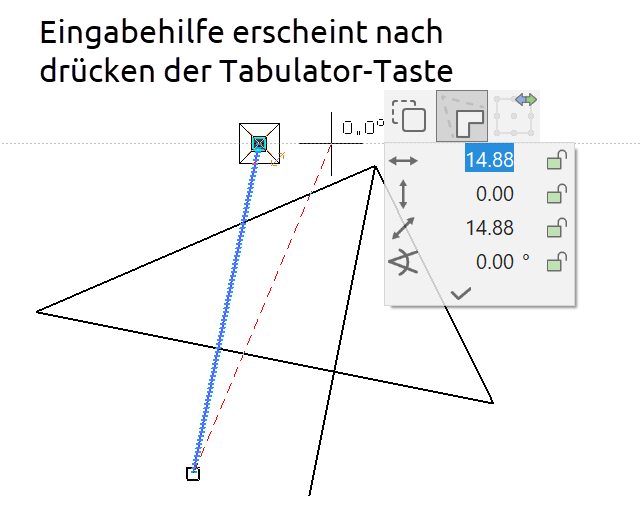
Input assistant
The Input Assistant appears above the value field when the Tab key is pressed. The Input Assistant provides additional options for inputs or processing depending on the function that is currently selected.
A selected line is to be connected to another in the example. The STRETCH function is selected in the Input Assistant.
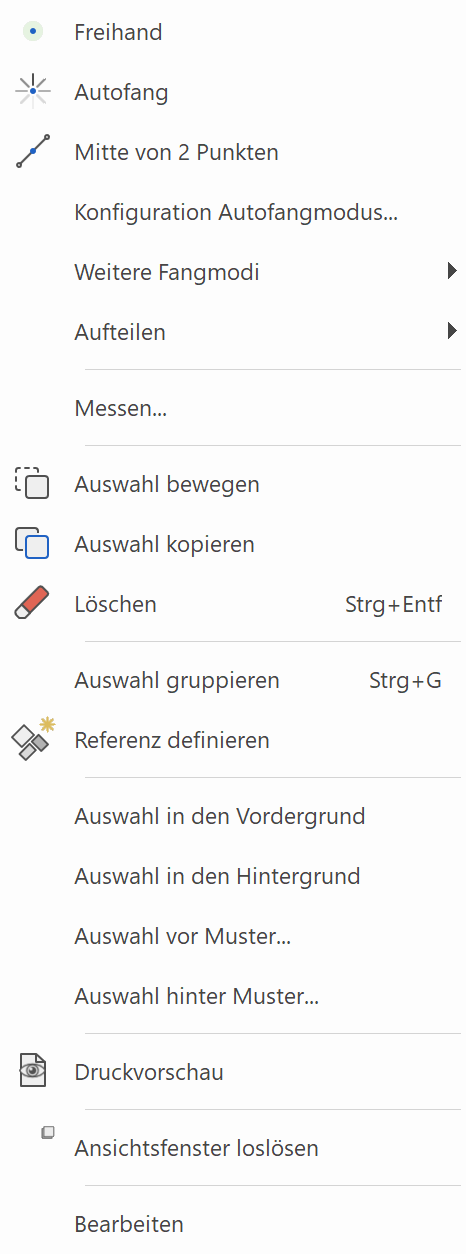
Right mouse button
The context menu may contain various functions.
| standard | for a selection | in a text field |
|---|---|---|
 |
 |
 |
Capture functions
The capture functions are described in chapter "Capture functions".
Divide
A division by number or fixed distance can be displayed on a line or polygon using this function. Temporary capture points are generated that are only deleted when the freehand capture mode is selected.
Number on line
Two points and the number of distances are queried.
Distance on line
Two points and the distance are queried. Division begins at the first point.
Number on polygon
The polygon must first be selected and then the position of the start and end points and the number of distances is queried.
Distance on polygon
The polygon must first be selected and then the position of the start and end points and the distance queried. Division begins at the first point. The side to be divided must also be stated for a closed polygon.
Measure…
This function moves the dimension values window into the foreground.
Move selection
You can use this function to move previously selected parts.
Copy selection
You can use this function to copy previously selected parts.
Delete
You can use this function to delete previously selected parts.
Group selection
An arbitrary selection can be combined into a group using this function.
Ungroup
A previously selected group can be ungrouped using this function.
Selection to foreground
The visibility of a specific selection can be modified and placed in the foreground using this function.
Selection to background
The visibility of a specific selection can be modified and placed in the background using this function.
Selection in front of model
The visibility of a specific selection can be modified and placed in front of a specific model using this function.
Selection behind model
The visibility of a specific selection can be modified and placed behind a specific model using this function.
Middle mouse button
Rotate image
Hold down the middle mouse button (scroll wheel) and move the mouse.
Zoom
Scroll with the middle mouse button (scroll wheel) or hold down the middle mouse button and the Shift key together and move the mouse up and down.
The current position of the cursor is the zoom centre when zooming with the scroll wheel.
Move
Hold down the middle mouse button and the Ctrl key and move the mouse.
The image section can also be moved using the Ctrl key and the arrow keys.
The key combination of the functions ROTATE IMAGE and MOVE IMAGE can be set in the OPTIONS.
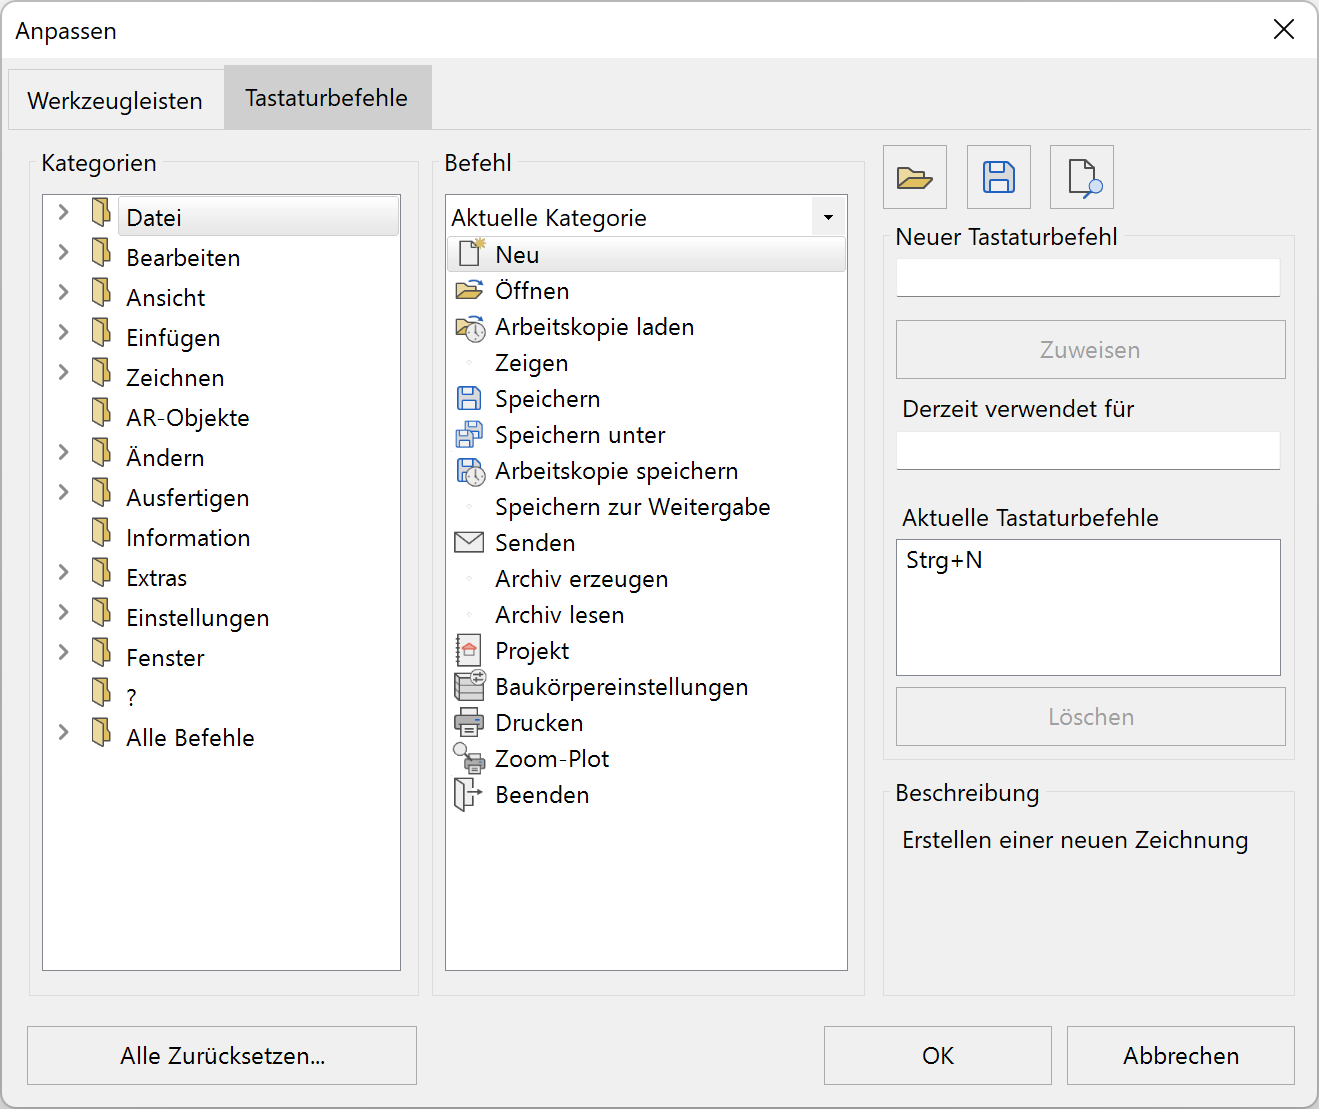
Keyboard commands (short cuts)
Users can create their own keyboard shortcuts or modify existing ones. The keyboard commands can be set in the menu SETTINGS > KEYBOARD COMMANDS.
Note
Keep in mind that the following keys on international keyboards may have different inscriptions:
Ctrl = Strg
Shift = Umschalt
Del = Entf
Home = Pos1
Categories
All menus and submenus are listed here.
Tip
The commands are organised by toolbars under "All commands".
Command
Individual commands are listed by selecting a category.
If a command is selected, the "Current key commands" field will show whether a keyboard combination has already been assigned to this command.
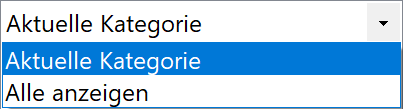
Tip
Users can choose between the OPTIONS "Current category" and "Display all". All commands are displayed by selecting "Display all".
New keyboard commands
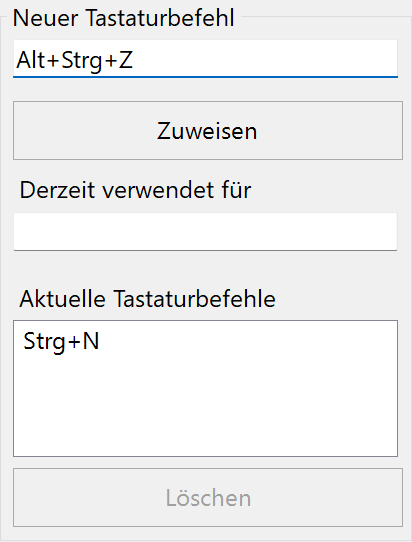
If a command is selected, the key combination can be entered in the "New key command" field. This is done by pressing the required keys together. If the selected combination is already in use for a different command, the command is displayed in the field "Currently used for".
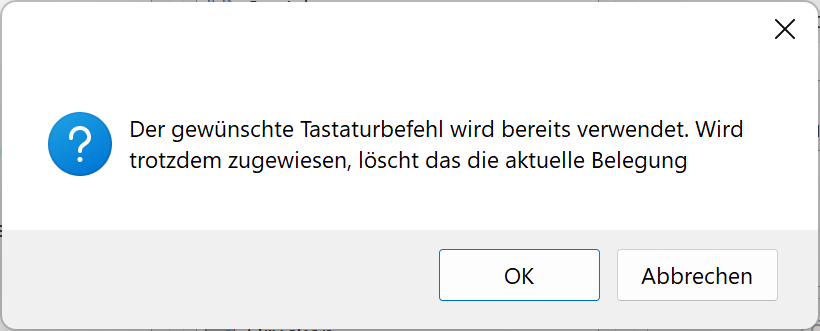
The new combination is saved by selecting "Apply". If the combination has already been assigned, a warning message appears.
Note
Possible keyboard commands:
A modifier key must be used:
Ctrl , Alt or Shift
Letters on their own do not work.
The only single key combinations are the function keys F1 - F12 .
Current keyboard commands
The current allocation of the command is displayed here. A marked command can also be deleted here.
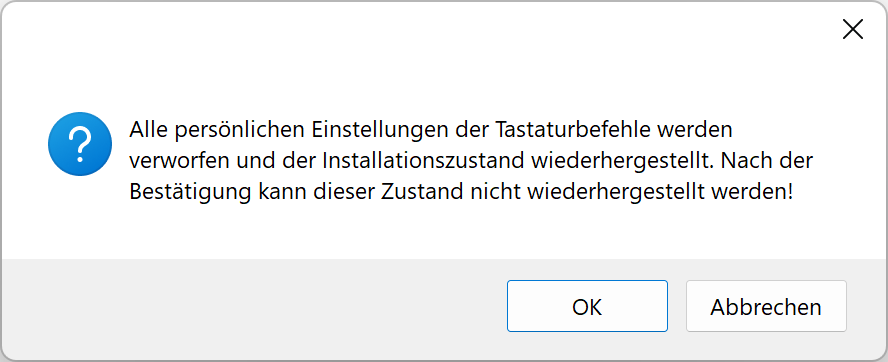
Reset all
Commands can be reset if you wish to return to the default settings. A warning message appears.
Management functions
![]()
![]()
The key combinations can be saved or transferred to other computers with the LOAD COMMANDS and SAVE COMMANDS management functions.
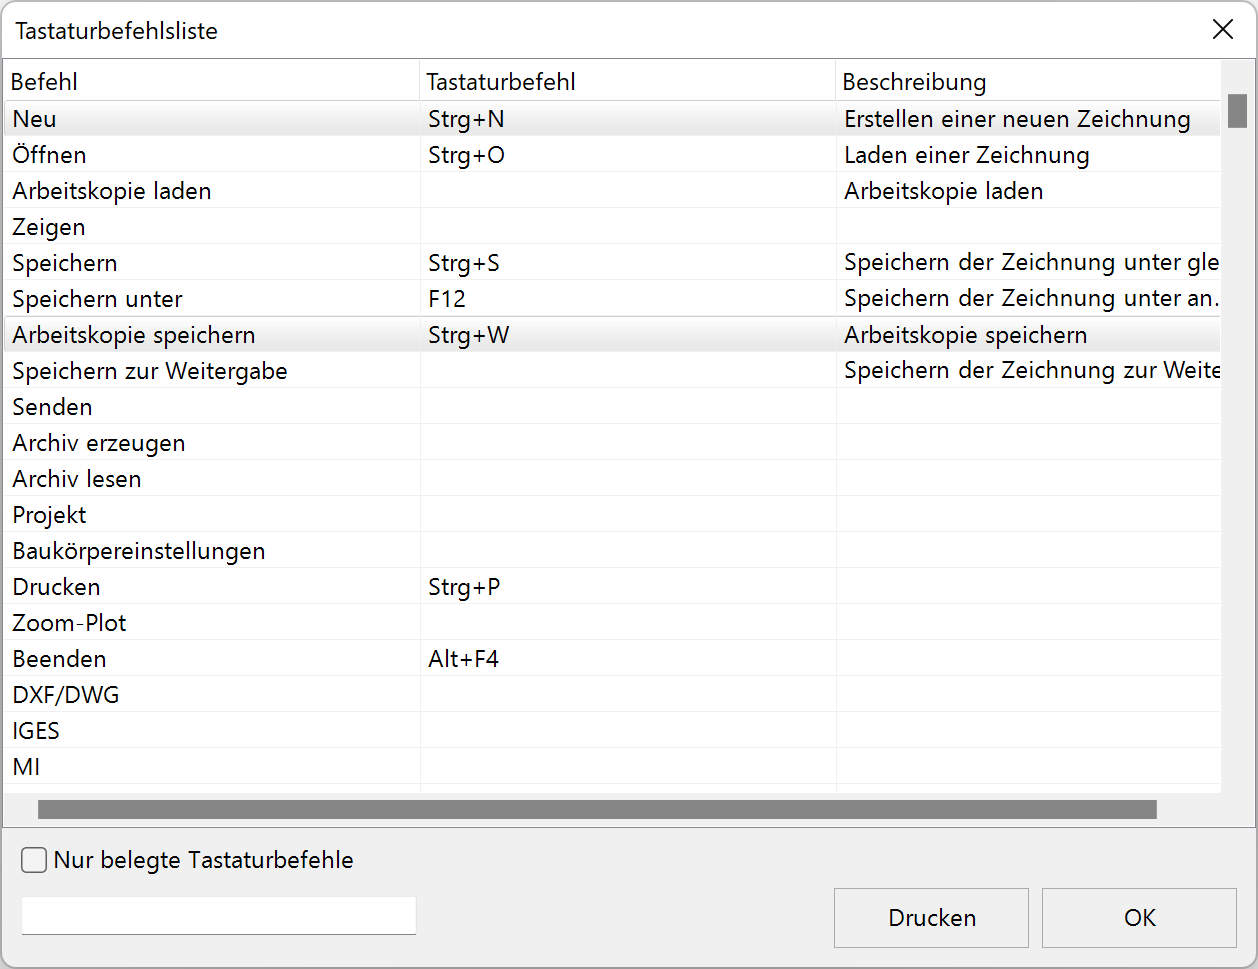
List commands
![]()
This function provides a complete list of all keyboard commands and provides a function for printing the list or searching for specific commands.
Note
The list can be reduced to keyboard commands already in use.

Search
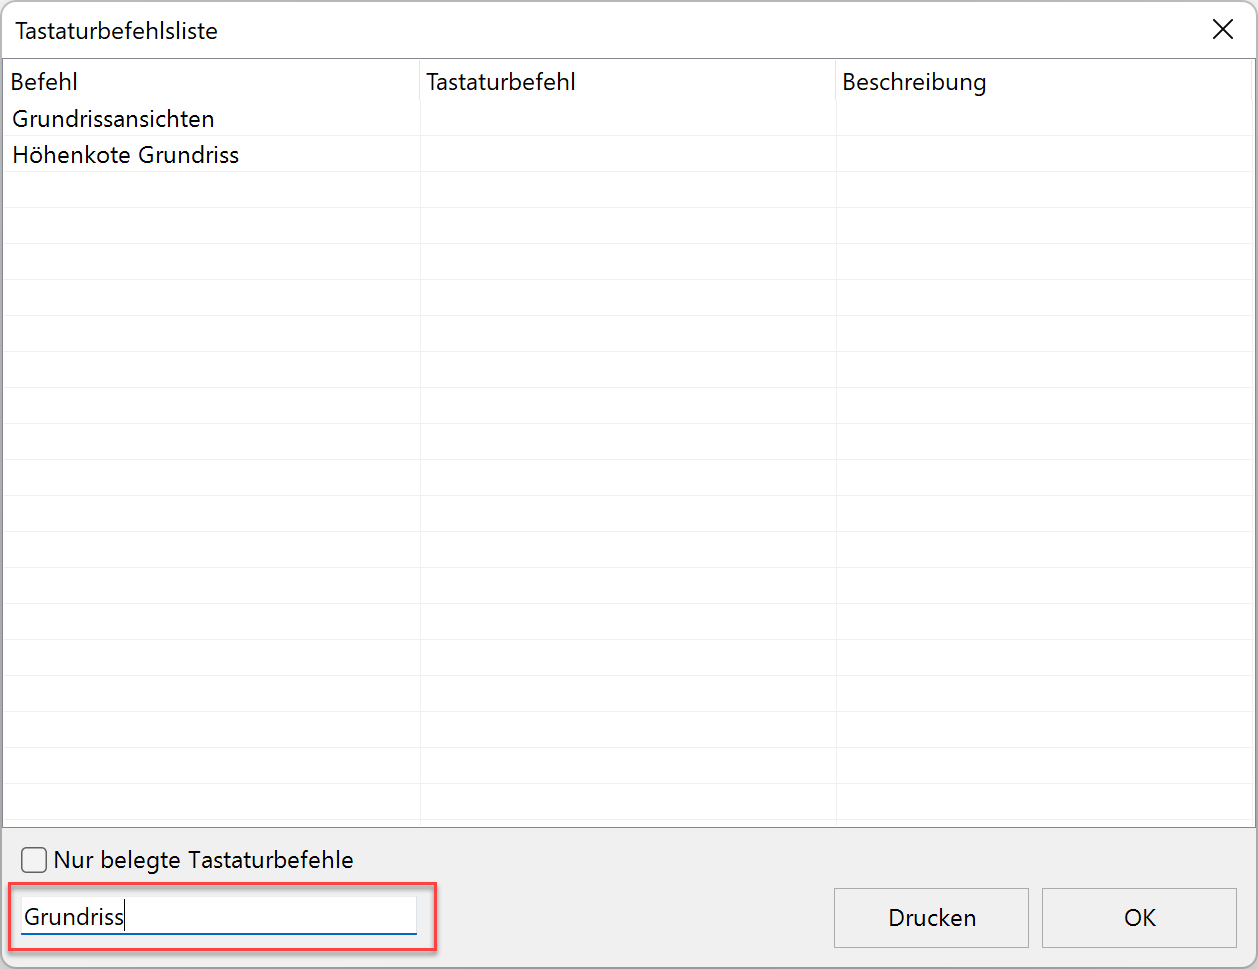
Enter a word or part of a word into the search field. The current list is filtered based on the text you enter.
Tip
Double-clicking on an entry takes you back to the main dialog window and displays the corresponding command.
Touch Input
Several gestures with the fingers are supported for tablets with touch sensitive displays in the graphics window.
Move
Put one finger on the graphics window and move the finger.
Rotate 2D
Put two fingers on the graphics window and rest one finger. This defines the rotation point. Rotate the second finger around the first. The z-axis remains unchanged.
Zoom
Put two fingers on the graphics window and move them closer or farther away.
Rotate 3D
Put two fingers on the graphics window and move them up and down. The z-axis is tilted.
Reset view
Put one finger on the graphics window and tap with a second finger.
Calculating expressions
There is an option for calculating mathematical expressions in the entry line. This type of calculation is made by pressing F9 .
Example
50*50 F9 >> 2500
sin(45) F9 >> 0.707106781186547