Work with Storeys
The correct and logical allocation of every individual object drawn in ELITECAD is a prerequisite for orderly and fast work with the program.
In addition to the variety of possibilities for condensing objects through layers or groupings, project management is above all. The top of the pyramid forms the "project" with its project name. The different "structures" to which different "storeys" are assigned in turn are managed under it.
Every object in ELITECAD is clearly allocated according to the project, structure and storey. Ensure that there is also a structure called "without structures" and a storey called "without storey".
This is the basic hierarchy of the architecture program and should always be kept in mind when drawing. In ELITECAD's program title bar, the current project, the active structure and active storey are always on display next to the loaded file.
Storey and structure allocation
A structure, which has no storey, is managed within every project. This is the structure "without structures". All objects which do not belong to a structure should be located on the "without structures" (and therefore also on "without storey"). These can for instance be the components of the exterior construction, development or similar.
If ELITECAD is restarted and no structure or storey is selected, all newly drawn objects are allocated as "without structures".
For the allocation of storey-transcending elements such as exterior chimneys, rainfall guttering, curtain facades (not by a multi-layered wall), the storey "without storey" can be used in the relevant structure.
Active storey
As long as a storey is active, all newly drawn elements are assigned to it.
The single storeys are activated, among other things, by the storey functions described below. In addition, storeys can also be activated by switching views and either activated or deactivated by loading "Storeys" and "work copies". The storeys manager is set to "empty" with a combination of "Select all + Delete" or NEW FILE from the menu item.
Storeys manager
|
|
Windows toolbar |
| Windows menu > Storeys | |
| Ctrl + G |
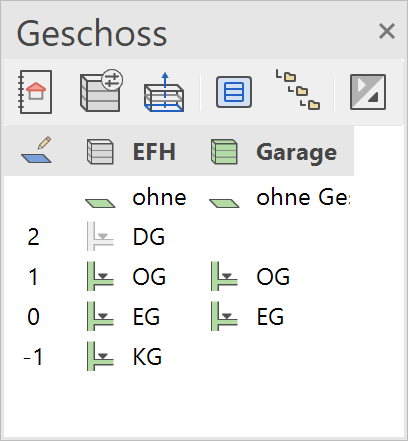
This dialog window has two areas. The header line, where project, structure and depiction of the storeys manager can be configured. Below that a table with the defined storeys as icons is found.
Functions in the header line

| Function | Description |
|---|---|
| Manage project settings | |
| Manage structure settings | |
| Create structure | |
| Show all storeys | |
| Switch the depiction of the storeys from table to list view | |
| Expand & collapse all storeys in the list view |
Depiction of the storeys manager
| Table | List | Overwrite protection active |
|---|---|---|
 |
 |
 |
Meaning of the different icon colours
| grey: | light green: | dark green: | blue: | lock: |
|---|---|---|---|---|
 |
||||
| not loaded | invisible | visible | active | locked |
Directly click on the icons in the storeys manager to control the storey's display. These commands and others can be found in the Context menu.
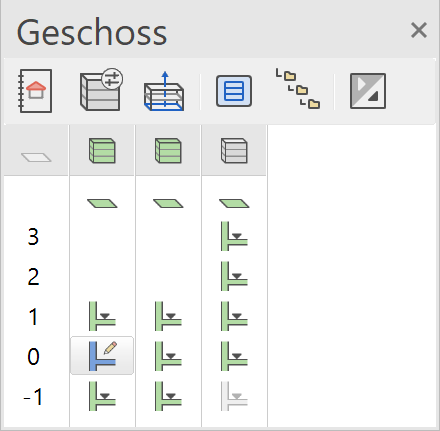
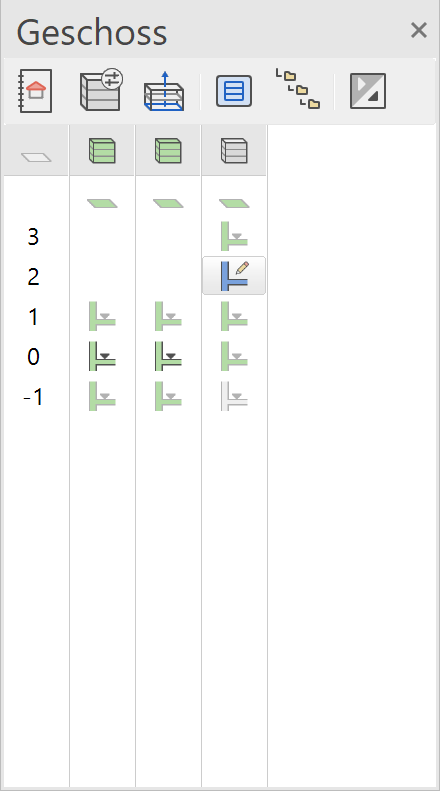
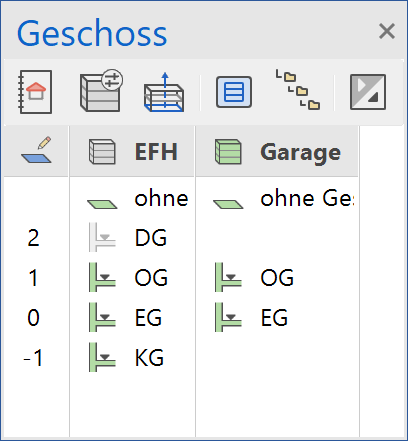
Table view
The symbols for the "without storey" structure are arranged in the header line. The symbol for the "without structure" structure is in the first field on the left.
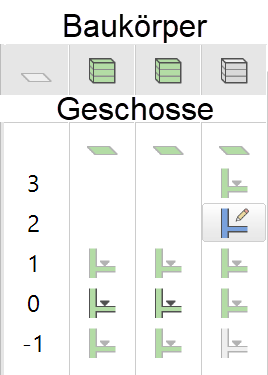
Storey table: The storeys are arranged in the rows according to their number and in the columns according to their structure.
The visibility of the single fields or entire rows/columns is controlled via the context menu.
The structure and storey names appear in the quick info of the individual fields.
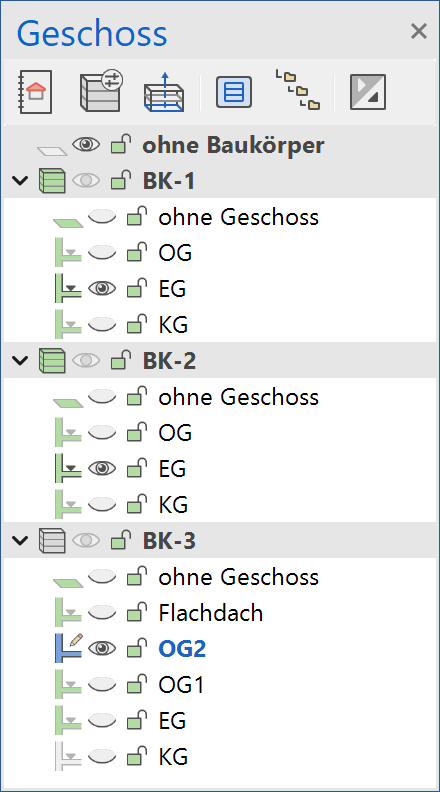
List view
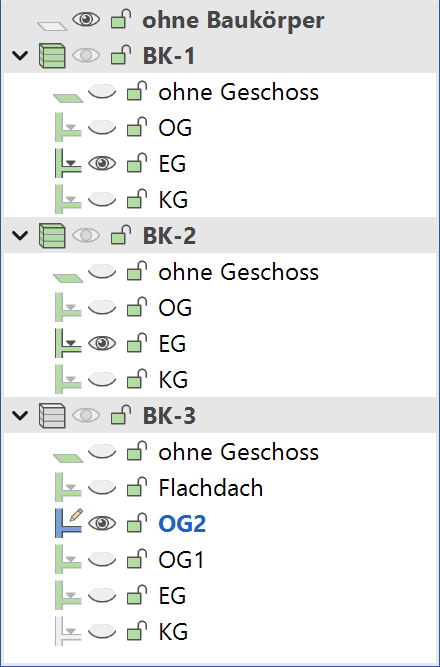
The list view provides direct access to the visibility and lock functions for the individual storeys or the entire structure.
This is similar to the layer list.
The visibility can be switched on or off with the "eye", and the lock locks the storey or structure. These are then shown as grey; the capture points are accessible but the elements cannot be modified.
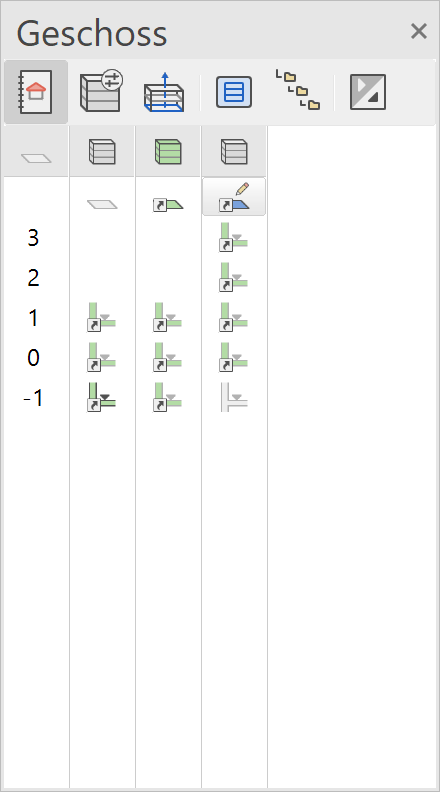
View from the active overwrite protection

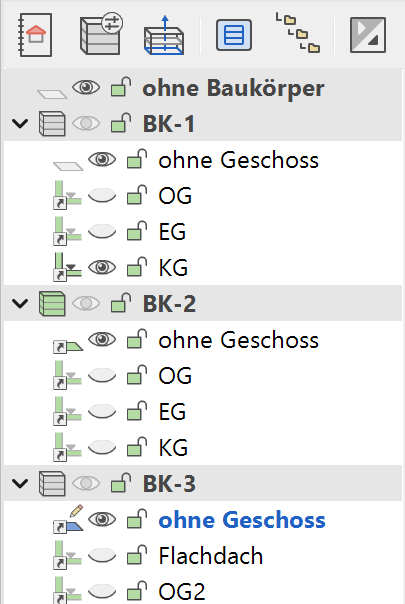
In this mode, the storey icons have an arrow added to those, which are loaded as reference only. This allows you to instantly see that the overwrite protection is active.
Design model editing in team
The storeys manager provides support when several people wish to work on the same design model. This consists of the corresponding functions in the context menu, in addition to the status indication in the storeys manager and precautions in order to prevent involuntarily overwriting.

Requirements
Project, structure settings and storeys are defined.
Team mode – Requirements for team functions
The STOREYS IN FILES option is activated under SETTINGS > OPTIONS > SAVE/LOAD > GENERAL.

This function must be activated on every workstation in the team. It unlocks the save and load functions for the teamwork and allows for another depiction of the storey symbols in the management:
| Reference only | Locked |
|---|---|
 |
 |
It also guarantees that only one team member at any one time can enact modifications to the design model area that he has loaded.
Preparation
Because the team function sets up its own file storage, it is a good idea to work with a master file from the very beginning. This could contain minimal information, for example the axis-grid in every storey. The storey files are generated with the SAVE ALL STOREYS context function. The team workers can now develop their design model areas independently.
Edit design model
The internal structure of the project with structures and storeys determines the possible design model ranges, which can be edited at the same time at different workstations. Design model area means at least a storey or any selection of storeys or structures.
The same design model area can only be saved on the workstation where it was first loaded. A restriction is that the loading and saving of the areas are exclusively performed via the storeys manager.
Loading a design model area over the context menu determines whether the area obtains the to modify or reference only status. If the area has already been loaded in another workstation with the to modify status, it can only be loaded as reference only.

If you then attempt to load it with the to modify an error message appears. The same message appears when you attempt to save a design model area, which was loaded as reference only, over the context menu as long as it is opened at another workstation with the to modify status.

In order to see all changes in the entire design model area, all design model areas are reloaded on a workstation. The views can then be generated and FILE > SAVE AS... saves the design model and views in the master file.
Tip
The complete file (master file) should be saved at regular intervals, ideally, with a version identification. Load the last master file, then reload all storeys via the storeys manager and save under FILE > SAVE AS.
The team function's file storage
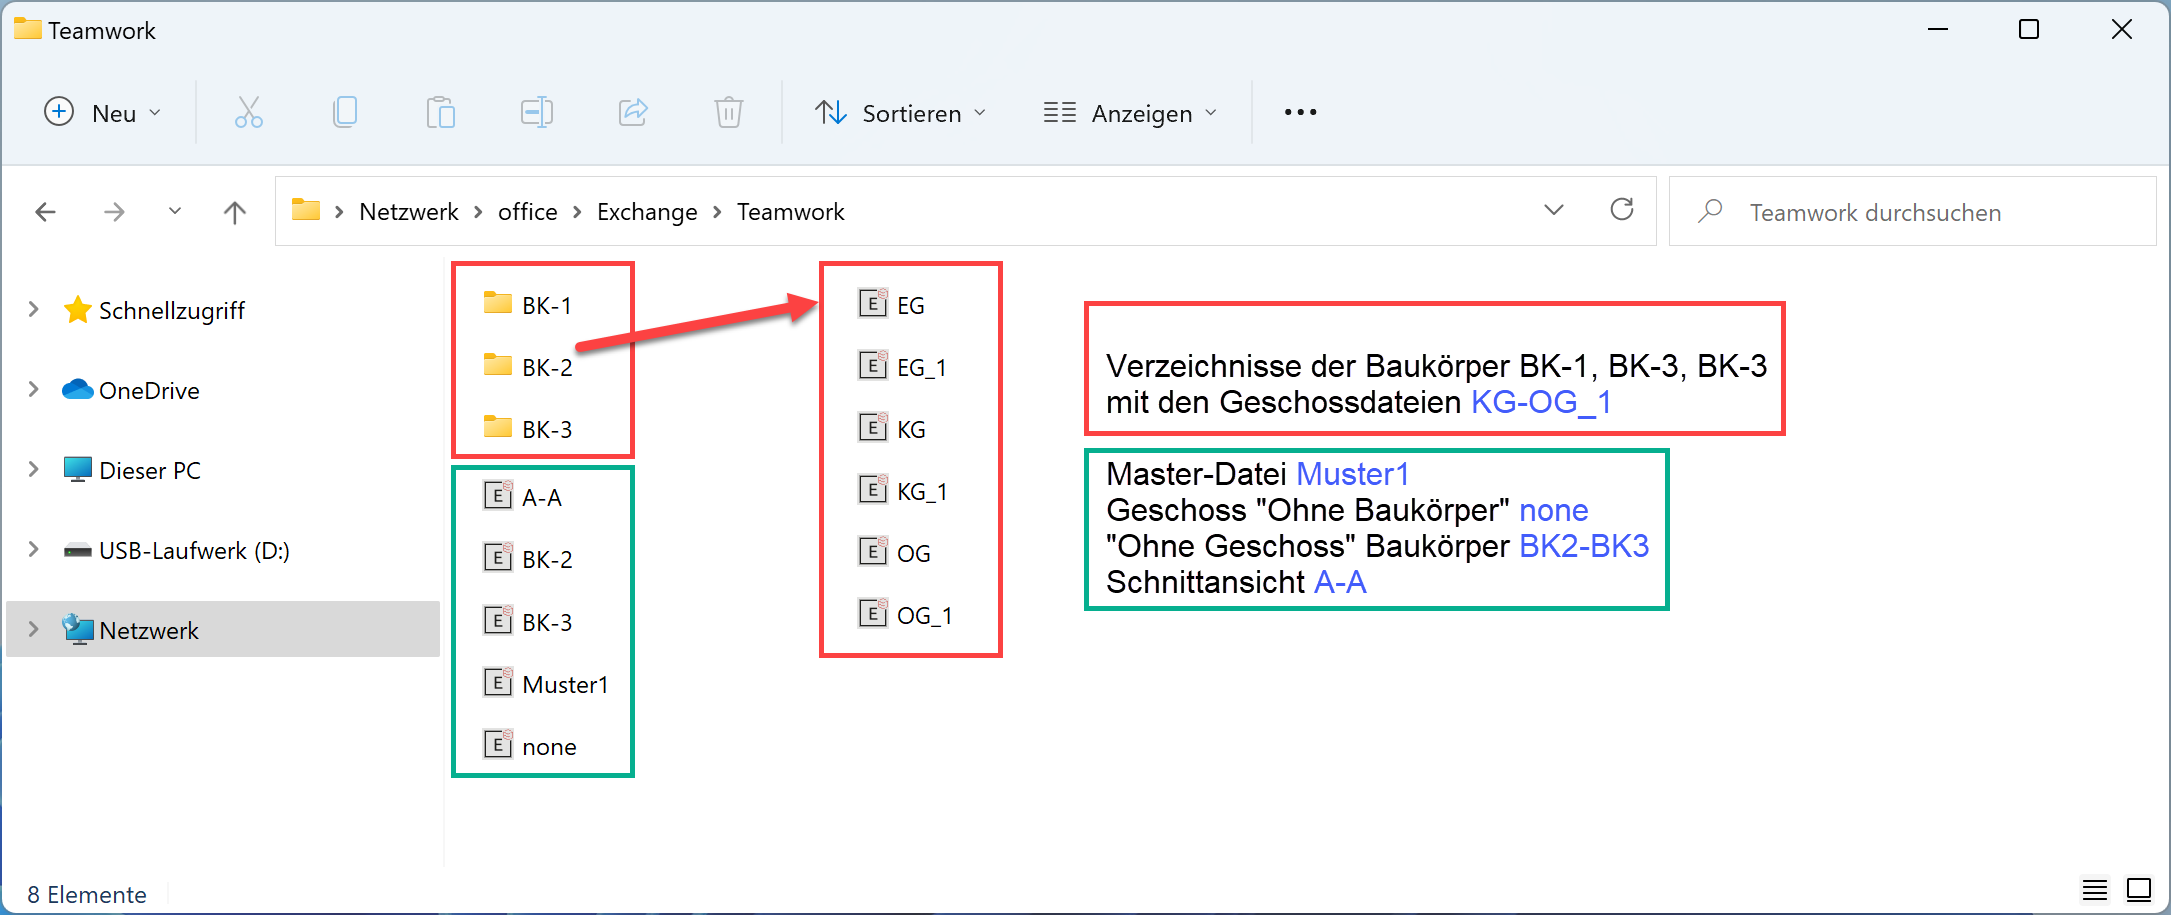
When "Save all storeys" is first selected in the context menu, ELITECAD executes it in the following steps:
The drawings of storeys "without structures" and "without storeys" are saved in the project directory provided that something has already been drawn.
Subdirectories with the name of the structures are then created. The drawings of the individual storeys are saved here.
When you later save this again, a one (_1) is added to the name of the existing file. The previous stage can then always be accessed.
The access to the storey remains locked until the user unloads it from his design model.
The following also removes the locks on: NEW FILE, LOAD, LOAD WORK COPY or DELETE ALL.
Objects, which are located on the structure "without structures" are saved in the none.d file.
Objects, which are assigned a structure but not a storey (without storey) are saved in the storey path in the none.d file.
Tip
Restricted access is generated by creating a file of the same name but with the prefix "~$" (e.g. house.d > ~$house.d). If the restricted access was not automatically removed, the manual deletion of this file may be revoked. These filenames are visible in Windows Explorer after the appropriate modifications have been made to the settings.
Saving from the context menu does not affect the master file.
Functions of the storeys manager
Additional commands for the storeys manager are available in the context menu (right-click on the storey or structure).
Context menu of storey icons
![]()
Descriptions of structures/storey
View options:
- Show/Hide
- Visible alone
- Locked – no modifications possible
Functions for team editing: (Available when Team mode is active)
- Save
- Load
- Reload
- Unload the selected storey/structure
View options
Show/Hide
![]()
![]()
Controls the storey's visibility. If it is the active storey, it cannot be hidden. This function is available by clicking the "eye" in the list view.
Show alone
Activates the storey and switches all other loaded storeys to invisible. Double-clicking the storey icon has the same effect.
Tip
Double-clicking on any icon shows the respective content alone.
A single click on the storey's icon constructs this storey and activates it.
A single click on the structure's icon shows the storey "without storey" and activates it.
Lock
![]()
The function locks the storey, which is only displayed in one colour. It can be shown or hidden. If you click on the icon, a query appears asking whether the lock should be removed. The pen colour with which the locked storeys are displayed is specified under SETTINGS > OPTIONS > REFERENCE PLAN.
Functions for team editing
The following functions for the design model editing in team are available as soon as Team mode has been activated. They make management easier when individual storeys are edited by different people. The selected storey or selected structure can be saved, deleted and loaded directly via the storeys manager without going through the file menu's usual functions.
Save
![]()
You will be asked whether the storey should be saved. Confirming saves the storey in the project path in a directory with the name of the respective structure (e.g. as GF.d). If the file already exists, the file will be named GF_1.d when saved.
Activating the file lock only allows the storey to be deleted by the user who locked the storey or who had loaded it to modify. Removing the storey deletes the restricted access.
Load
![]()
Loads the storey file. The name of the storey is shown in the title line. If overwrite protection is activated, this checks to see if the storey has already been loaded by one of the other users. If this is the case, then the storey can only be loaded as reference only.
Reload
Replaces the storey in question with the saved version. All of the storey's existing elements are also deleted! The name of the storey is shown in the title line. If overwrite protection is activated, this checks to see if the storey has already been loaded by one of the other users. If this is the case, then the storey can only be loaded as reference only.
Unload
This function deletes the storey from the design model.
note
A backed up storey file is, however, not deleted from the structure path!
Structure icon context menu
![]()
- Description of the selected structures
View options:
- Show/Hide
- Visible alone
- Locked
Functions for Team mode:
- Save
- Load missing (storeys)
- Reload
- Unload
The same commands, with one exception, as those in the storey's context menu are available here. The function Load missing is additionally present here.
Structure icon context menu
If you right-click in the storeys manager's empty space, a menu with additional commands appears. The visibility control is on the one side (always available) and the loading/saving of all storeys on the other. These commands are only available under the active Team mode option.
Visibility control and depiction in the storeys manager
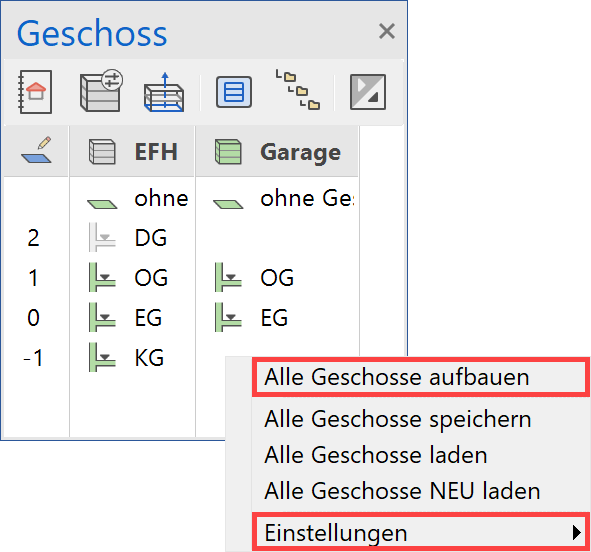
Show all sets all loaded storeys as "visible".
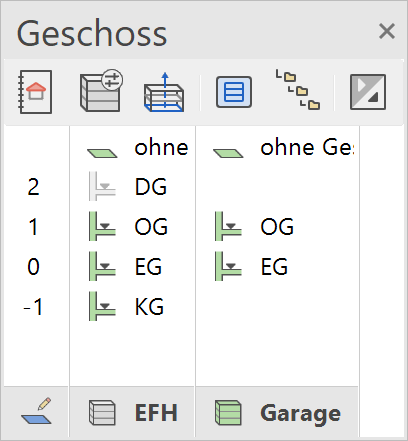
Settings modifies the depiction of the storey dialog window:
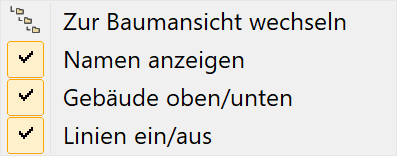
| Show names | Building top/down | Lines on/off |
|---|---|---|
 |
 |
 |
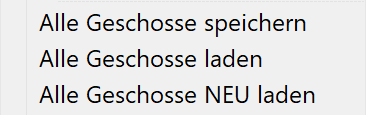
Save all storeys saves all of the loaded storeys.
See information on file storage above.
This command can also be used when all storeys up until now had been saved under a single name (e.g. model.d) and the design model should now be divided into single storey files.
The Load all storeys, function only loads the saves single storeys whose storeys in the current file are empty.
The Reload all storeys, function deletes all loaded data after a confirmation prompt and then loads all saved single storeys (including none.d).
Show storey filter
|
|
View toolbar |
| F5 |
This function constructs all of the objects from the former storey filter.
This has the following advantages:
If single objects are shown or hidden from an active storey filter (visible storeys), this function can quickly be set back to the former view without having to again redefine the visibility in the graphic storeys manager.
Copy into active storey
|
|
*Modify toolbar |
| Modify menu > Copy into active storey |
This function is only available in ELITECAD Architecture and is used to copy individual objects or a selection of objects on a storey to a different storey.
The target storey must be active.
If the object in question has sub objects (such as walls with windows and doors), the associated sub objects are also copied. The heights of walls are adapted to the new corresponding storey. In the same way, copied slabs adapt the thickness to the presets in the storey list. A wall must be present for windows, doors and wall openings to be copied to a storey.
If you wish to copy a selection, the selection must first be made and then the function started.
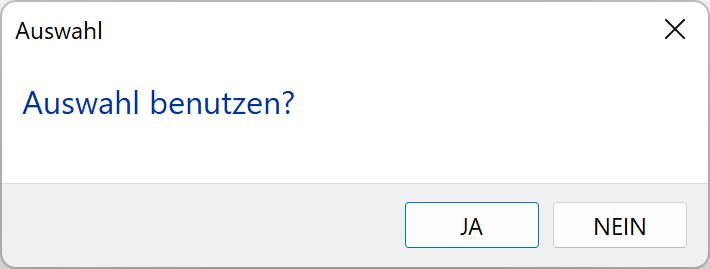
The selection can be copied to further storeys.
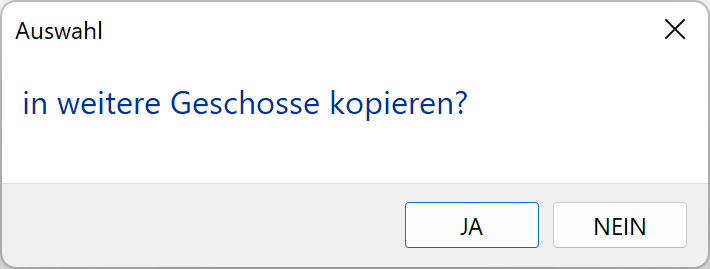
You are asked about each storey and can answer Yes or No.
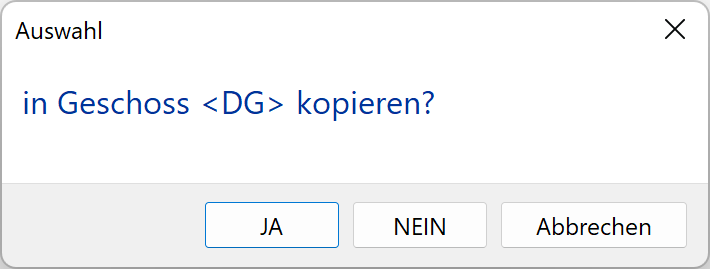
Tip
This function only works within the same structure.