Video
Create a video
|
|
Camera toolbar |
| Menu View > Camera > Create a video |
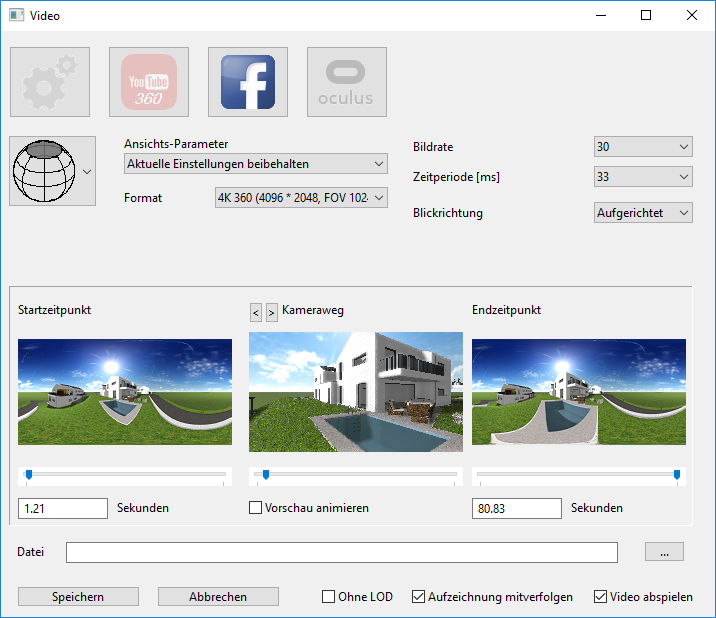
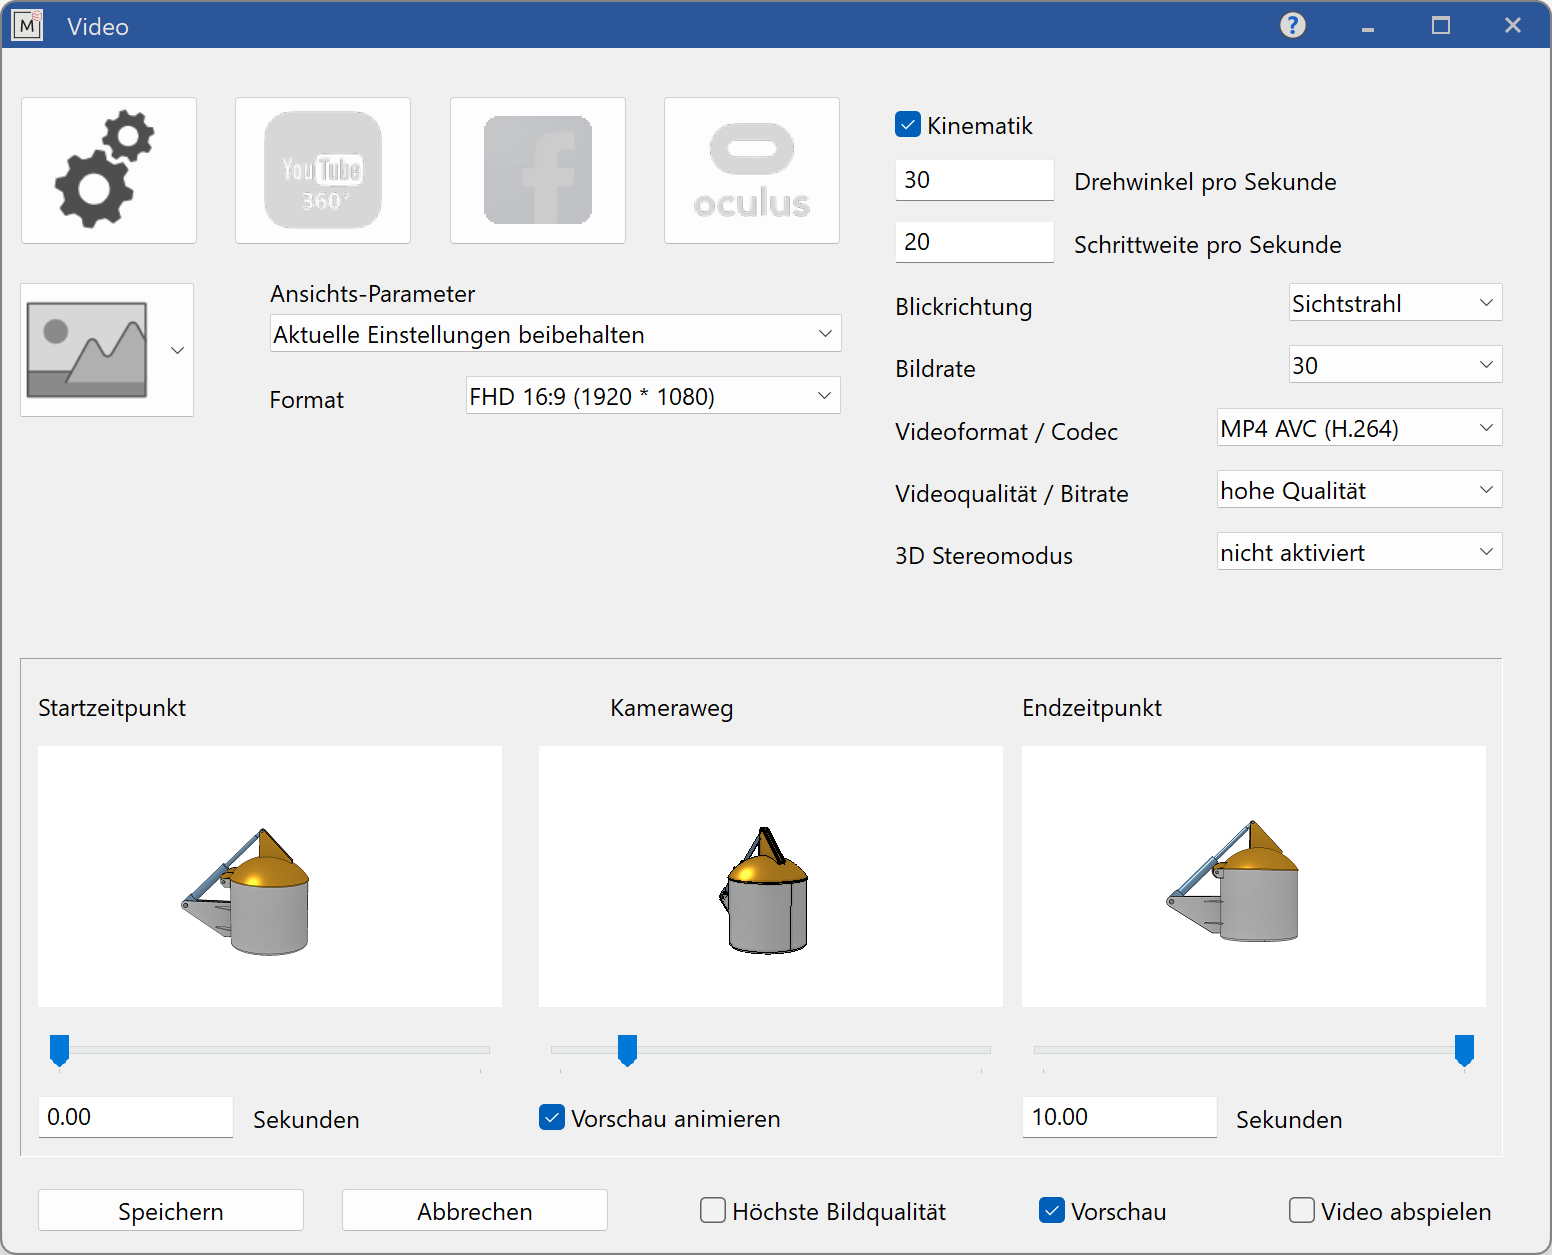
The camera path can be exported as a video with numerous graphical effects. If multiple camera paths exist, the desired path can be selected after starting the function.
The preview window in the middle shows the selected path. The left window shows the starting frame and the right window displays the last frame.
Pre-sets
![]() Free configuration of the presets
Free configuration of the presets
![]() Presets for a YouTube 360° video
Presets for a YouTube 360° video
![]() Presets for a Facebook 360° video
Presets for a Facebook 360° video
![]() Presets for an Oculus Rift 360° video
Presets for an Oculus Rift 360° video
Video mode
![]() 2D video
2D video
![]() Panorama video
Panorama video
![]() 360° video
360° video
View parameter
For the image generations you can use either the current settings or the settings from the walking mode.
Format
Here you can set the image resolution in pixels. The available options depend on the type of the video. If you choose custom type, you can freely choose the resolution.
Viewing direction
You can choose between three viewing directions.
- Current direction
- Up
- North
Samples per second
The bitrate defines he frames per second. Entering a value here also sets the period value (period = 1000 / frame rate).
Video format / Codec
Improved · 16 R1 · Improvements
Either the two codecs AVC (H.264) and HEVC (H.265) for MP4 videos or an external codec can be used.
Video quality / Bitrate
Improved · 16 R1 · Improvements
Video quality levels are: low - medium - high - highest quality
3D Stereo mode
Improved · 16 R1 · Improvements
The following options are available for generating stereo videos.
- not activated
- 2 files (left and right)
- side-by-side (left and right)
- side-by-side (top and bottom)
Kinematics
In ELITECAD Mechanics, kinematics and video export can be combined.
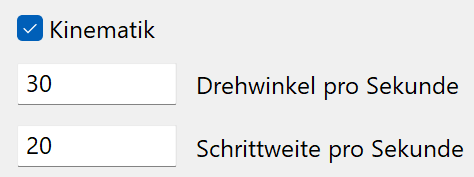
This option is only visible if a kinematics system is defined and can be activated optionally. Depending on the type of simulation, the increment distance or the angle is synchronized with the time control of the video.
Start time
The start time is a value in seconds, and can be entered manually or with the help of a slider. The position in the camera path is displayed in the preview window.
End time
The end time is a value in seconds, and can be entered manually or with the help of a slider. The position in the camera path is displayed in the preview window.
Camera path
The window in the middle shows the preview between start and stop frame.
Select camera path

If multiple camera paths exist, these buttons can be used to switch between the paths.
Animate preview
If this option is set, the window in the middle will show an animated preview of the video.
File
This text field can be used to enter a target file. This selection can also be made by using the button next to it.
Highest image quality
The settings for Level of Detail (LOD) are described in Settings > input devices, and reduce the graphical effects. For image generation, the LOD can be deactivated. This leads to a better image quality, but also takes more time.
Follow recording
The rendering of images can be observed in the window.
Play video
At the end of the video generation, the video can be played if desired.