Visualisation materials manager
|
|
Window toolbar |
| Window menu > Visualisation material |
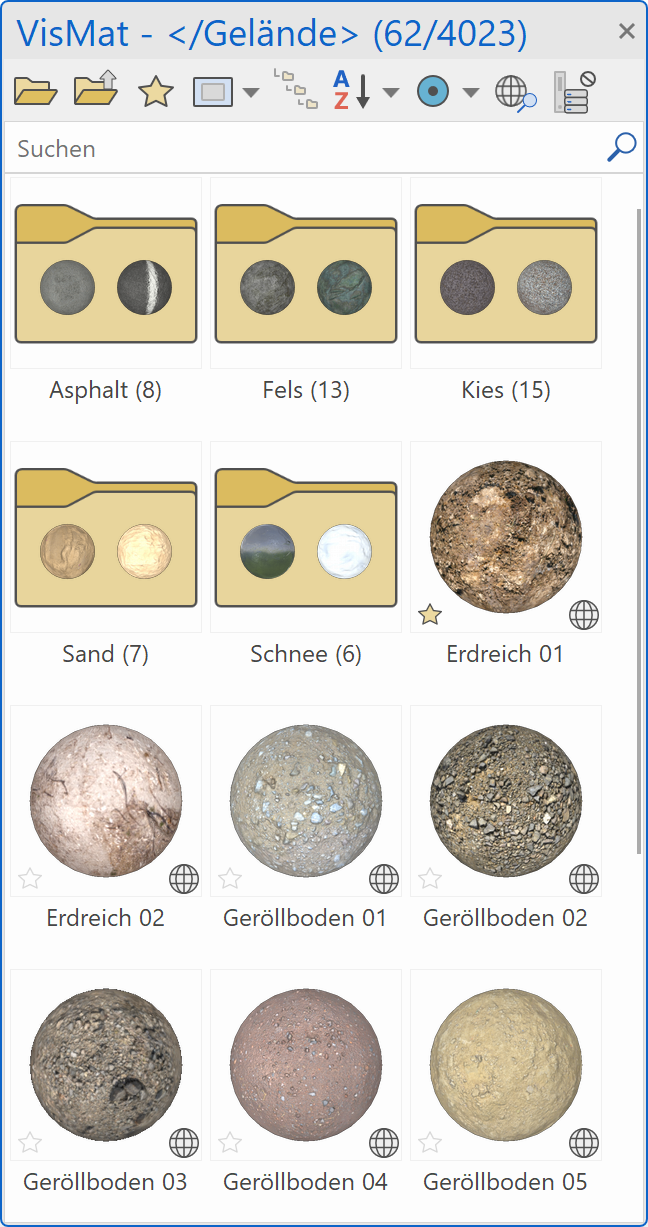
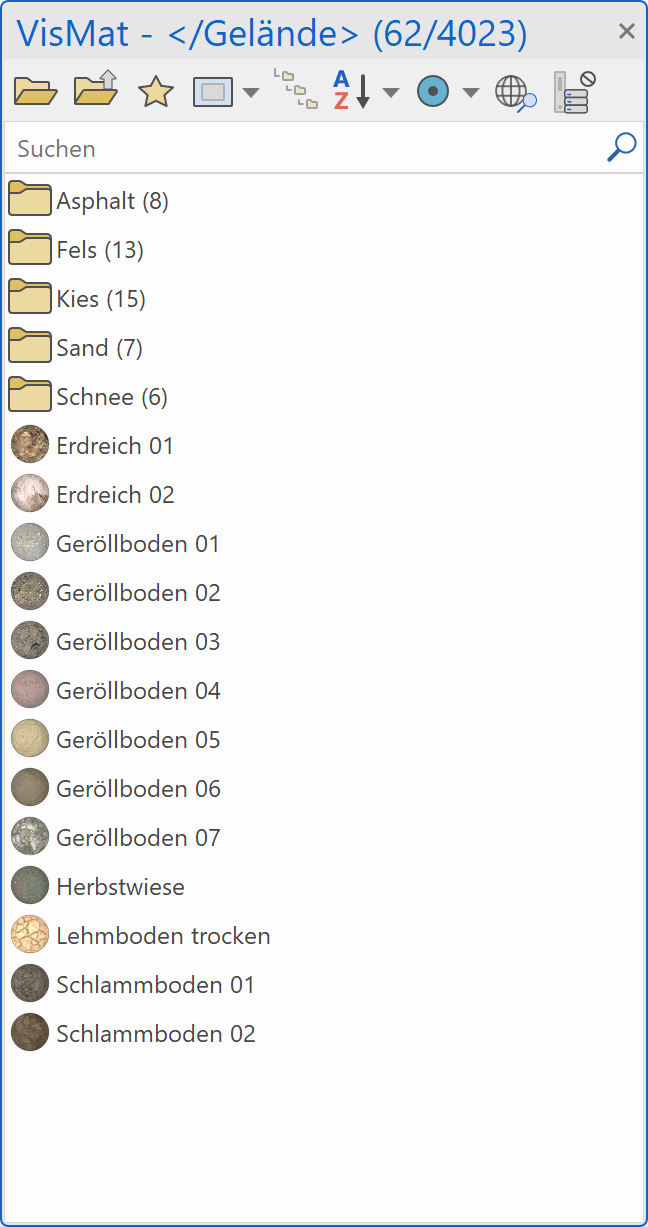
The visualisation materials manager (VisMat) is used for organising and selecting visualisation materials. Each visualisation material has properties such as texture image, transparency, mirroring, shine, etc. that can be set in the visualisation materials editor.
The visualisation materials manager can be opened via the menu WINDOW > VISUALISATION MATERIAL.
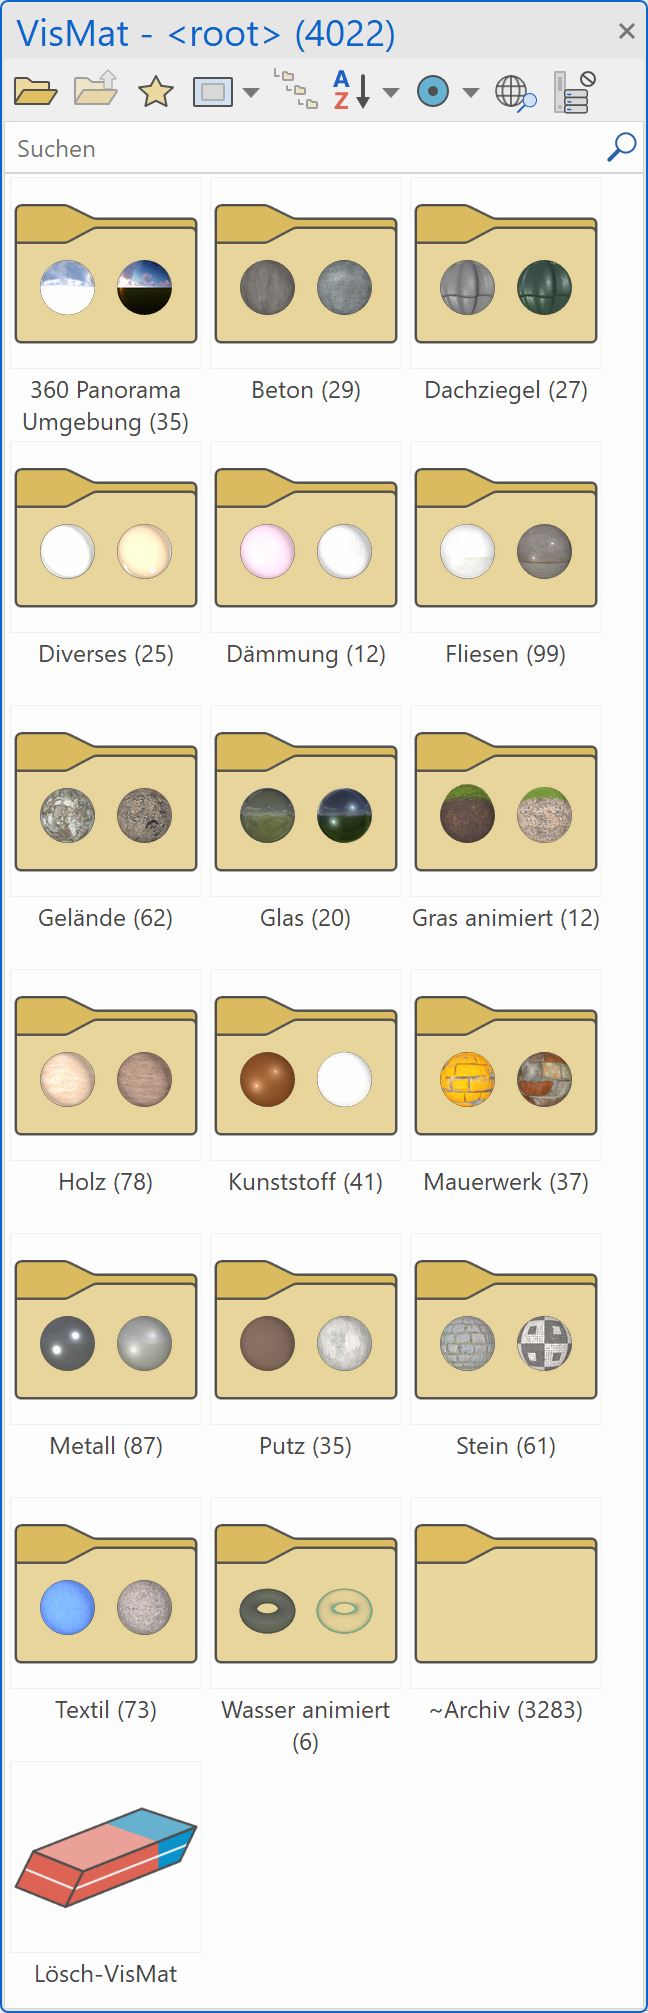
The visualisation materials are divided into categories. The number of visualisation materials contained is given in brackets for each folder.
Header functions The top row populated with functions in the management window.
Left mouse button The subfolders are displayed by double clicking on a folder icon. If there are no subfolders, the visualisation materials are visible. These can be allocated via drag and drop.
Right mouse button Various options that are described in detail below can be called up by clicking once on a folder, visualisation material or background.
Header functions

Search

Visualisation materials can be searched for using terms in the search bar. All visualisation materials containing the search terms are displayed.
Folder
![]()
If this button is pressed, the visualisation materials manager window is divided and the folders displayed in an Explorer view in the bottom half.
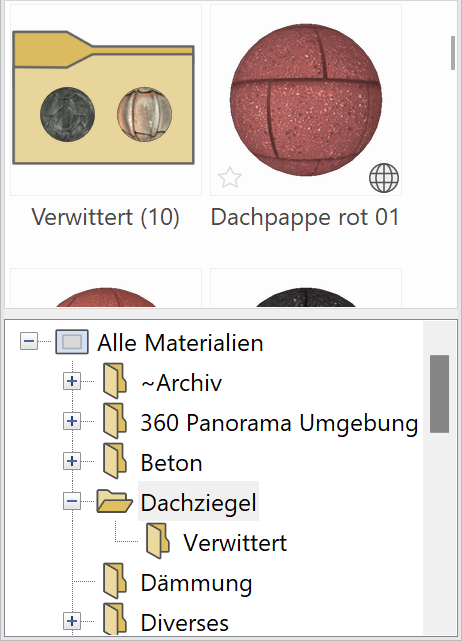
Further structures are displayed or hidden by clicking once on the plus or minus sign preceding the main titles. If you click on the folder itself, either the subfolders or the visualisation materials it contains are displayed at the top.
Up
![]()
Click this button to return to the higher-level folder.
Favourites
![]()
If this switch is active, only visualisation materials marked as favourites are displayed.
Hierarchical/flat display
![]()
![]()
The respective visualisation materials are initially displayed in the bottommost folder in the "Hierarchical view" (default setting). In "Flat display", however, all visualisation materials are visible in the same window regardless of the folder to which they belong.
Only the hierarchical view available for "All VisMats" and "VisMat database".
Filter
The visualisation materials are always saved in a database. It may be the case that visualisation materials that have not yet been saved are present in a drawing. This may be a result of an external drawing or new visualisation materials that you have not yet saved to the database.
The display of the folders and visualisation materials in the management window can be controlled in different ways using this toggle key.
All VisMats
![]()
This switch setting always displays all of the visualisation materials, regardless of whether they are present in the database or not.
All VisMats (besides standard)
![]()
This displays all the visualisation materials that were added or modified as a proprietary visualisation material and were not included in the original ELITECAD default visualisation material set.
VisMat database
![]()
Only displays the visualisation materials that are saved in the database.
New VisMats in DB
![]()
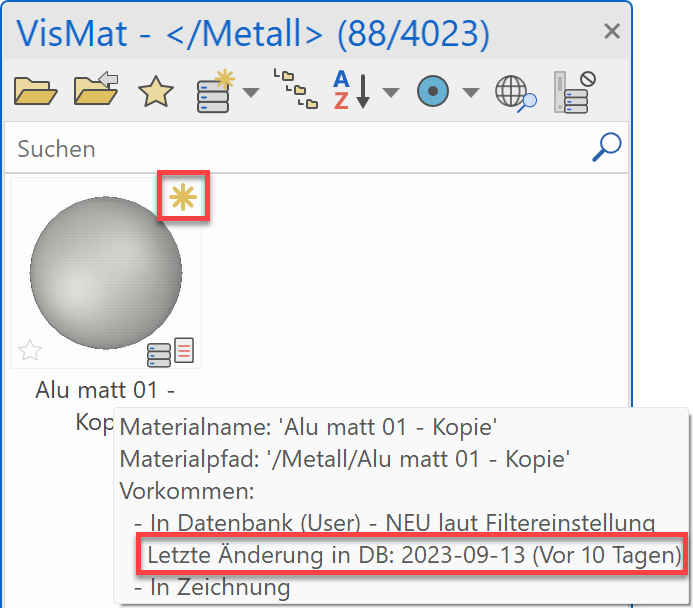
Only displays the visualisation materials that were added or modified in the database within the time frame chosen.
A dialog opens when this is selected to allow you to choose the time frame. This selection is then used (until a different one is selected) to mark visualisation materials within that time frame with an asterisk ![]() to indicate it is newly added or modified.
to indicate it is newly added or modified.
Additionally, this dialog displays how long it has been since the last modification was implemented.

Drawing
![]()
Only displays the visualisation materials that are used in the drawing.
Image
![]()
Only displays the visualisation materials that are shown in the drawing.
Temporary VisMats
![]()
Only displays the visualisation materials that are not yet saved in the database.
Sort ascending/descending
![]()
![]()
Change the sorting to alphabetical order.
Tip
The management window can be refreshed by pressing F5 .
Sort by date
![]()
Change the sorting to date added to the database with the newest always shown at the top.
Assignment mode
There are various allocation options for applying visualisation materials to the construction parts. The surfaces are assigned visualisation materials according to the switch setting. The same options can be used for visualisation material to be deleted, which deletes the visualisation materials again.
Explanation
Visualisation materials are allocated via drag and drop. Left-click a visualisation material from the manager, hold down the mouse button and drag the visualisation material to the object or surface that is to receive the visualisation material. Depending on the current allocation mode, the visualisation material is then additionally allocated to multiple surfaces, e.g. all surfaces in an object.
On object
![]()
If the allocation mode is set to object, the entire object is allocated with the visualisation material unless it is an "intelligent" construction part such as a window or a door, etc.
Although these are objects, a distinction is made depending on whether the visualisation material is allocated to a frame, window sill or glass, etc.
Part of an object
![]()
The visualisation material always only occupies parts of an object.
On surface
![]()
Only occupies individual surfaces. Users should note that the allocation disappears if the object is edited and/or modified.
Replace
![]()
If this switch is active, the visualisation material that you drag to a surface with drag and drop is allocated to all surfaces that have the same visualisation material or colour as this surface.
On selection
If you want to allocate a visualisation material on a specific selection, you can make a prior selection on the screen and drag the visualisation material into the selection. It does not matter which switch setting is currently active.
Tip
If you want to allocate the same visualisation material to multiple surfaces or objects etc., there is a multiple allocation function. Drag the visualisation material onto a surface as normal. However, instead of releasing it, press the Shift key on the keyboard or the + sign. Click and hold down the mouse and move it to a different surface before pressing one of the two buttons.
This can be repeated any number of times.
Import of external visualisation materials
New · 17 R3 · Improvements
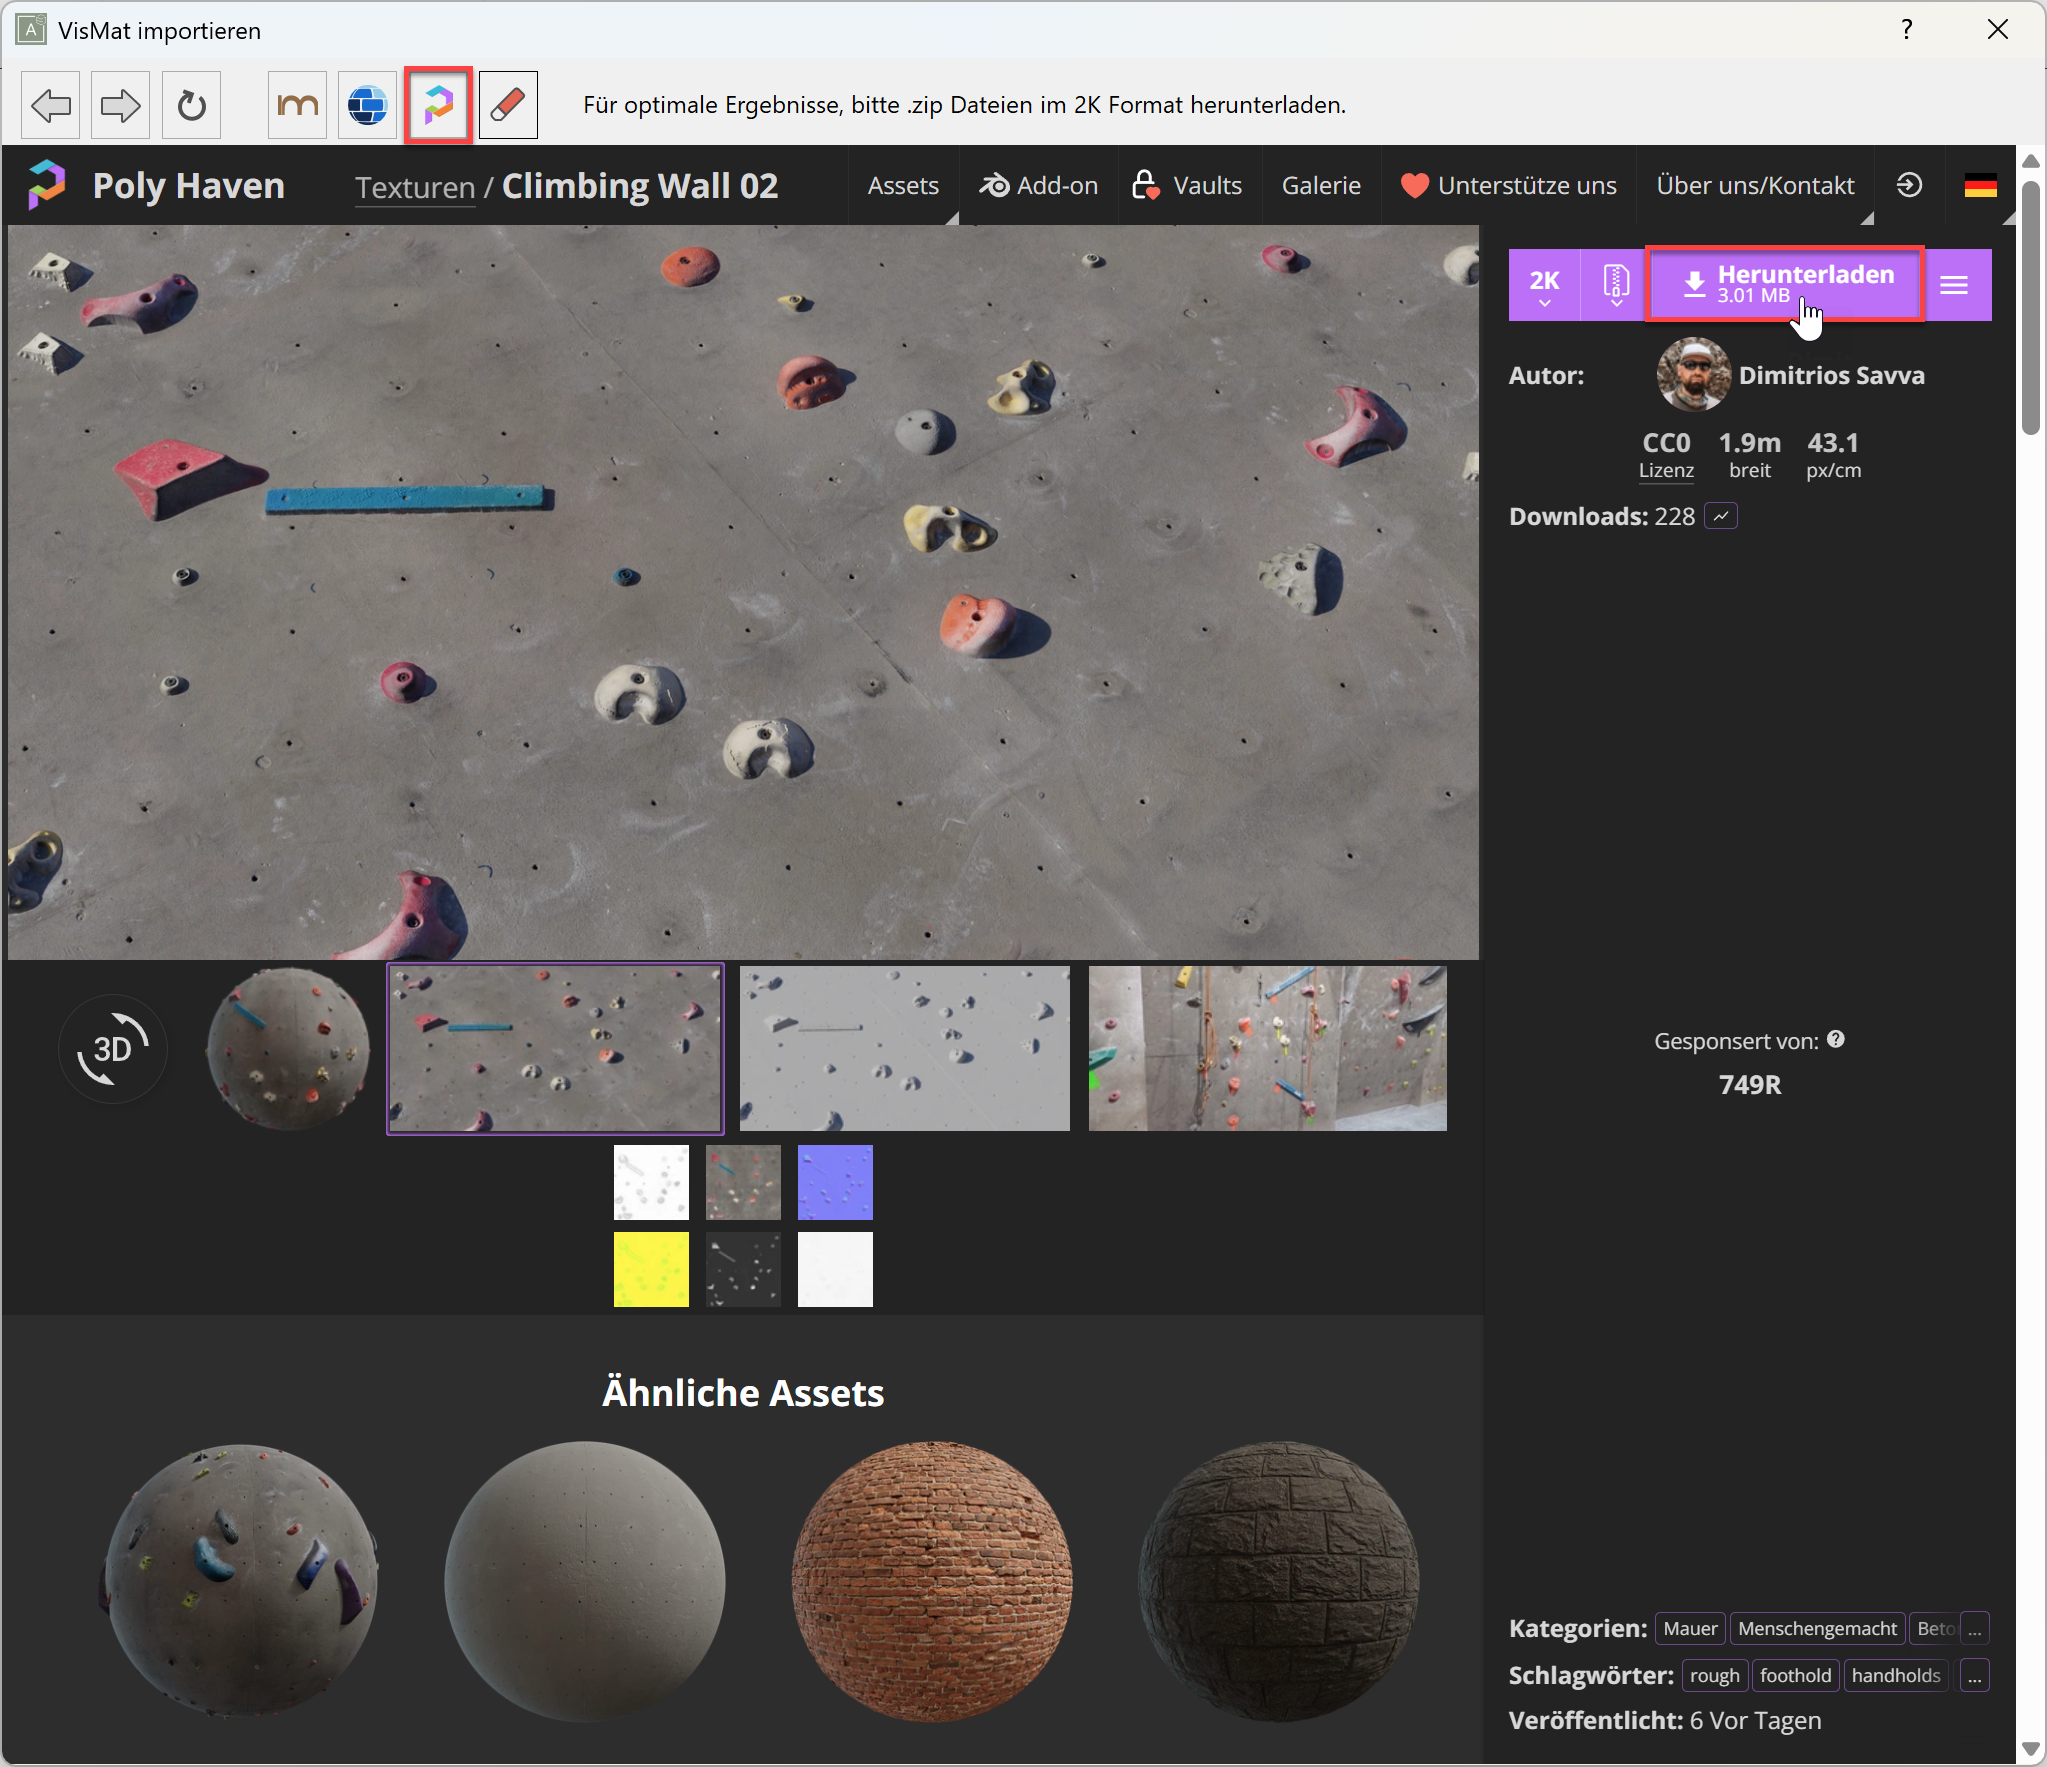
With this integrated texture import manager, it is possible to natively import textures from three different online repositories without payment or an account. Settings are pre-set to the optimal interface options for ELITECAD and the downloaded textures are placed directly into the visualisation material manager.
![]()
![]() - Page back and page forward to navigate through previouly opened pages.
- Page back and page forward to navigate through previouly opened pages.
![]() - Refresh the current page
- Refresh the current page
Tip
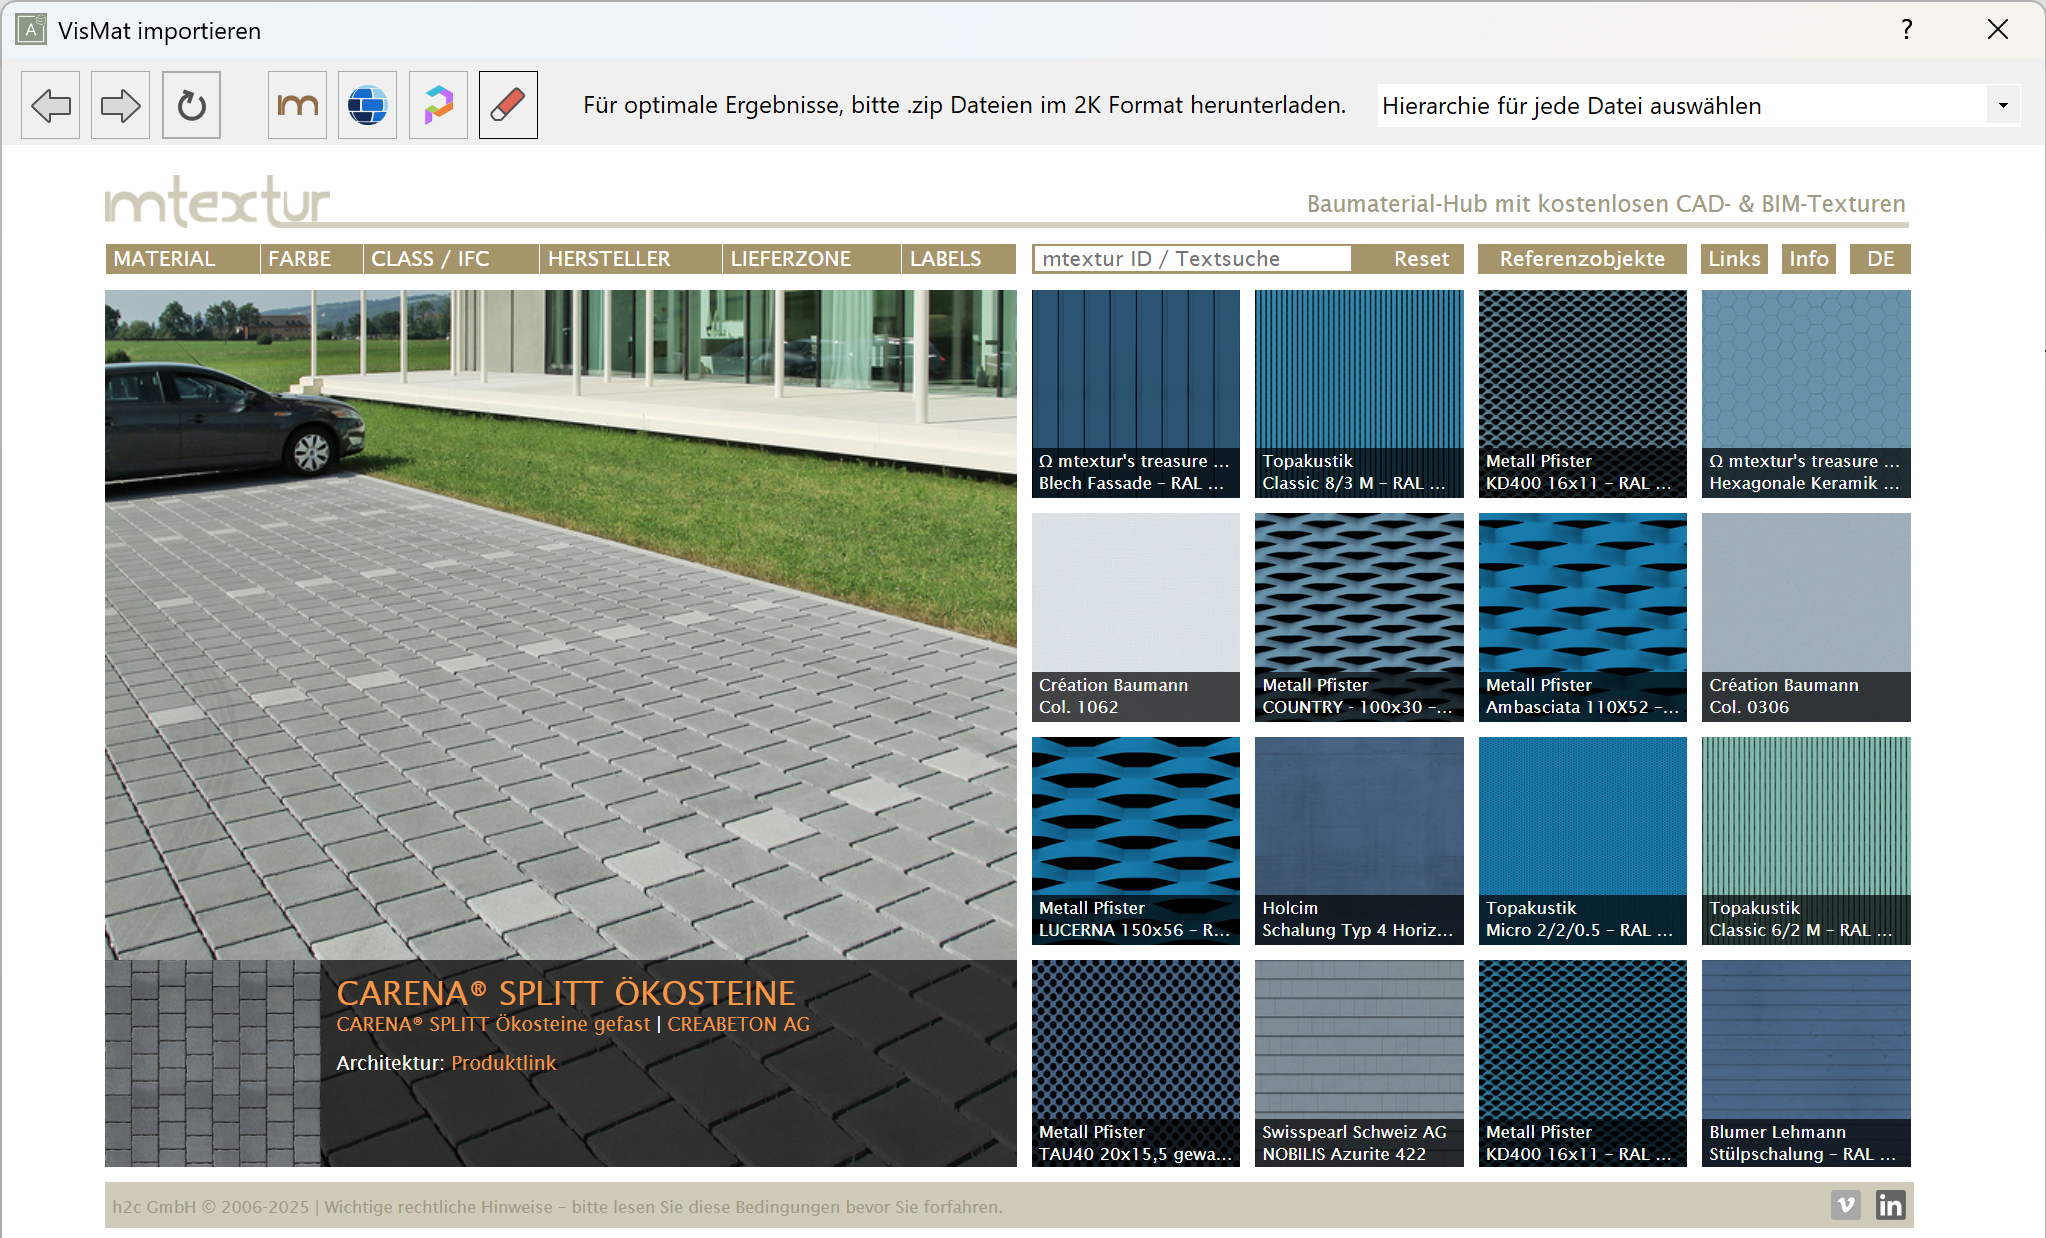
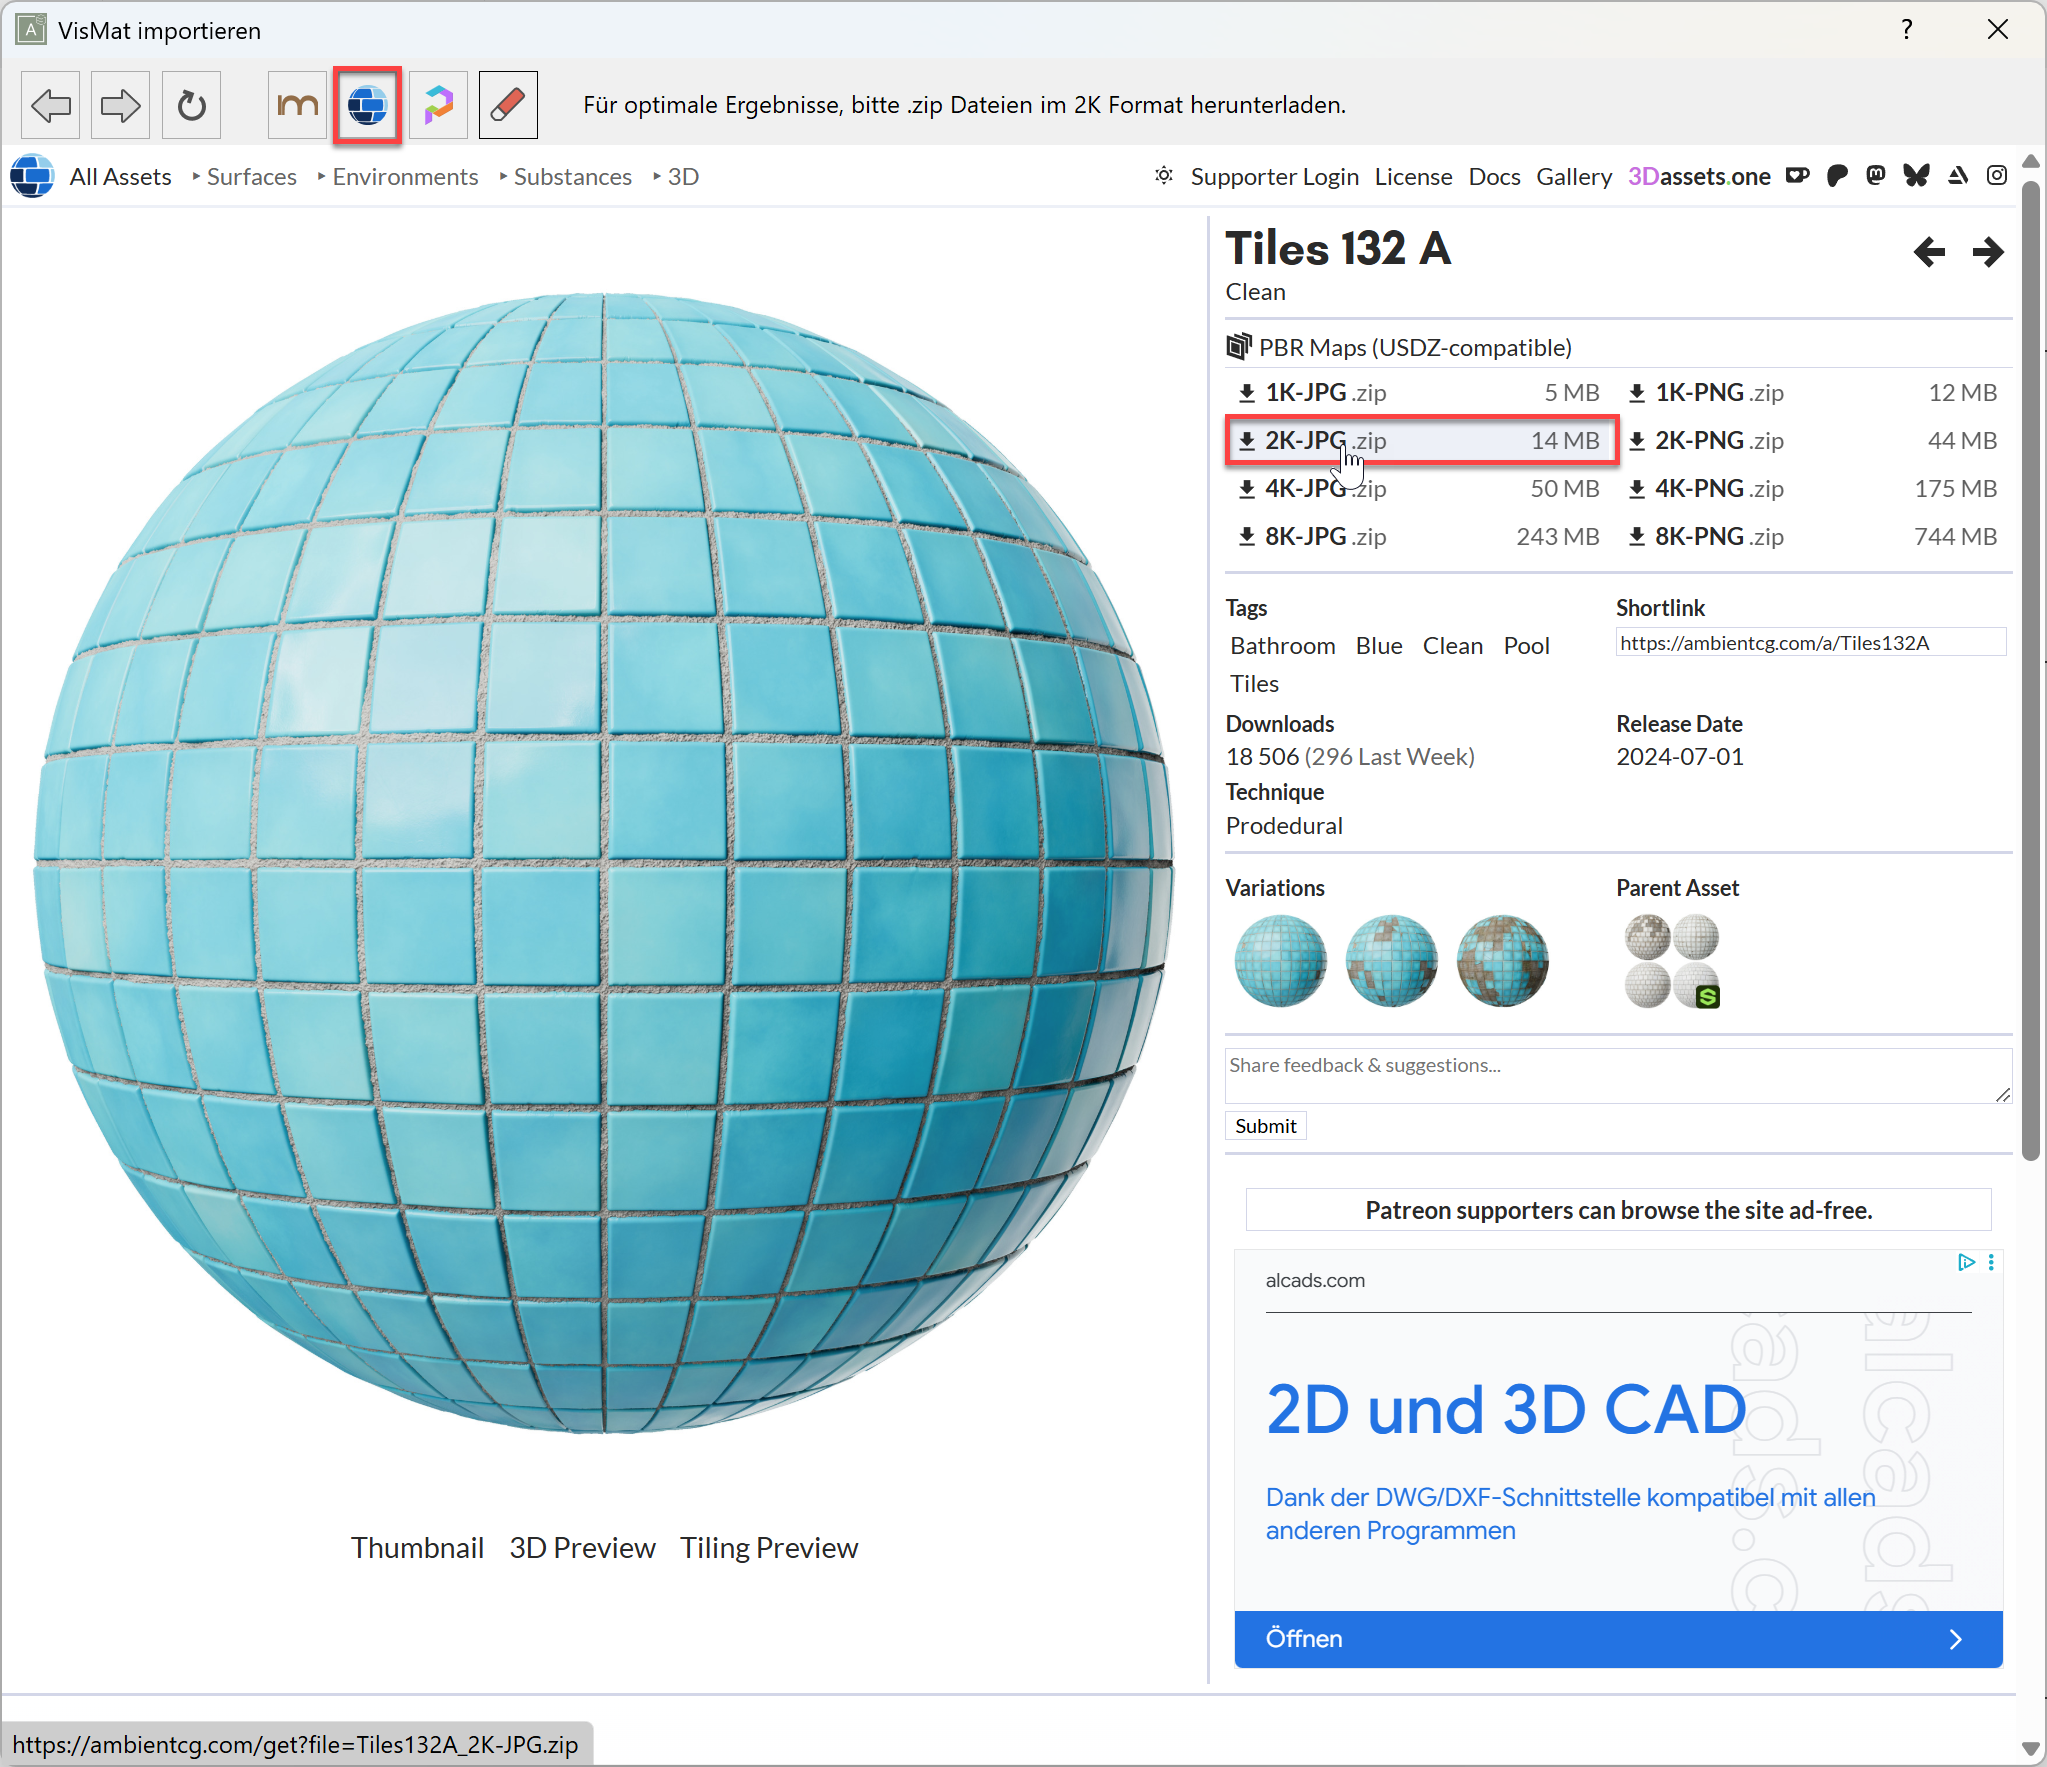
For the best results, we highly recommend downloading the textures in 2K resolution. Higher resolutions do work, but they can disproportionately increase processing time and place a greater load on the system.
The following images indicate where to click to download a texture for each of the three platforms:
Import mtextur VisMat
![]()
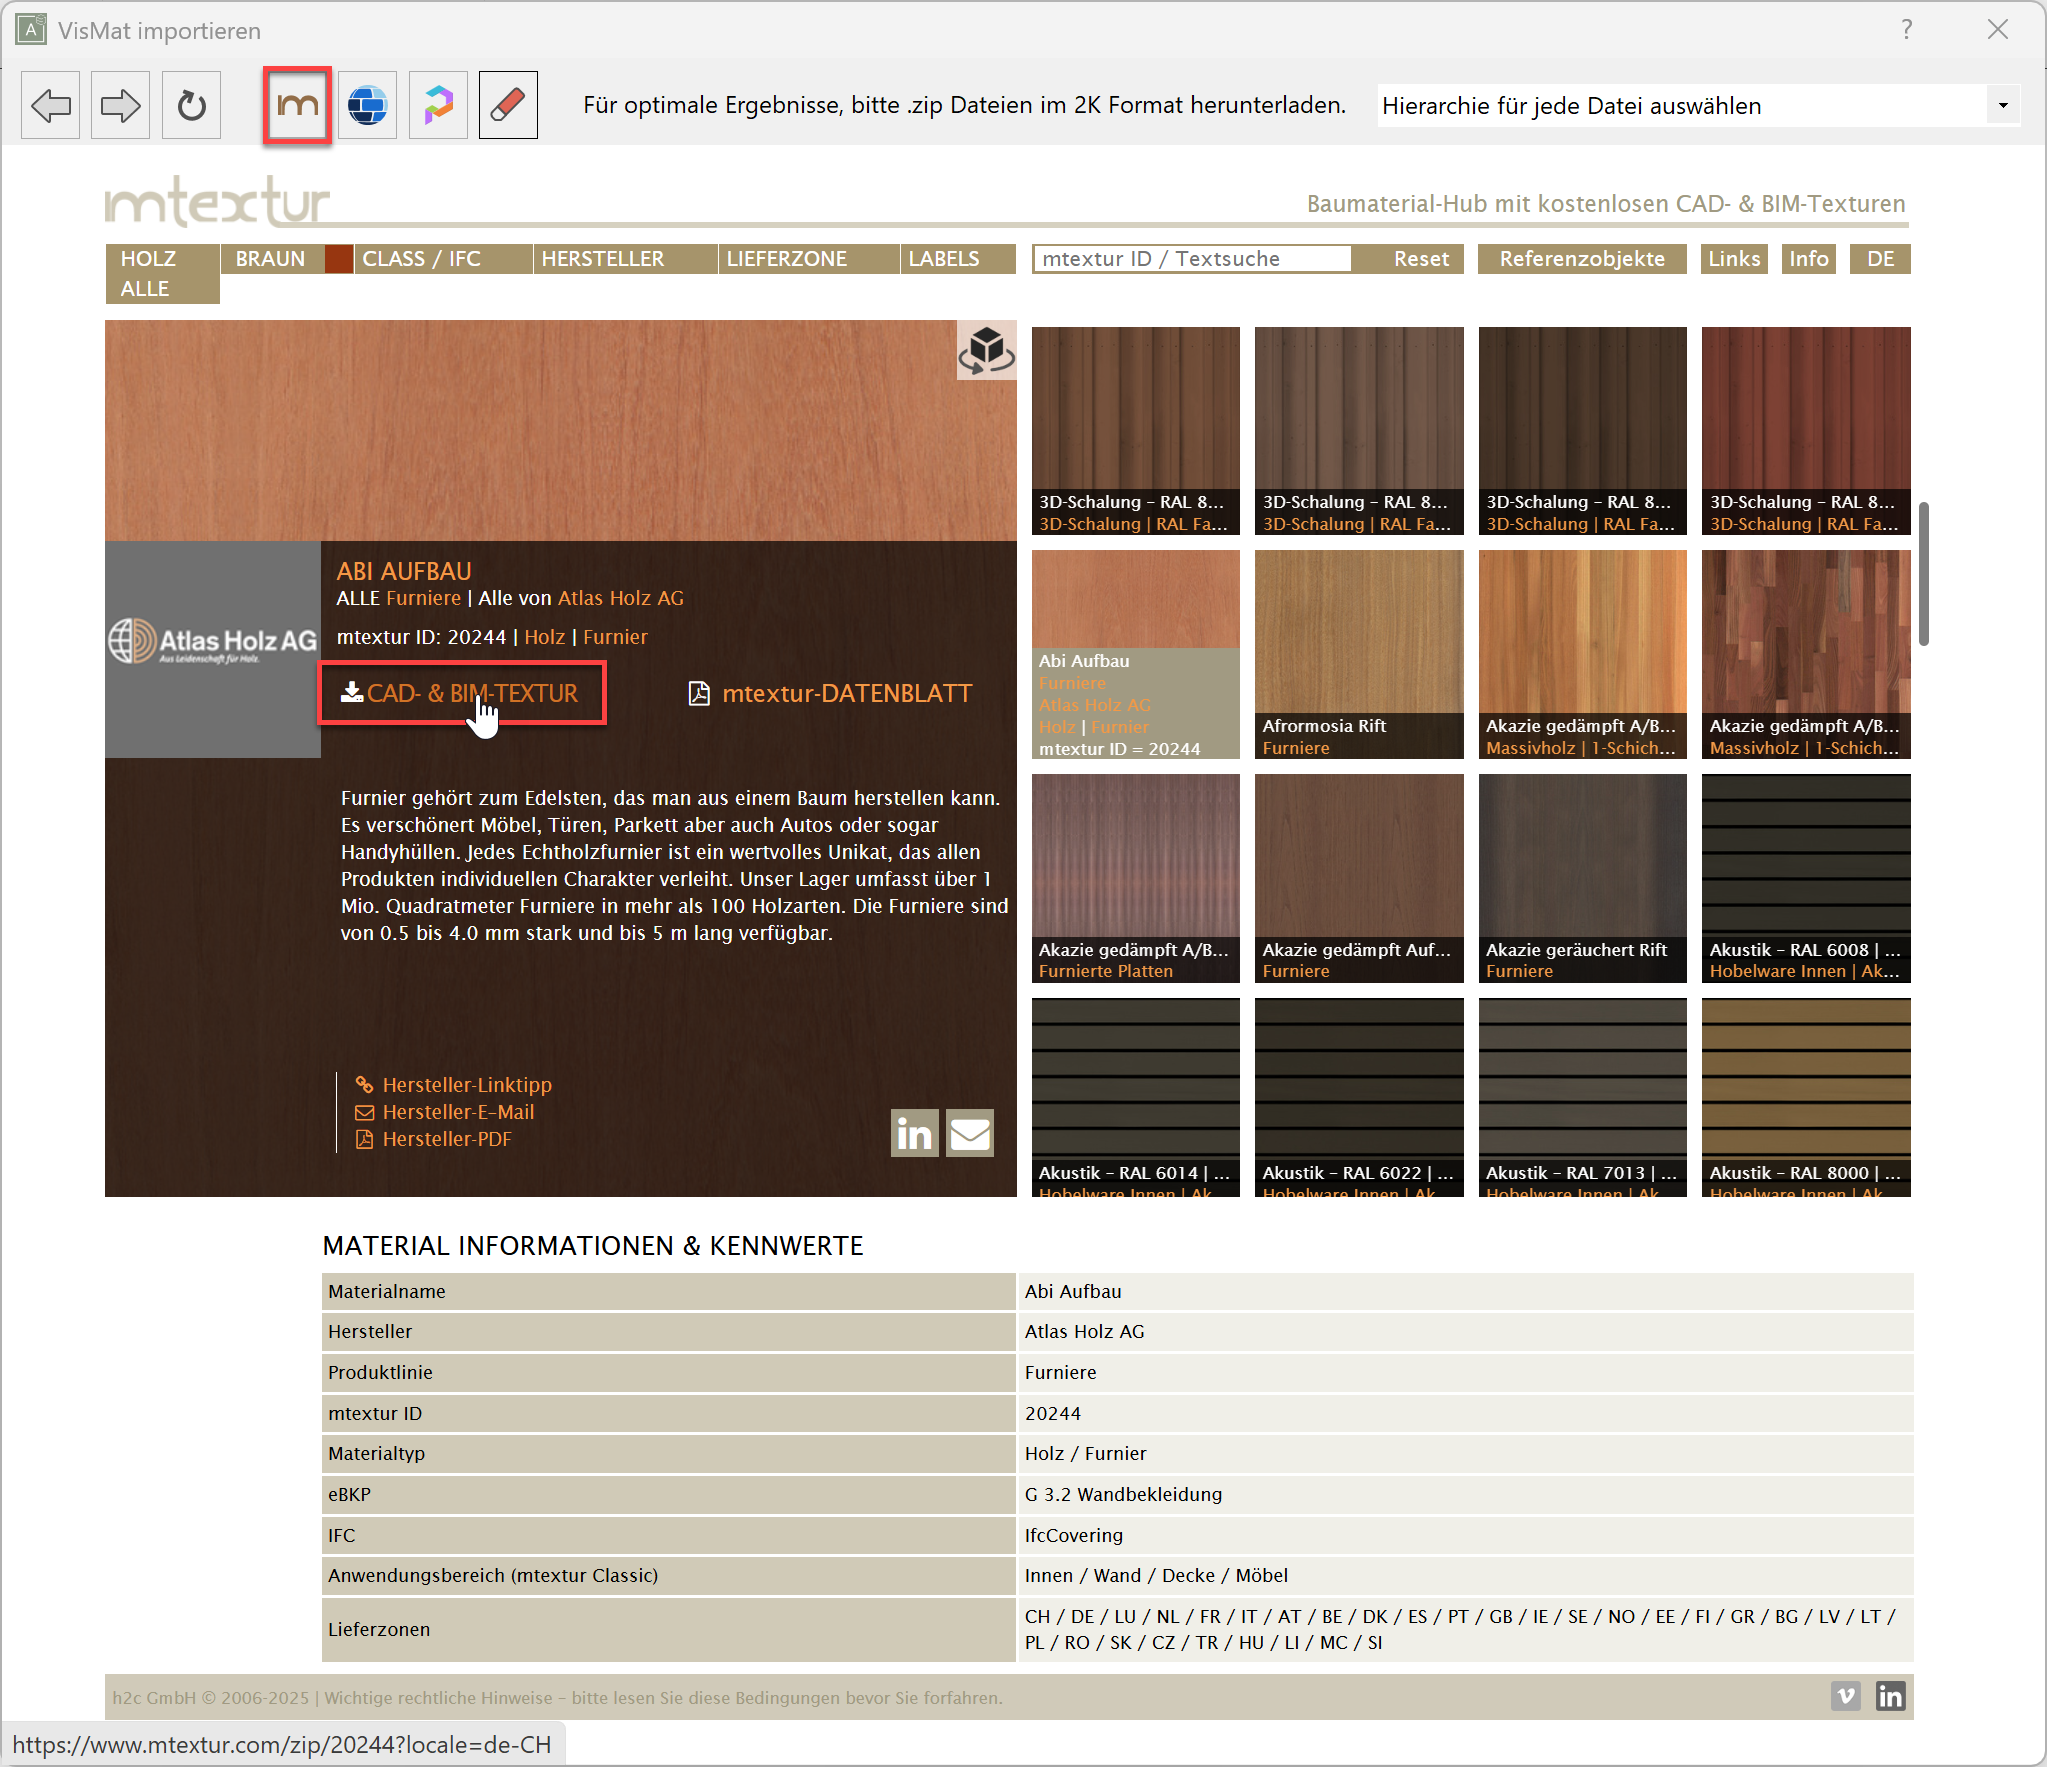
For mtextur, the destination of the downloaded texture can be selected from the dropdown menu in the upper right-hand corner.
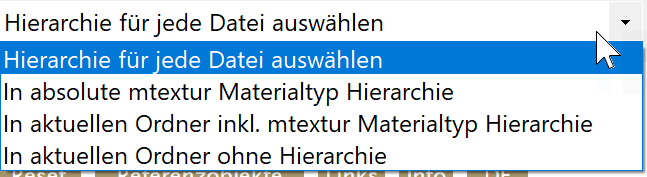
- Select hierarchy for each file - opens a dialog to query from the following 3 options for each downloaded texture
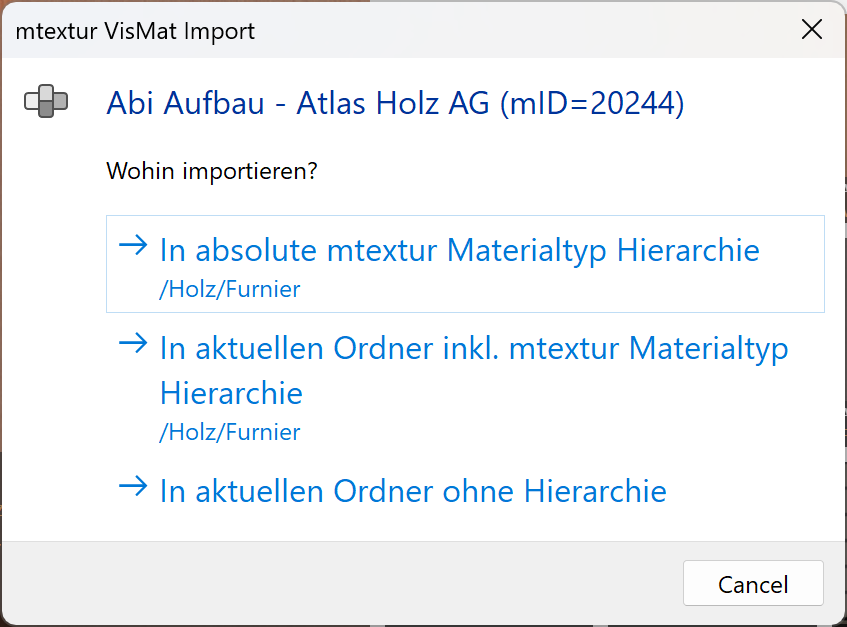
- Into absolute mtextur material type hierarchy - creates new folders, as needed, using the mtextur material type hierarchy
- Into current folder incl. mtextur material type hierarchy - same as above but using the currently selected visualisation material manager folder as a starting point
- Into current folder without hierarchy - ignores the mtextur material type hierarchy and places texture directly into the currently selected visualisation material manager folder
Import ambientCG VisMat
![]()
Import Poly Haven VisMat
![]()
Video Tip
You can also see how to best import textures in this video from our ELITECAD@work series.
![]() - When this is inactive, the temporary files are automatically deleted once the download it complete.
- When this is inactive, the temporary files are automatically deleted once the download it complete.
When this is active, the deletion of the temporary files is delayed until the manager is closed and the temporary file location for the most recently downloaded texture is opened allowing you to access the files information that makes up a texture in case you have need of these.
Help: Import VisMat
![]()
New visualisation materials can also be created by dragging & dropping downloaded graphic files into the visualisation material manager. This is also possible for entire folders. Visualisation material files can be downloaded from several platforms. An attempt is made to set the appropriate properties as automatically as possible.
Common platforms include:
>> Quixel Megascans (licensing)
Ignore archive
![]()
By activating this setting, the archive folder can be ignored when searching for visualisation materials in the database.
Right-click functions
Different context menus are displayed by right-clicking a folder, visualisation material or background.
Right-clicking a folder
The following context menu opens.

Note
The visualisation materials are saved in ELITECAD either as "user" or "global". This depends on the active storage type of the parameters under SETTINGS > OPTIONS > SYSTEM > CONFIGURATION.
This switch setting is also used for deleting. If a visualisation material has been saved as "global", it cannot be deleted as "user" or vice versa. A copy is created when renaming a "global" visualisation material as "user".
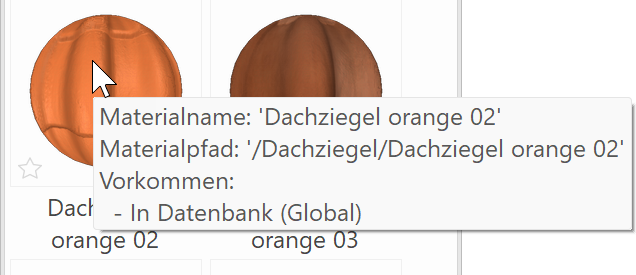
The occurrence of a visualisation material can be read in quick info.
Rename
Folder names can be changed.
Delete
Folders can be deleted together with their entire contents.
Create copy of folder
Creates a copy of the folder including the entire contents.
Save folder content in DB
Saves the entire contents of the folder, depending on the "Storage type", in the database.
Export folder content
The folder contents can be exported as a file. This line type can be imported on a different workstation or to a remote office.
Select VisMat over surface
See "Right-clicking on the background".
More info here.
Edit VisMat over surface
See "Right-clicking on the background".
More info here.
Properties
Displays the properties of the folder.
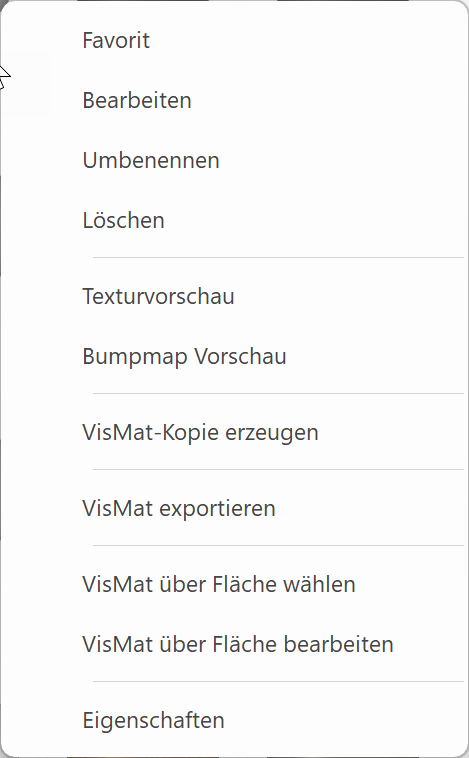
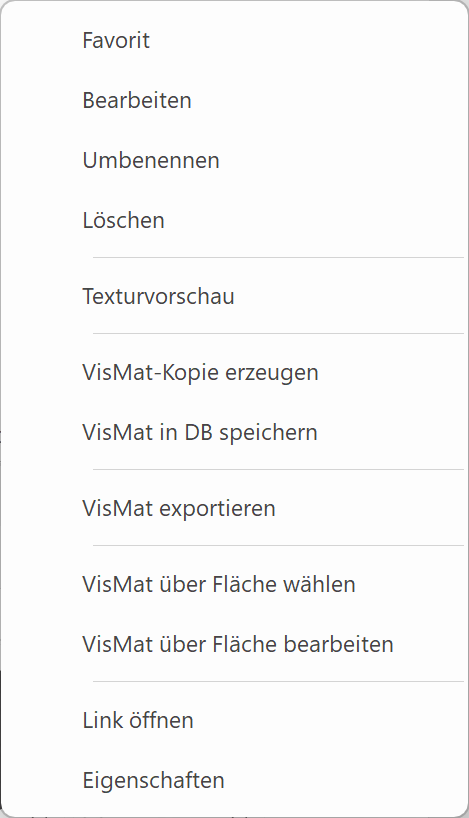
Right-clicking a visualisation material
Displays the properties of the folder:
| Existing visualisation materials | Imported visualisation materials |
|---|---|
 |
 |
Favourite 
The visualisation material is declared as favourite.
Edit
The visualisation material editor opens.
Rename
Visualisation materials can be renamed.
Delete
Visualisation materials can be deleted.
Texture preview
The original image is displayed.

Create copy of VisMat
Creates a copy of the visualisation material.
Tip
If you want to select multiple folders or visualisation materials simultaneously, you can do this either by holding down Shift , Ctrl or by dragging a rectangle over the folders and visualisation materials. The context menu is abbreviated.
Save VisMat in database
This only appears when the visualisation material is not yet saved to the database. Once this is clicked, it is saved and this option no longer appears for this material.
Export VisMat
Visualisation materials can be exported as a file. These files can be imported on a different workstation or to a remote office.
Select VisMat over surface
See "Right-clicking on the background".
More info here.
Edit VisMat over surface
See "Right-clicking on the background".
More info here.
Open link
New · 17 R3 · Improvements
This appears only for textures that have been imported with the ELITECAD texture import manager and it opens the manager directly to the page for that texture.
Show visualisation material assignments
All objects, sub objects or surfaces, where this visualisation material is assigned, are selected.
Properties
Displays the properties of the visualisation material.
Right-clicking on the background
Displays the properties of the visualisation material:
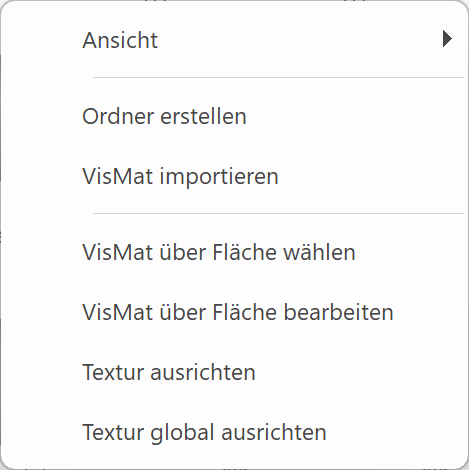
View
A menu appears beneath "View" in which the appearance of visualisation materials manager can be modified.
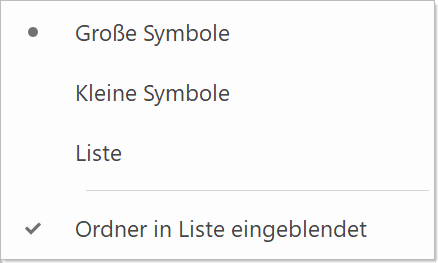
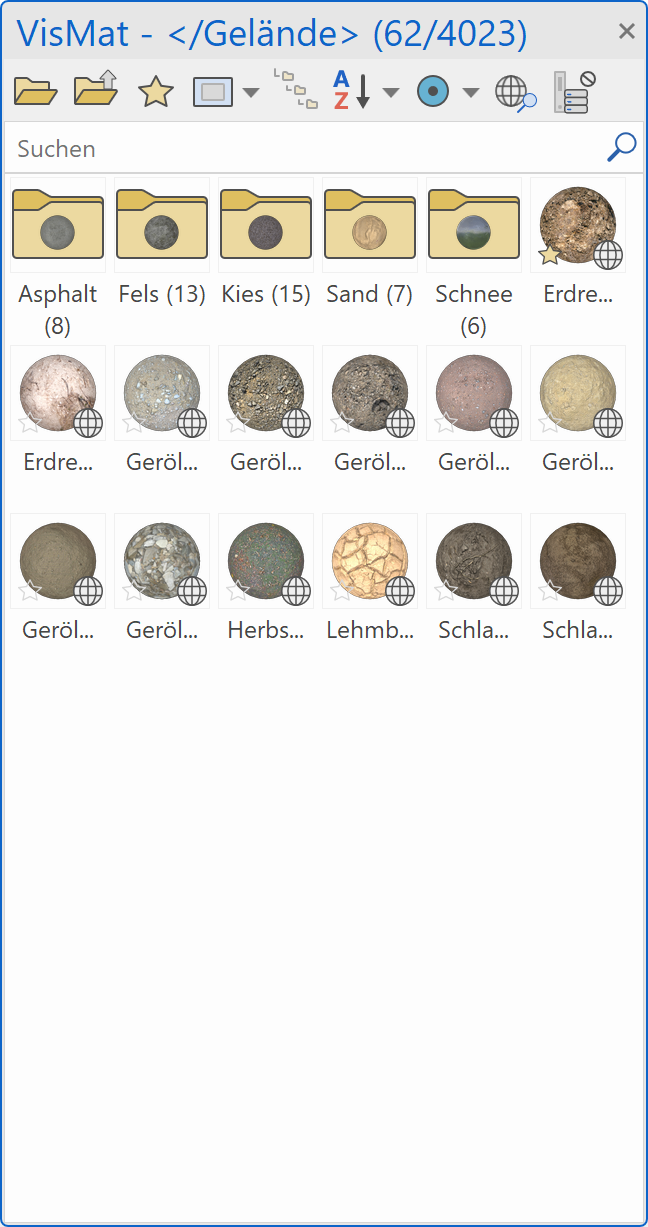
| Large symbols | Small symbols | List |
|---|---|---|
 |
 |
 |
The symbol size can also be changed dynamically with the mouse wheel.
A small additional symbol at the bottom right indicates the origin of the visualisation material (drawing, database, temporary). With a click on the additional symbol, all uses of the visualisation material in the drawing are highlighted graphically as long as the mouse button remains pressed. A visualisation material becomes a favourite by clicking on the additional symbol at the bottom left.
| Database | Drawing | Temporary |
|---|---|---|
Create folder
Creates a new folder in the folder in which the menu item is called up.
Import visualisation material
Imports visualisation material data that was either exported from the visualisation materials manager (*.mydmp) or saved as parameters (*.par) in Messerli VIS (up to Release 12).
Select visualisation material over surface
If this is selected, a visualisation material in the drawing can then be clicked on that is displayed directly in the management window. (Blue frame)
If a surface is selected, that does not have any visualisation material but rather a 3D colour, a message is displayed.
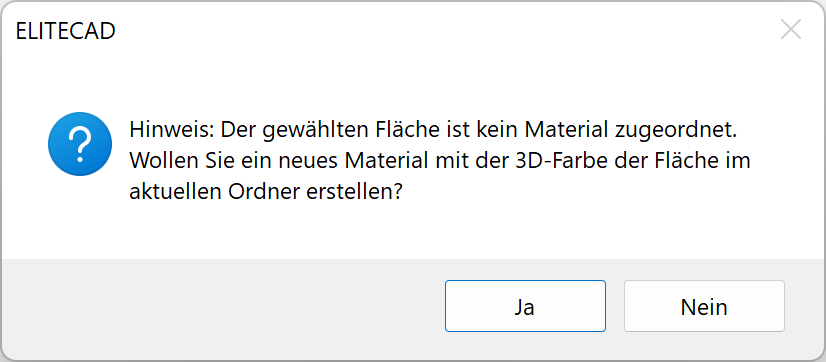
Selecting "Yes" automatically generates a new visualisation material that can then be processed.
The function is cancelled by selecting "No".
Edit visualisation material over surface
This option functions in exactly the same way as "Select visualisation material over surface", with the difference that the visualisation materials editor opens straight away so changes to the settings can be made.
Tip
These two options are very useful for finding the visualisation material that has already been used and for editing it straight away if required.
Align texture
This function is used for orientating a texture on an edge that can be selected. The exact description of this function can be found in the chapter LAYOUT > VISUALISATION MATERIAL > ALIGN TEXTURE.
Align texture globally
This function is used for orientating multiple textures on an edge that can be selected. The exact description of this function can be found in the chapter LAYOUT > VISUALISATION MATERIAL > ALIGN TEXTURE GLOBALLY.