External stairs
In the case of an external staircase that is not storey height, you must always enter the heights correctly first before specifying any additional values.
Workshop
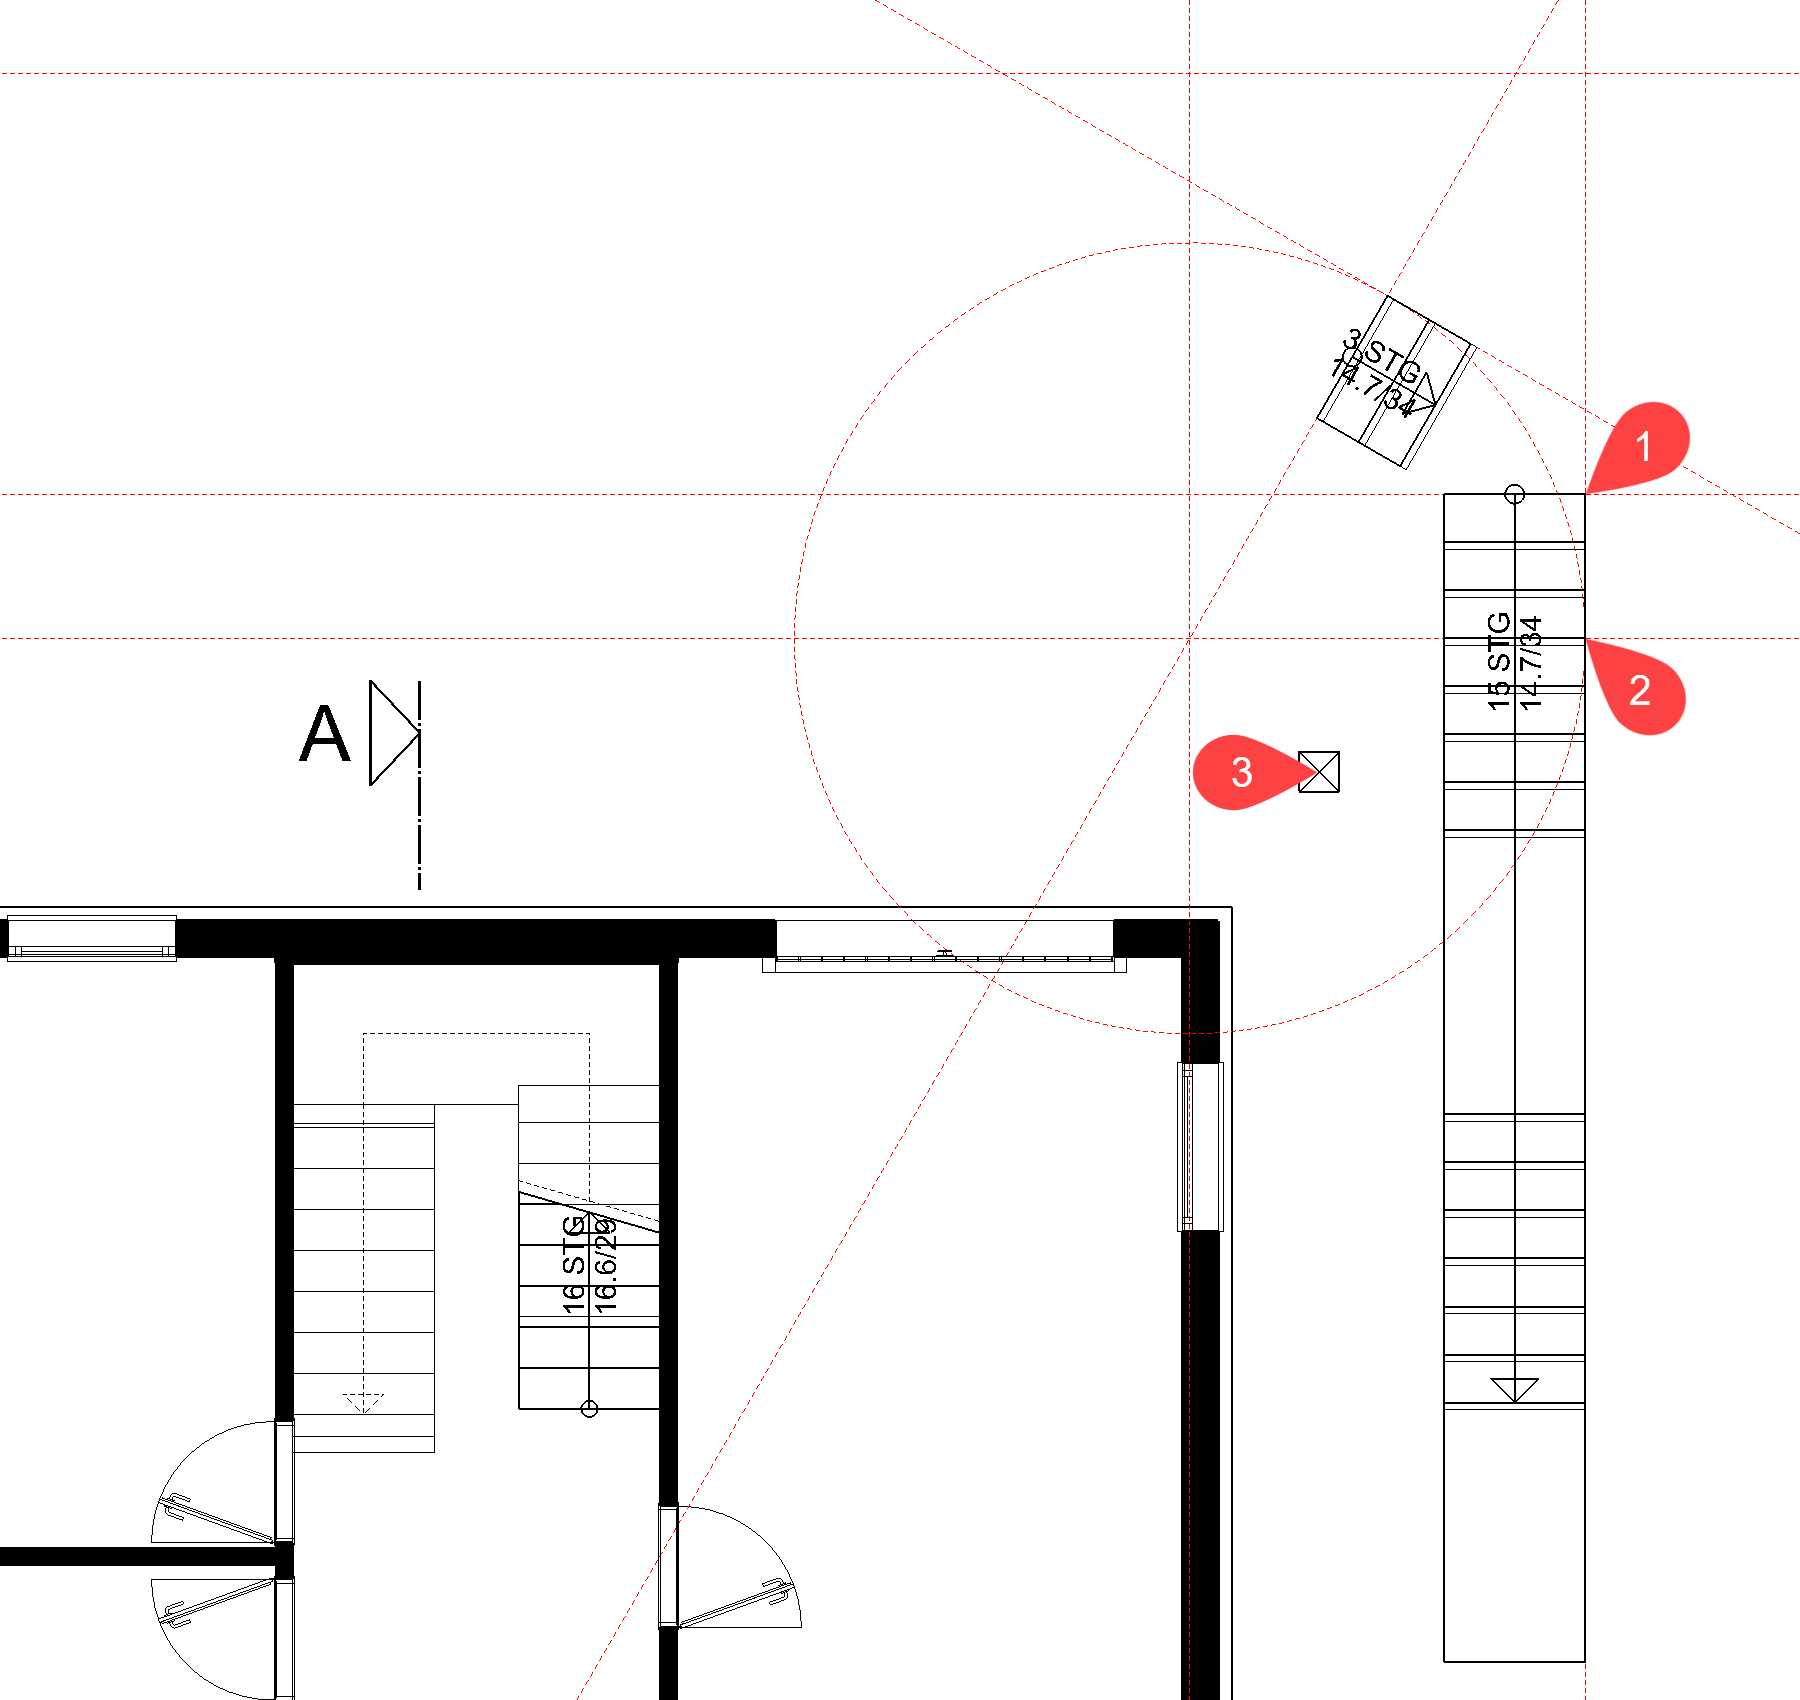
You will create the following staircase on the next pages:
The first flight with three steps is created as a separate "straight flight".
The second and third flight are combined into one staircase with a middle landing. Therefore, only the landing (free slab) between the first and second flight needs to be added.

- Activate the basement and select show alone from the context menu.
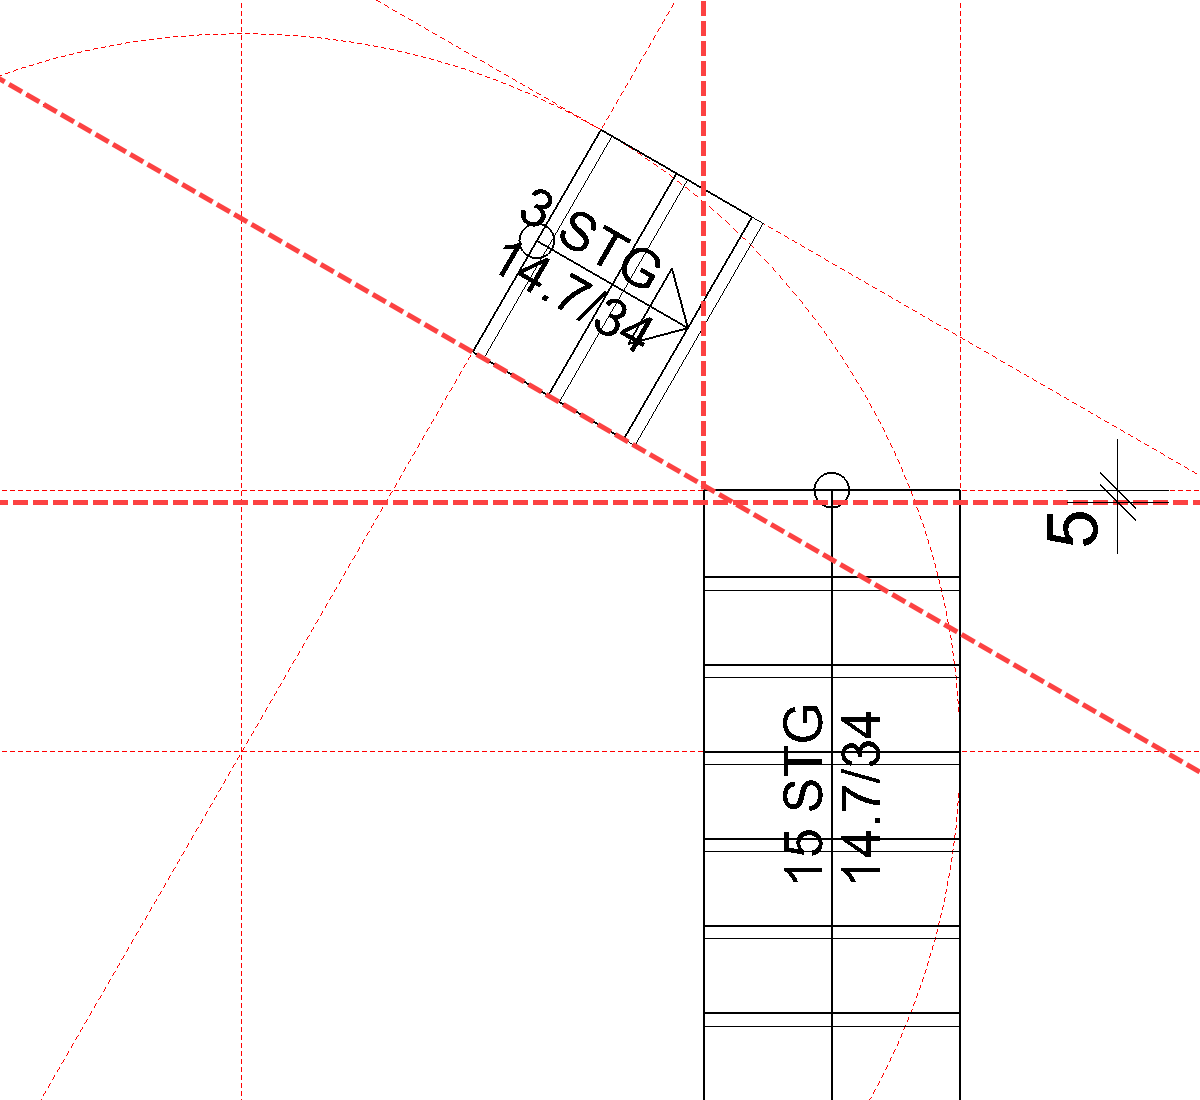
- Construct the following secondary drawing with auxiliary lines.

- Function CREATE STAIR

- Open the parameters dialog and select the stair type "Straight flight"


- Modify the height definition

- Activate the rise
 >
> 
Enter the new rise

- Fix the rise, >
- Set the number of steps to 3
The rise of step I should have the value 14.7 - Set the rise width to 34
The stair length must not yet be fixed.
The stair length should now be 68.
Fix this value as well. >
- Stair width value 100

- Select the step layout

- Modify the type


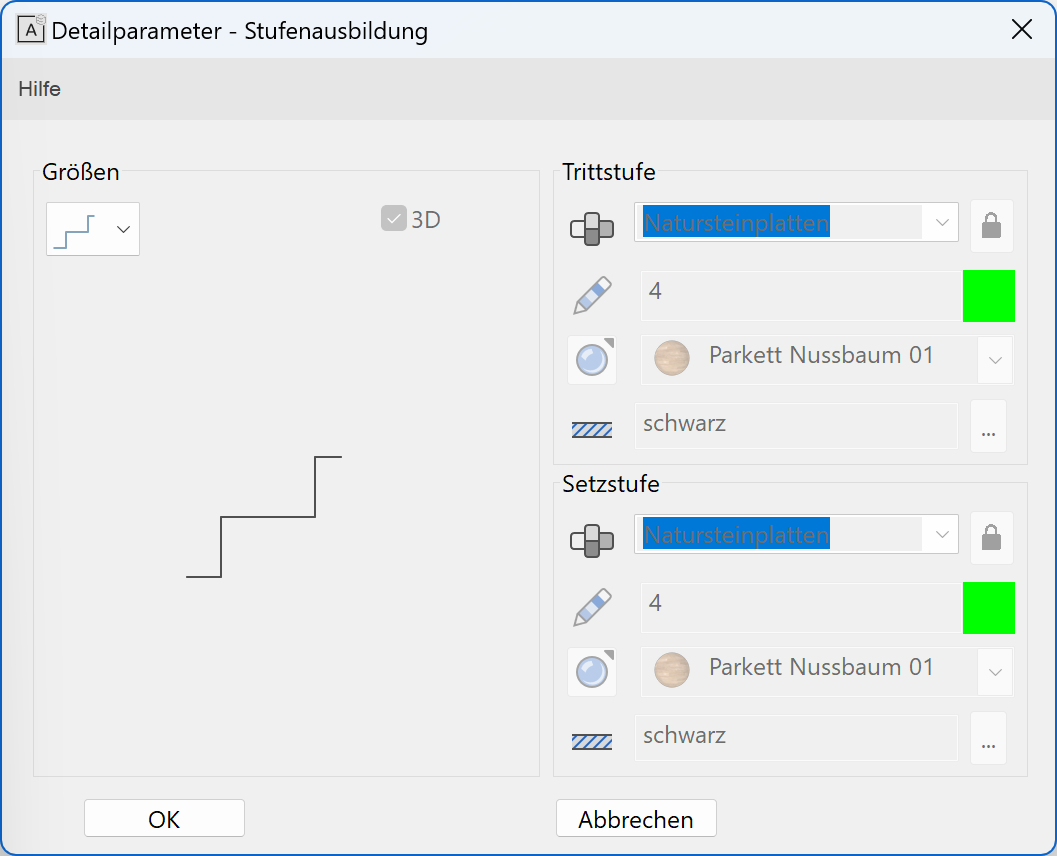
- Select the load-bearing construction

- Select the style lower edge graduated

- Enter the values:
Overlap 5, height 14.7 - Determine the material and texture

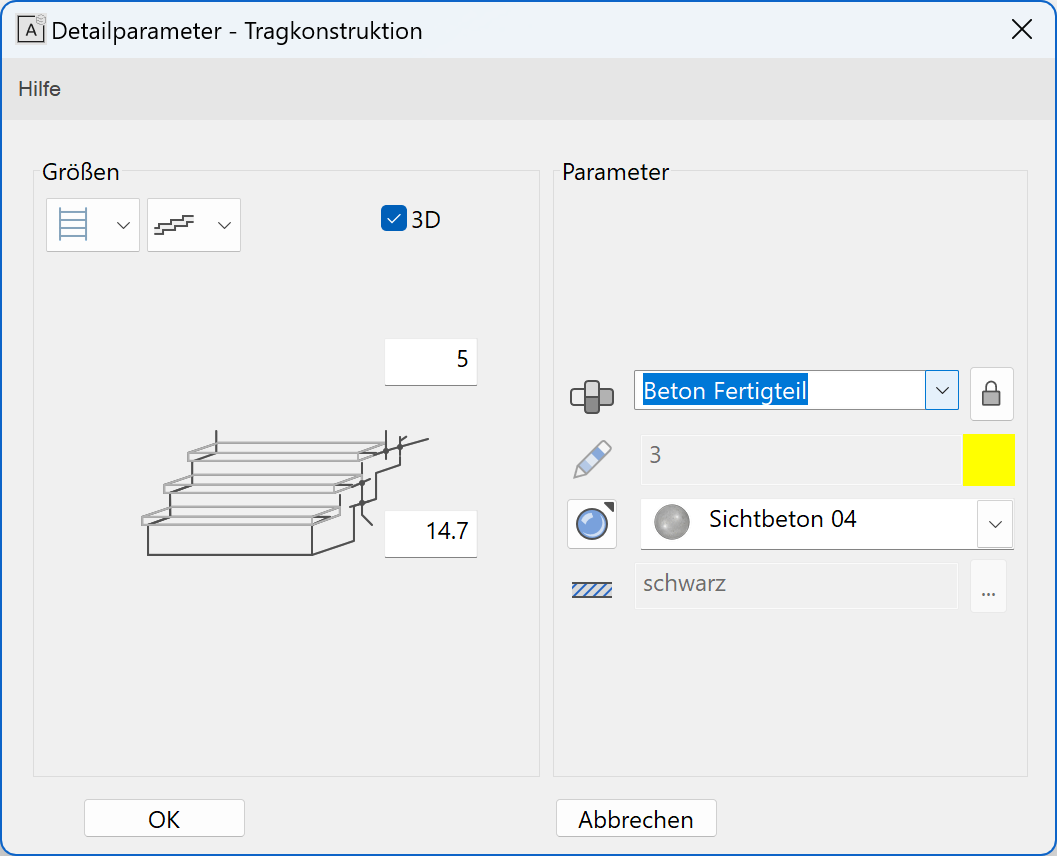
- Select the stringer

- Switch off the stringer


- Modify the type

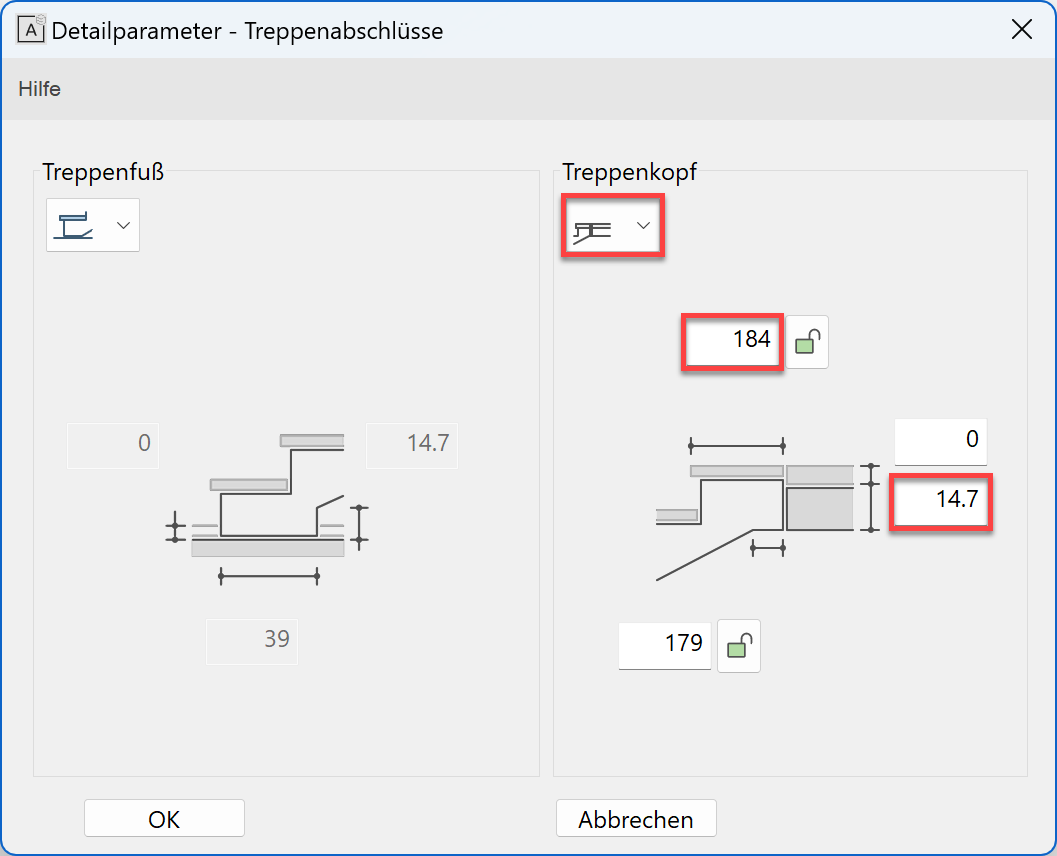
- Specify the values for substructure 0, 14.7
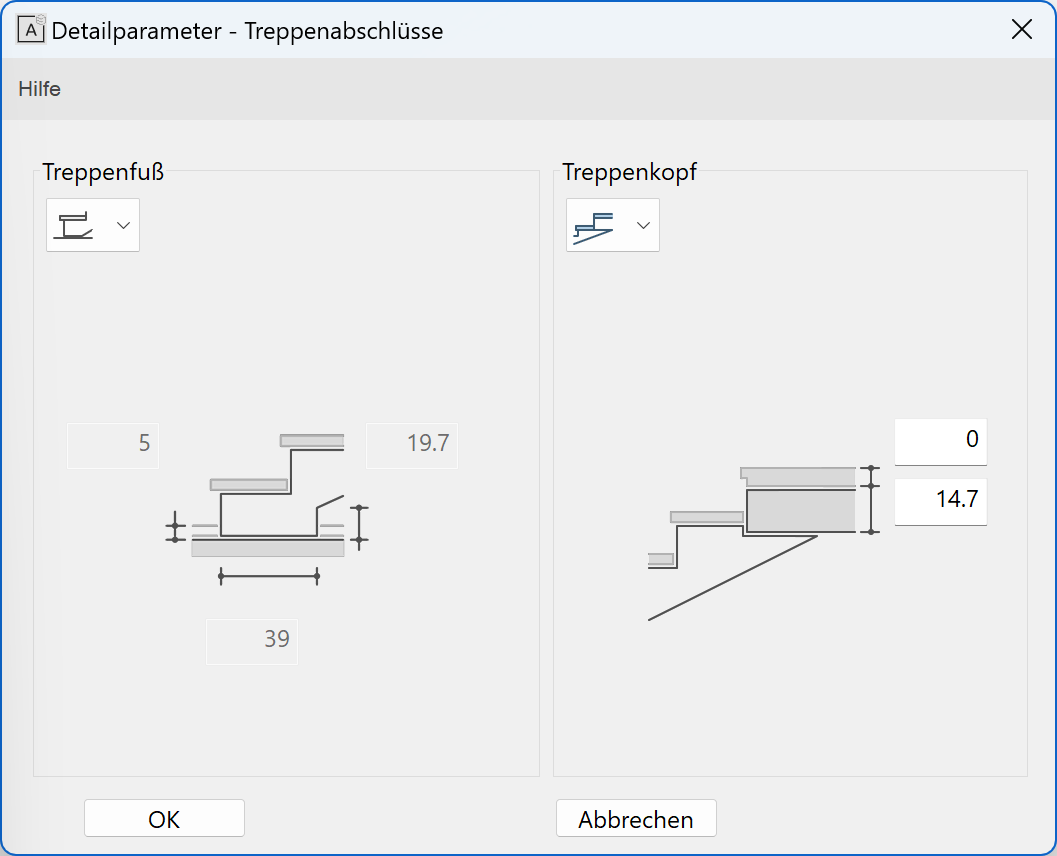
- Modify the type

- Specify the construction height at exit 14.7

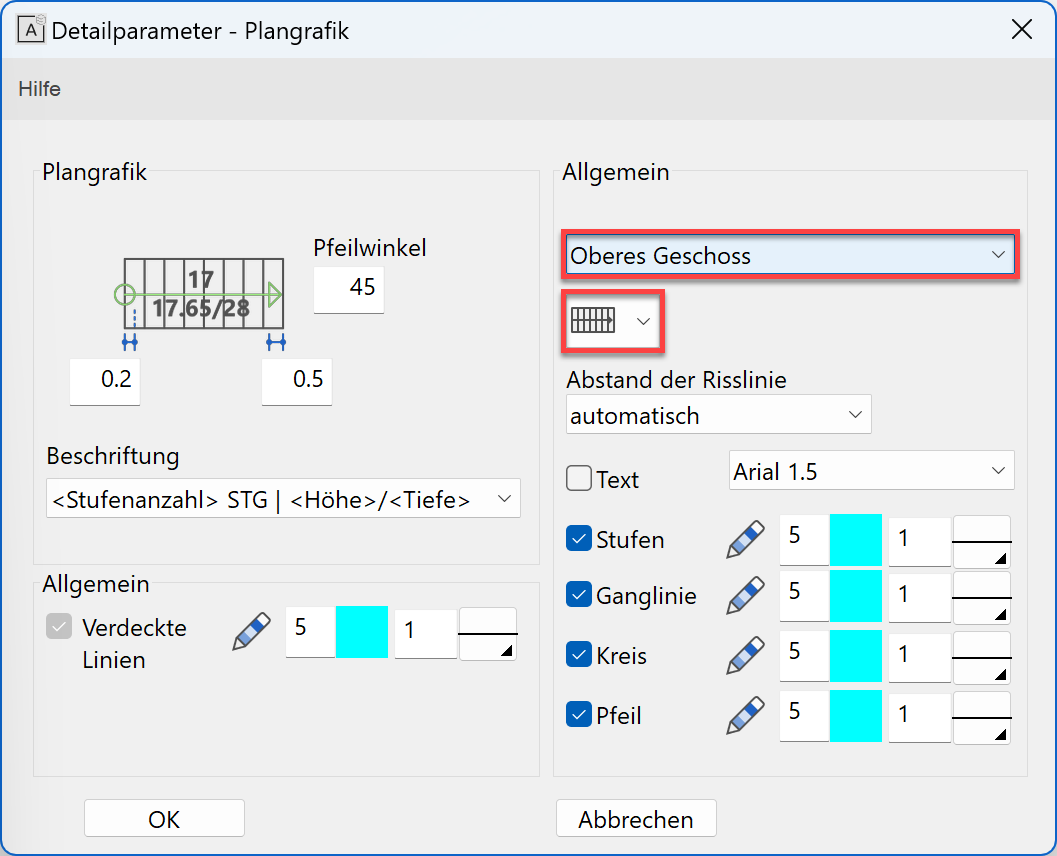
- Select the plan graphic

- Display for the active floor

- Display for the upper floor
- Check the remaining settings


- The geometry tab shows over which of the two points the staircase is to be placed.

Specify the two points P1 and P2.
- The direction of the staircase is determined by the third point > P3.

- Click
 to close stair screen.
- Create the second staircase in the same way as the staircase you just created with the following settings:
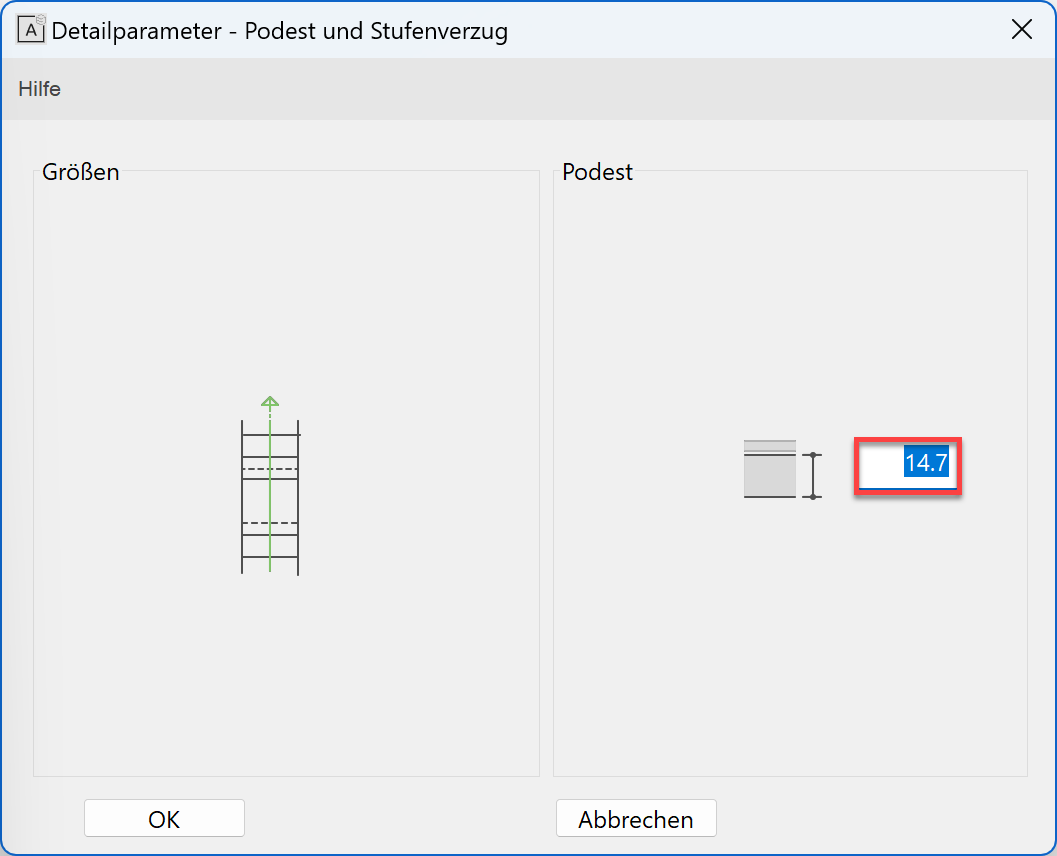
Stair geometry 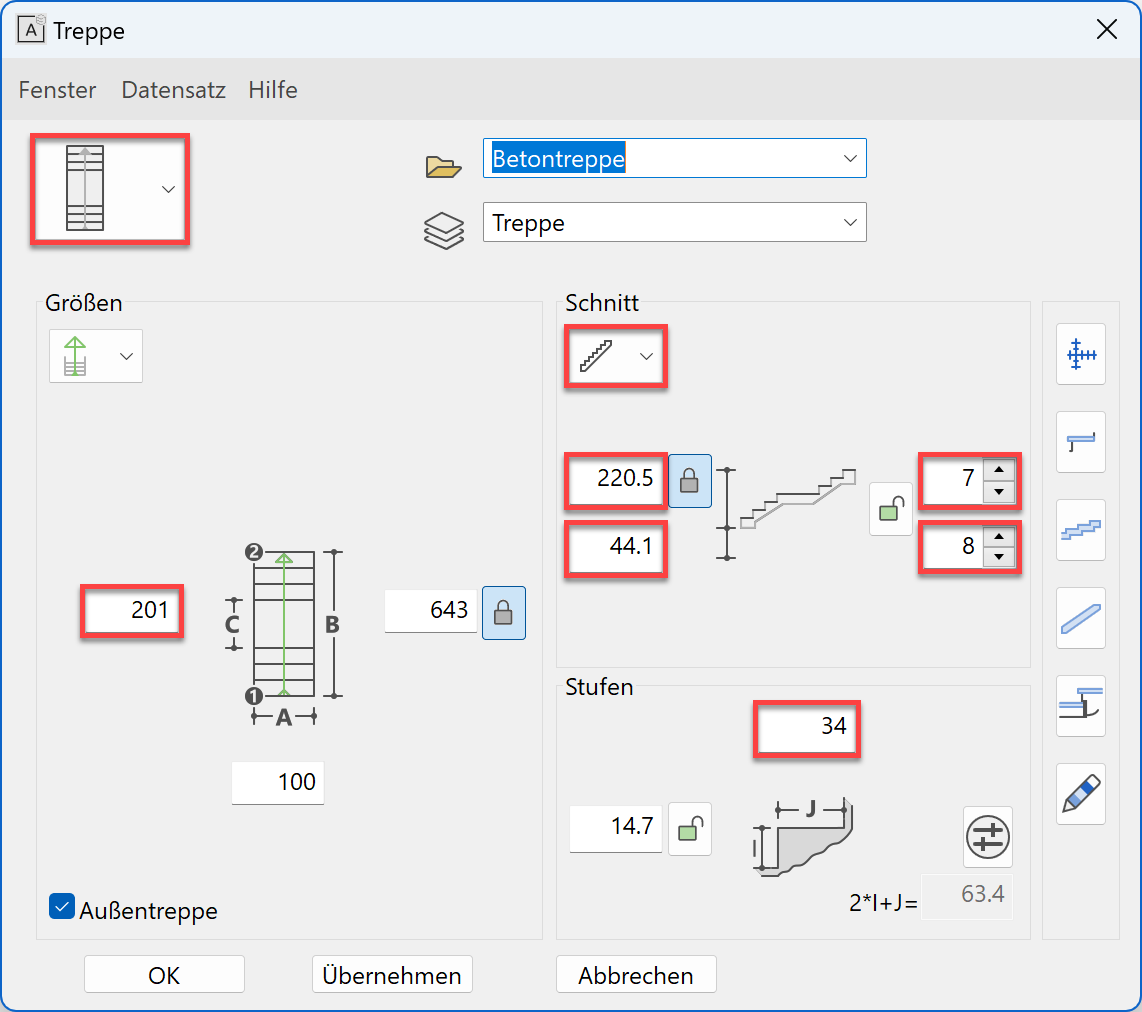
Landing thickness 
Stair endings 
Plan graphic - active floor 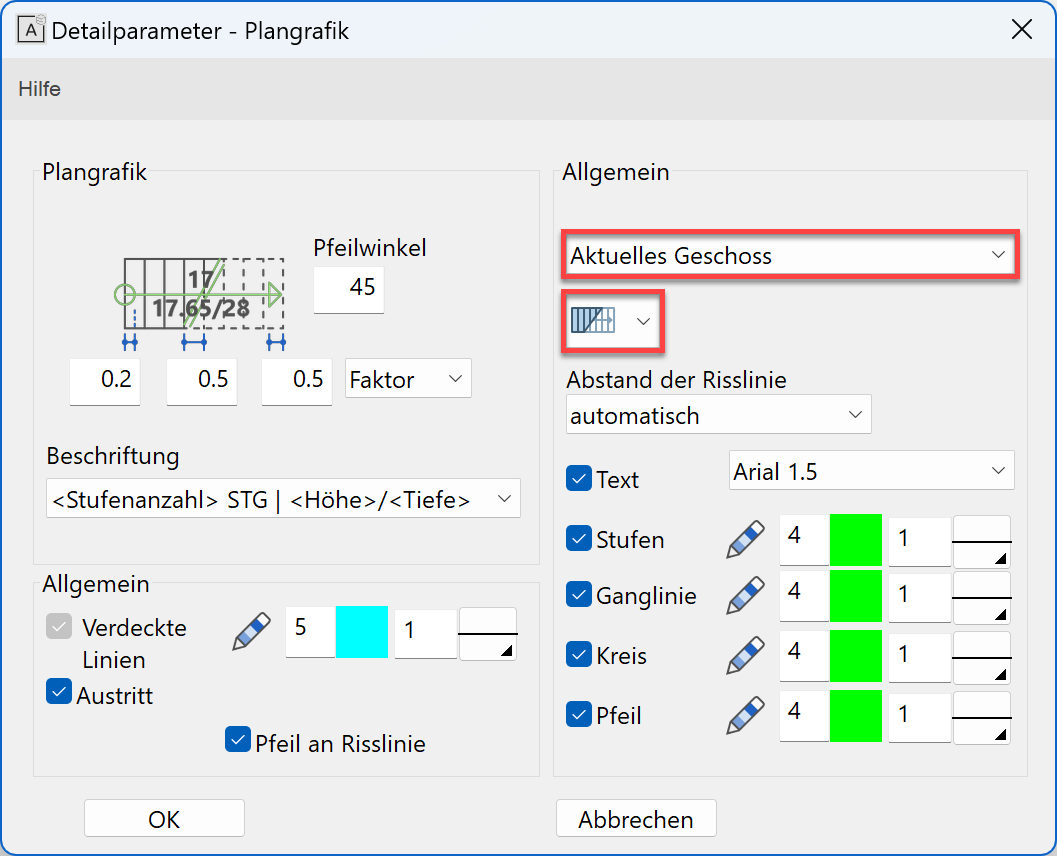
Plan graphic - upper floor 
- Locate the staircase with the points P1, P2 specified below.
- Specify the direction of the staircase > P3.
- Close the staircase screen.
Stair geometry
Step layout
Load-bearing construction
Stringer
Stair endings
![]()
Stair foot
Stair head
Plan graphic
Set stairs
Intermediate landing (free slab)
The intermediate landing between the first and second staircase must be created with a slab. This slab must not have any reference to the walls and must be located on a certain marker, independent of storey heights. Use the free slab for the landing.
Height reference free slab
![]()
Workshop
- Add a parallel auxiliary line to the existing auxiliary lines at a distance of 5 cm for the overlap and one parallel auxiliary line at a distance of 0 cm to the outer sides of the staircase.
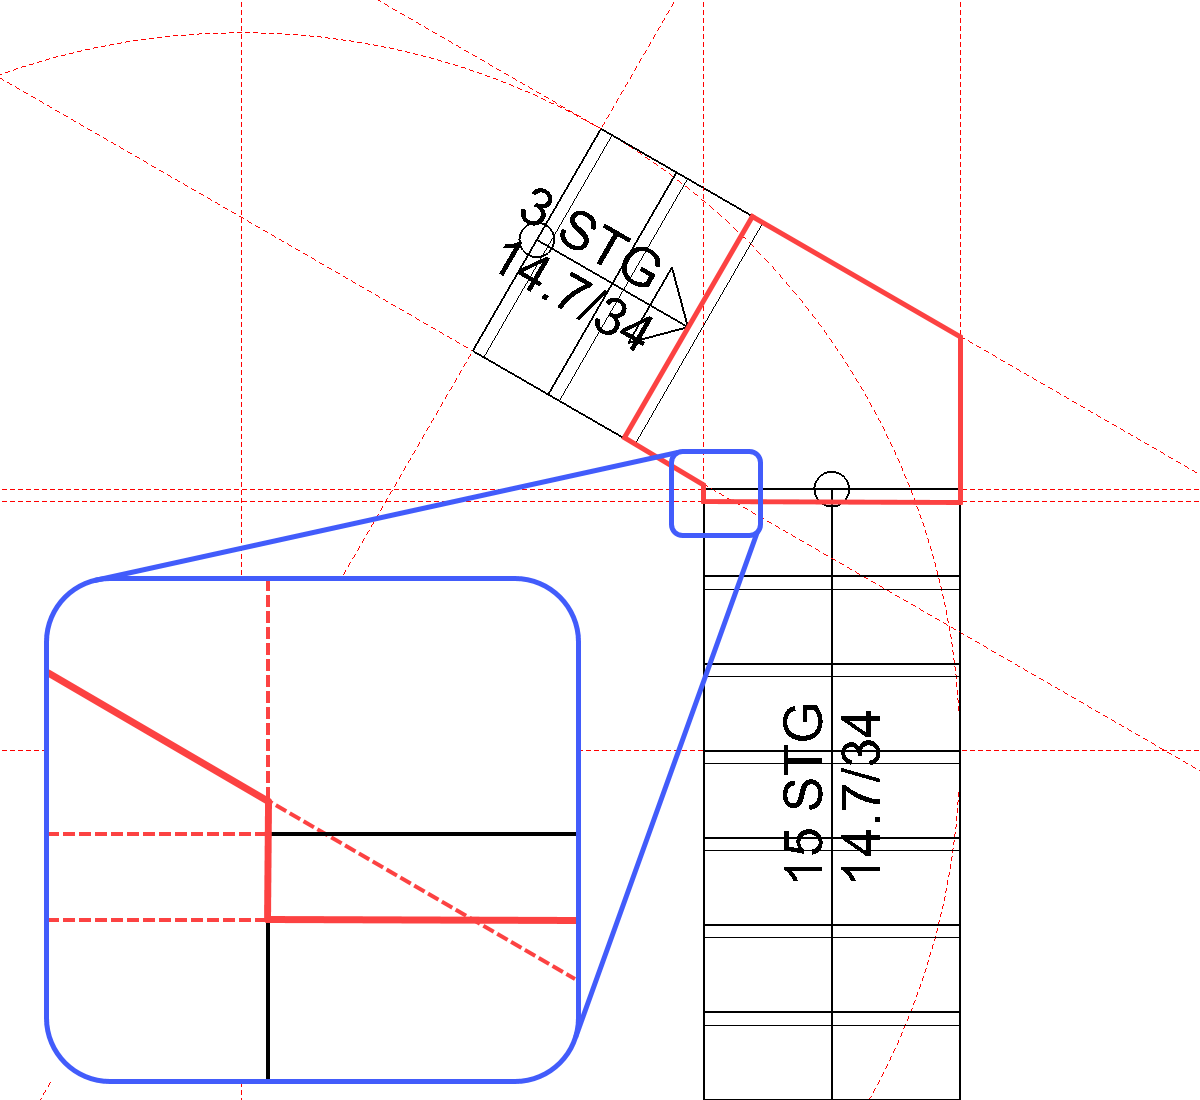
- Select the function CREATE SLAB and add the values to the property bar.

Change the type of slab to "Exterior slab". - Draw the contour of the landing (see image above).

- Cancel the function with Esc.