Radiosity
Daylight rendering is a process for rendering the energy distribution of atmospheric light in the scene. This energy diffusion enables a basic illumination level as would be found on a cloudy day, which you can combine with other light sources.
If you wish, the result may be saved with the drawing. Menu "Settings > Options > Save/Load > Drawing". This setting is “on” by default. In the CAD_Object6 example file, the setting is “off”.
Workshop
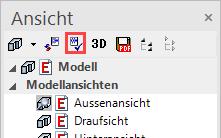
- Load the model view "Exterior view".

- Trigger rendering.

- Access the screen setting, adjust the following settings and then close the dialog with
 .
.


- Refresh the view.
- The progression is displayed in the information line. Following the radiosity calculation, the system automatically carries on rendering.


- Since the radiosity calculation works like an additional light source, the ambient light must be reduced. Open the light parameters, confirm the prompt with "Temporarily switch to solid mode" and change the intensity of the ambient light to 25.


- Close the dialog with . Rendering will be triggered again.
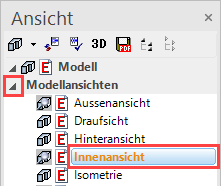
- Load the model view "Interior view" onto the screen.
- Trigger rendering.
- Access the screen settings, set the following settings and then close the dialog with schliessen.
- Refresh the view.
- Open the light parameters, confirm the prompt with "Temporarily switch to solid mode" and change the intensity of the ambient light to 20.

- Close the dialog with . Rendering will be triggered again.
Exterior view

Interior view

Tip
When working, it is advisable to use the "preview" depiction and only to use optimal rendering where necessary and for the final image.
Tip
After rendering has been completed, the intensity of the result can be adjusted retroactively without the need to run the rendering again. If you reset the slider to "0", the radiosity result will be deleted.
Radiosity update
Once the radiosity has been rendered once, it is not automatically refreshed when the geometry is modified or if new material is allocated. The daylight rendering process must be manually restarted.
Workshop
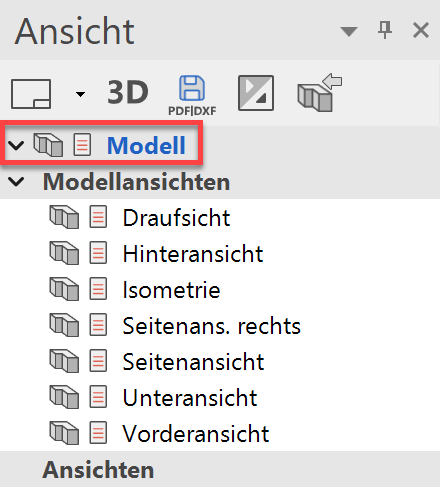
- Load the "model" view onto the screen.
- Access the menu item "Insert", select "Load into" and confirm the prompt with "to startpoint".


- Select the template "Parts of Library.d" and open. Confirm the subsequent prompt with.

- Load the model view "Exterior view".
- Refresh the view.
- As yet the new parts have no radiosity illumination. Right-click in the model window and select the item "Radiosity Update". Radiosity and rendering will be recalculated.

- Refresh the radiosity for the Interior view as well.
Exterior view

Interior view

Tip
If in a plot compilation render images with radiosity are present, the radiosity update can also be carried out in the plot for multiple views. Right-click in the model window and select the item "Radiosity Update".