Modify external wall
The walls from the building permit are single-layered and must be adjusted in accordance with the construction.
Workshop
- Activate the "GF" floor and it show alone.

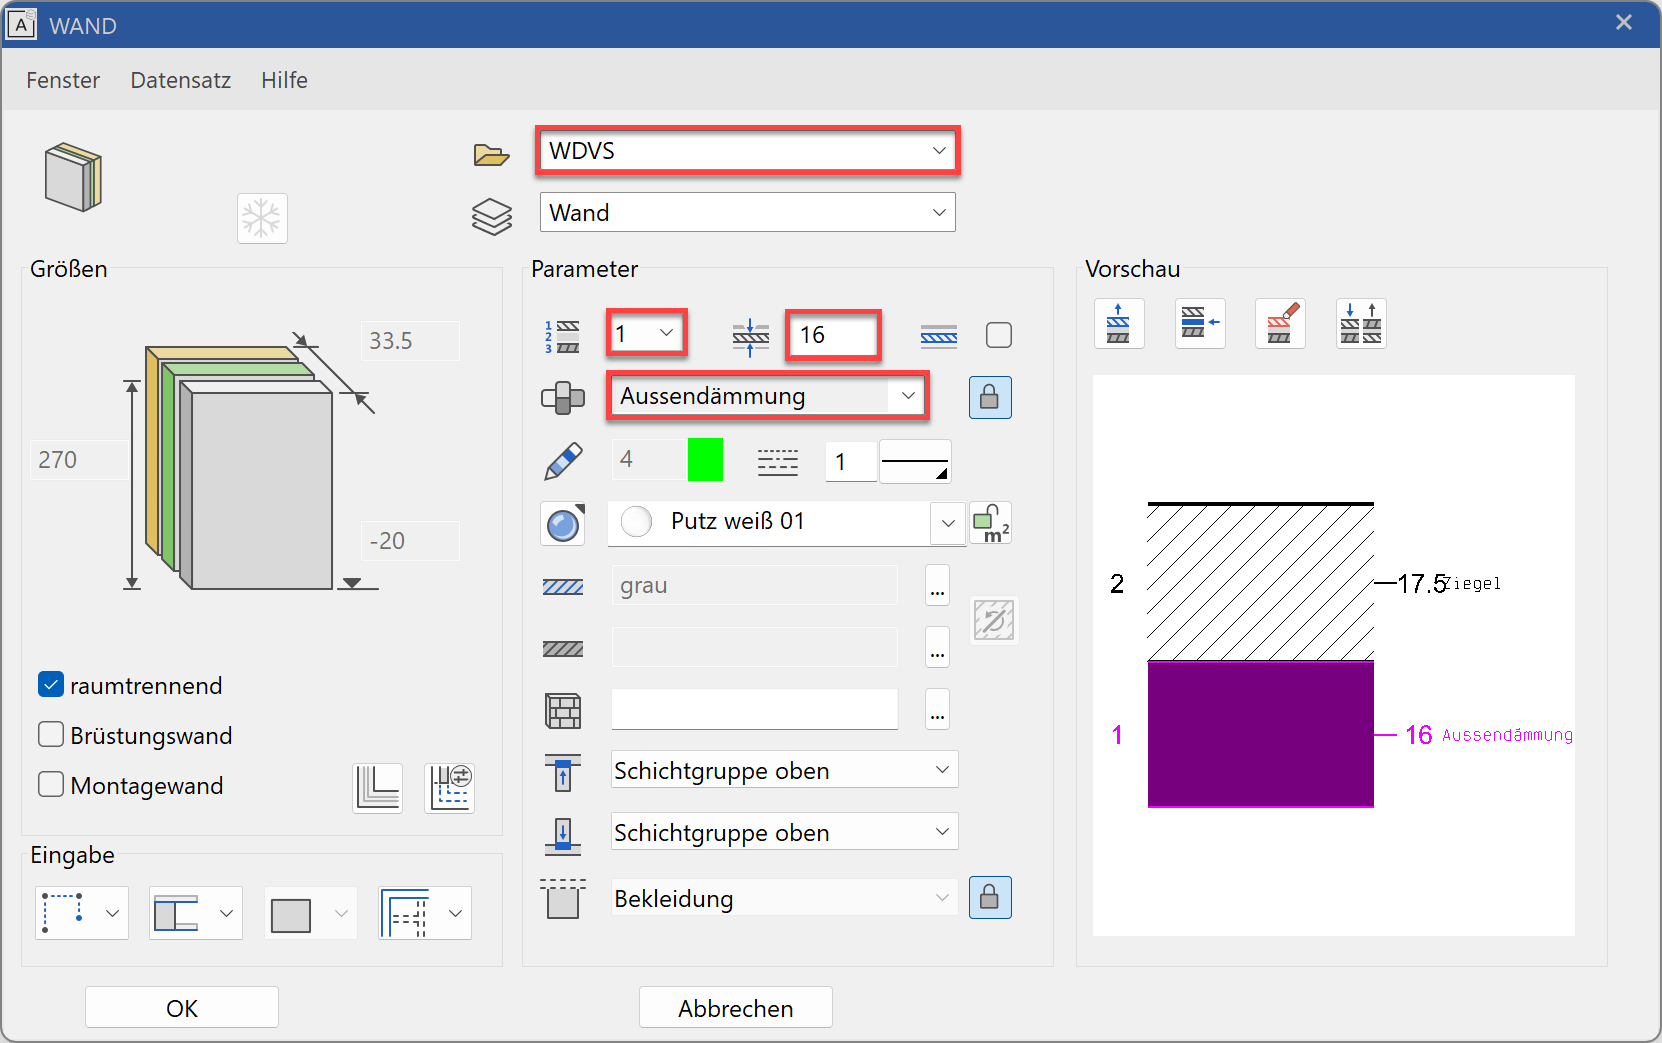
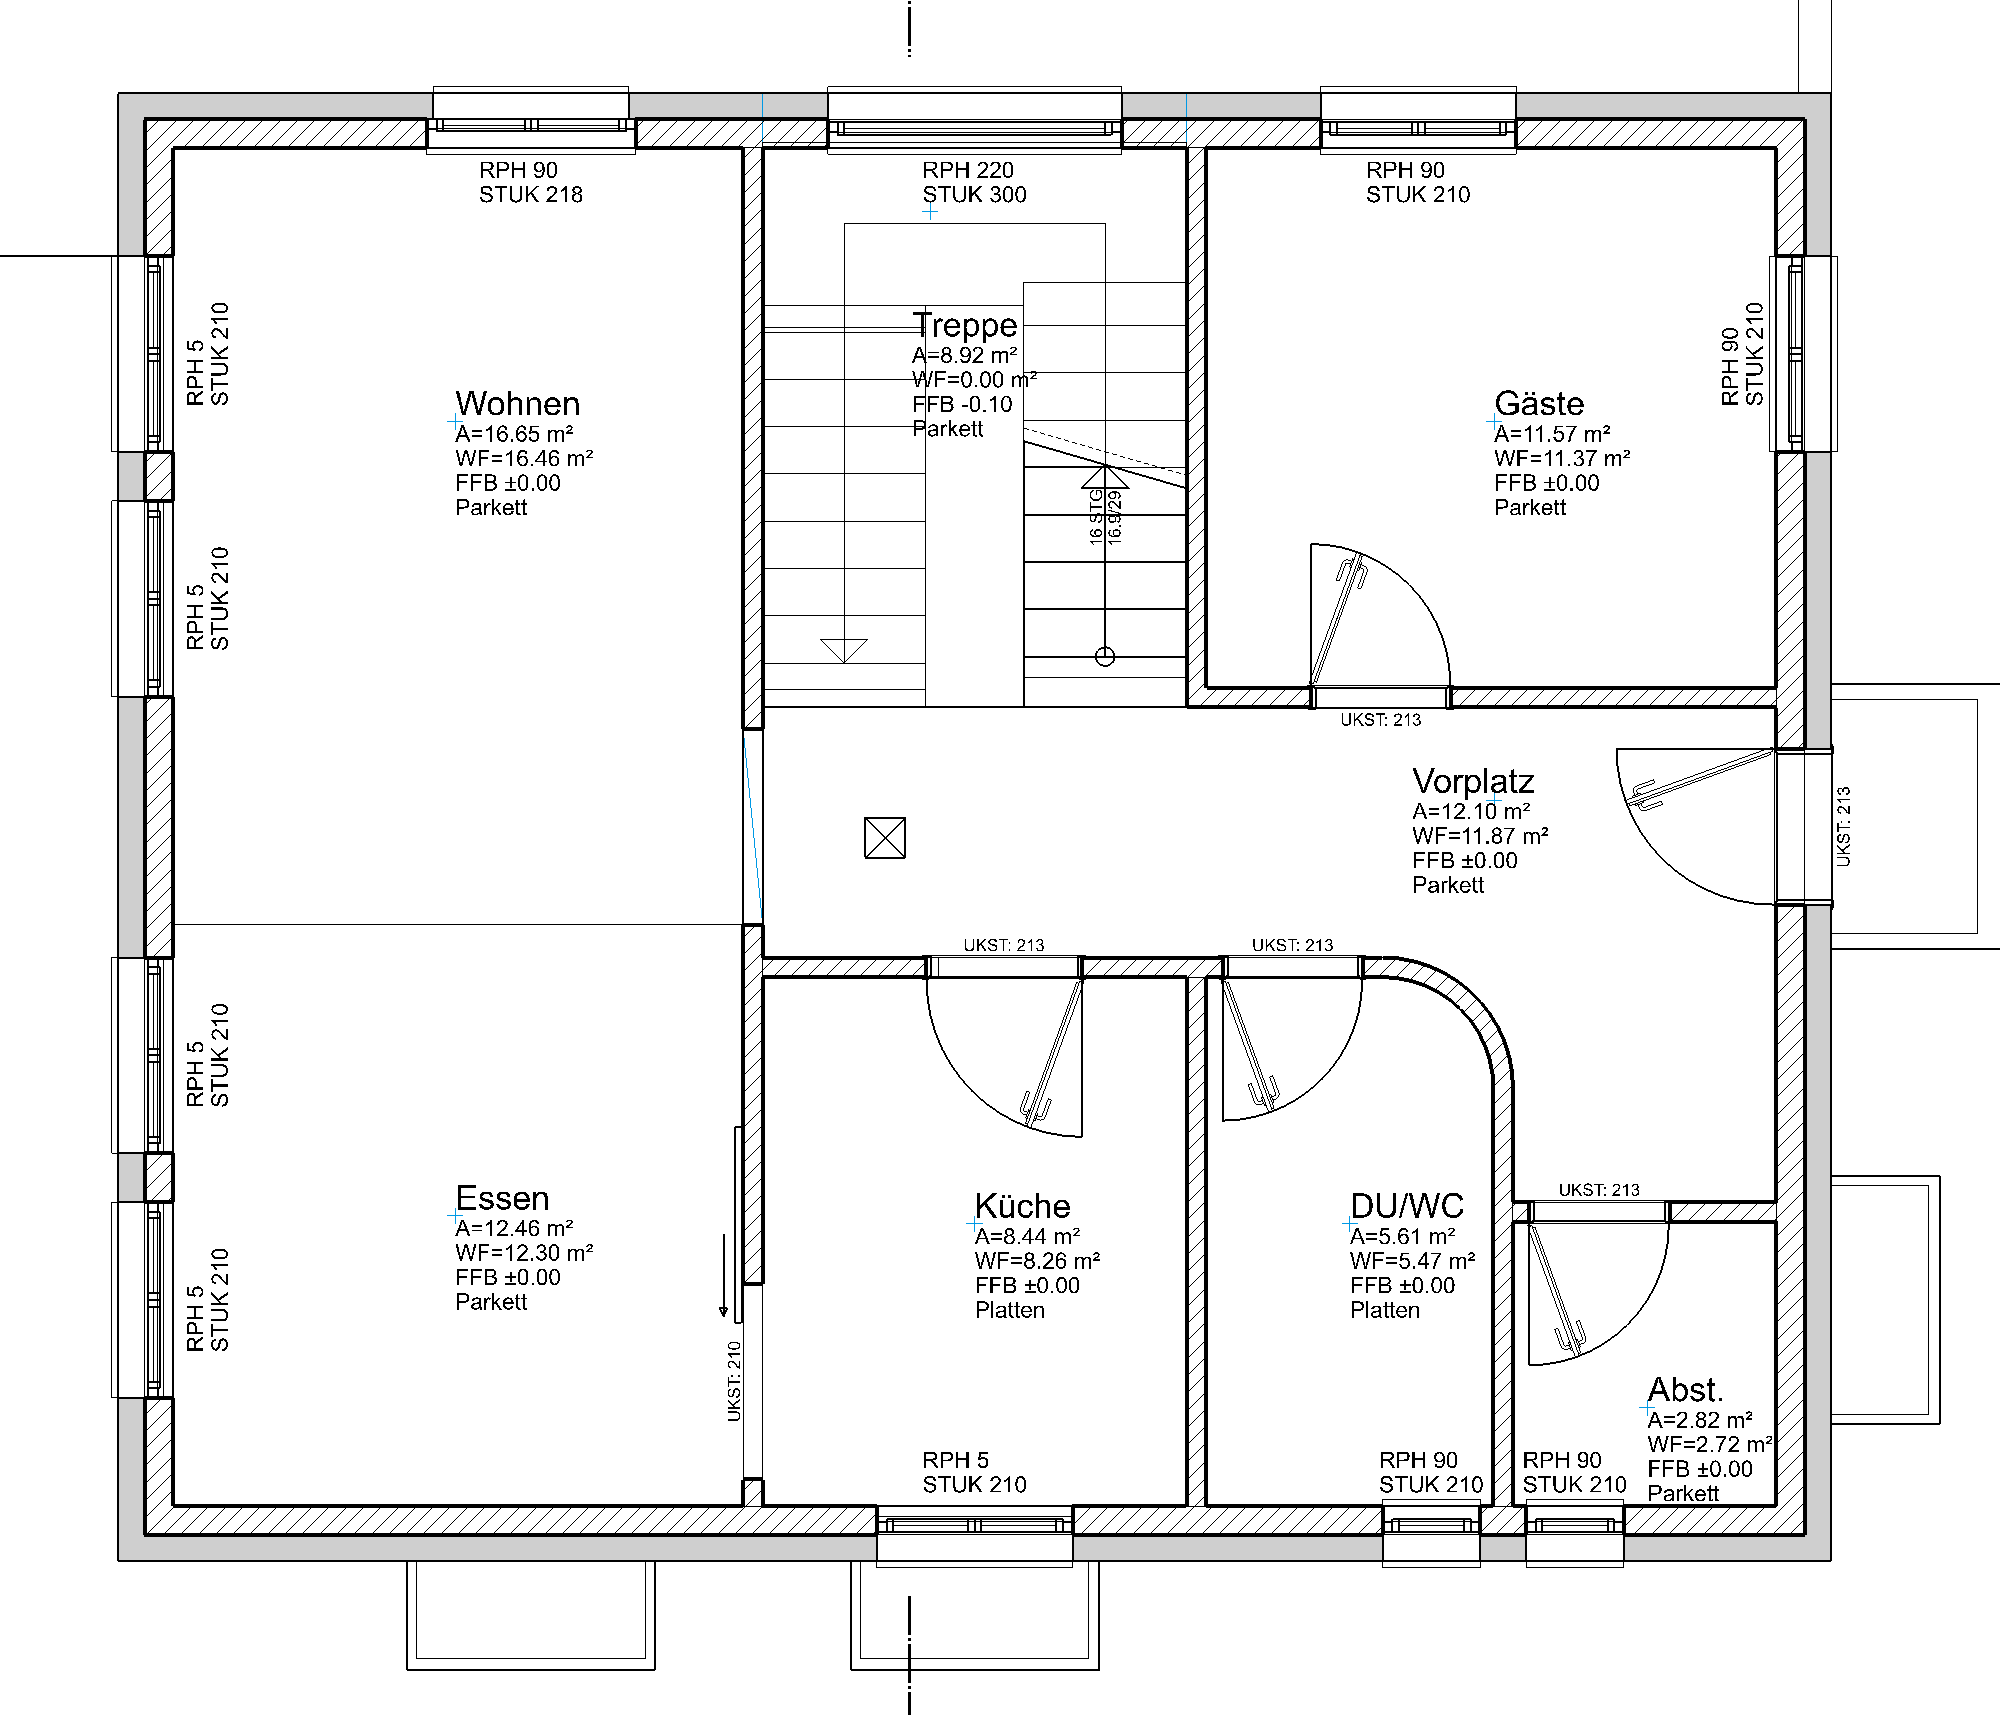
- Select the outer wall and switch to the parameter dialog.

- Select Exterior insulation as the type and change the number of active layers to 2. Change the dimention of the external insulation layer to 16cm and the brick layer to 17.5 cm.
- The room labels may need to be updated. From the menu, select LAY-OUT > REFRESH ROOMS and confirm with
 .
.
Explanation
If the wall thickness is changed, the wall connections adjust themselves automatically. Library parts, stairs, own 2D elements, etc. must be adjusted manually to the new ratios.
Modify window stop
The window stops must be adjusted to the new wall construction.
Workshop
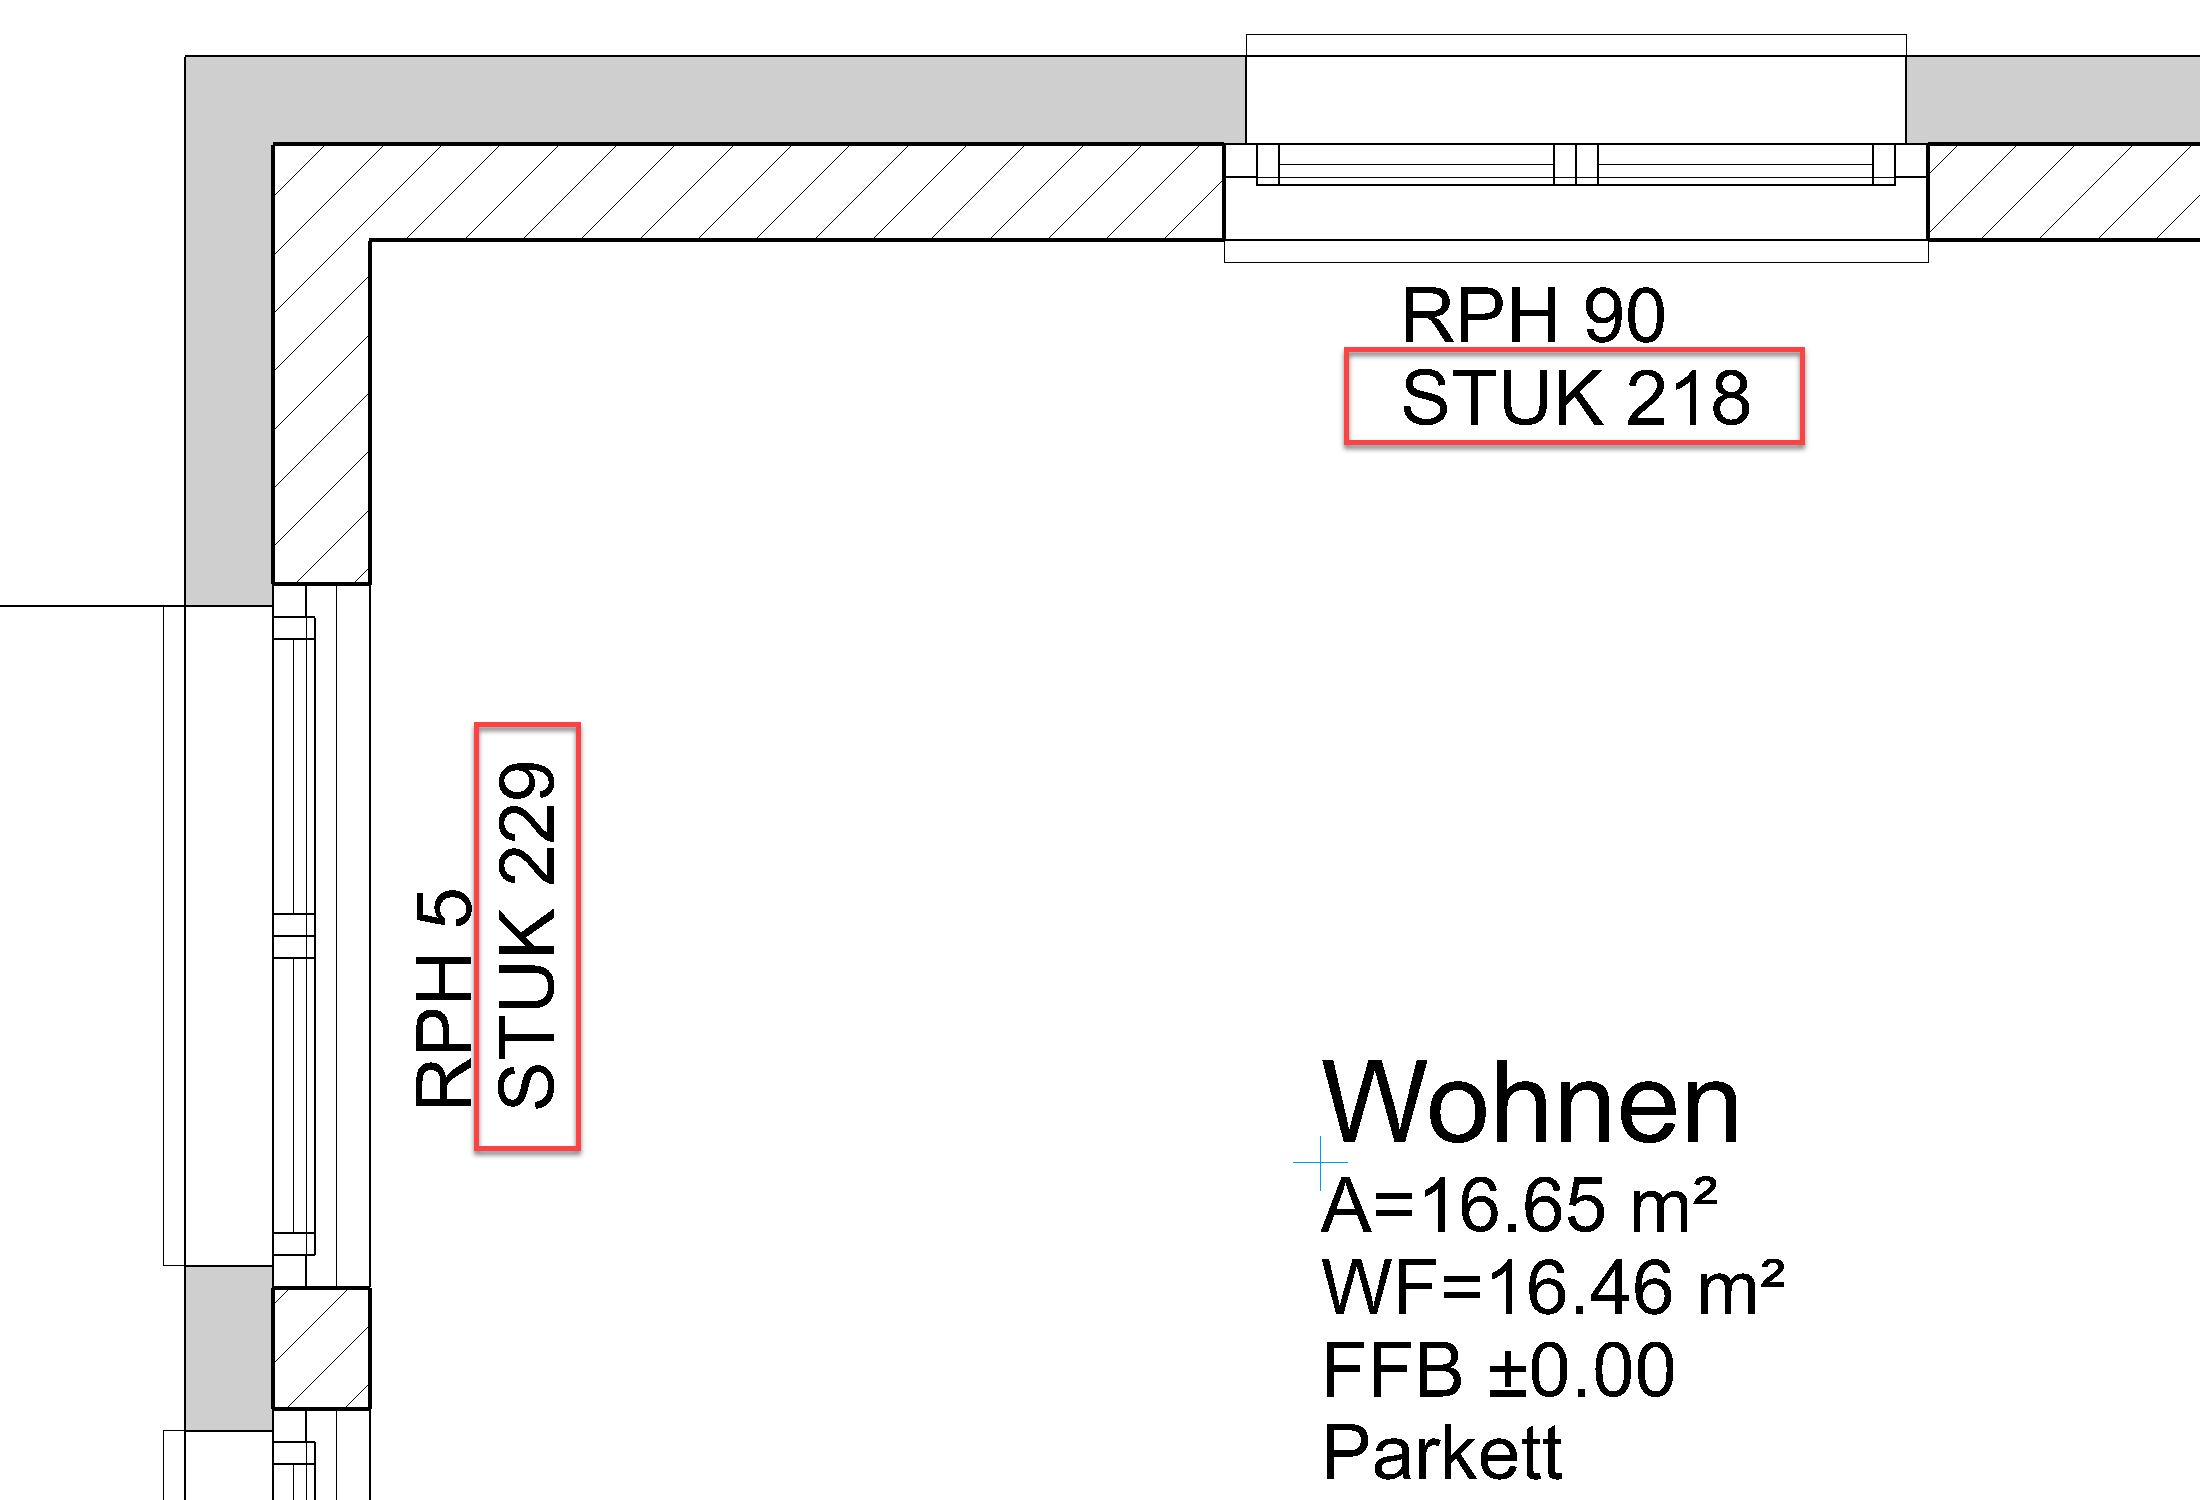
- Edit the window in the Living room at the top left.

- In the property bar, switch to the large parameter dialog.

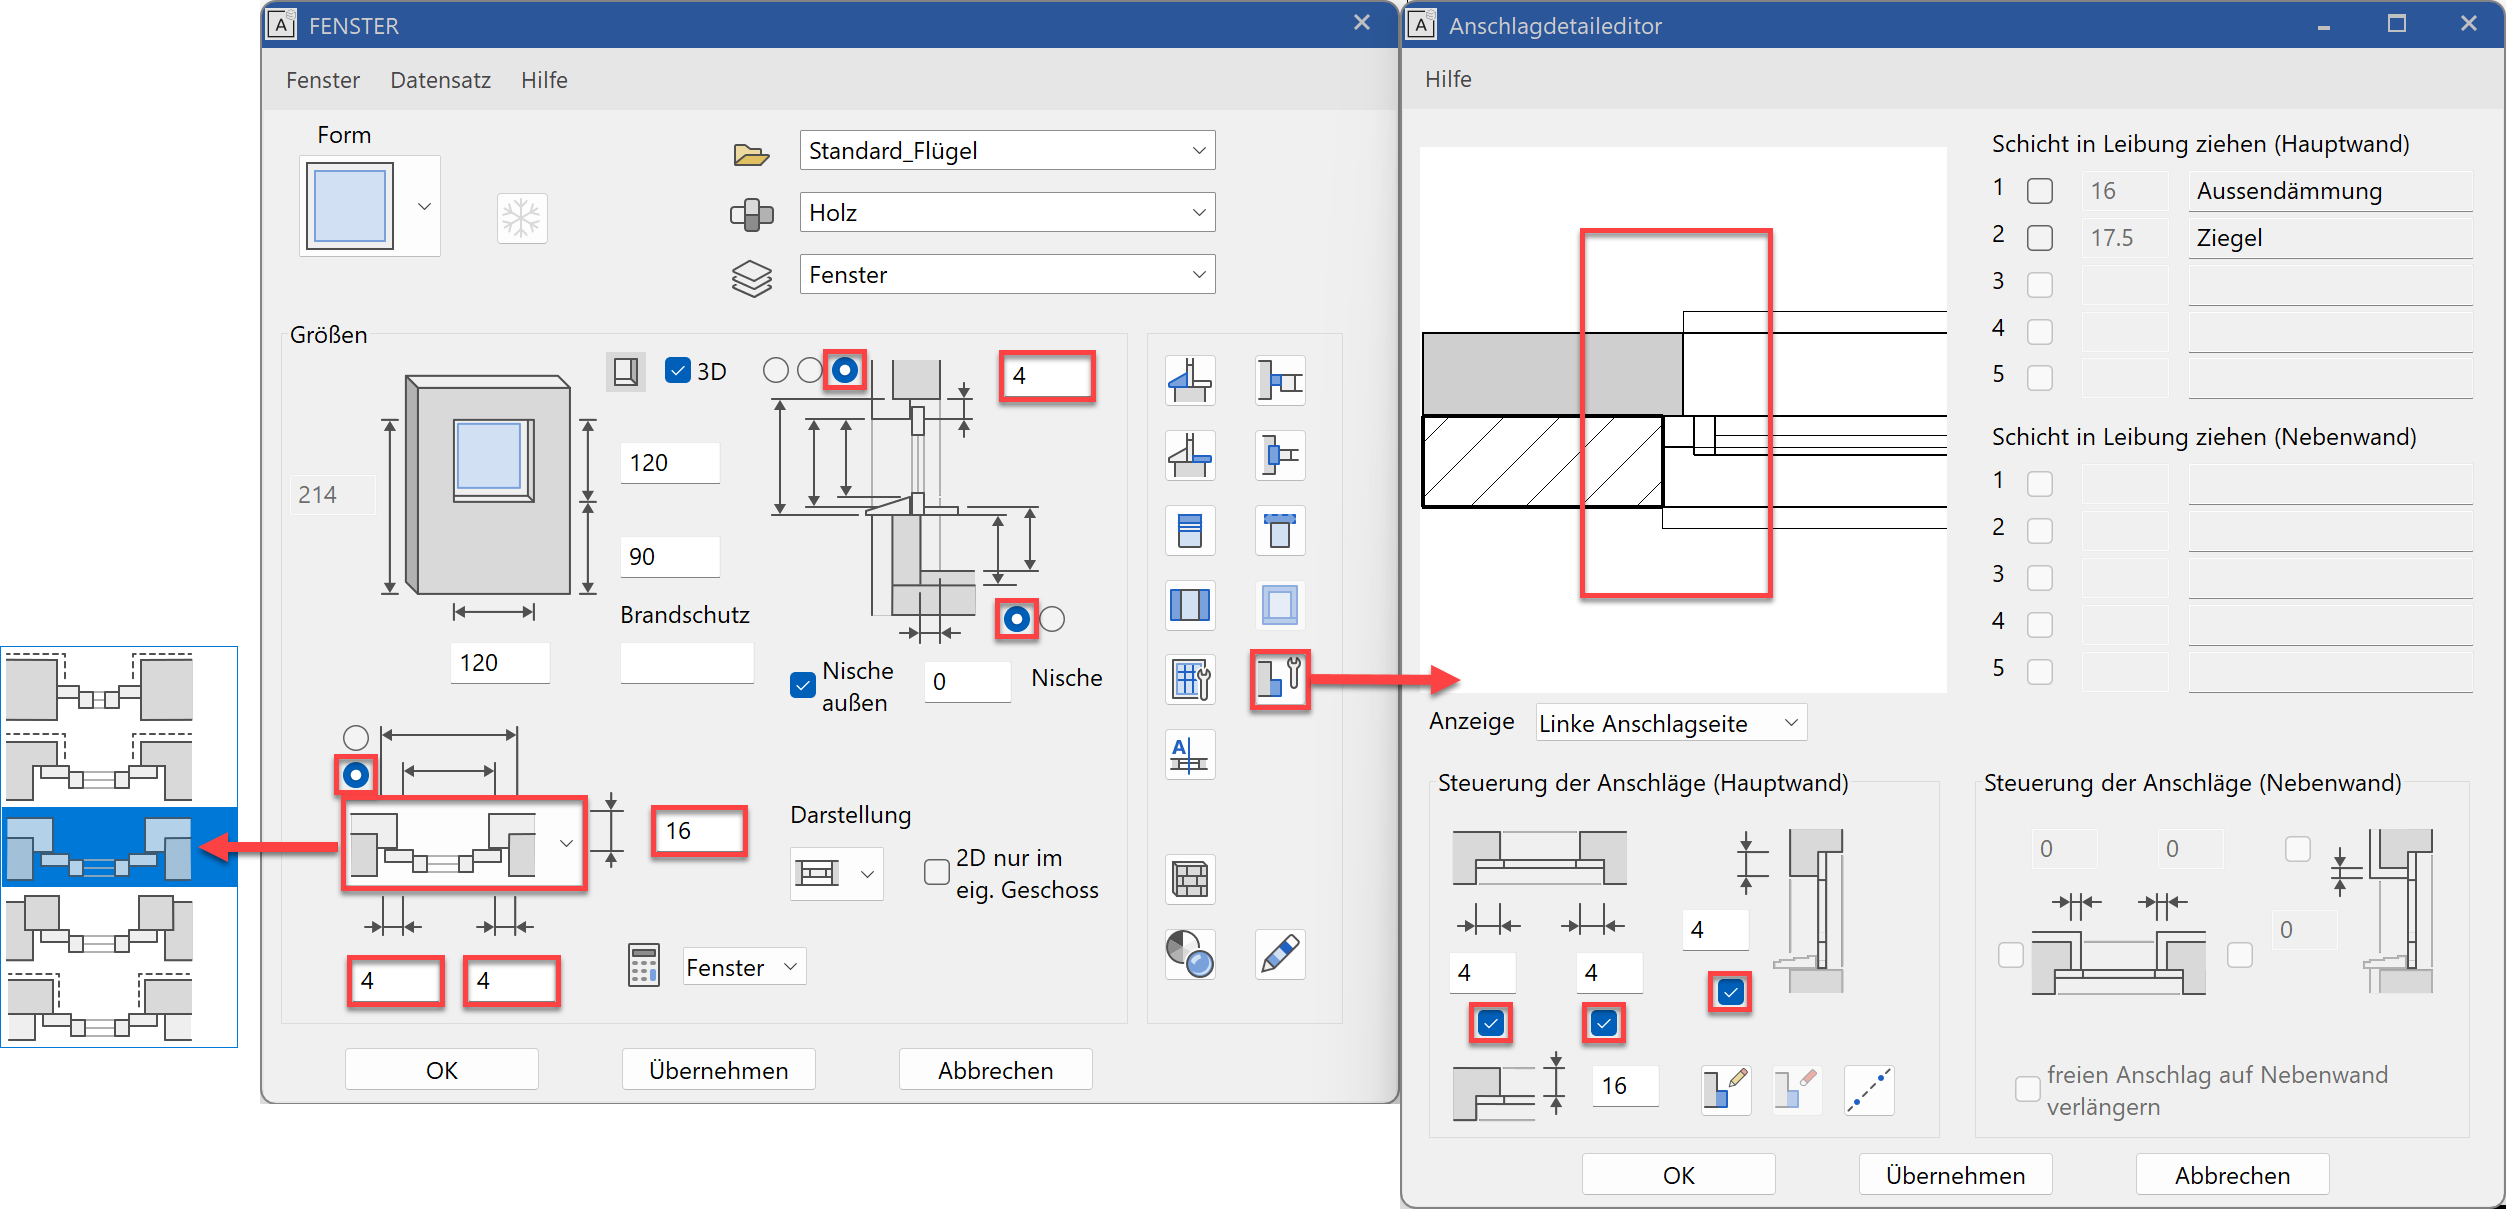
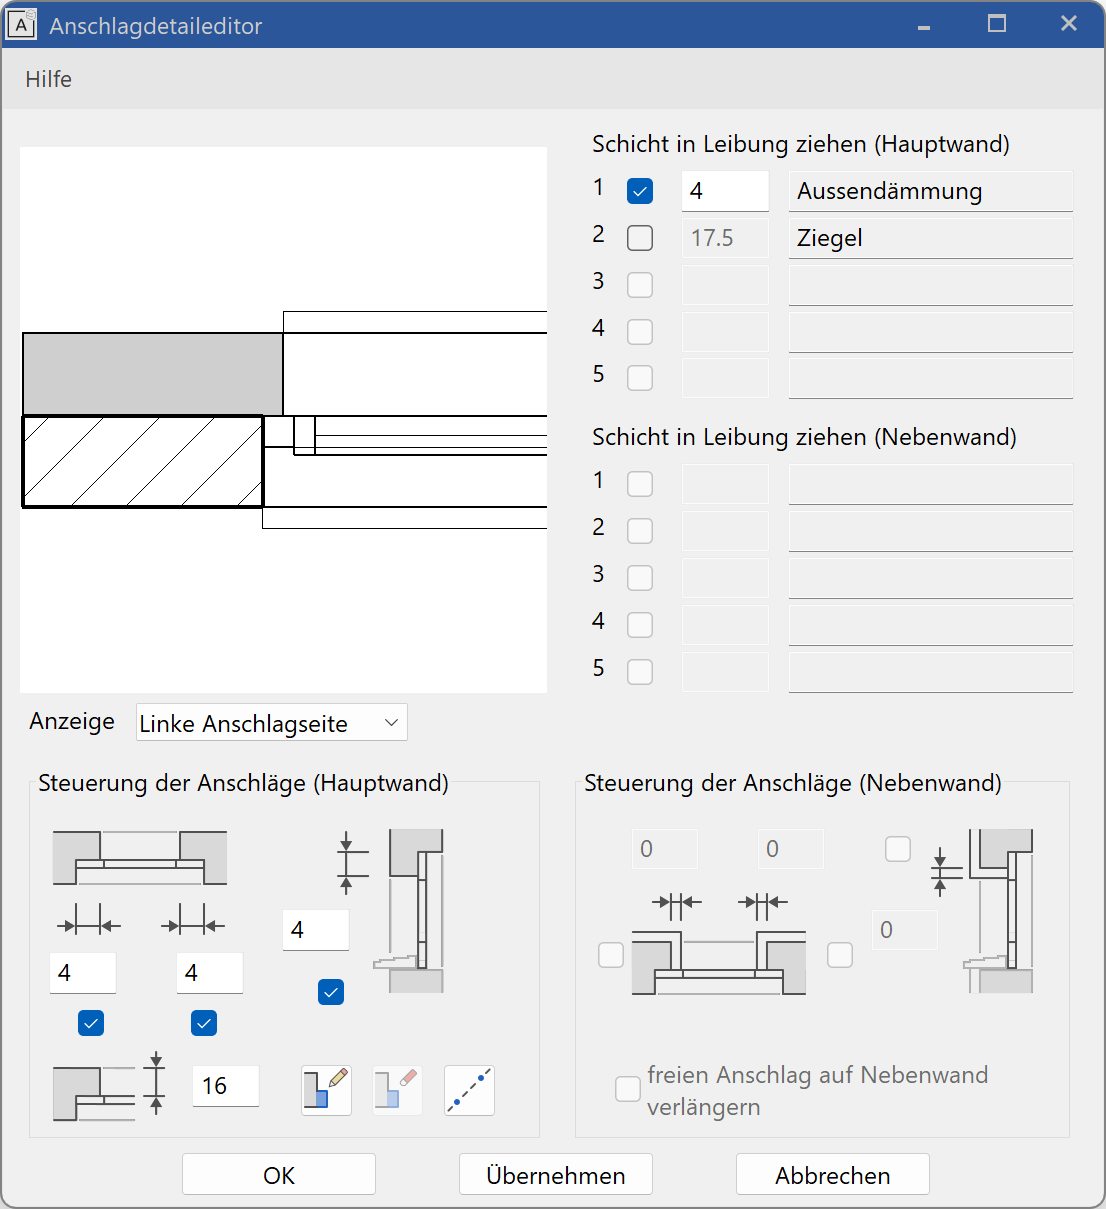
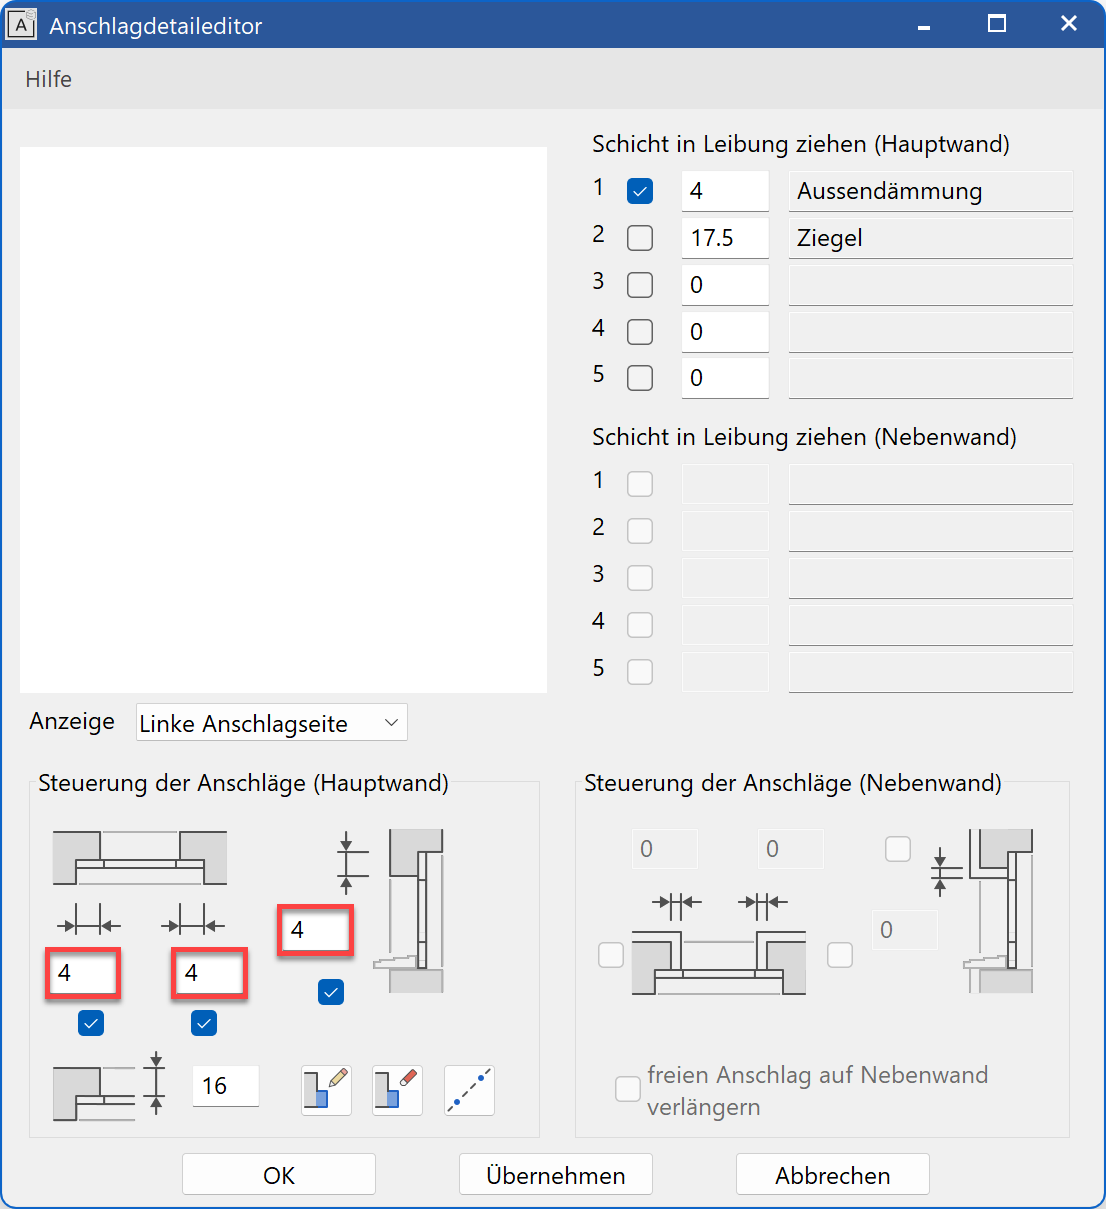
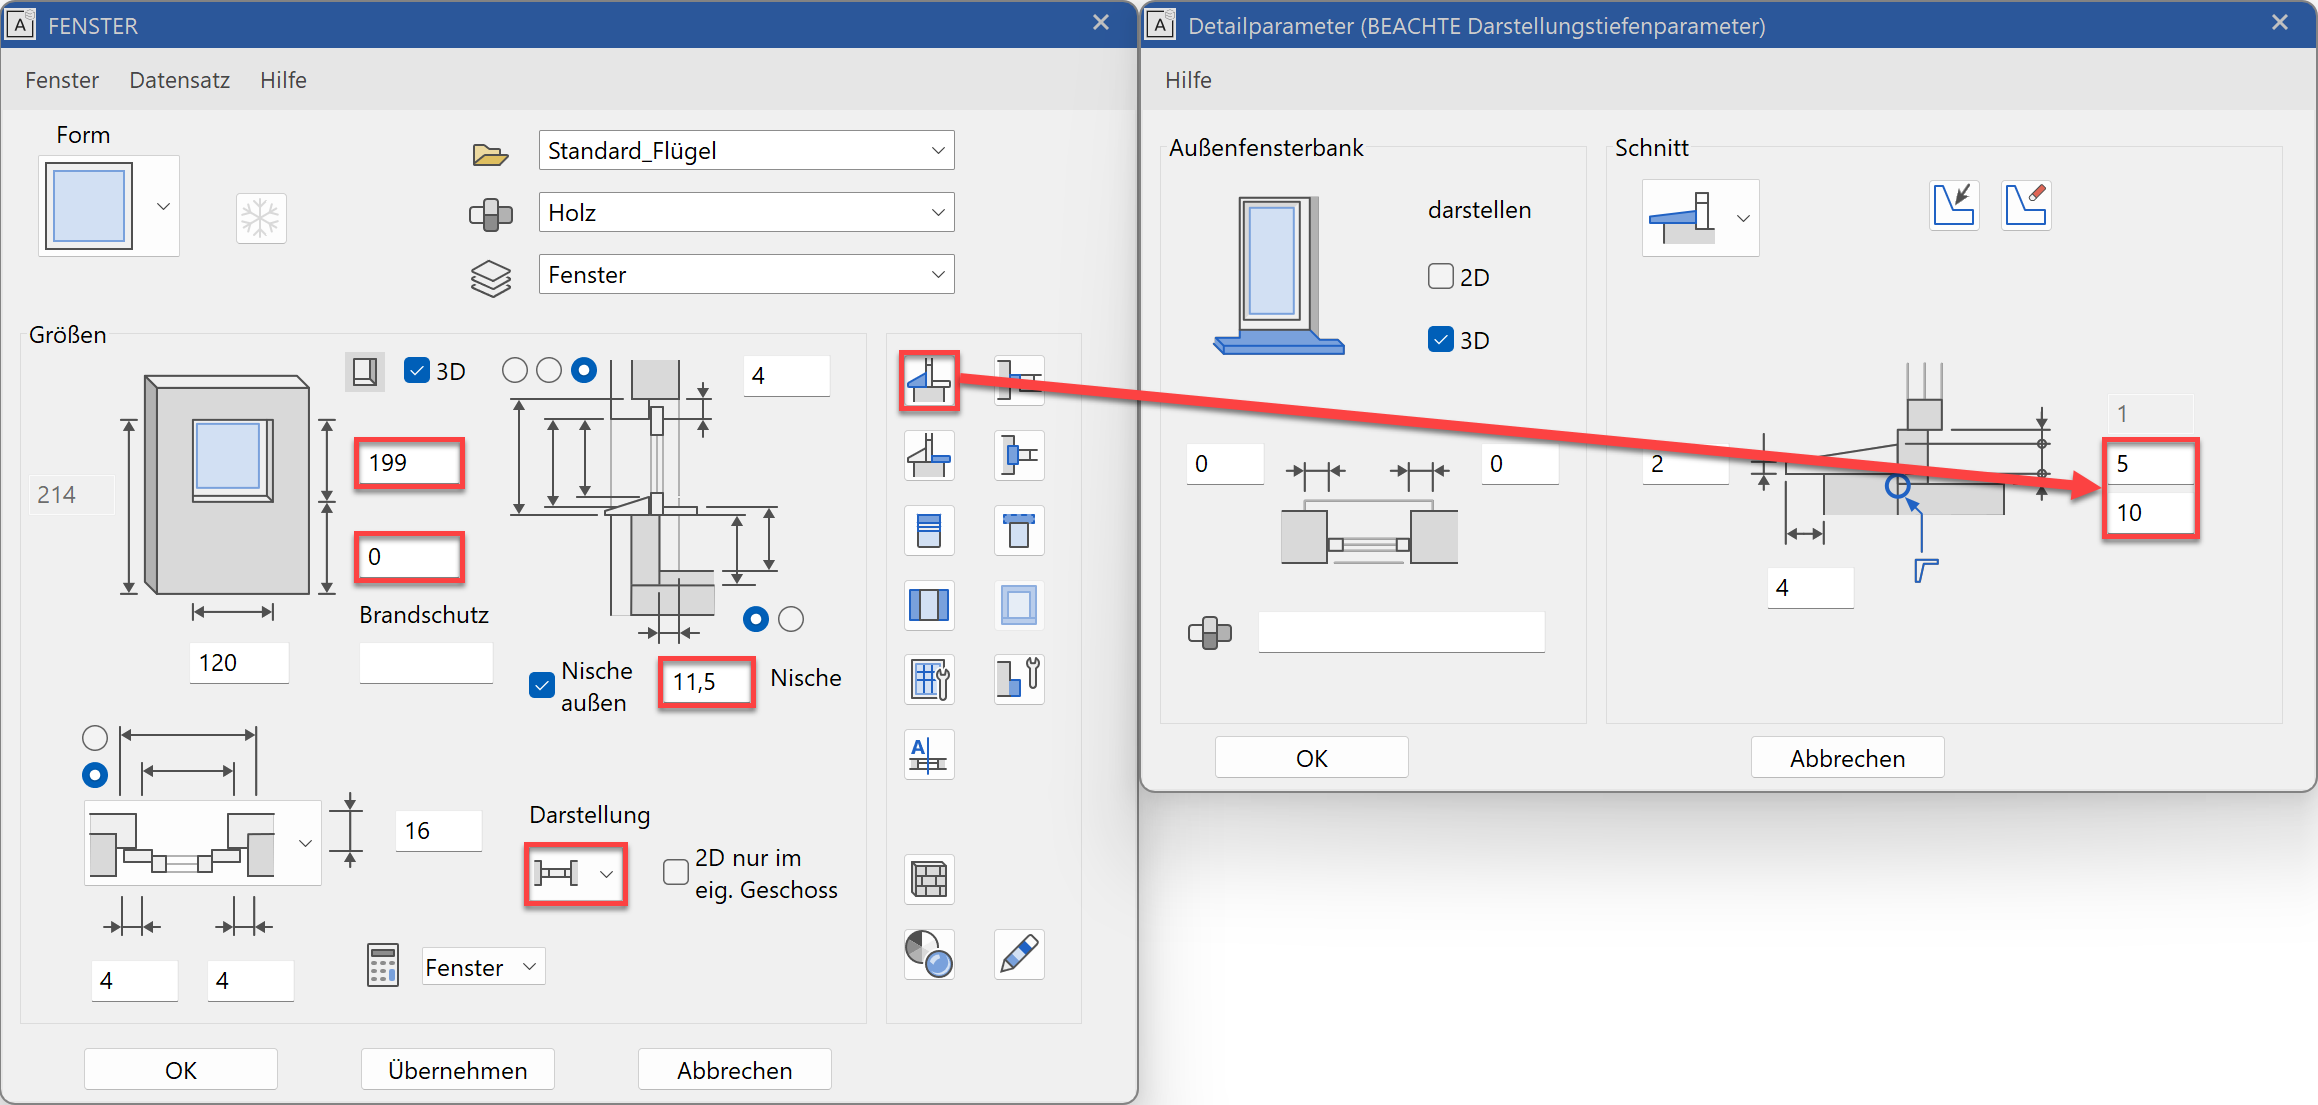
- Give the window a stop, set the width to 4 and the depth to 16 and change the "measurement point" to “Finished clearance”, then switch to the "Stop detail editor" and activate all stops. Close the “Stop detail editor” with
 .
.
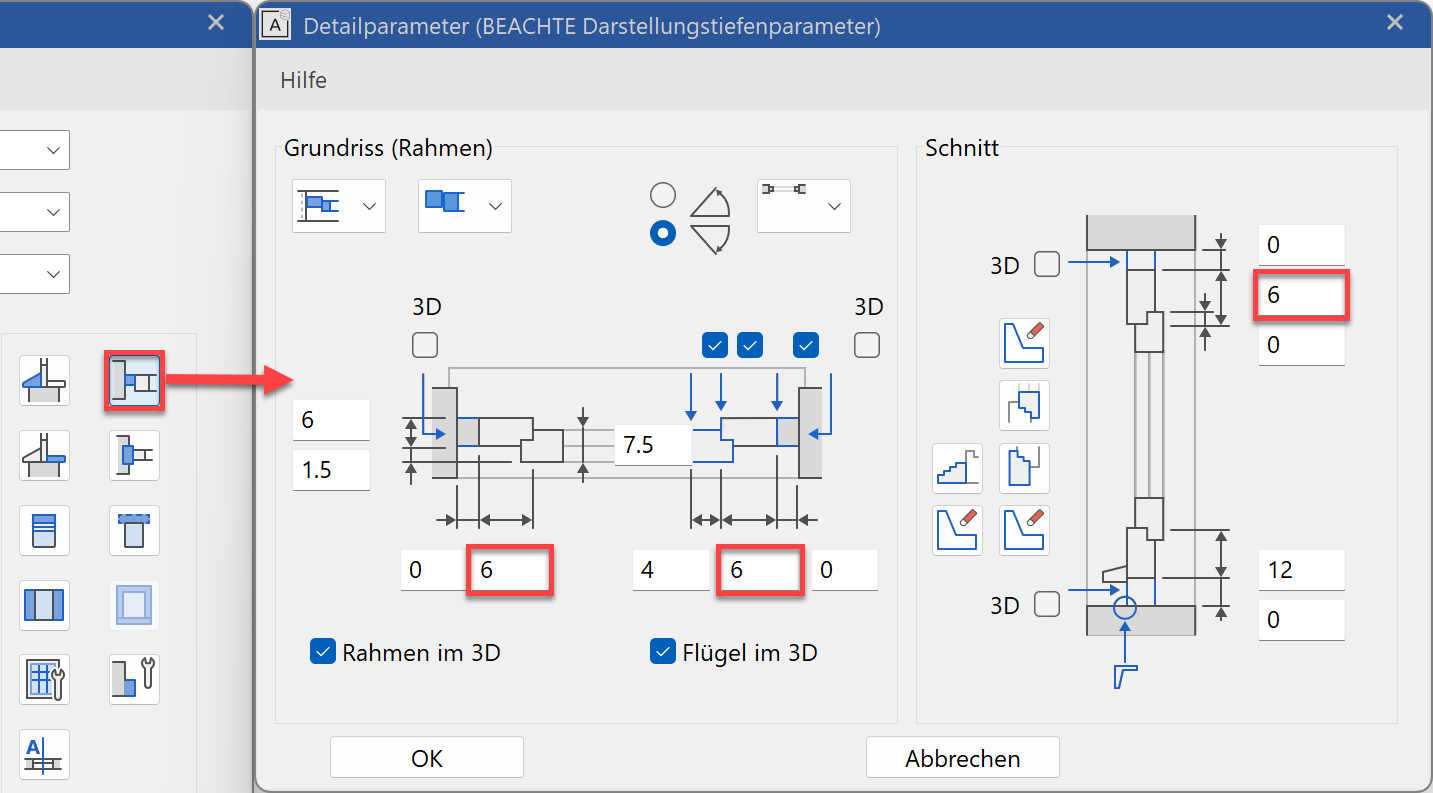
- Open the frame parameters and change the frame thickness at the side and top to 6 cm. Confirm with .
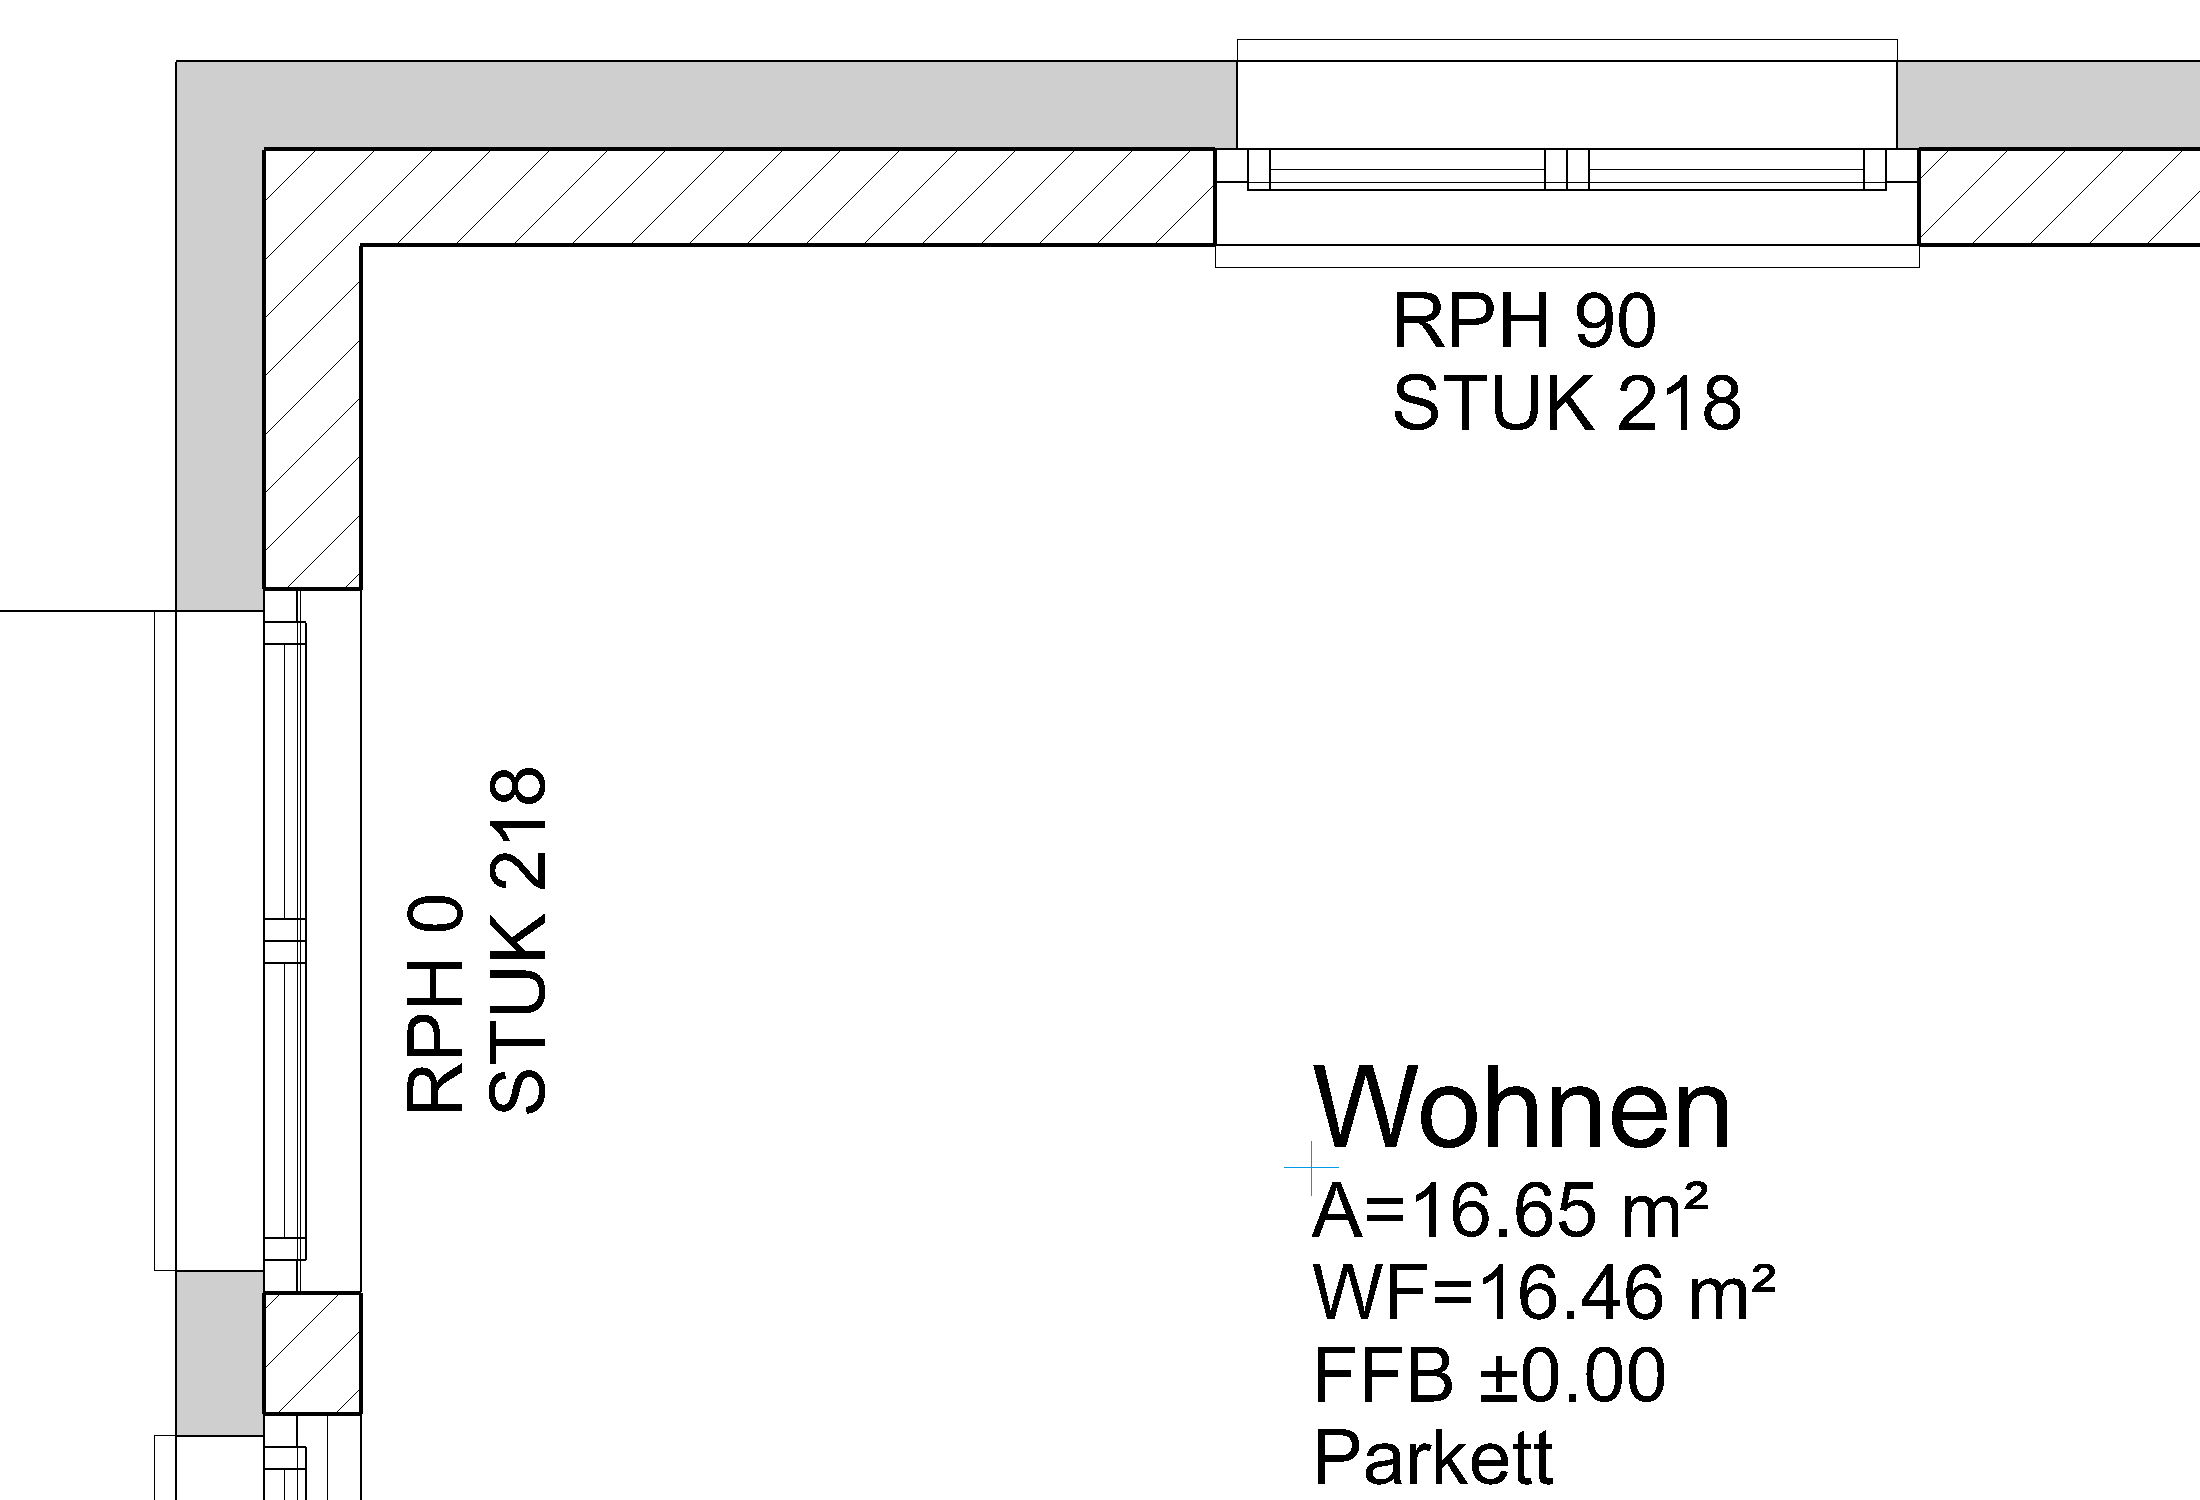
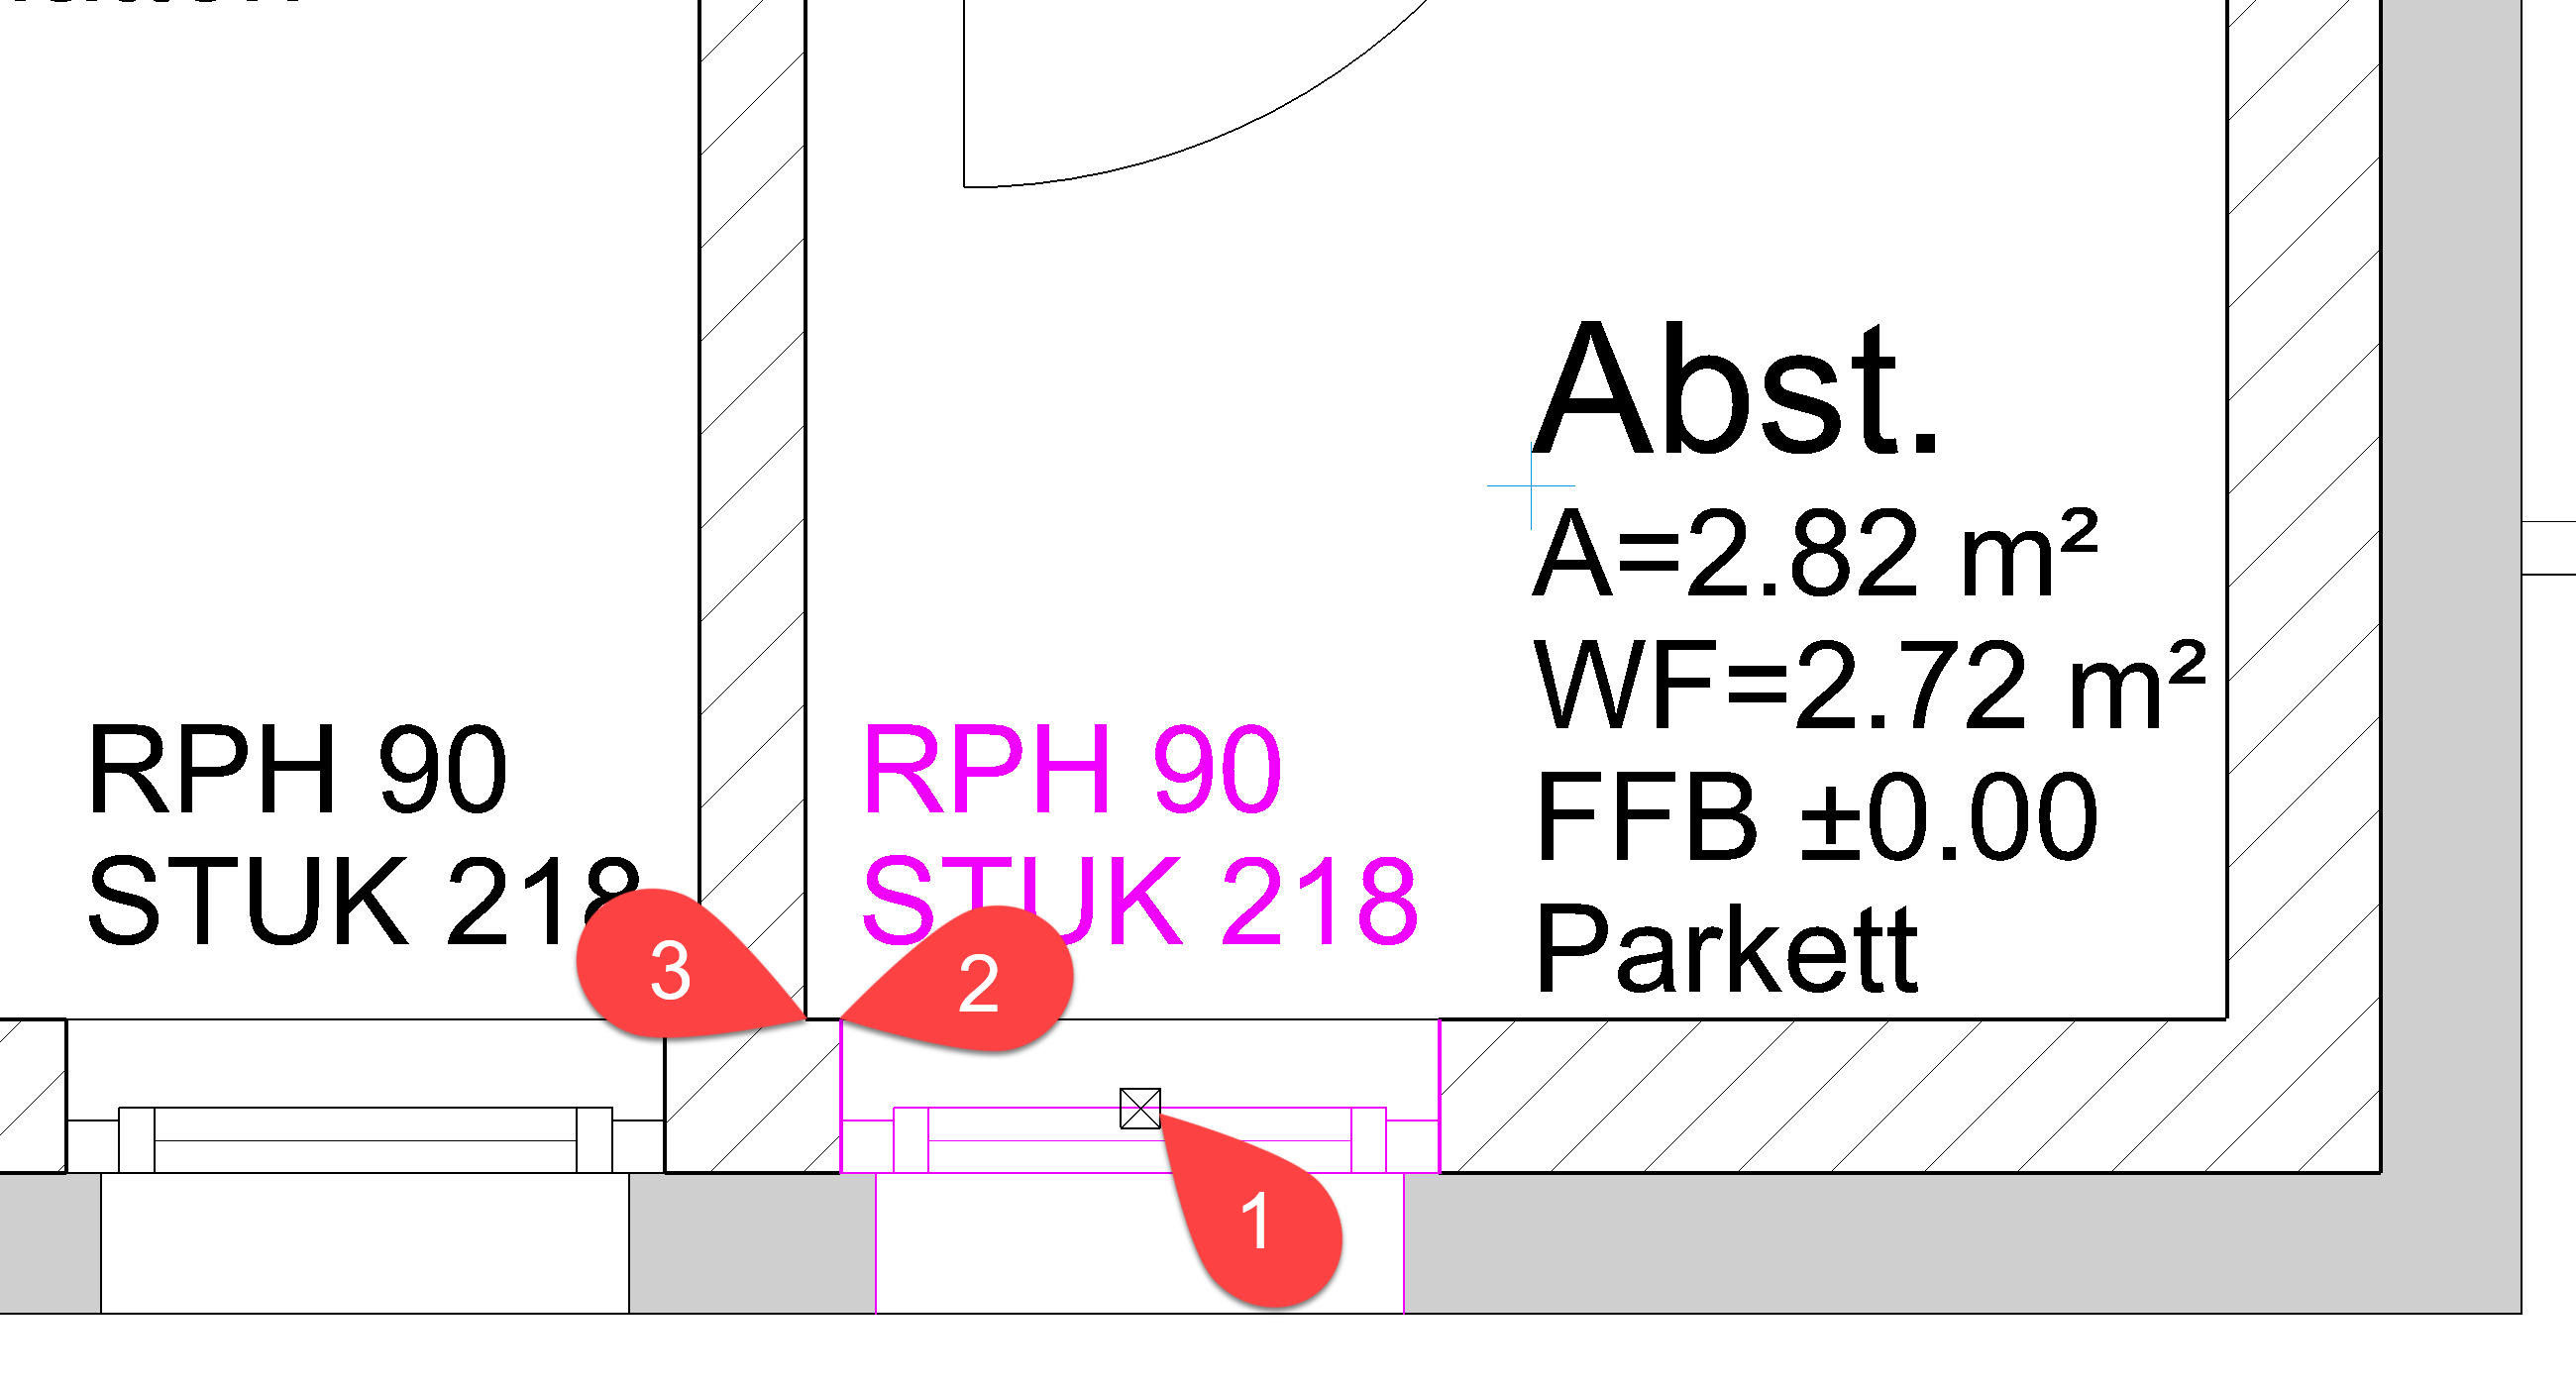
The floor plan and geometry lines are shown in the model. The corrected depiction of the floor plan can be checked in the plan view in print mode (shortcut key code: Ctrl+K).
Model Floor plan 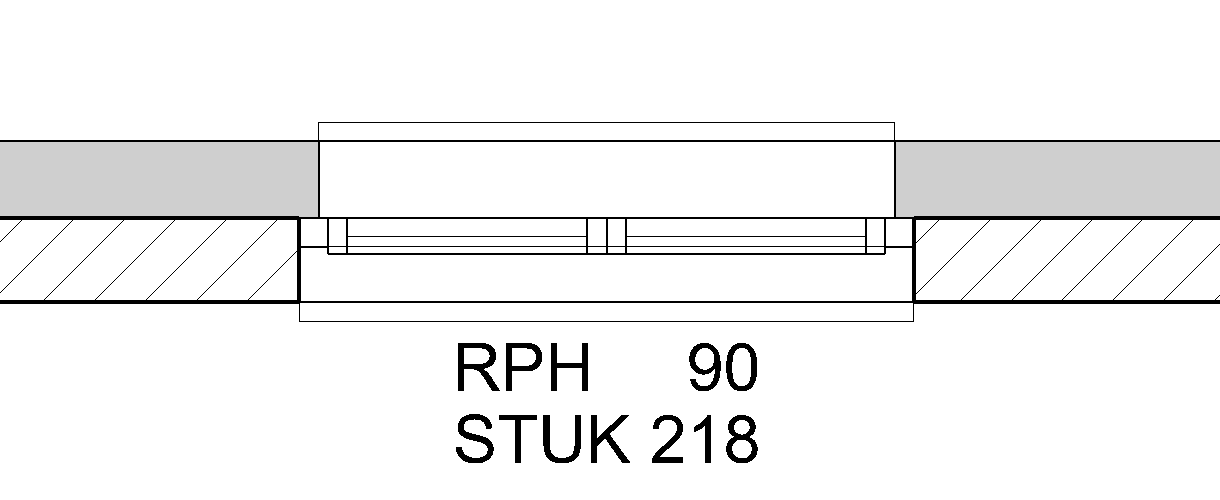

Explanation
In the "Stop detail editor", even more detailed setting for the stop can be determined.
![]()
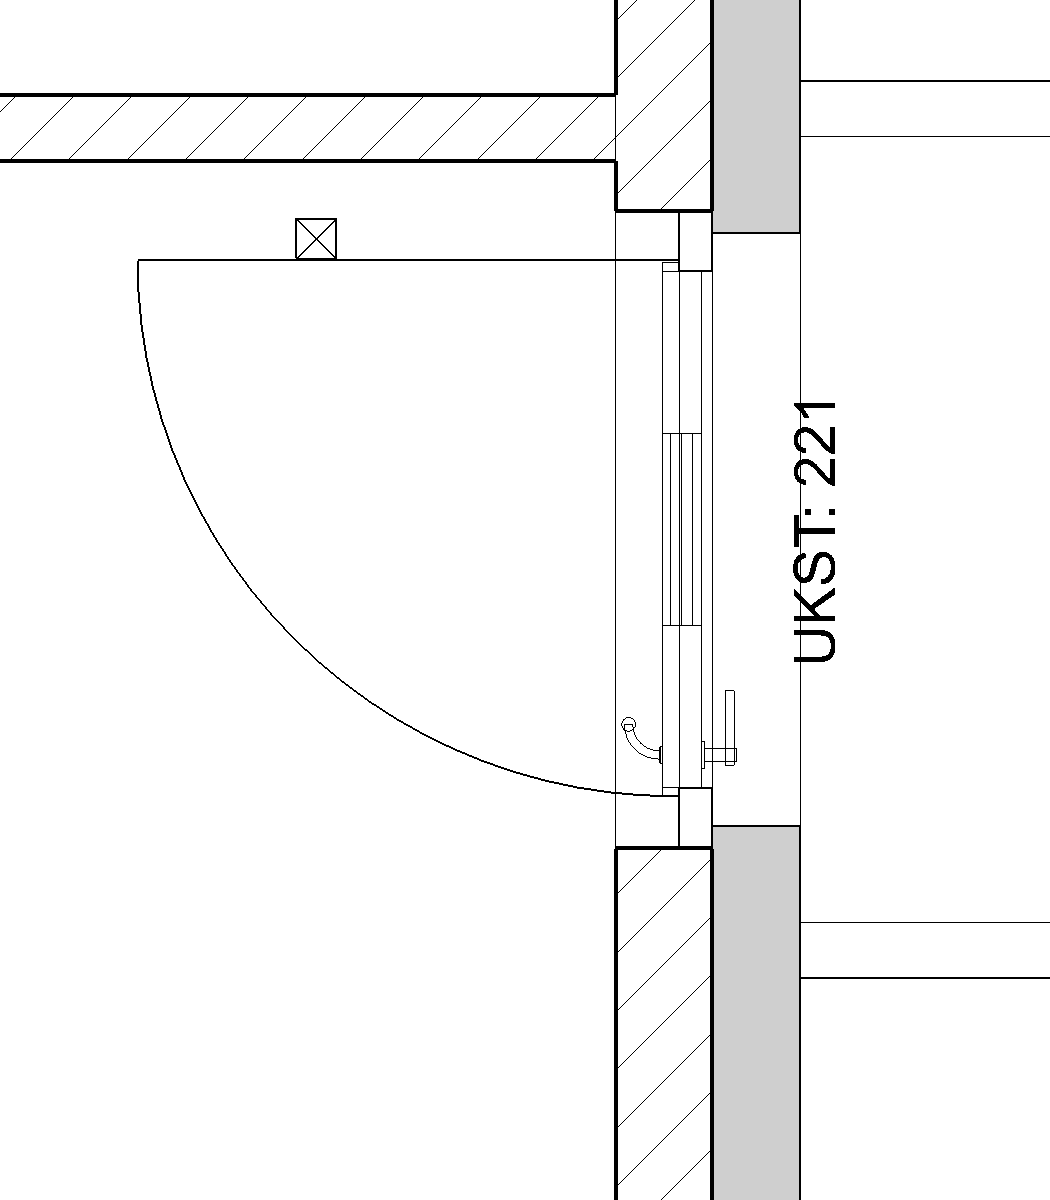
Modify door stop
Workshop
- Select the kitchen doors.

- Check whether the "fixed point" is in the correct place.
After it is selected, the "fixed point" is indicated by a handle and can if necessary be dragged to the correct position.

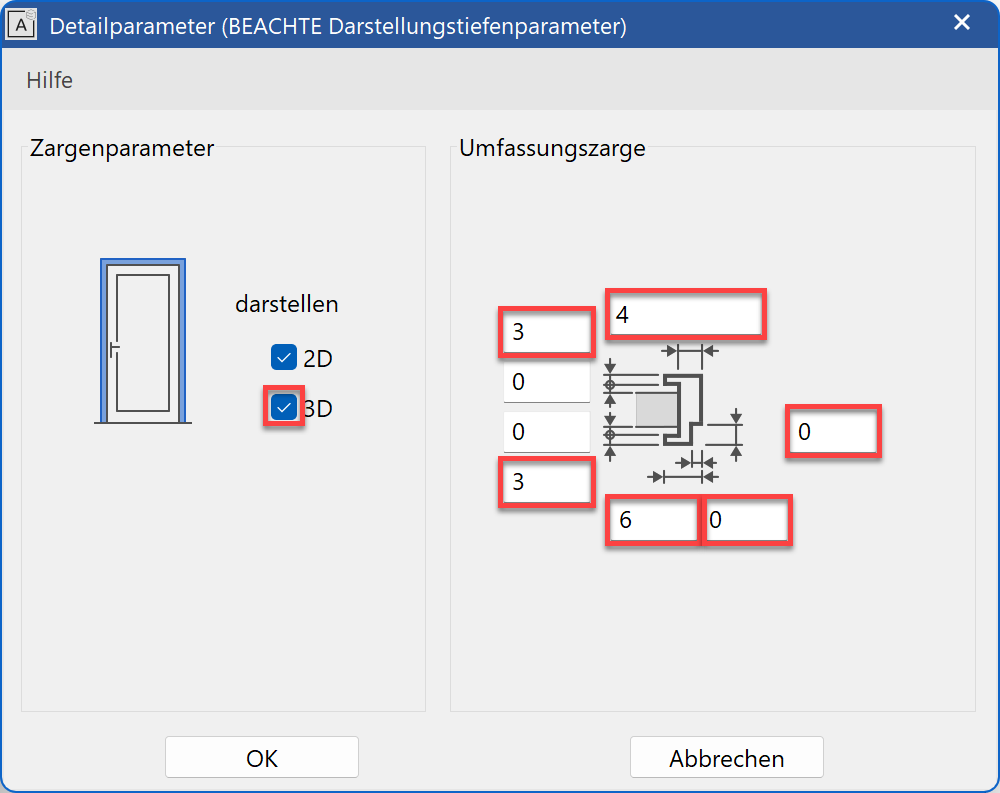
- Change the door jamb type to "Embracing jamb" and then open the "Door jamb parameters".

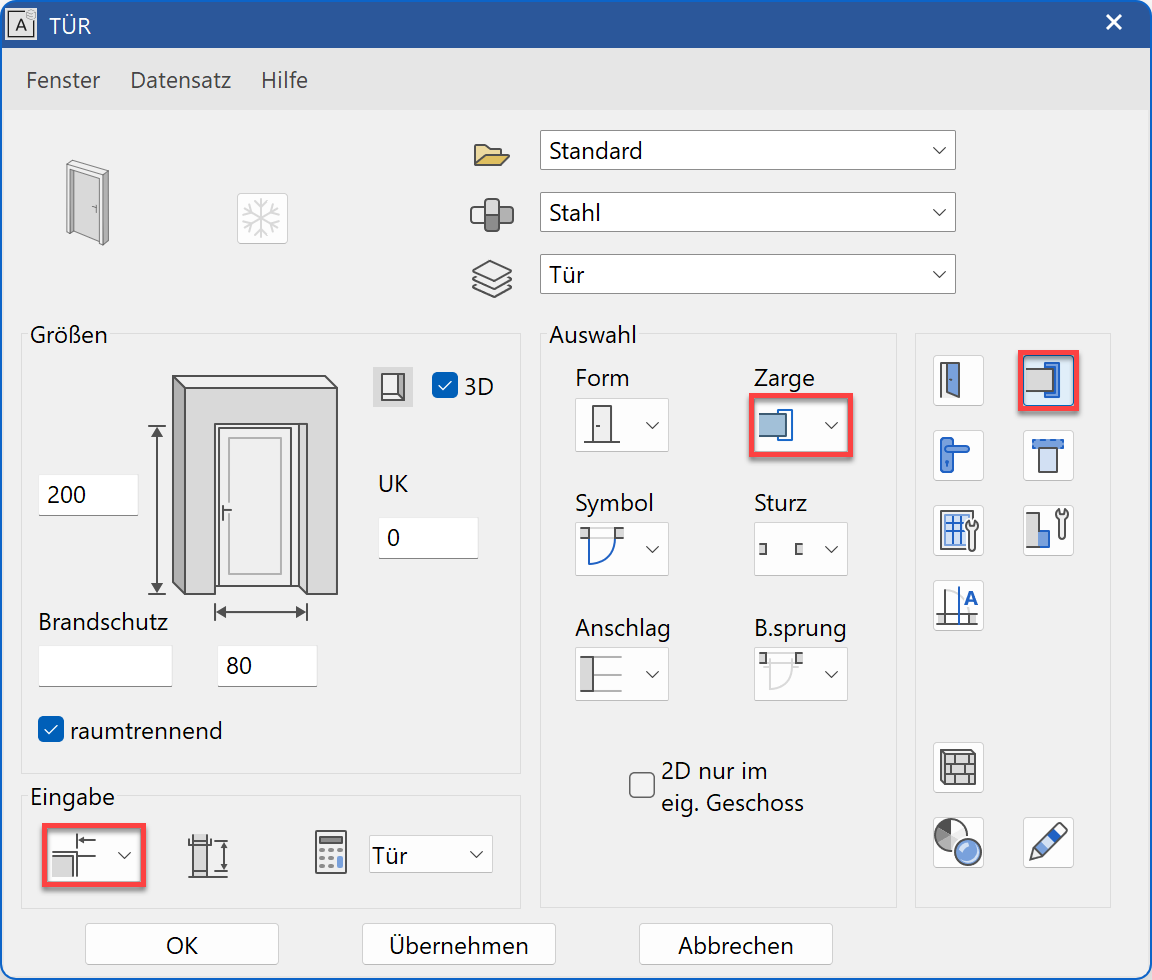
- Change the settings for the "Embracing jamb" as shown and close both door dialogs.
For display of doors, the same applies as for windows. The depiction in the model is not updated.
Model Floor plan 

Set doors with stop
Since, in the work drawing, the outside doors also have a stop, it is advisable to re-set them.
Workshop
- The outside door must first be deleted.
Select the door, which is most easily done by selecting the door leaf, and delete it by using the function DELETE or by pressing the Del key.


- Start the function CREATE DOORS and open the parameter dialog from the property bar.

- Select the record Entry door 1 and change the rest of the values. Switch to the stop editor of the doors.
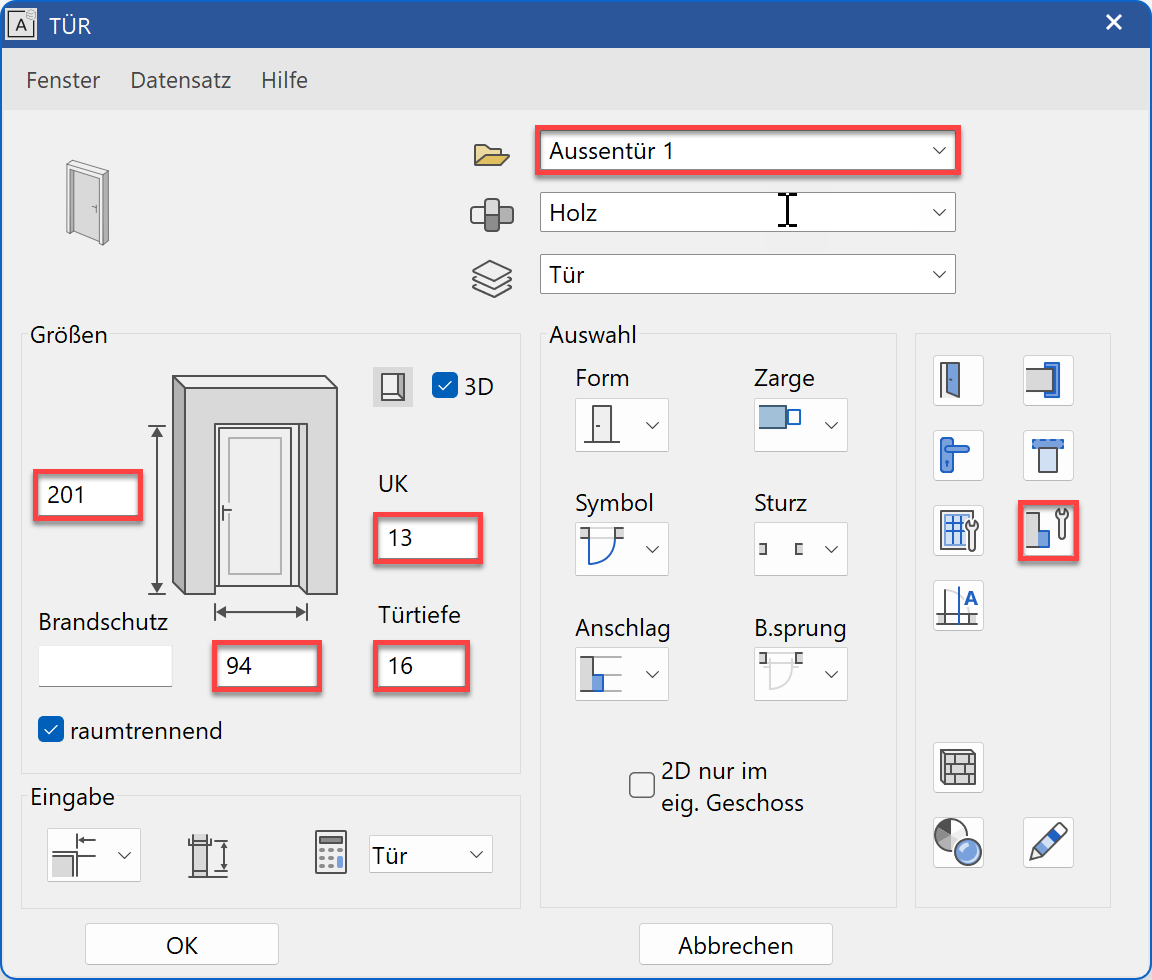
- Set the stop to one side and above at 10 cm. No preview will be displayed because the wall function is not yet known.
- Set the doors into the middle of the exterior wall. Click again to determine whether the door opens inwards or outwards.
Transfer the parameters of the doors
The parameter settings of the modified components can now be transferred globally to all others.
Workshop
- Select the function COPY PARAMETERS.

- Click on the kitchen door you created earlier and from which the parameters are to be transferred. The parameters cannot be transferred to all doors (outside door, garage door, sliding door) meaning that you have to make a selection. The parameters may only be transferred to doors that are 80 cm wide and 200 cm high.
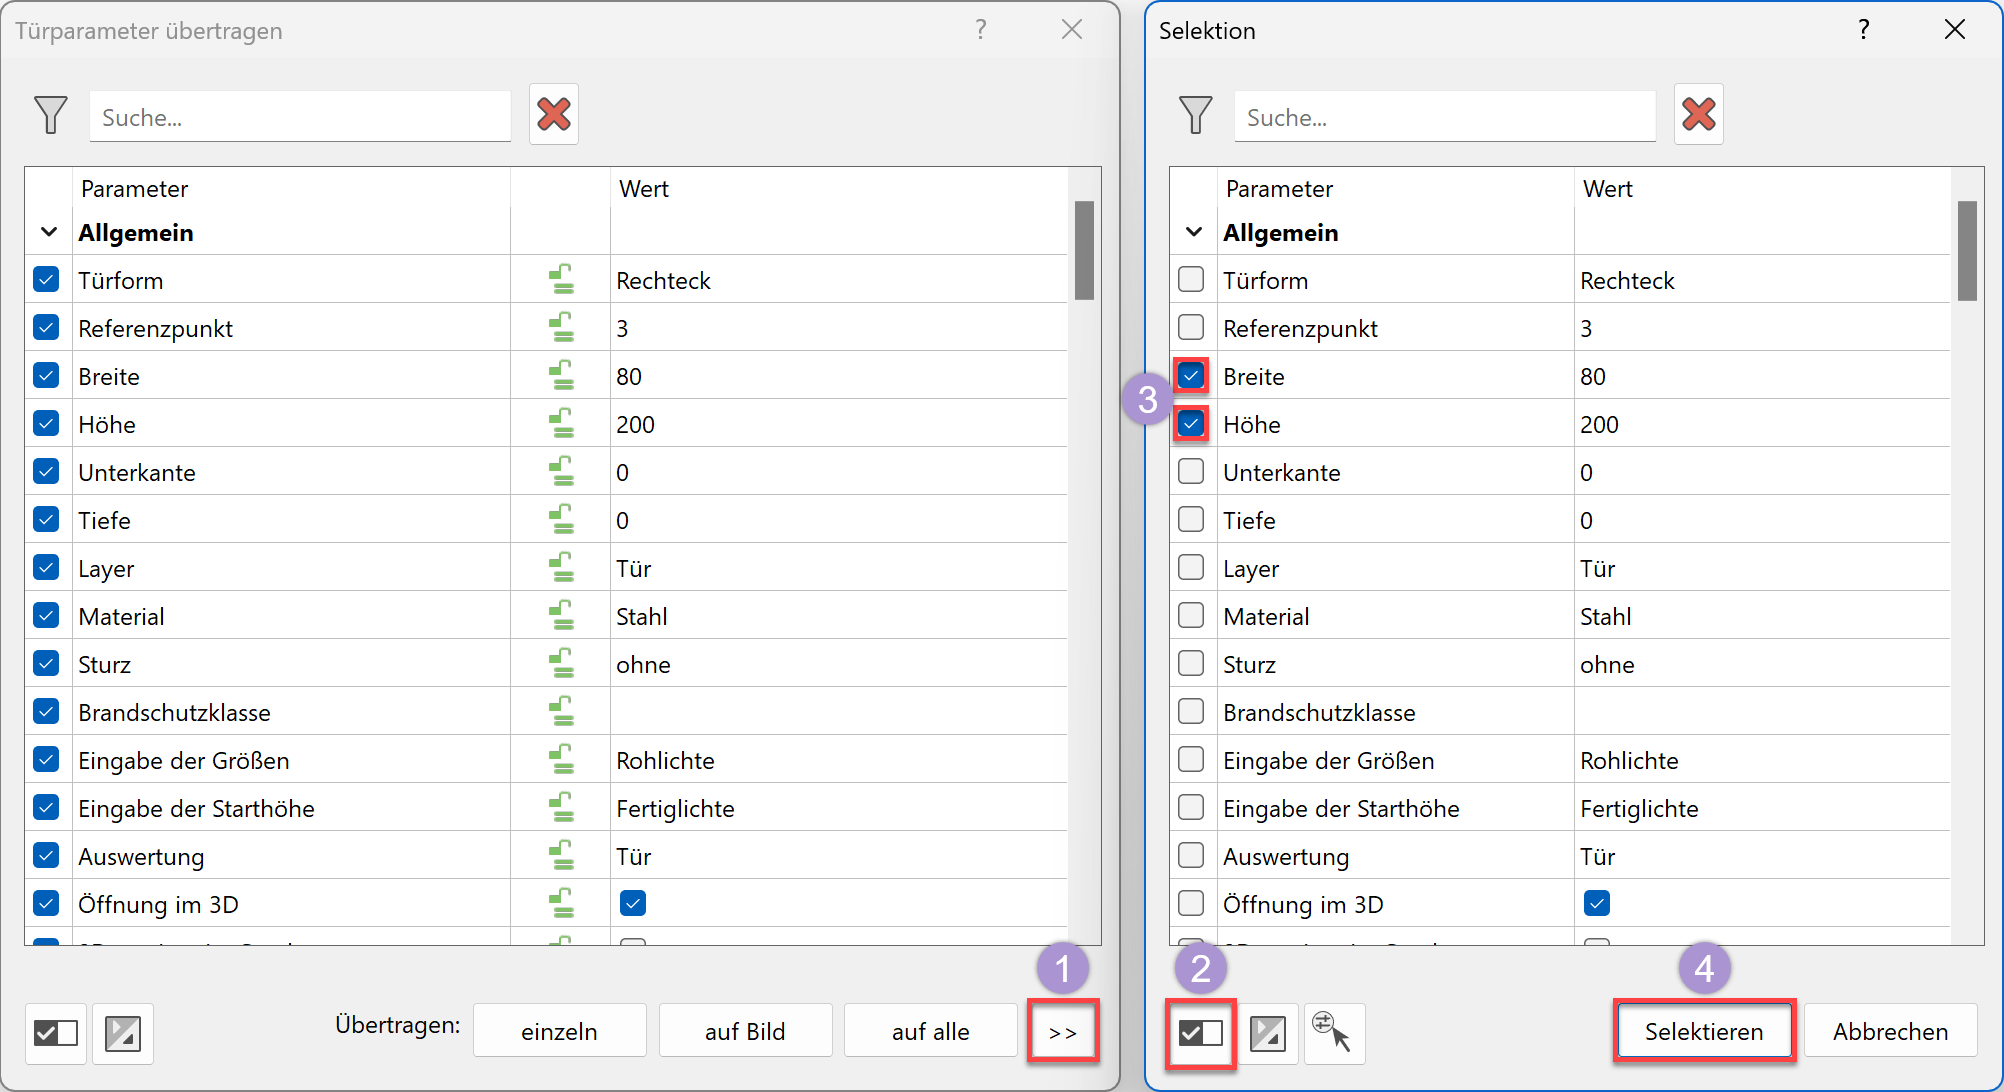
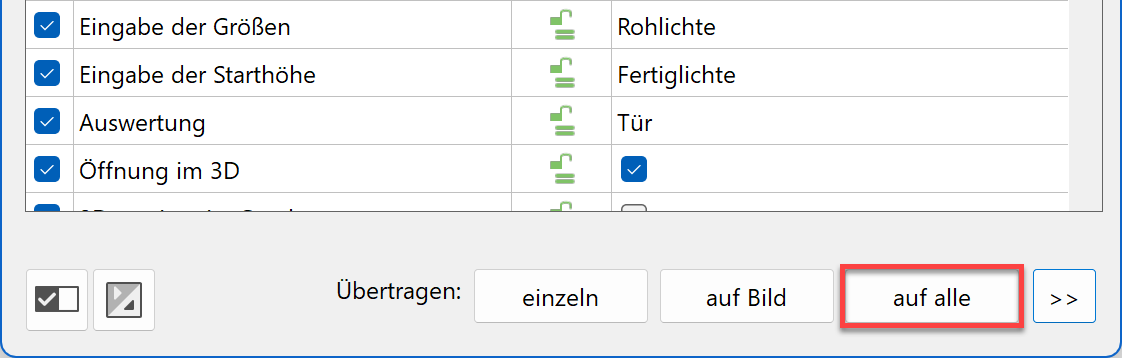
- Thanks to the selection the parameters can now be transferred to all. Compared to on image this also includes the doors of the basement and of the top floor not displayed.
Transfer the parameters of the windows
Workshop
- Make the top floor visible as well.

- Select the function TRANSFER PARAMETERS.
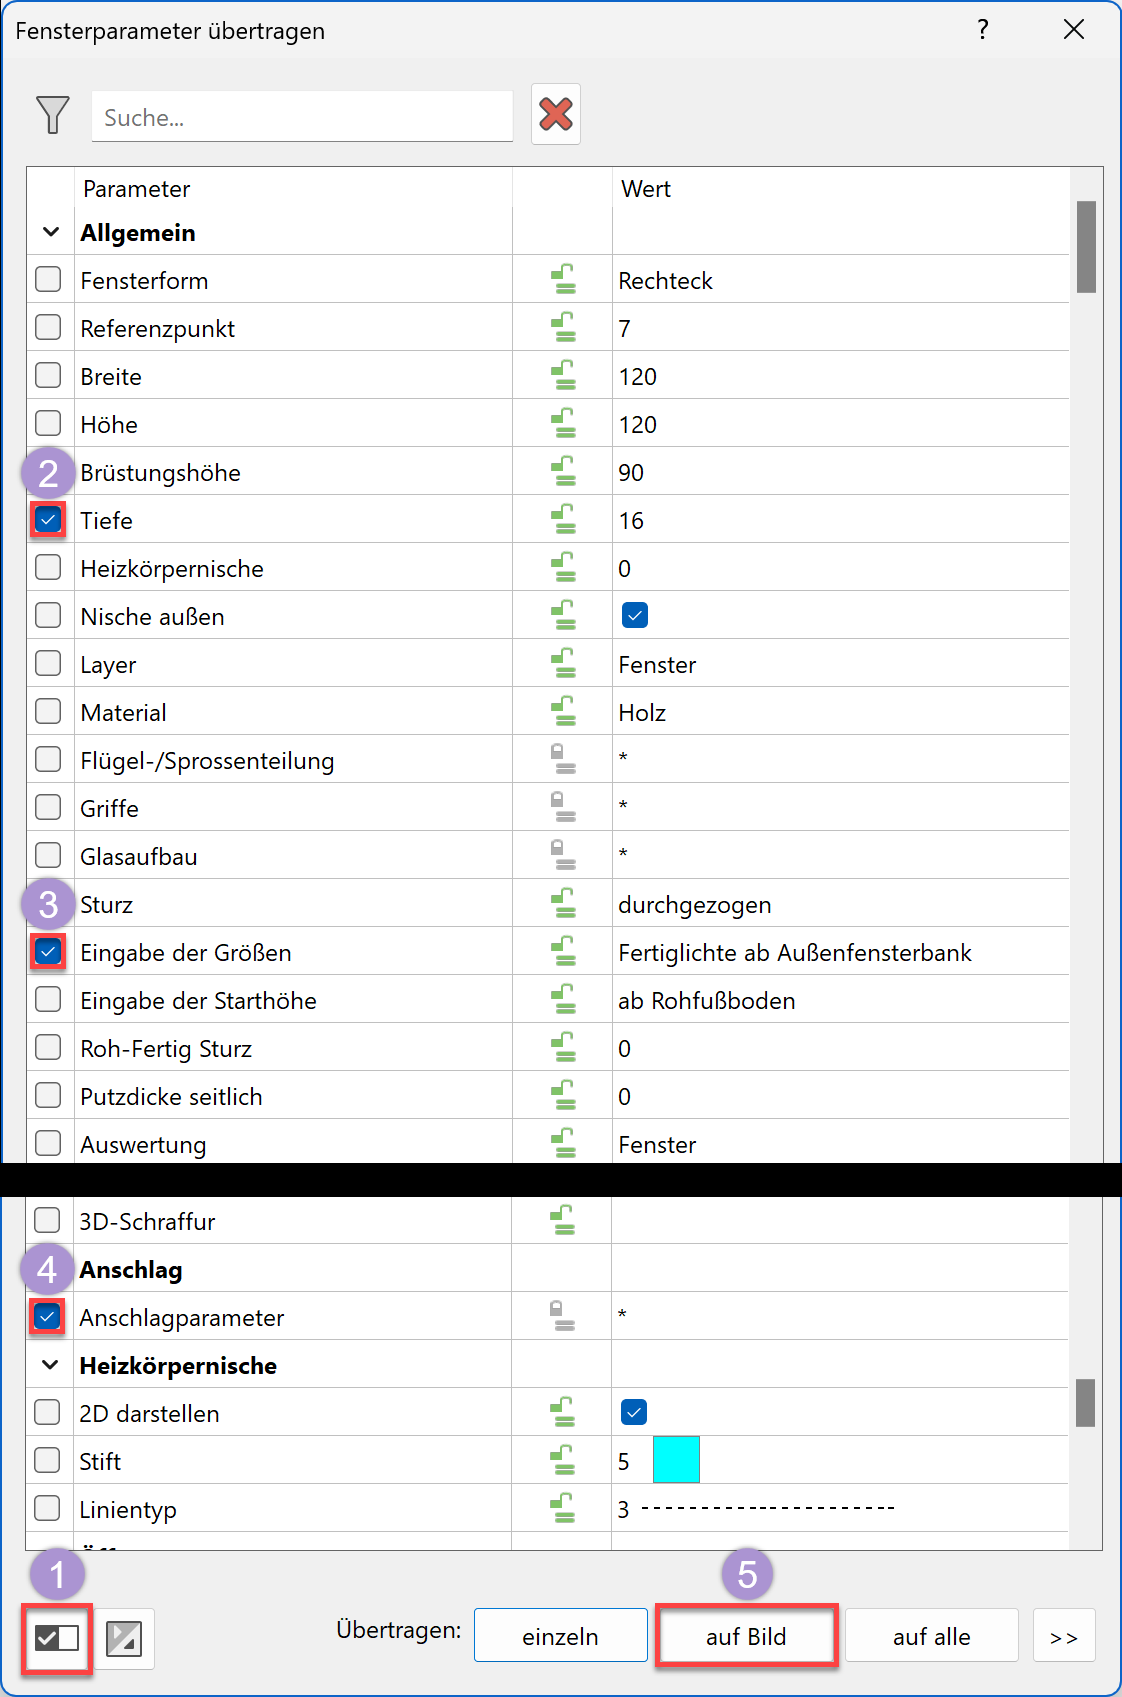
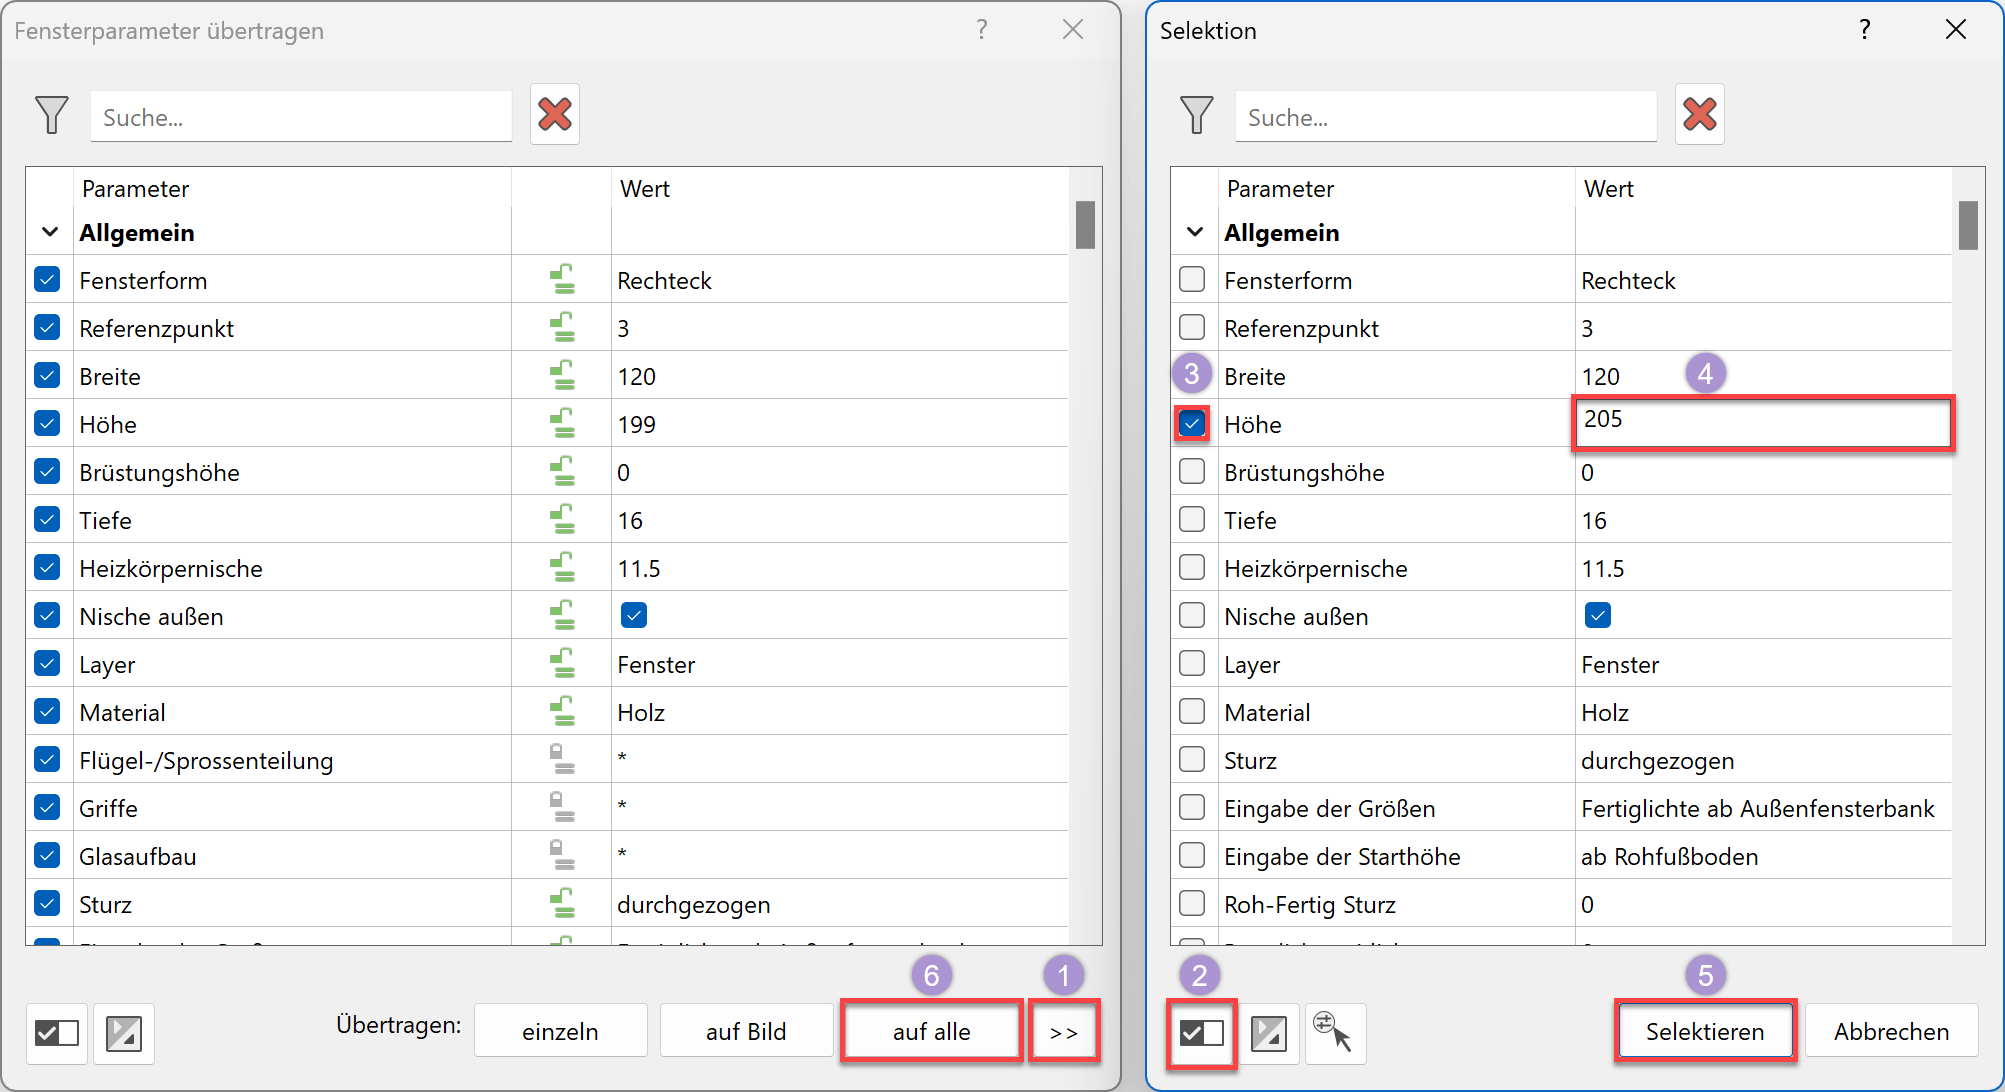
- Click on the window in the living area modified previously. Not all values may be transferred because the windows differ in size or are divided in different ways. Activate the window depth, enter dimensions, the values of the frame (except frame width below) and the stop parameter. Transfer the values on image (to all visible objects) > the basement windows must not be affected.
- The recess depth of the window doors no longer matches the new wall construction. The lintel height if the window doors should be the same as the regular windows.

- Modify a window door. The height, the recess depth and the depiction need to be adjusted. Also check the setting for the outer window sill.
- Now transfer these values to all window doors. You can select the window doors according to their height and width.
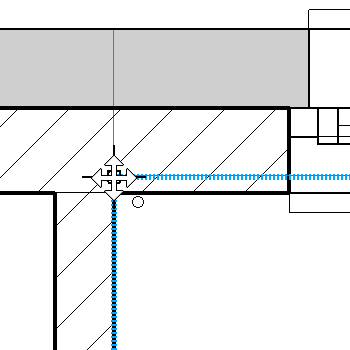
Move window
The addition of the stop for the windows causes the position of the windows to be changed. To move an object, you can use either the manipulation function MOVE SELECTION or the handles. View the advantages and disadvantages in the workshop.
Workshop
- Switch to the plan view GF.
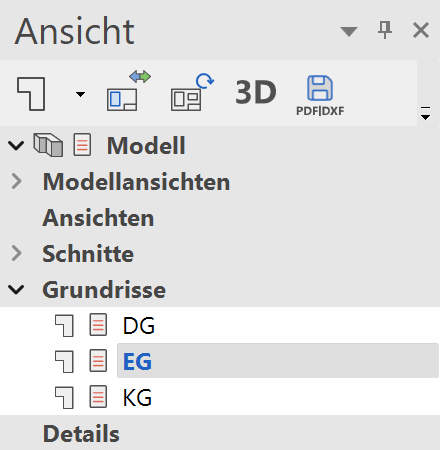
- The two windows in the rooms Bathroom and Cupboard must be corrected.
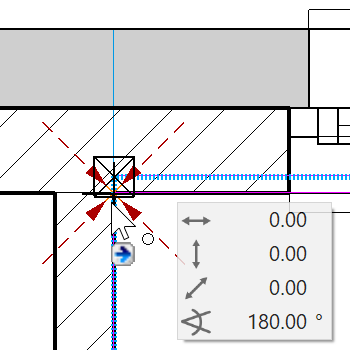
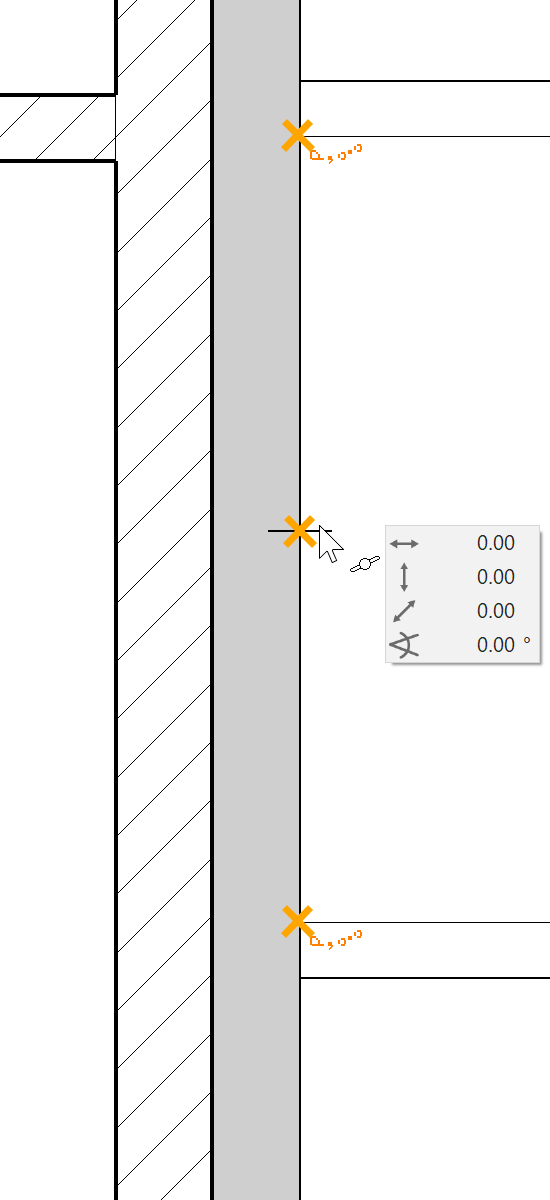
With the mouse, select the window in the Cupboard P1 and start the function MOVE SELECTION.

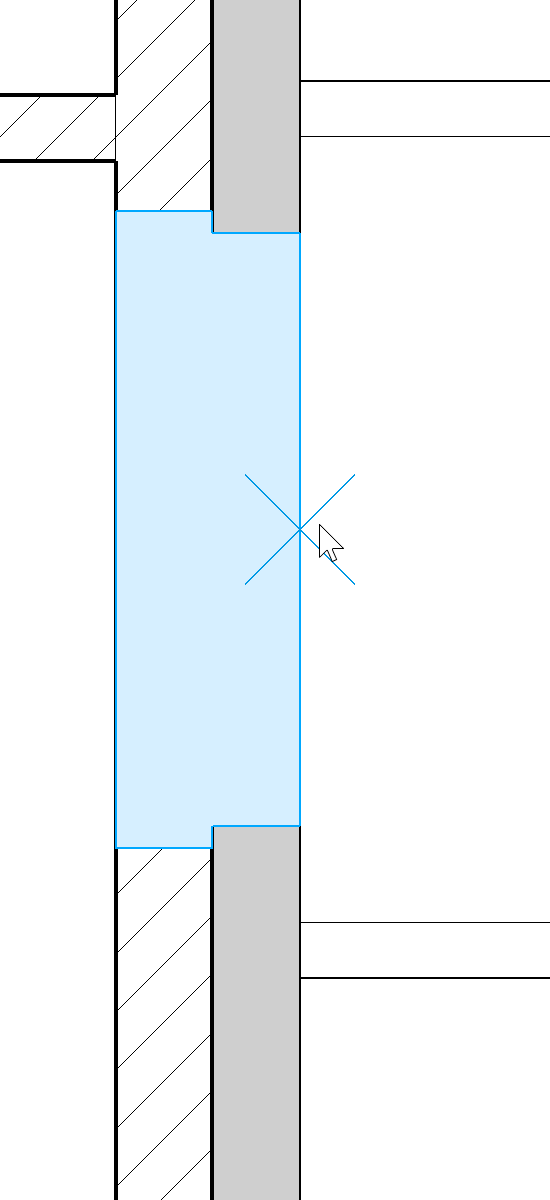
- The function allows you to use a freely selectable reference point. Click on the point P2 and drop the window at point P3.
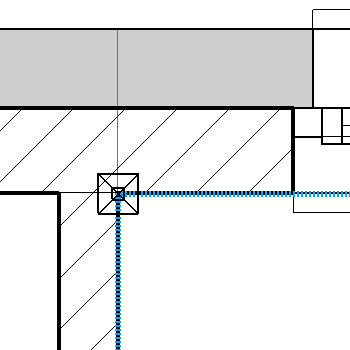
- End the function.
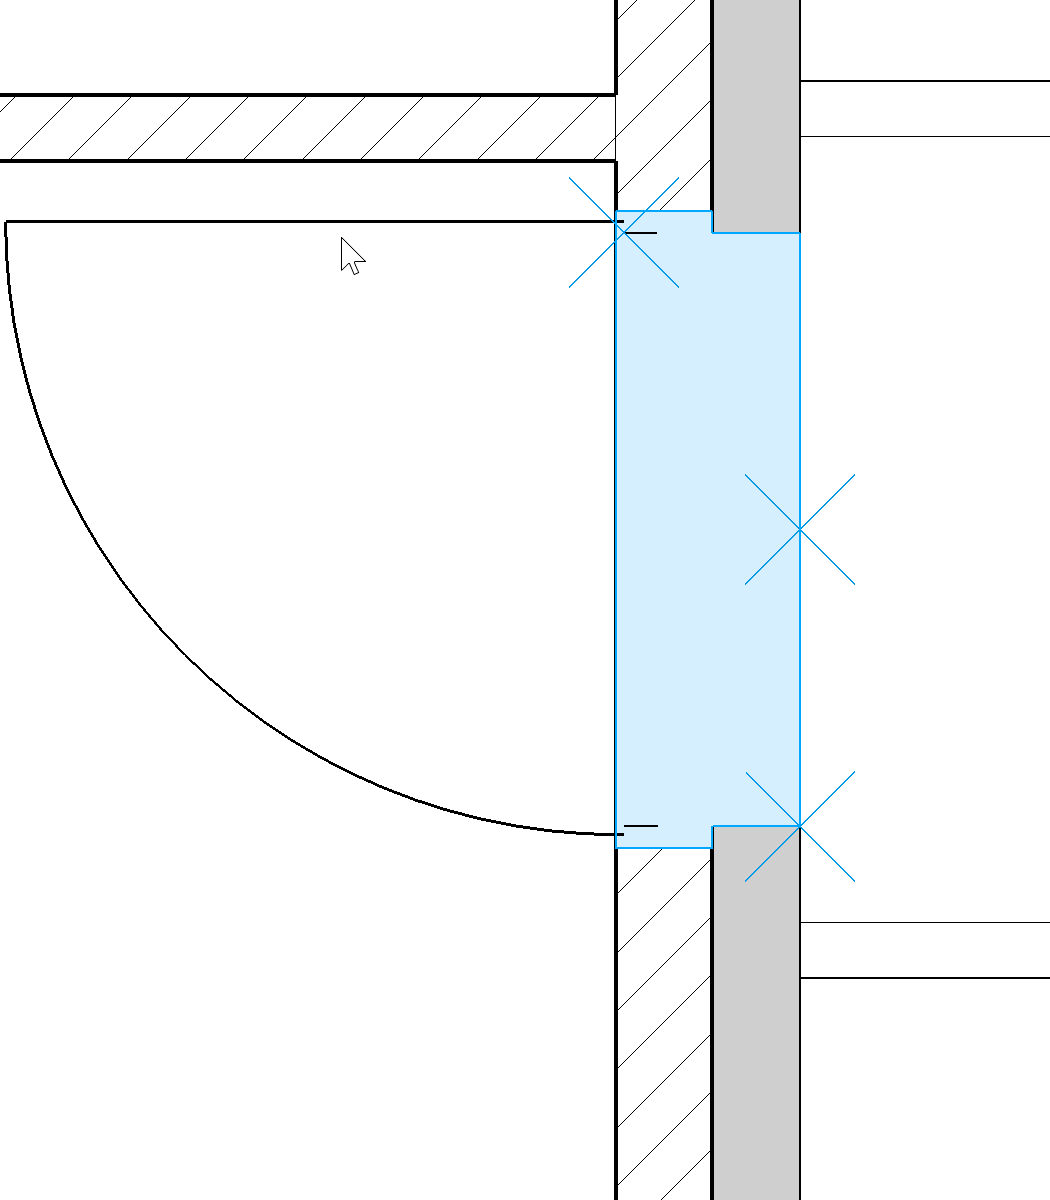
- Also move the window in the room Bathroom so that the window reveal is flush with the interior wall.
- Select window
- Function MOVE SELECTION
- Set reference point
- Move to new position
- Cancel function
- The function (Re)Draw walls recalculates all wall connections and removes superfluous lines. If 2 walls with the same material meet each other, the dividing line is removed.

Correct Stair
The stair landing must be adjusted to the new wall construction.
Workshop
- The staircase protrudes into the wall. Measure the value. To do so, open the measurement functions (context menu "Measure") and use the MEASURE VERTICAL function to measure the distance between the landing and the wall corner.

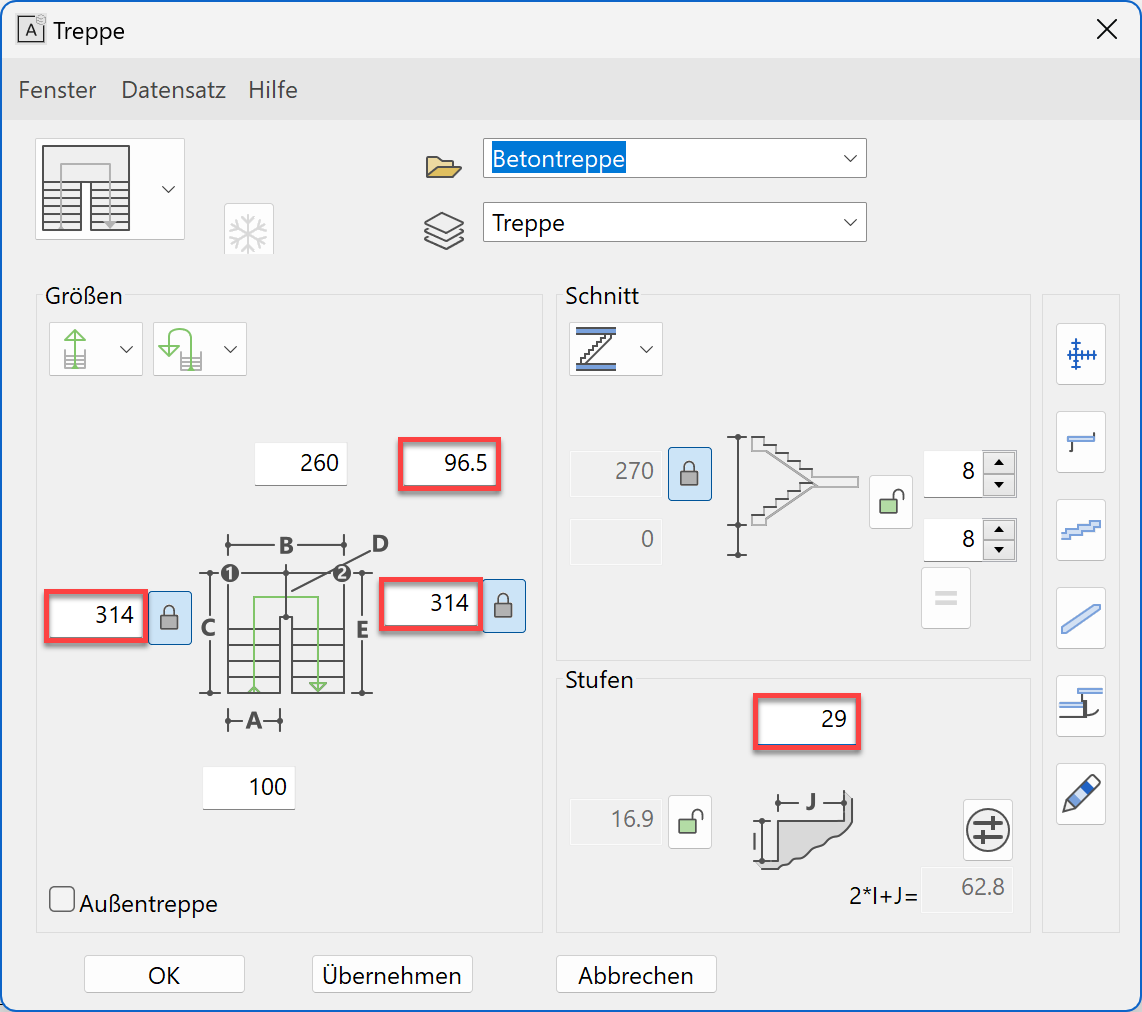
- The last step must be shortened by 3.5 cm. Select the stair and open the stair parameter dialog. Shorten the length of the flight of stairs and the length of the landing by 3.5 cm, change the rise width to 29 cm and assign the values.

- Select the stairs and move them with the handle to the corner of the wall.