Defining rotation objects
Rotation extrude
As soon as you select the DEFINE ROTATION EXTRUDE function, the properties bar appears.
![]()

In the case of rotation extrude definitions, the contour can also be open, but the contour must be in its own model. The axis of rotation must not lie within the contour to be rotated. This is not a problem outside or on the contour.
Define rotation extrude
Workshop
Draw a contour, then click on DEFINE ROTATION EXTRUDE and set the start angle to 0, the end angle to -180 and the colour to 2. For the position of the axis, click on points P1 and P2 and click on the contour.
 |
|
|---|---|
 |
 |
Several 3D definitions can even be created for the same contour.
Then simply click again on DEFINE ROTATION EXTRUDE and set the start angle to 80, the end angle to 100 and the colour to 3.
Click once more on points P1 and P2 and click on the contour.
 |
|---|
 |
Tip
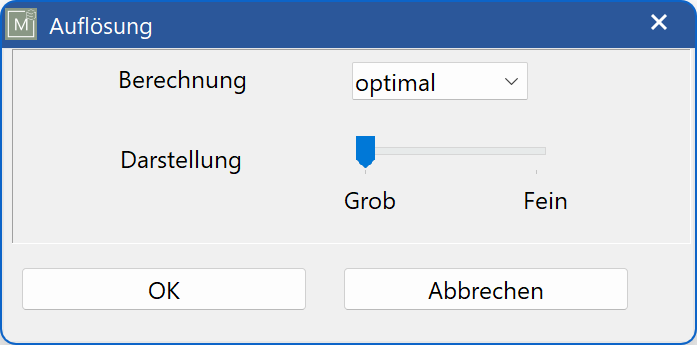
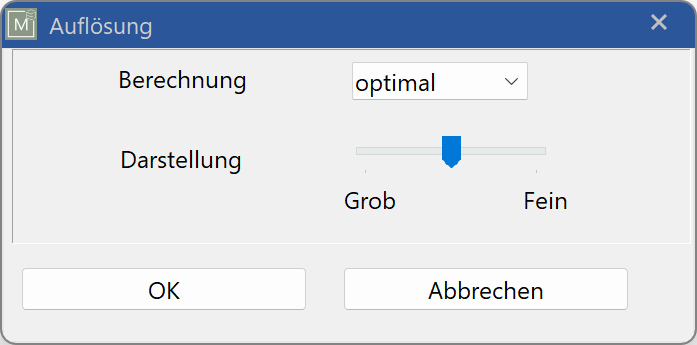
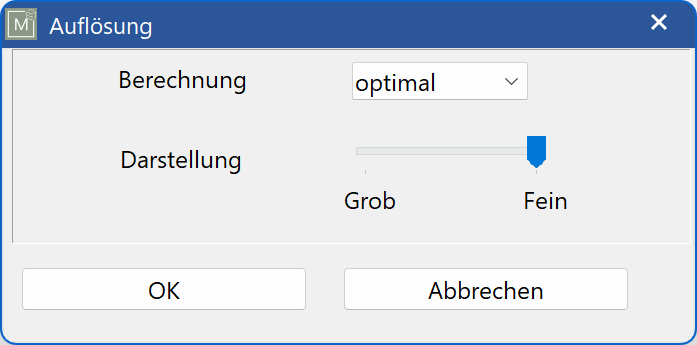
In the case of round parts with a large radius, whether defined with a box, extrude, rotation box, rotation extrude, etc., the resolution can be set too coarse. In this case you can adjust the resolution of the object in the property bar of the respective object with the function MODIFY RESOLUTION.
![]()
| Low | Default setting | Fine |
|---|---|---|
 |
 |
 |
 |
 |
 |
Rotation box
As soon as you select the DEFINE ROTATION BOX function, the properties bar appears.
![]()
 With rotation box definitions, the contour should be closed, the contour must be its own model. The axis of rotation must not lie within the contour to be rotated. This is not a problem outside or on the contour.
Define rotation box
Workshop
Draw a contour, then click on DEFINE ROTATION BOX and set the start angle to 0, the end angle to -180 and the colour to 2. For the position of the axis, click on points P1 and P2 and click on the contour.
|
|
|---|---|
 |
 |
Several 3D definitions can even be created for the same contour.
Then simply click again on DEFINE ROTATION BOX and set the start angle to 80, the end angle to 100 and the colour to 3.
Click once more on points P1 and P2 and click on the contour.
|
|---|
 |