Modify piping system
Improvements · 17 R1 · Improvements
Once the Routing line has been generated into a piping line, changes can be made to this. Piping elements can be added, modified or removed as needed.
Selection of piping
New · 17 R1 · Improvements
Clicking on a part of the routing line will select the individual element.
A second click will select the entire routing line with all elements.
A third click selects the routing line itself giving access to all handles.
| 2D | 3D | |
|---|---|---|
| 1st click |
 |
 |
| 2nd click |
 |
 |
| 3rd click |
 |
 |
Modifying the routing line
To modify the routing line, the third selection option from above is used. There are several options for handles that have different uses. There are handles for working in 2D, 3D or both at once. These options can be toggled using the Tab key.
| Type | Usage example |
|---|---|
2D |
 |
3D |
 |
combined |
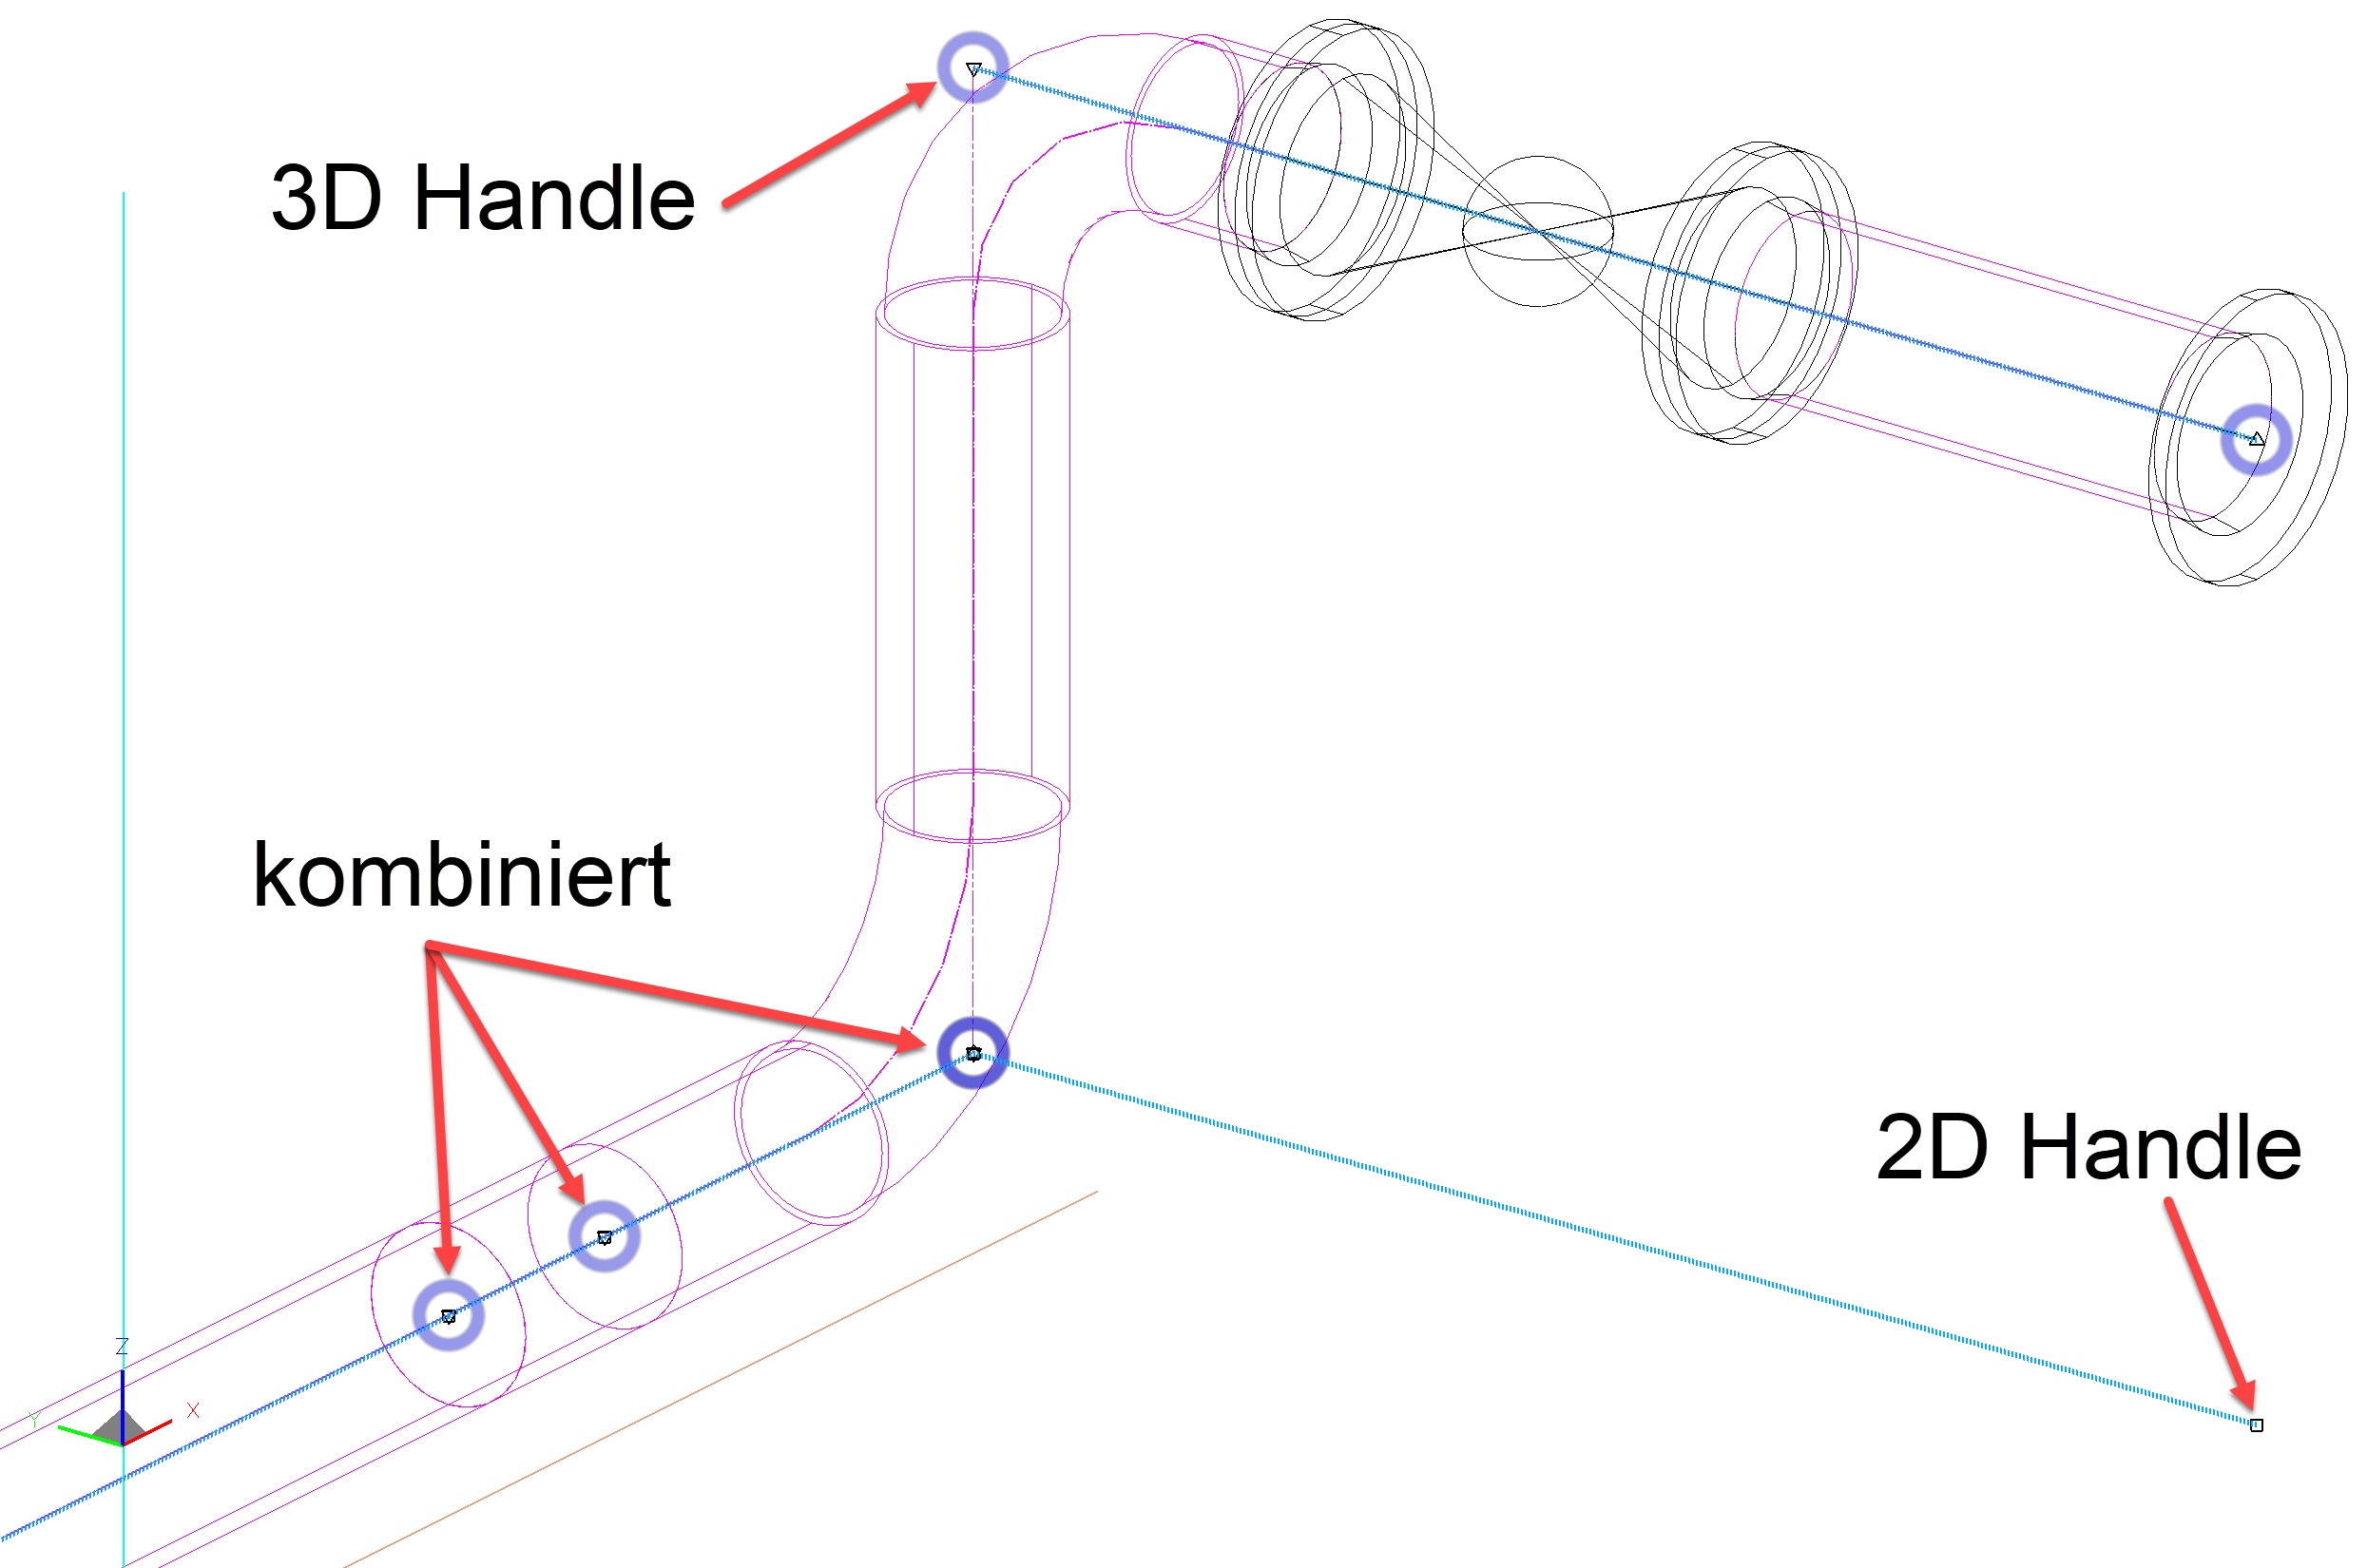 |
- This handle moves alone the work plane. It is useful for adjusting length of a pipe section or changing direction along the work plane.
- This handle moves only in the z-direction. It can move an entire section including all additional elements up or down.
- This handle is not actually a unique handle but rather two overlapping handles. Both actions can be done at that point but the 3D handle will always take precedent. If the 2D functionality is needed, then toggle to the 2D view to be able to access that handle.
Modifying a pipe
To modify a pipe, it needs to be selected (highlighted in magenta) and then the input fields can be edited from either the property bar or the parameter dialog.
Modifying the length or position is done as described above, by making alterations to the routing line.
Modify piping construction elements
When adding a piping construction element (such as an armature, flange, etc...) the addition is placed directly with a single click at the desired point along the routing line, it is then automatically added and rotated to the correct angle.
Tip
Should an element not adopt the correct angle automatically. Select the incorrectly placed, newly drawn element and then using the handles move it again to the routing line. This usually corrects it with the automated placing function. If it still does not work. It can manually be rotated as needed, though this is only in rare situations necessary.
Dimensioning
|
|
Piping toolbar |
This function can be used to change the dimensions of existing pipe systems.
Dimension property bar

When you select the function, the property bar appears where the parameters for the pipe can be adjusted.
| Function | Description |
|---|---|
 |
Standard of pipe |
 |
Kind of pipe |
 |
Series of pipe |
| Nominal diameter | |
| Outside diameter of pipe | |
| Wall thickness |