Rooms
Room label
Function DEFINE ROOM:
The function DEFINE ROOM sets the room label and the floor finish (3D) into the plan. In addition, various measurements of the room are calculated. These dimensions appear in the evaluation but can also be made visible in the room label.
Some values:
The room size is equal to the area within all of the adjacent walls.
The window area is the total of all windows that are entirely within the room.
Function ROOM SEPARATION:
Often rooms are defined not just within surrounding walls but are also separated by an imaginary line, e.g. living rooms and dining rooms.
The ROOM SEPARATION function can be used to draw a line that divides a room. The room dividing line must NOT be used to draw the entire outline of the room, but only where there are no walls. Any room-separating lines on or along a wall leads to errors.
Workshop
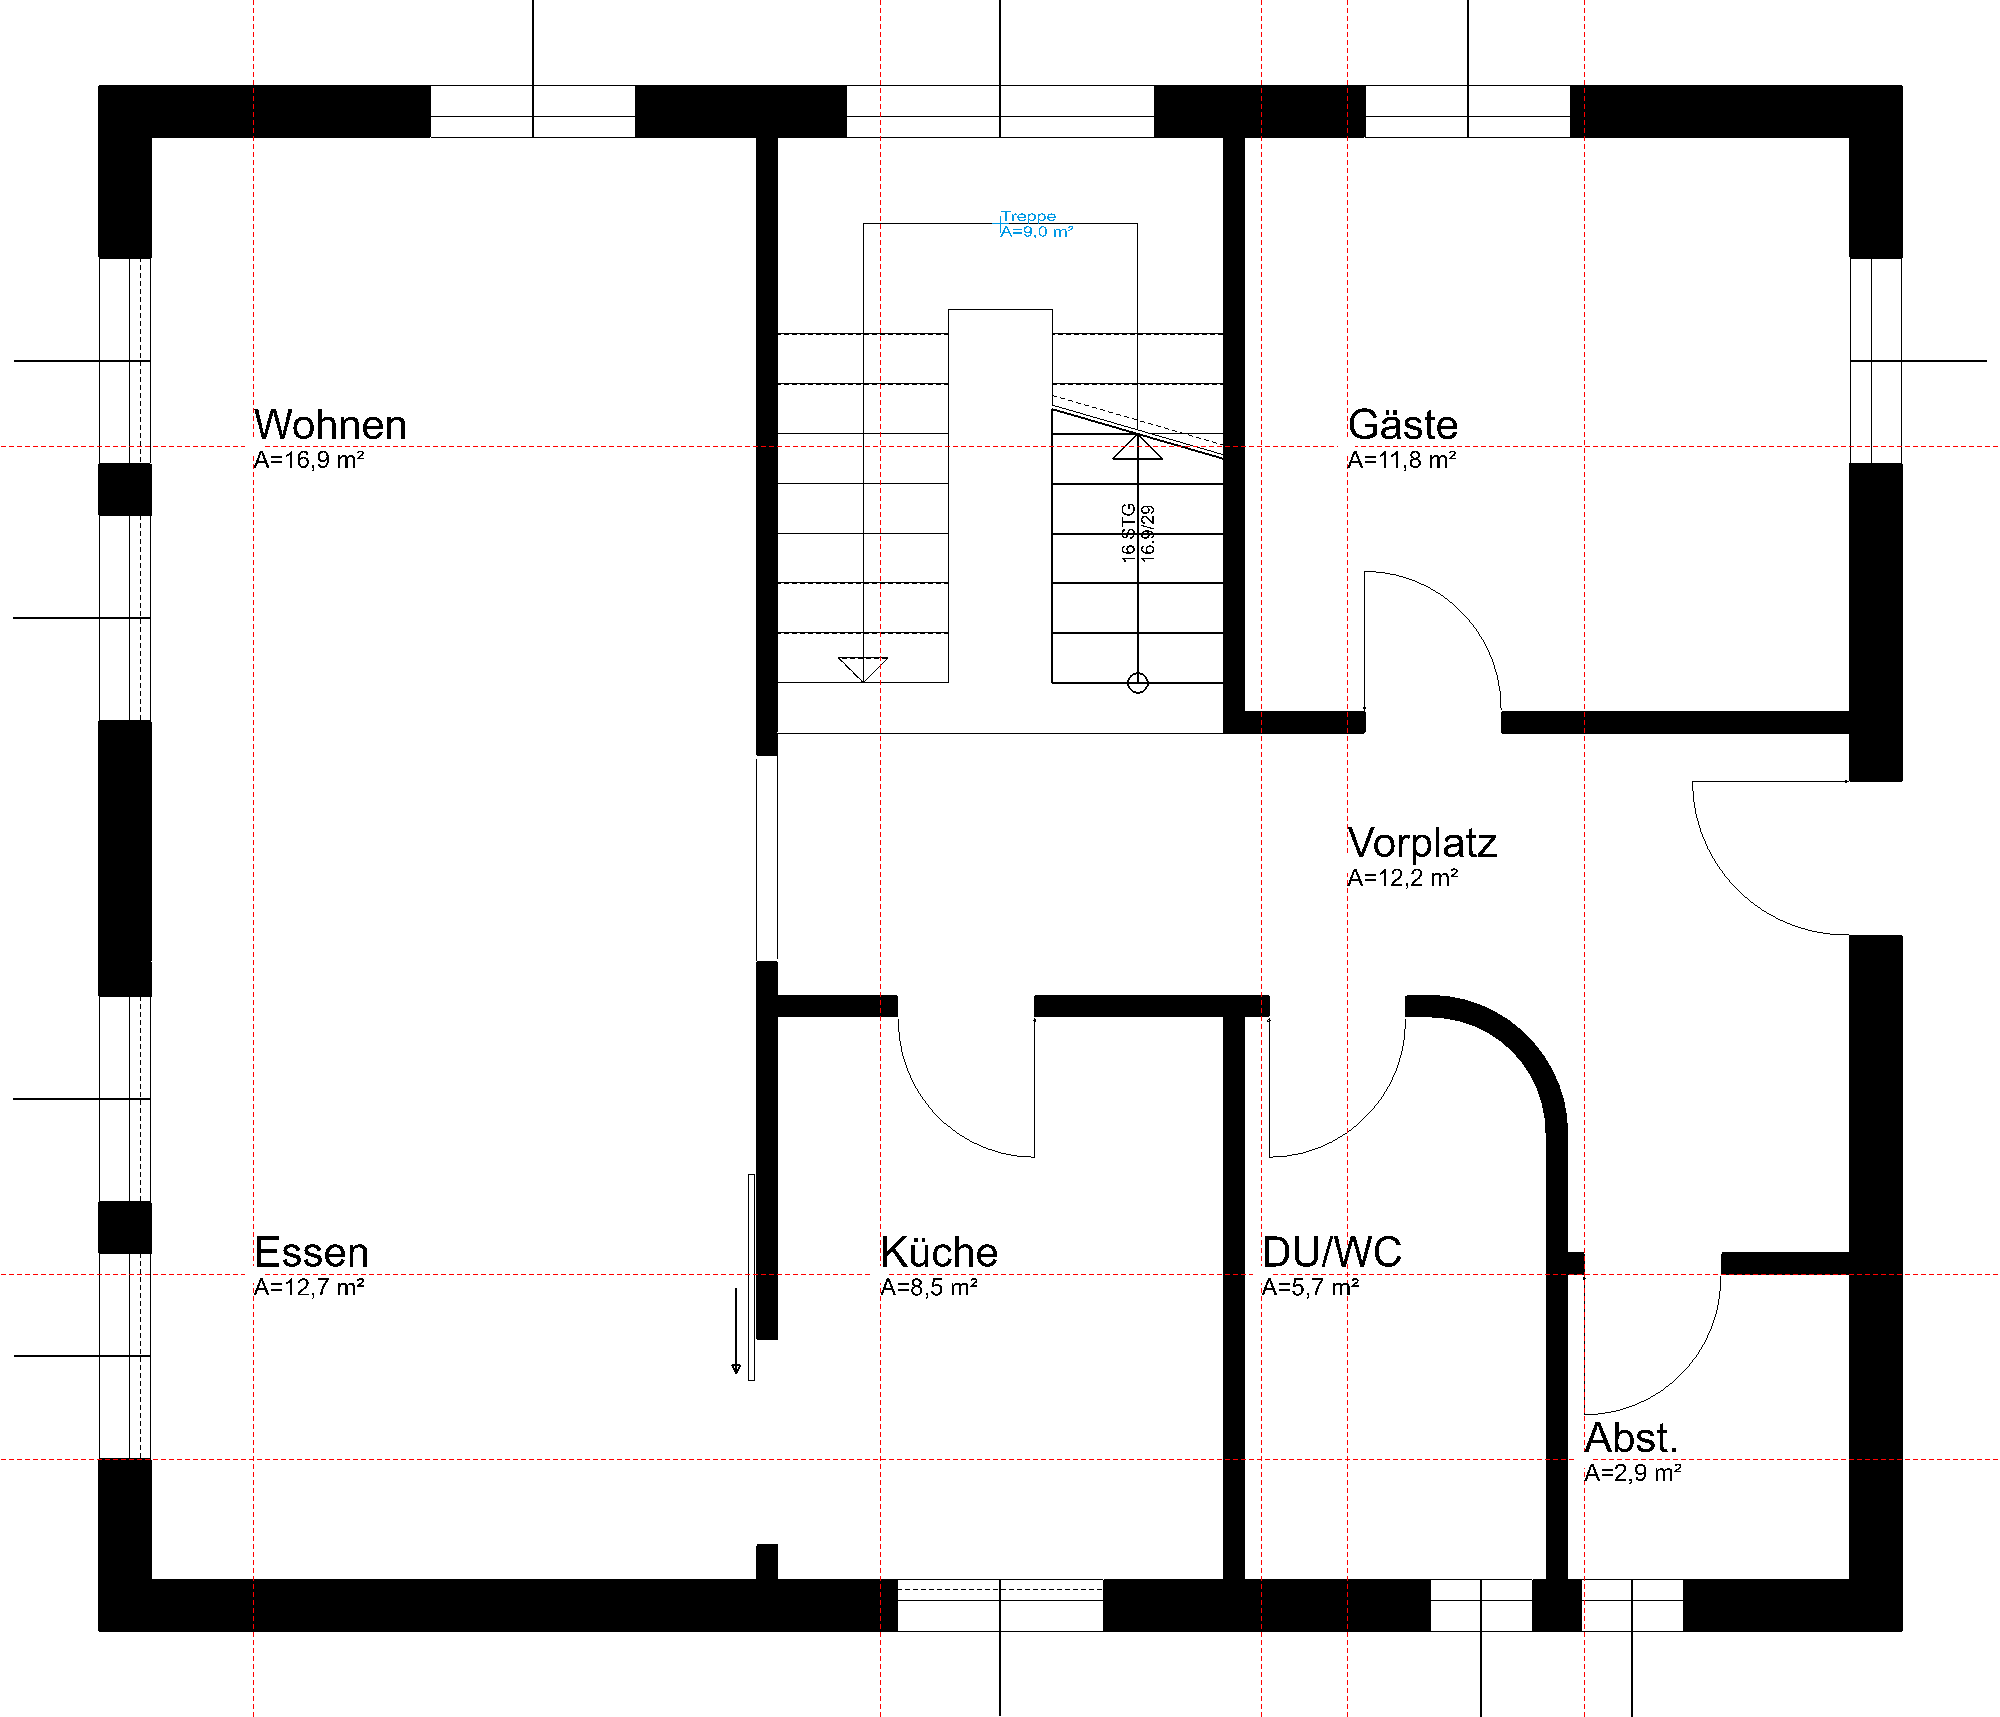
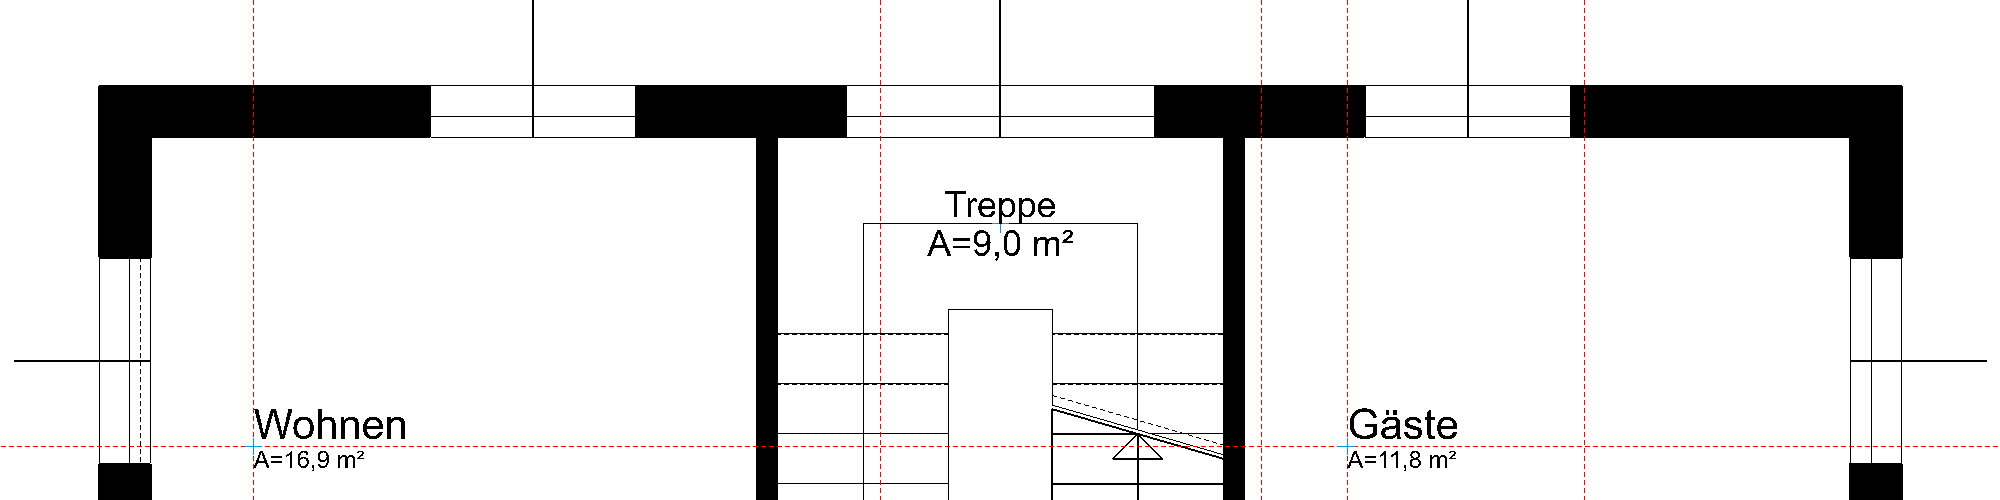
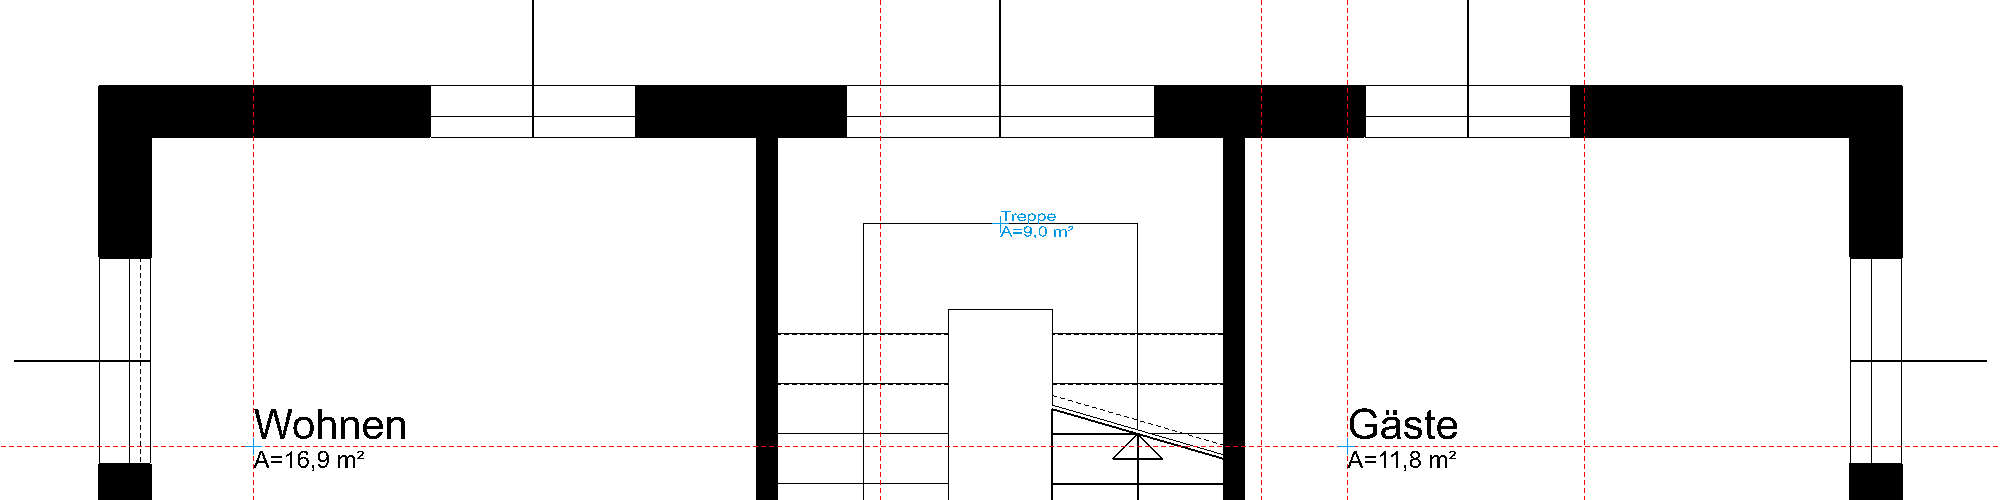
You will now label the rooms on the ground floor.
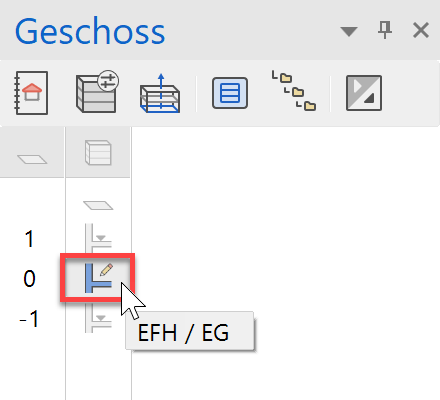
- Switch the ground floor to < > visible alone. (double-click)
- Start the function ROOM SEPARATION and select the option Draw contour.
(The living room and dining room are labelled separately, the staircase is not counted as part of the foyer.)


- Draw the room separator from point P1 to point P2. To complete the room separation, you need to click again on the end point P2.
- Create a second room separation between the points P3 and P4. To end, click again on the end point.

- Cancel the function with Esc.
- Create a support drawing with auxiliary lines to be able to position the room labels.
- Start the function ROOM and open the room parameters dialog.

Select the record Living area.
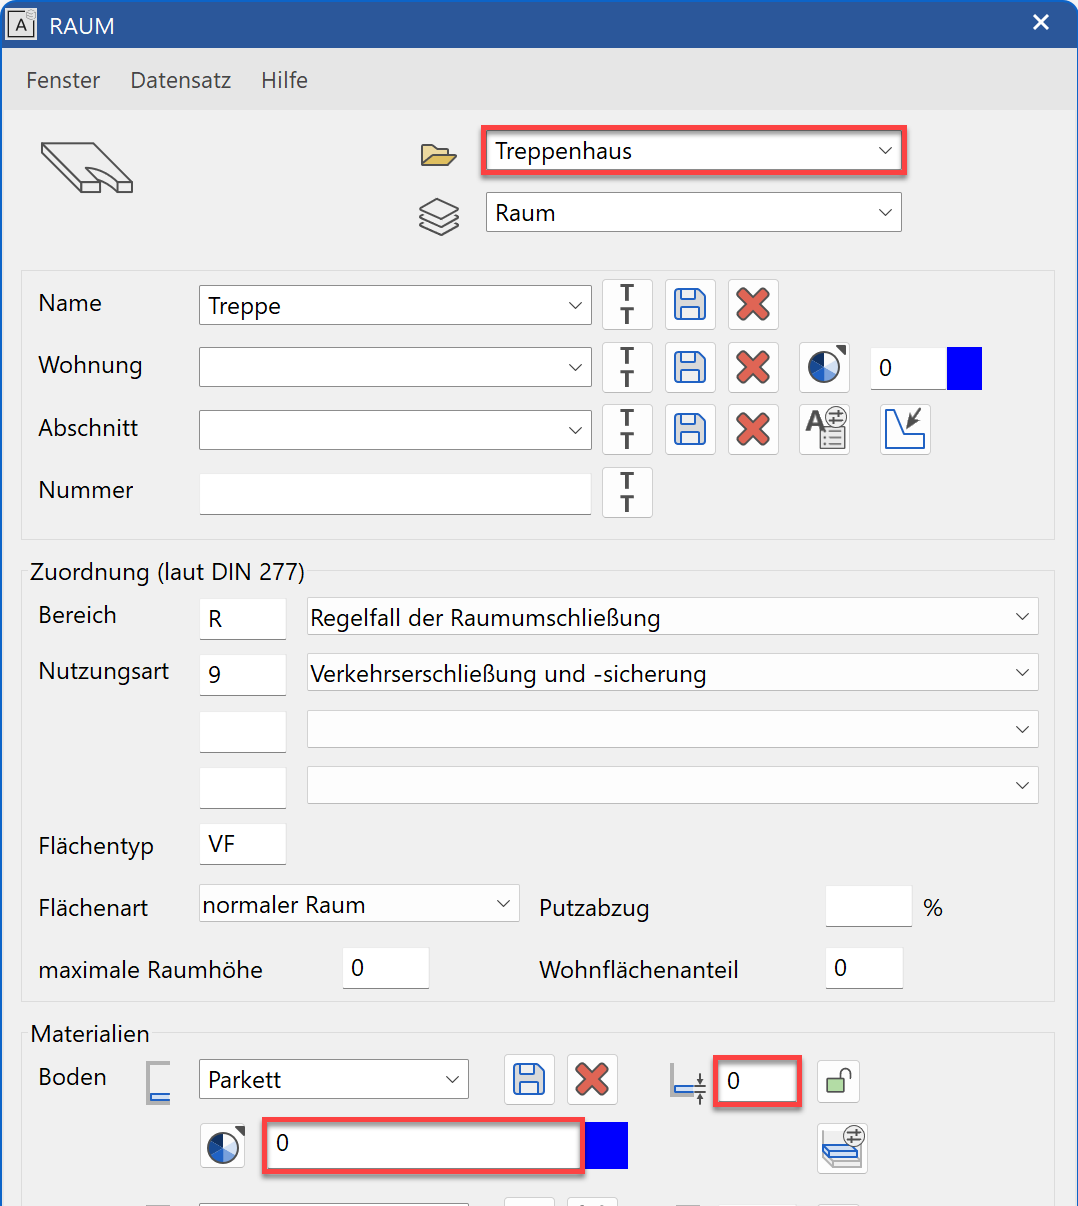
The most important settings in the room dialog are the name of the room (1), the room type (2), materials (floor, wall and ceiling), the height of the floor finish (3) and the room parameters (4).
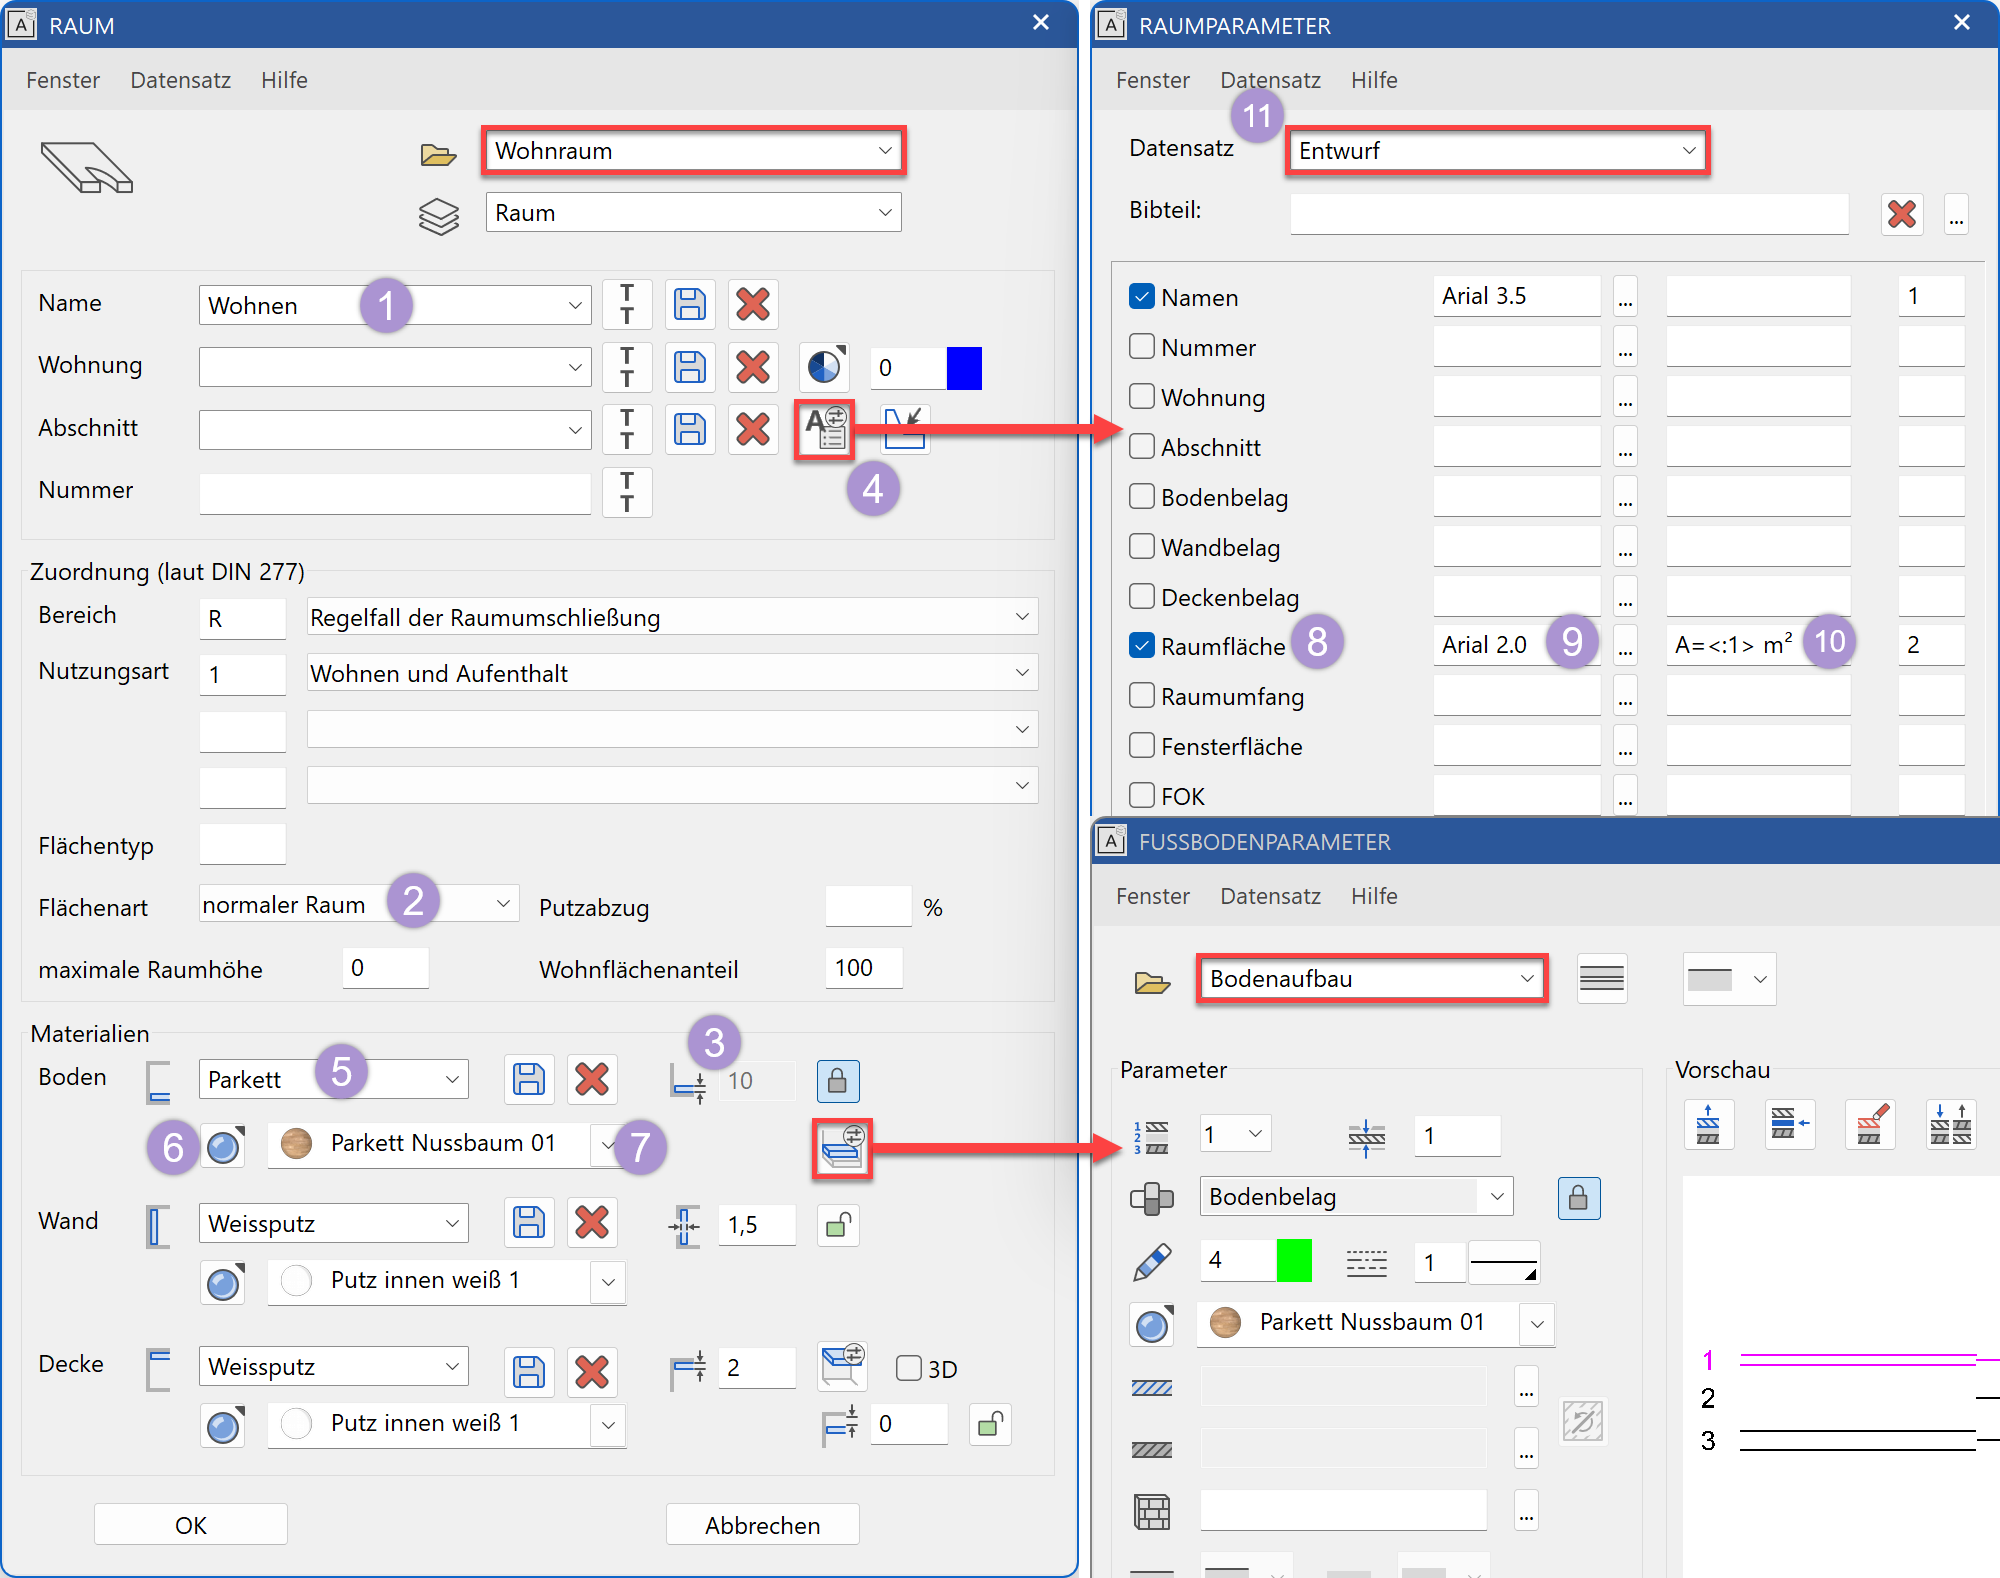
The space type and room kind (2) are especially important for the evaluation.A missing material name (5) can be supplemented and stored with the save (diskette) symbol.
The 3D colour and visualisation material (texture) belonging to the material must be selected accordingly. Using the toggle key (6) the 3D colour and the visualisation material can be selected. Both are always assigned. If you do not want a visualisation material, you need to delete the entire visualisation material name so that the visualisation material field is blank.
Use the preview field (7) to select a visualisation material or 3D colour.In the room parameters dialog (4), you determine which values should be displayed in the plan. Activate the desired line (8), select a text parameter (9) and the additional formatting (10) with pre-text and rounding. These room label blocks can be stored as a data record (11).
In the floor parameters, you can set the layer definition in detail.
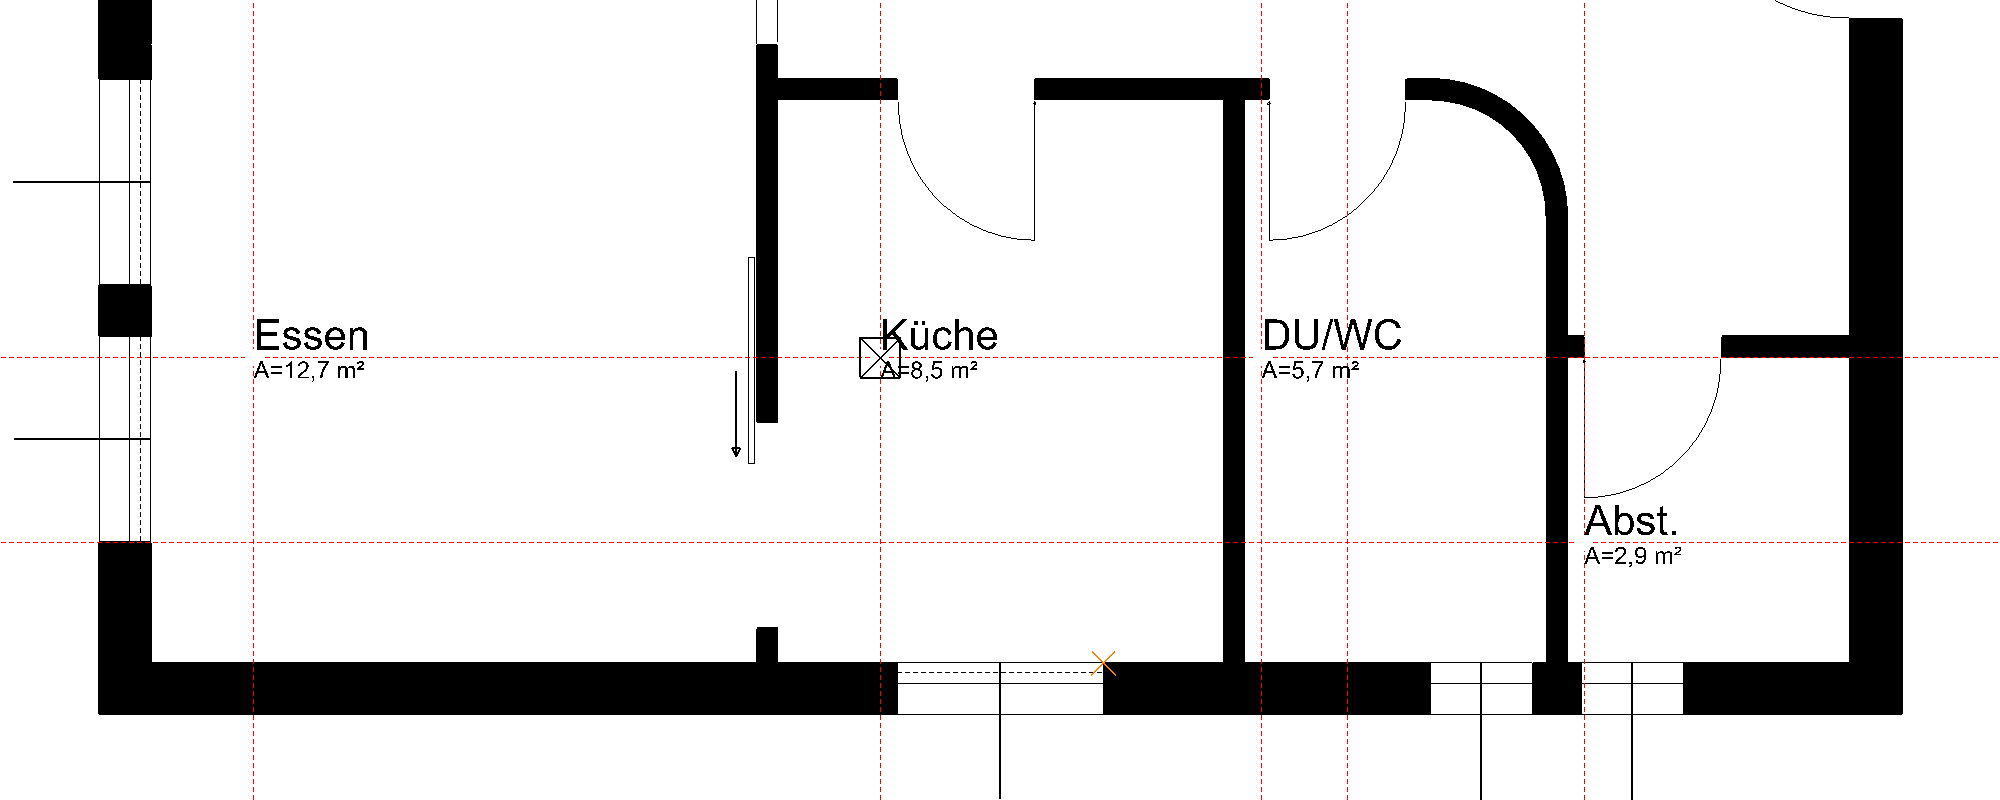
- Position the rooms Living, Guest, Dining und Cupboard ** with parquet flooring that has the visualisation material ~Archive/Wood/Parquet/Laminate/Laminate001 and the area type normal room, and the room parameter type Floor finish.
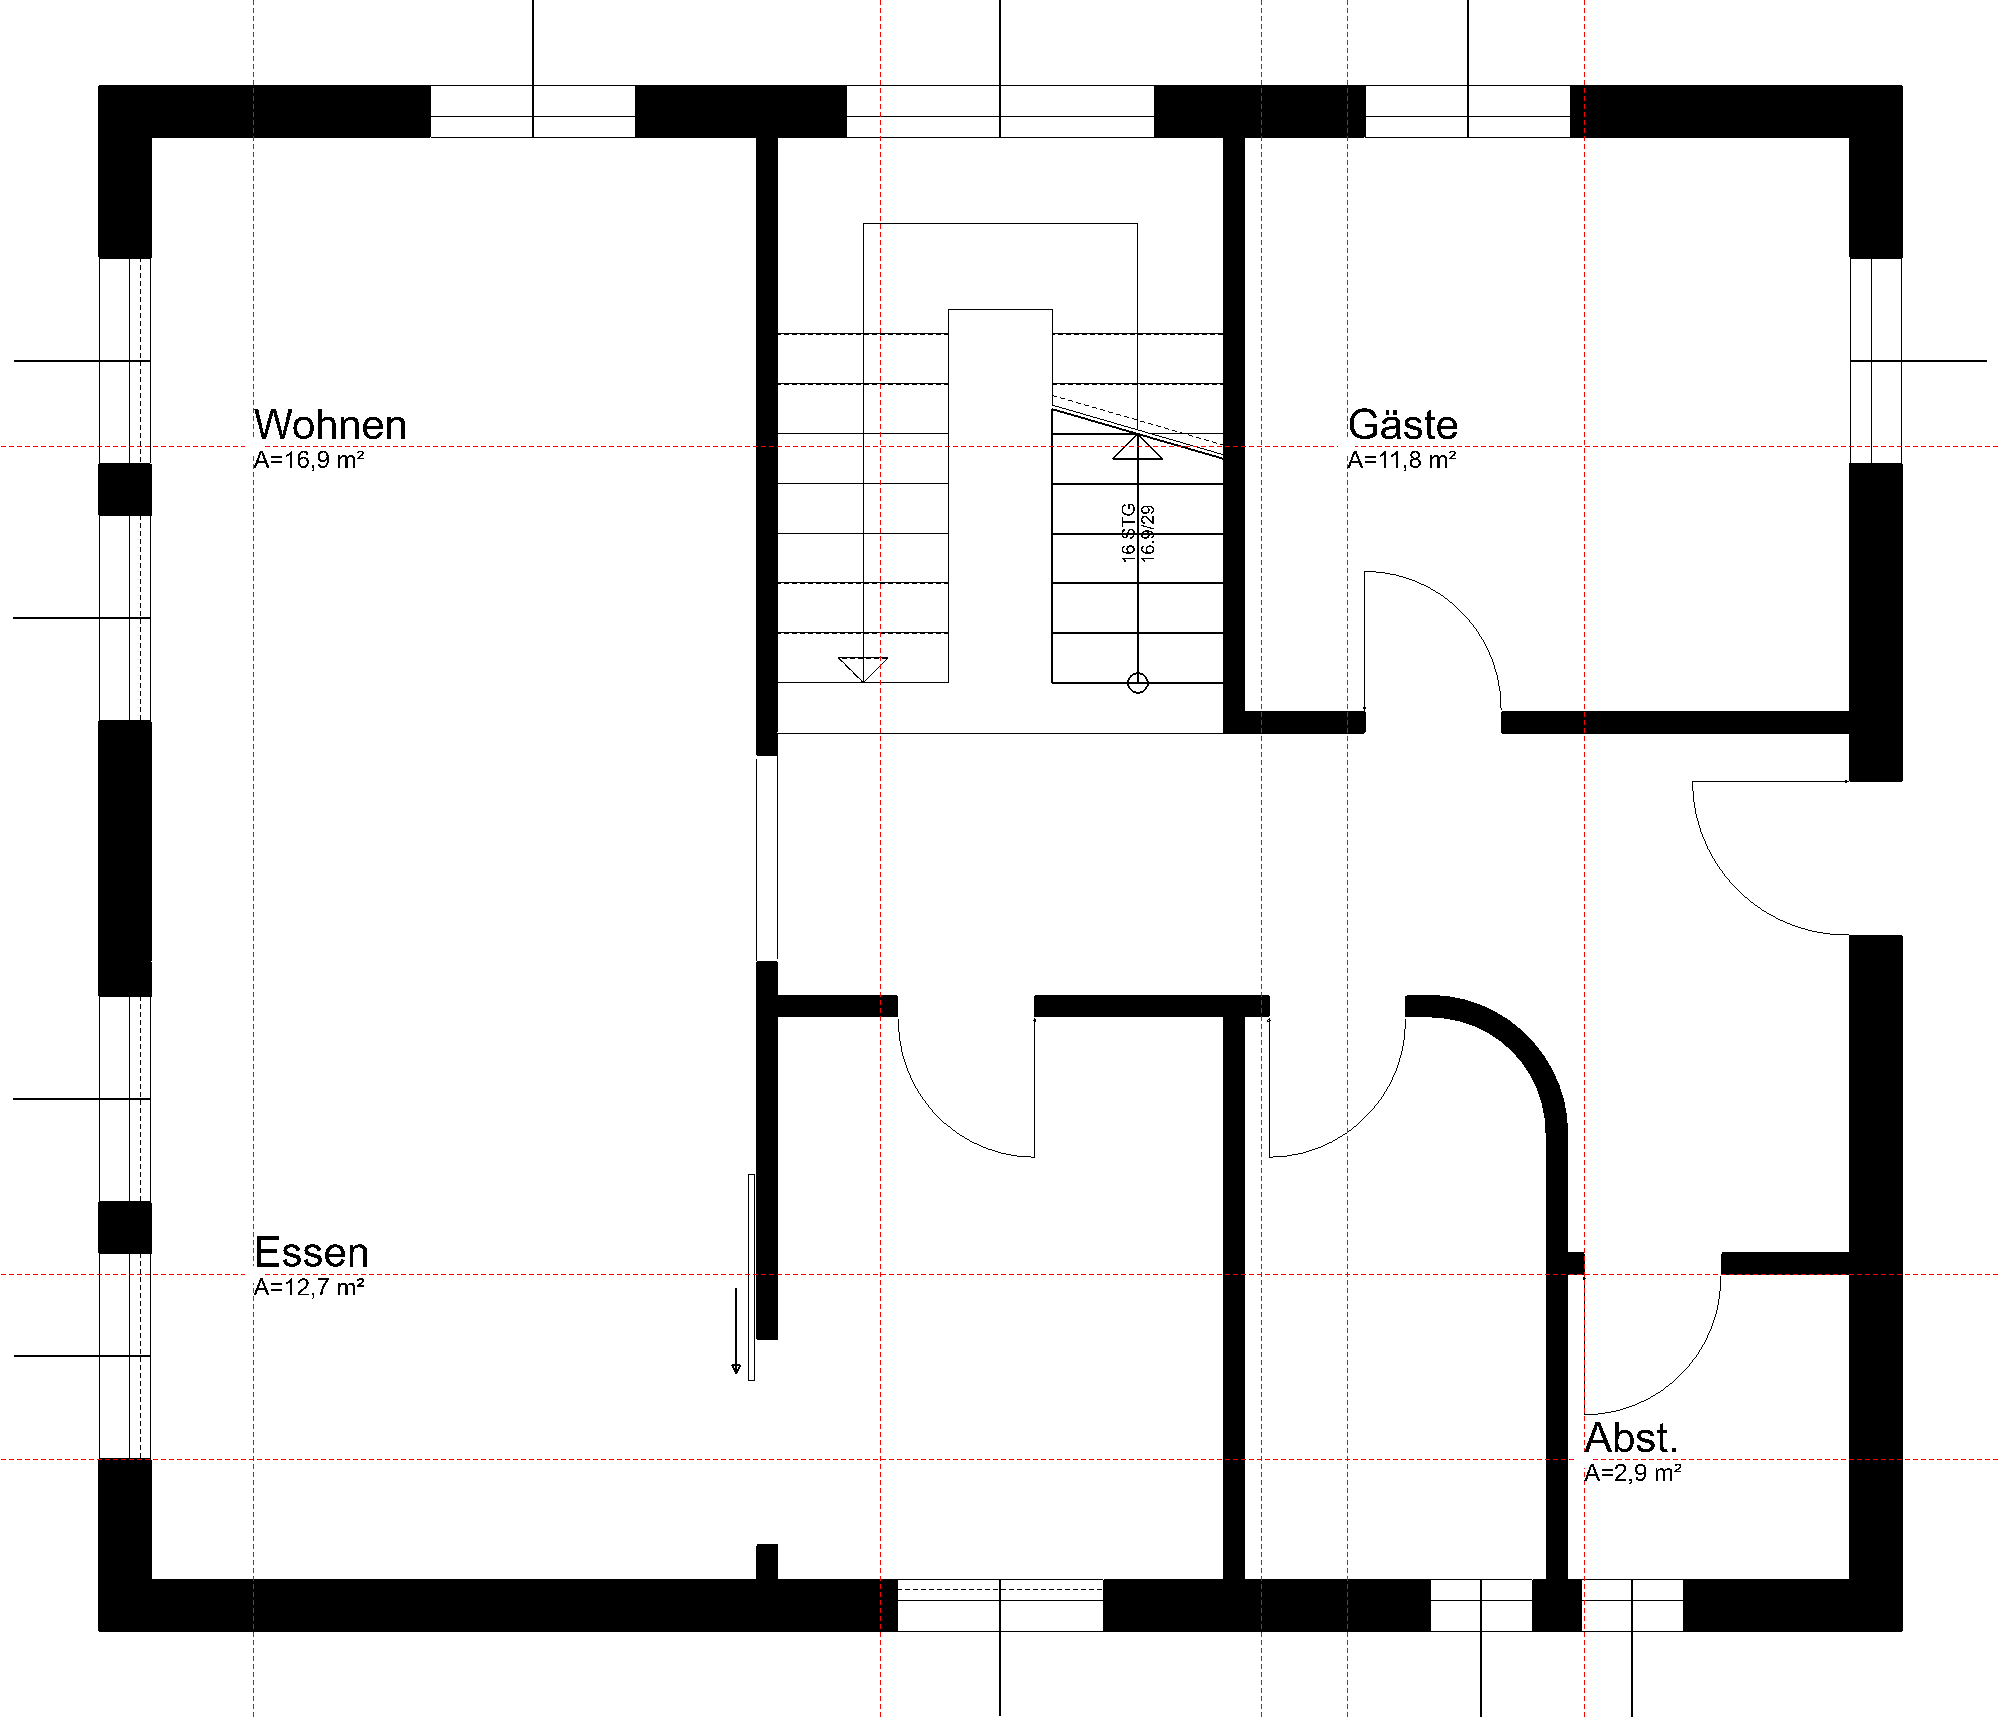
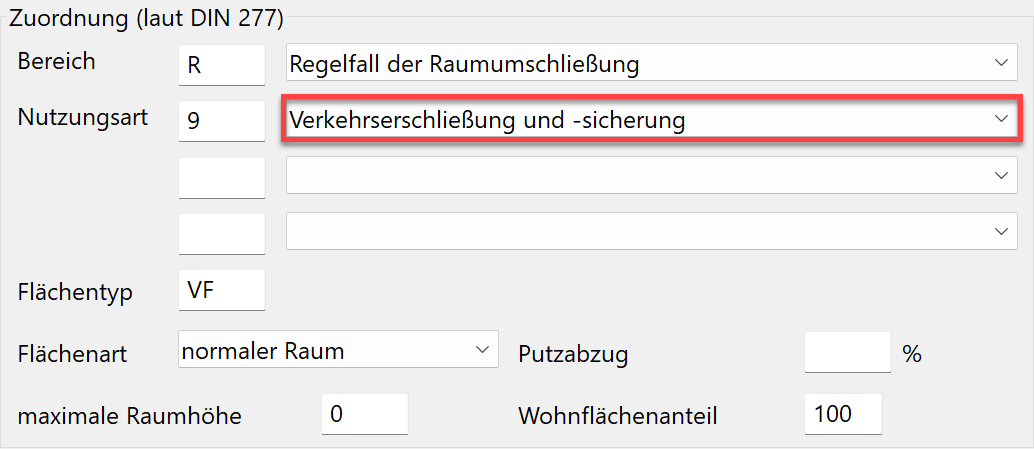
- For the room Foyer in the room dialog, change the area category from primary area (PA) to circulation area (CA). TEXT MUSS ANGEPASST WERDEN! DO WHEN YOU DO THE NEW IMAGE TO ENSURE PROPER PHRASING.
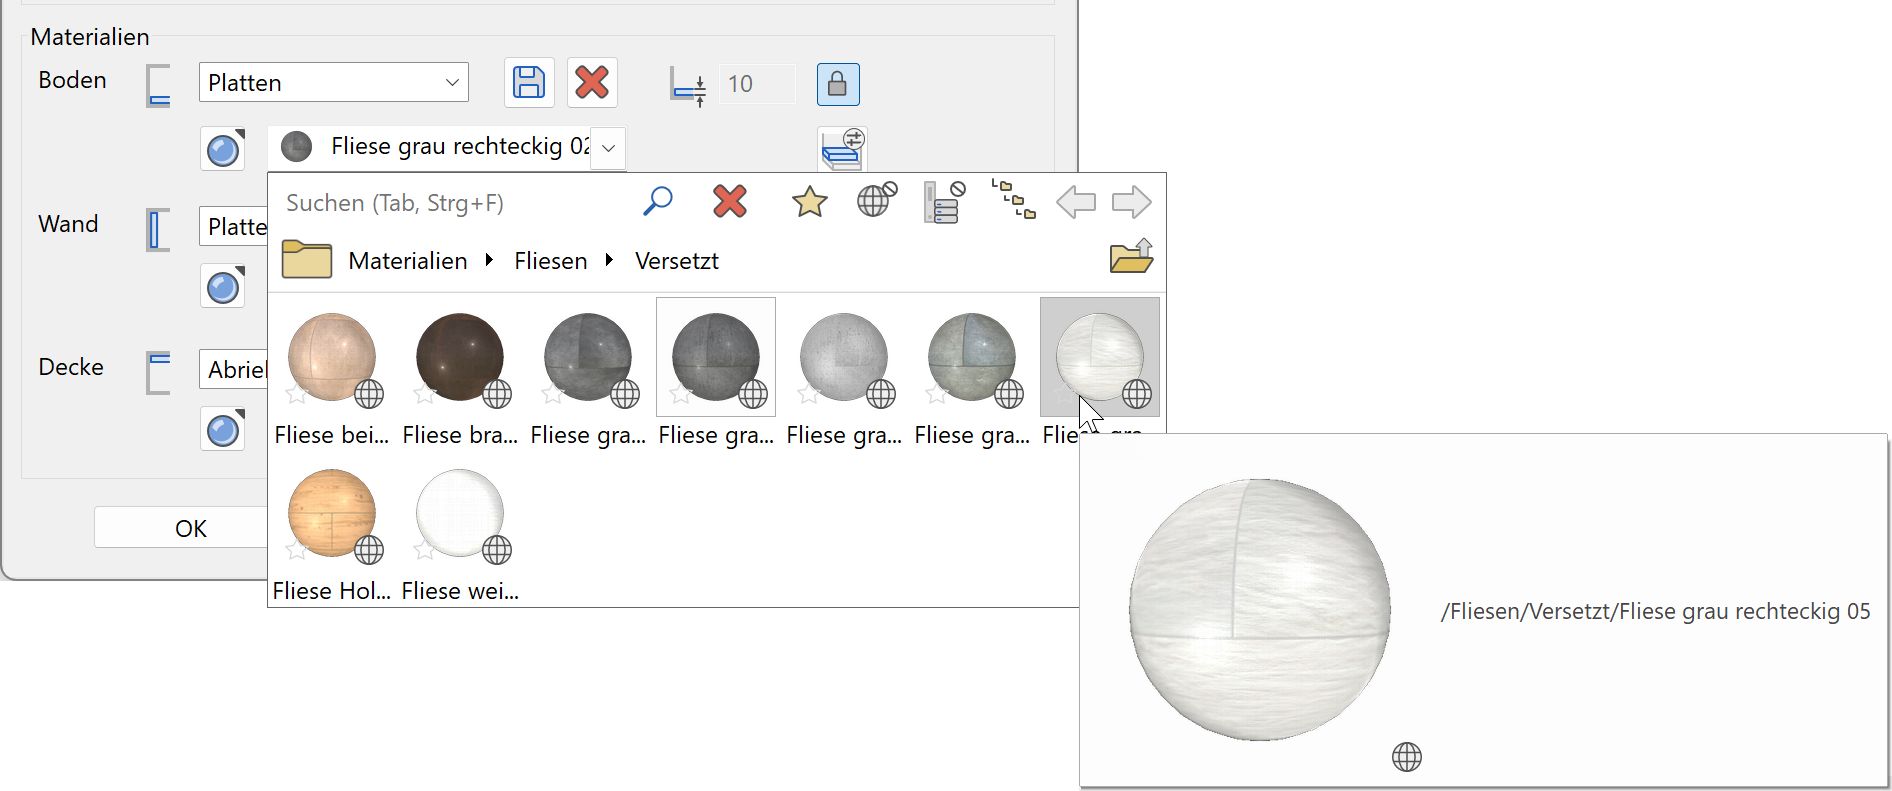
- For the rooms Bathroom and Kitchen in the room dialog, select the type Wet area. The space type changes to amenity area (AA) and the floor material to tiles. Change the floor visualisation material to .../Tile/Offset/Tile grey rectangle 05.
- The last room is the staircase. To ensure that the evaluation produces a correct cubage and base area, staircases must also have a room label. Select the record Staircase.
If you do not want to see any label in the outline, you can use the text parameter Arial_0 in the room parameters, which generates a blue text that is not printed out.

- Delete the auxiliary lines.
