Windows
Workshop
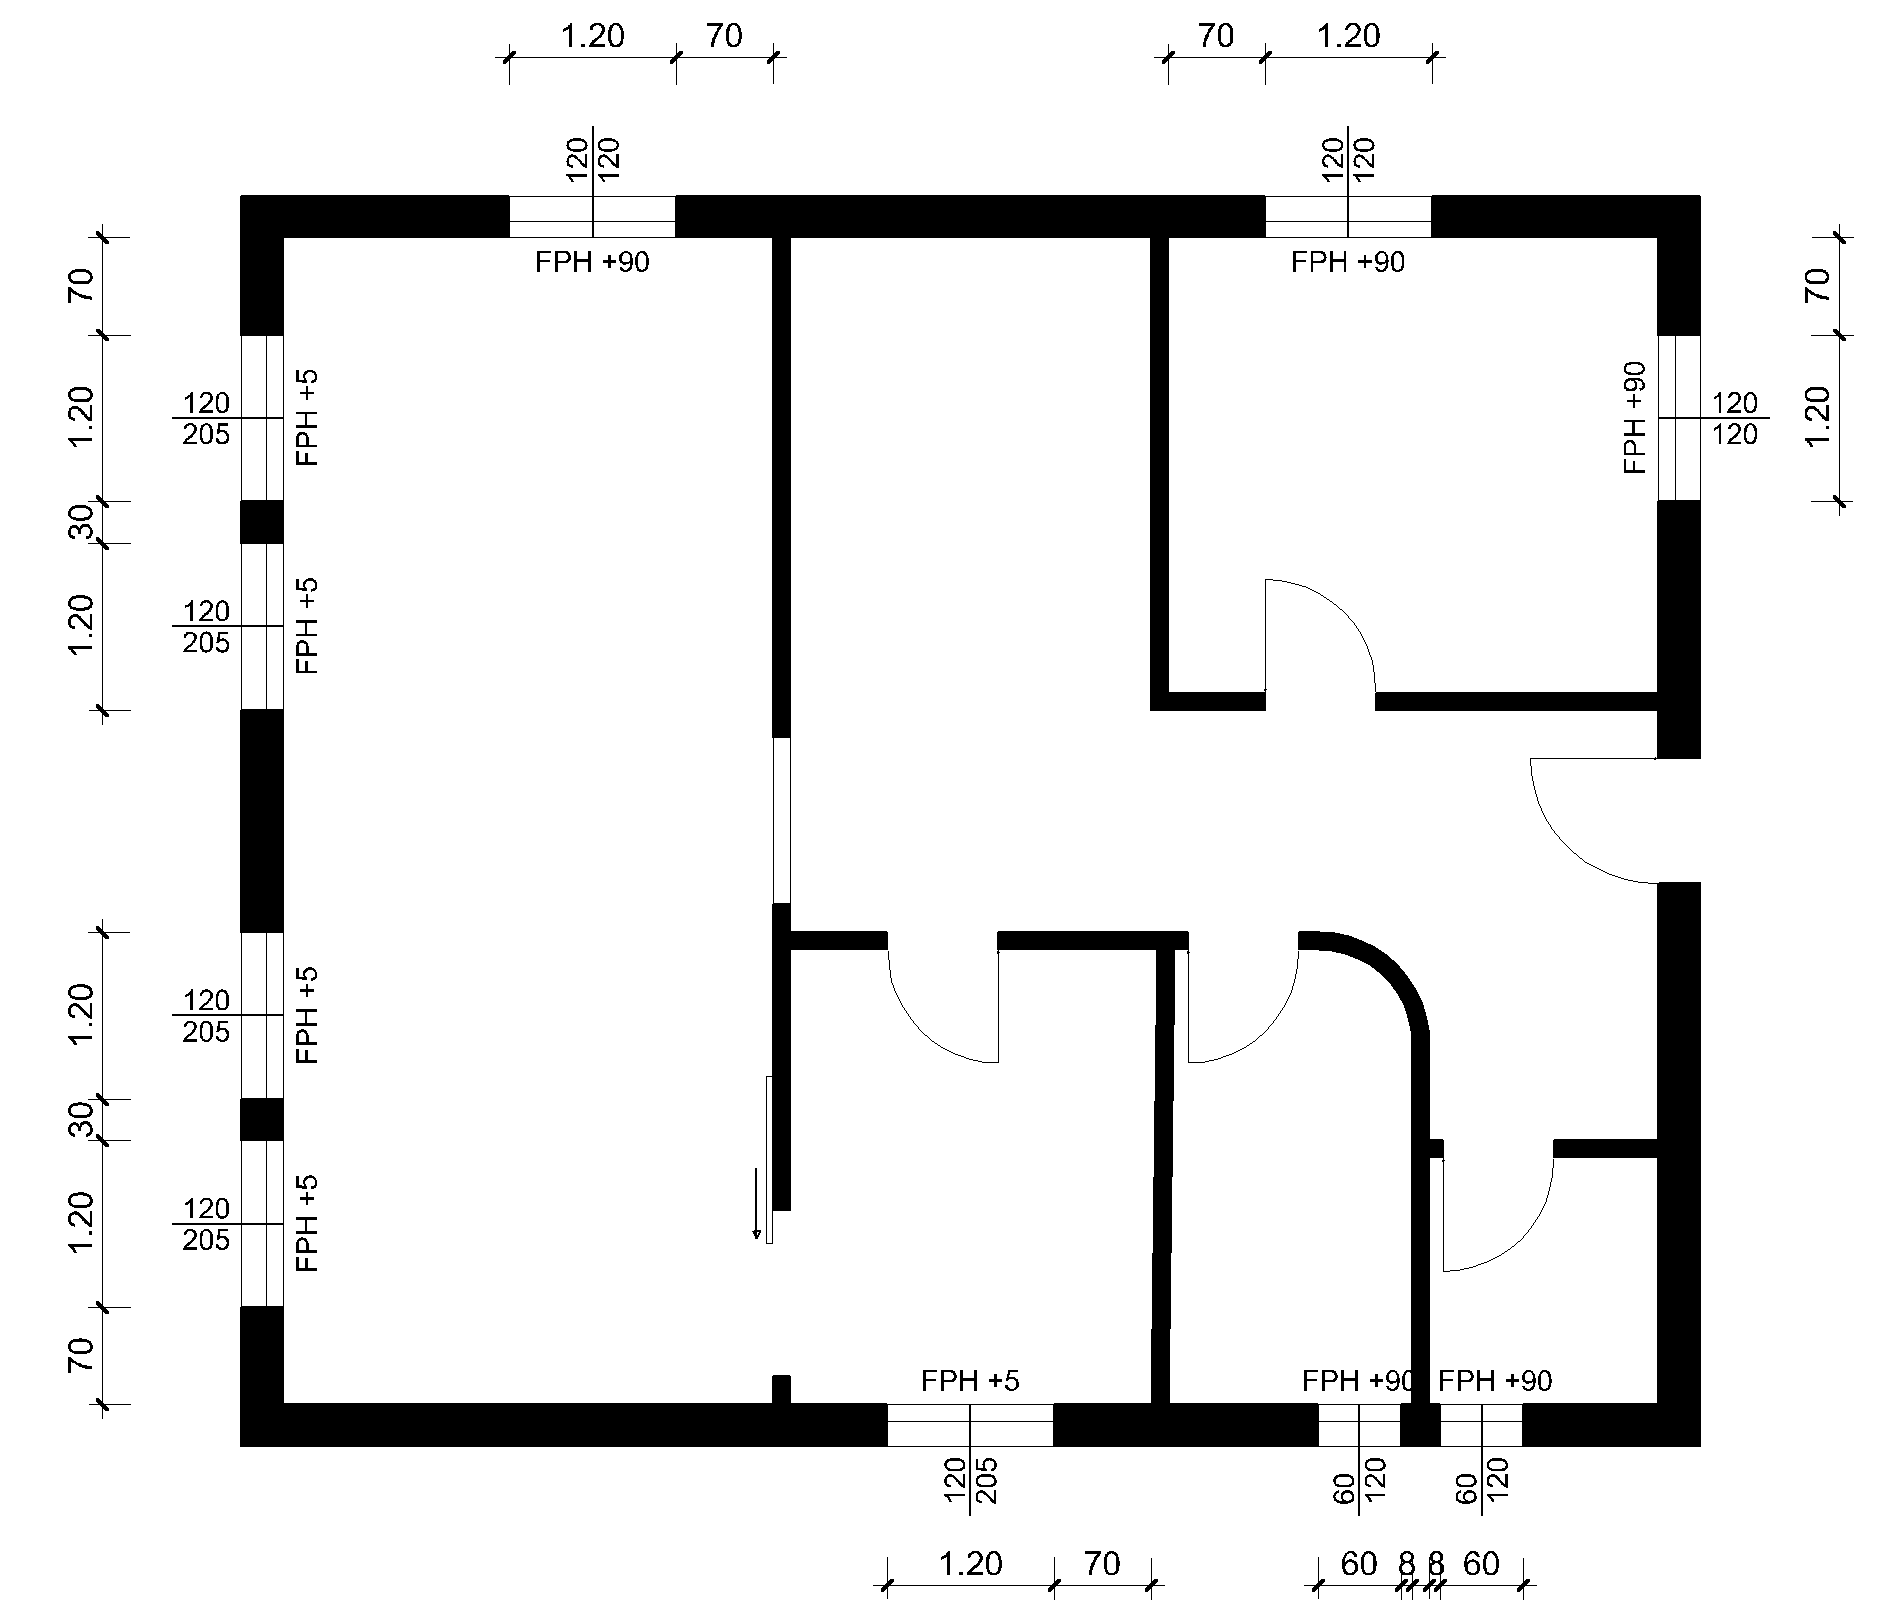
In the floor plan, you will now draw windows of different sizes.
- Select the function CREATE WINDOW. Select the type "Standard casement" and check the settings.


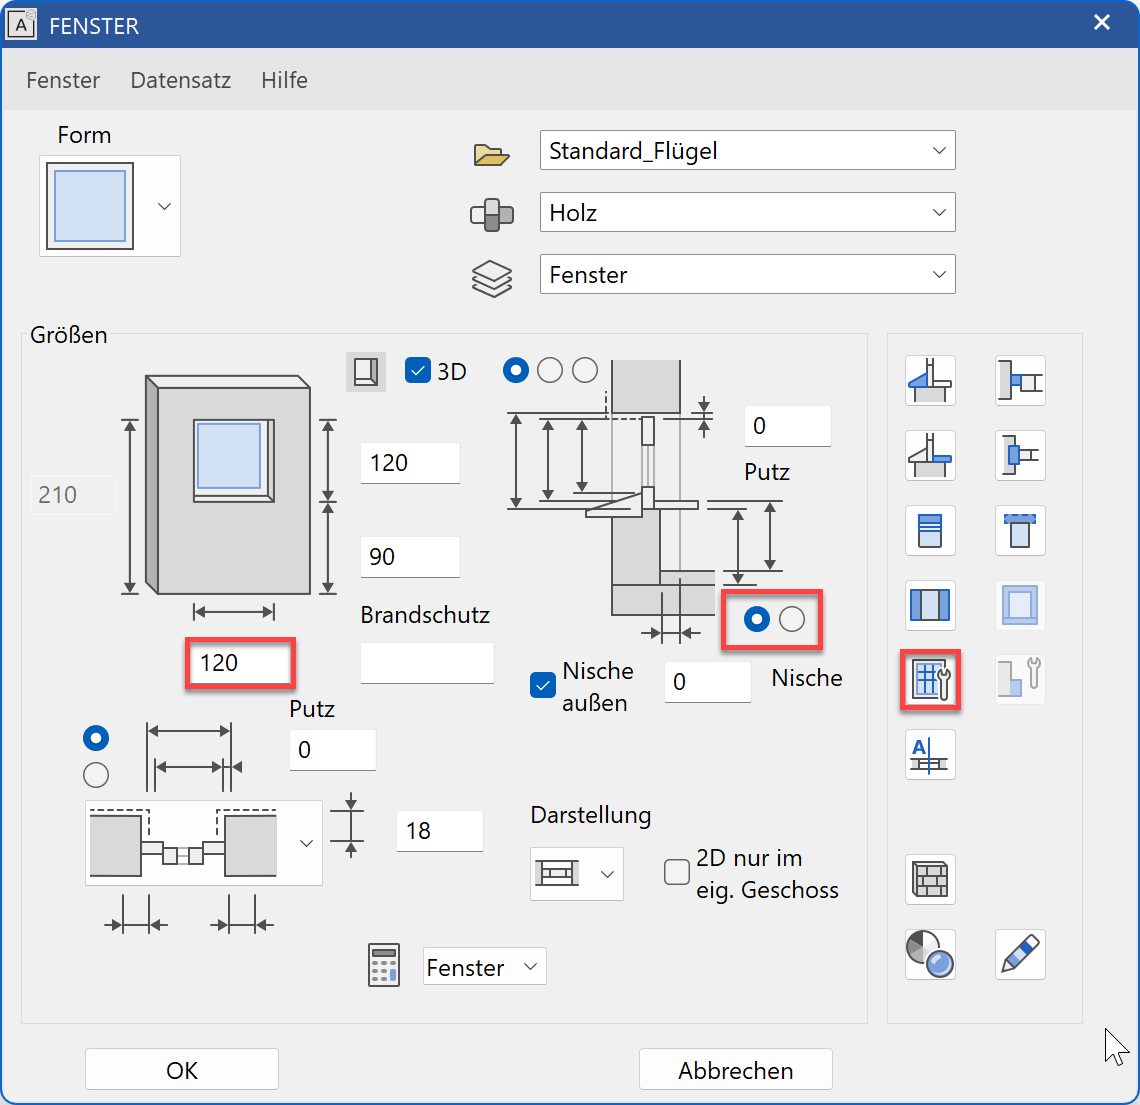
- Select the function TOOL FOR WINDOW DIVISION / MUNTINS at the end of the property bar.
- Select the function SYMMETRIC CASEMENTS, check the settings and confirm your entries with
 .
.
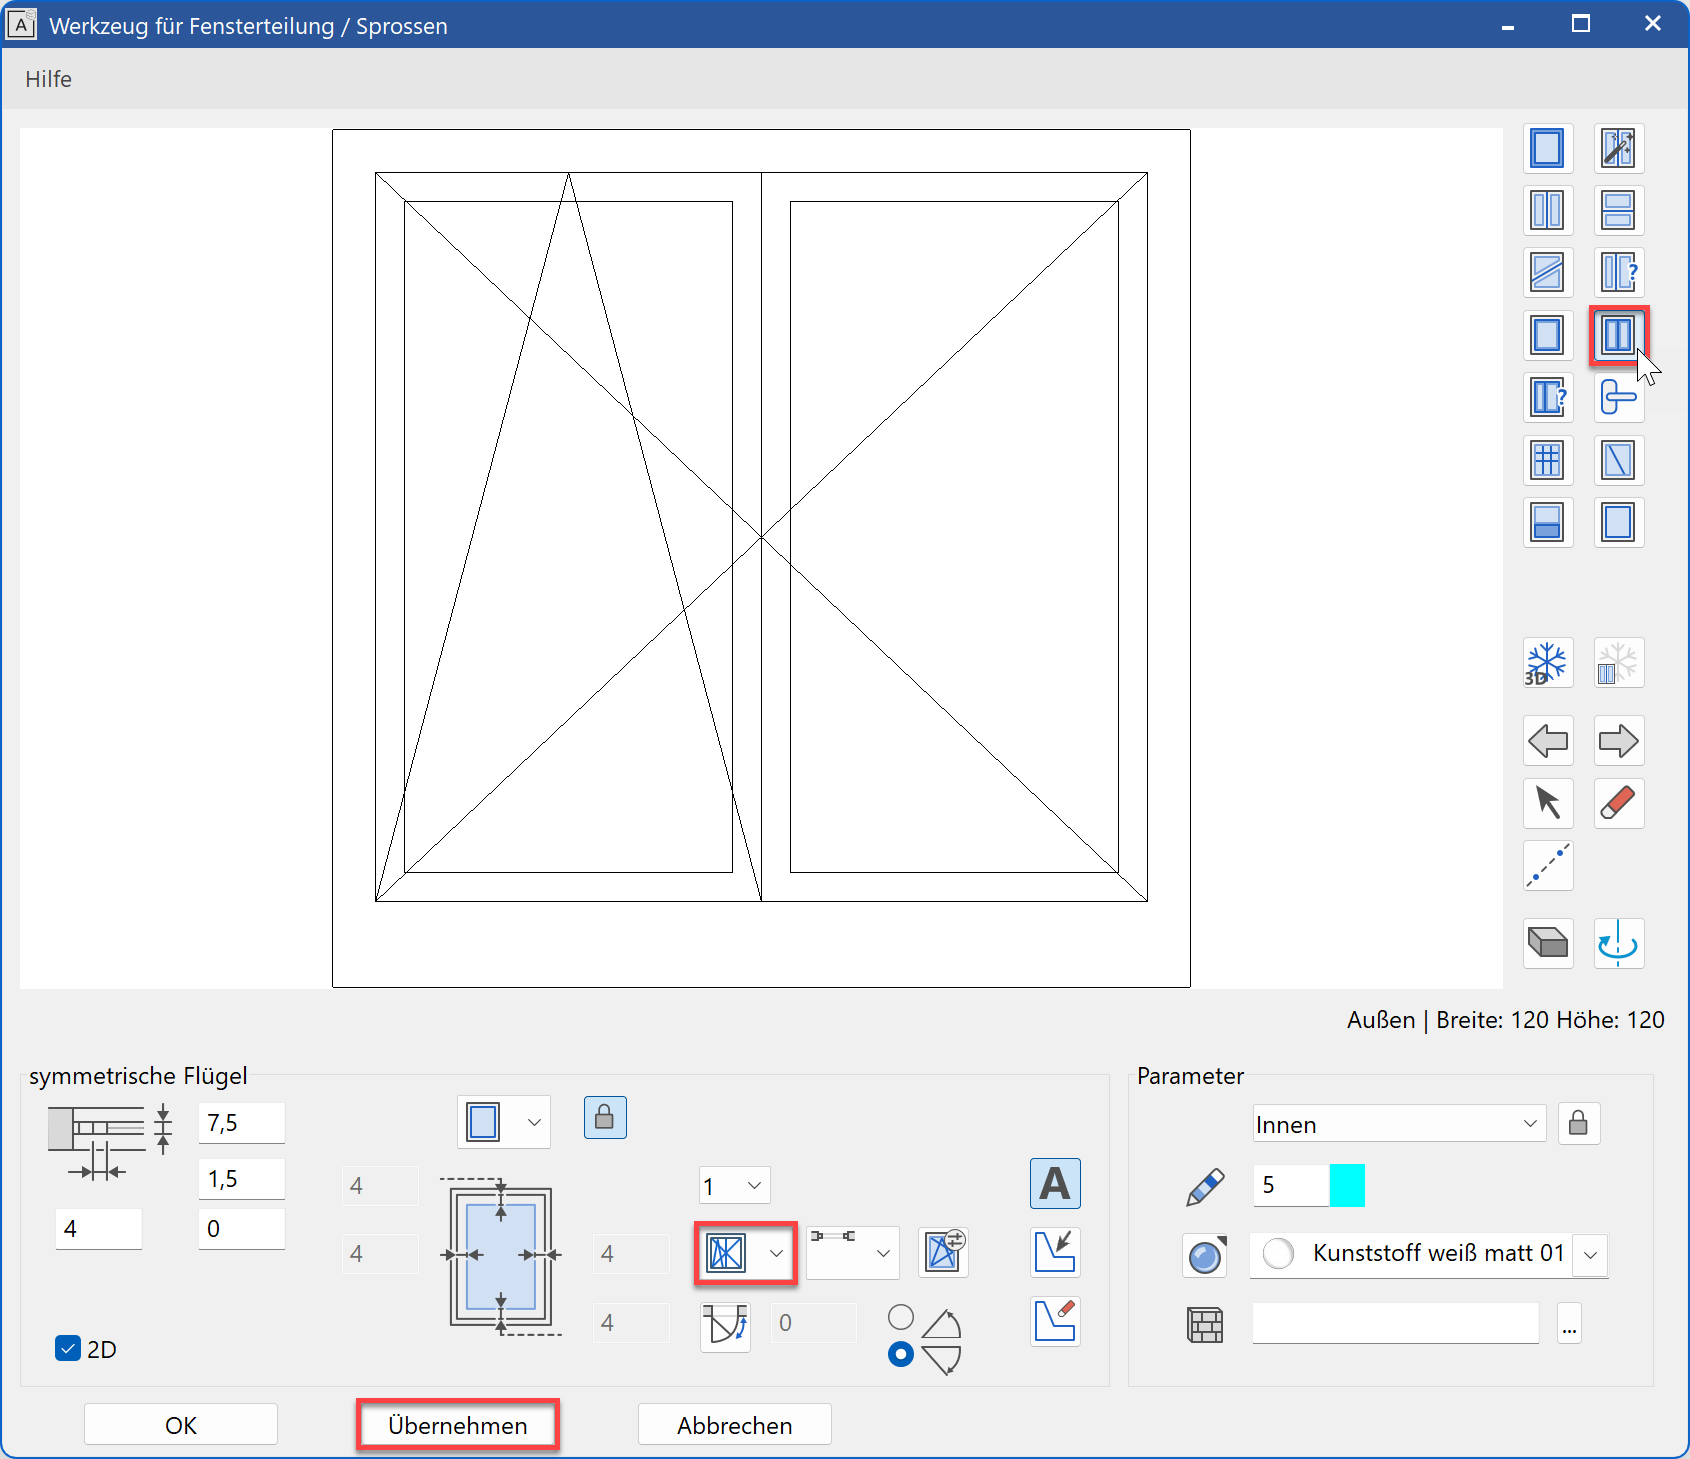
Click
 to close the dialog.
- Set the windows into the floor plan. While setting the window, the outside of the window is indicated with a line.
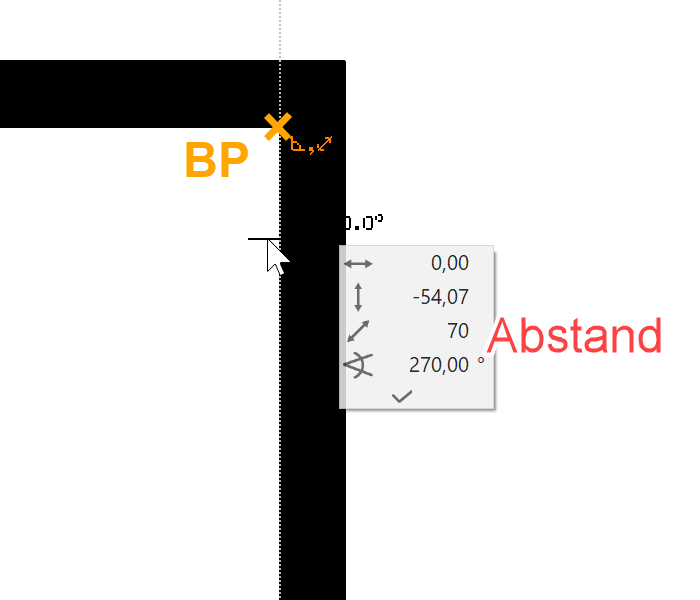
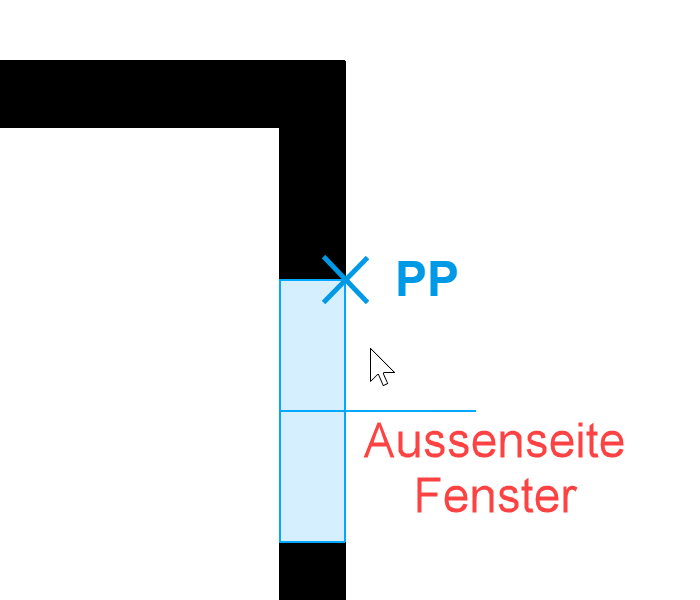
Take care to observe the different widths and heights.
Tip
In the property bar, the dimensions can be easily entered and other windows set. The function is retained until it is cancelled.
Save a work copy with Ctrl+W.
Modify window division
Workshop
All of the windows you just created are double-casement windows. The small windows 60/120 must now be changed to single-casement.
- Rotate the model.
Rotate: Press and hold the centre mouse button (or wheel) and move the mouse.
Solid: Ctrl+D oder

- Now change the small windows to single-casement. Position the window.

Open the Tool for window casement/muntins from the property bar.

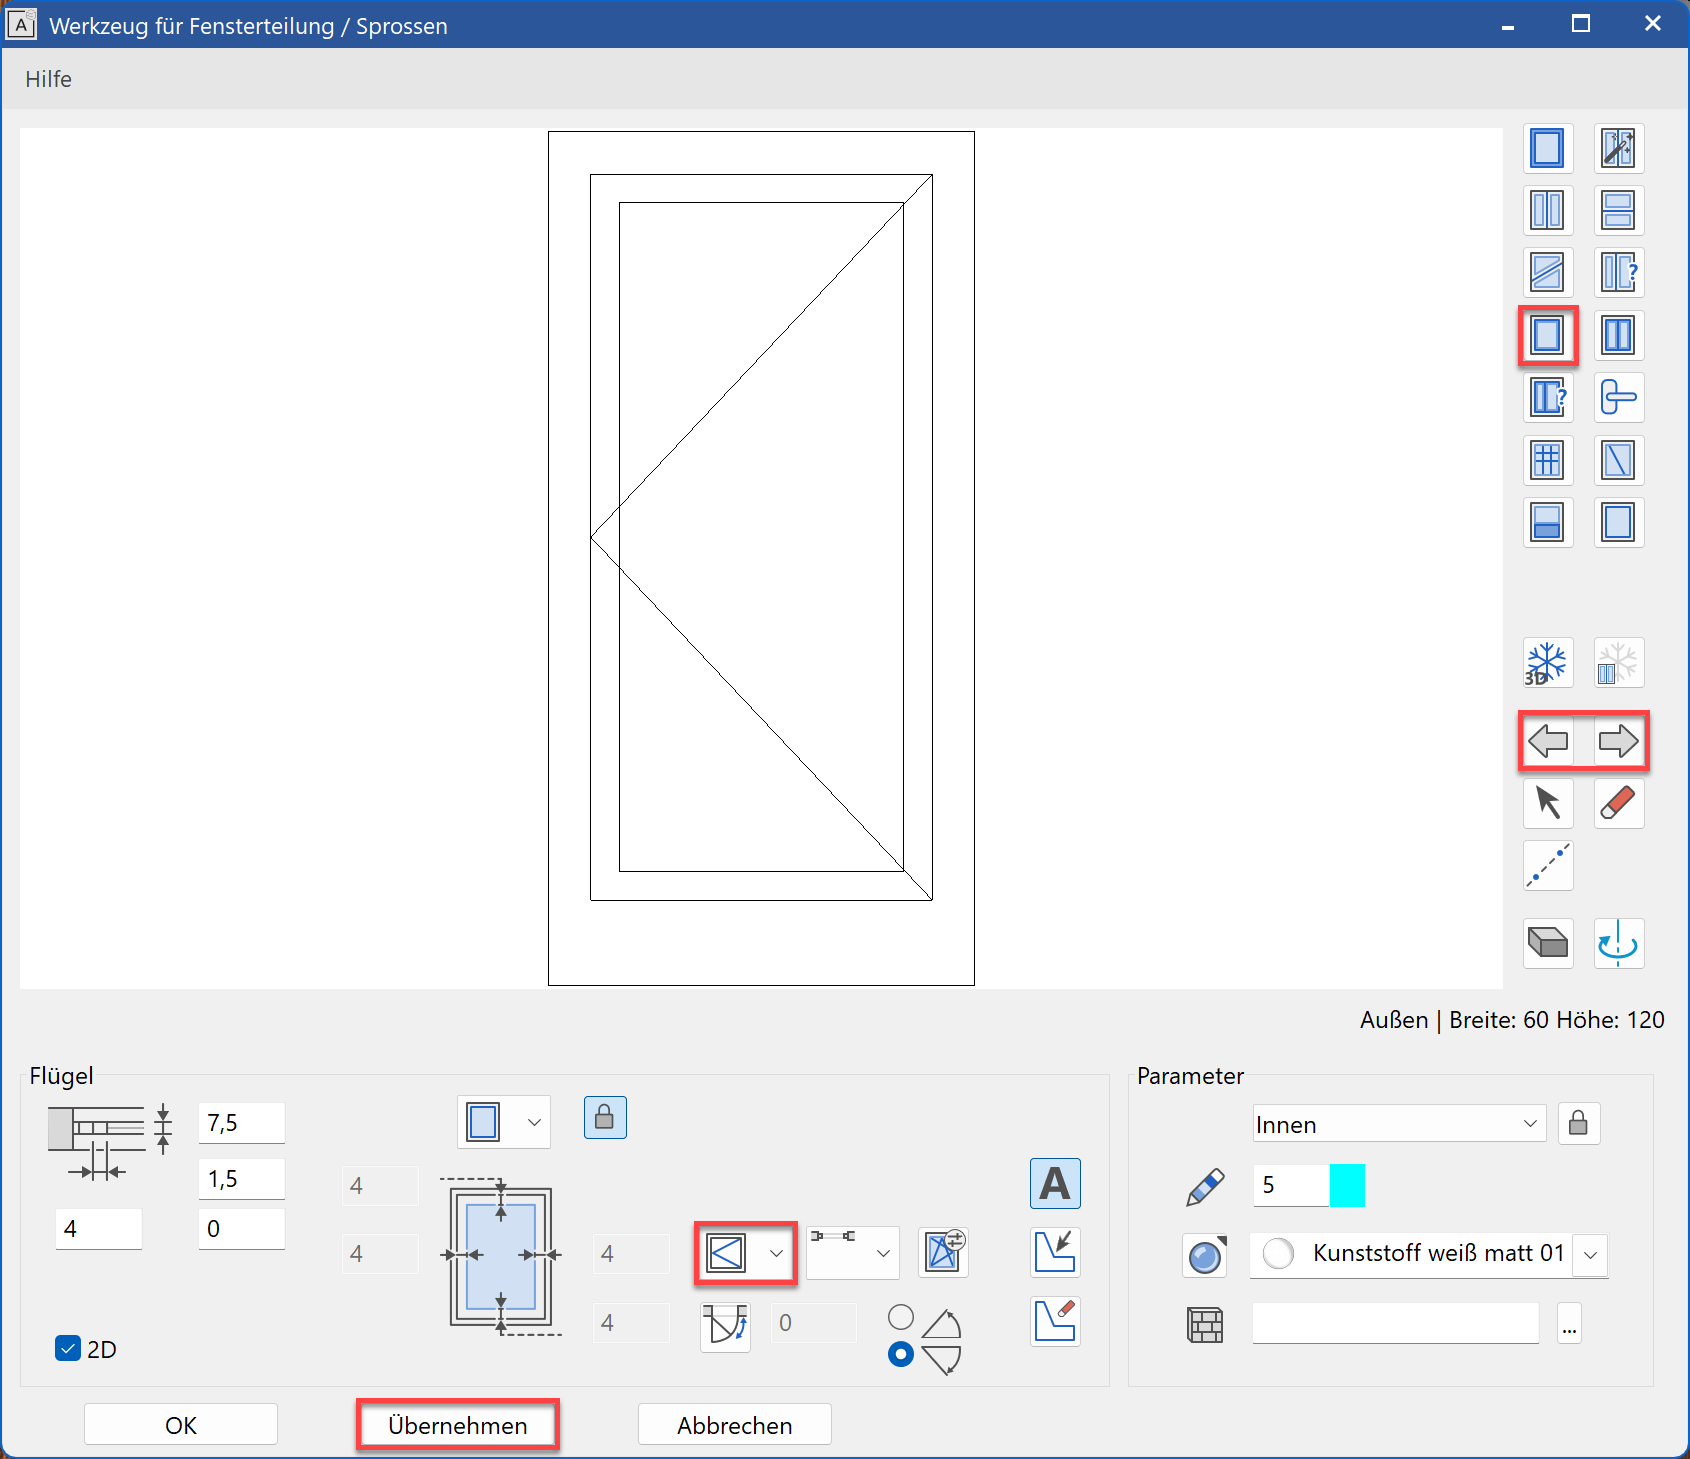
- Select the function CASEMENT, change the OPENING SYMBOL and confirm with the function . Afterwards, close the dialog.
- Proceed in the same way with the second window with opposite opening situation.

Modify window parameters
The thresholds of the window doors are still represented as parapet windows. The inner sill must be removed and the window frame extended as far as the concrete floor (slab).

Workshop
- Select a window door in the model, switch to INPUT FROM GROSS CLEARANCE and open the window parameters.

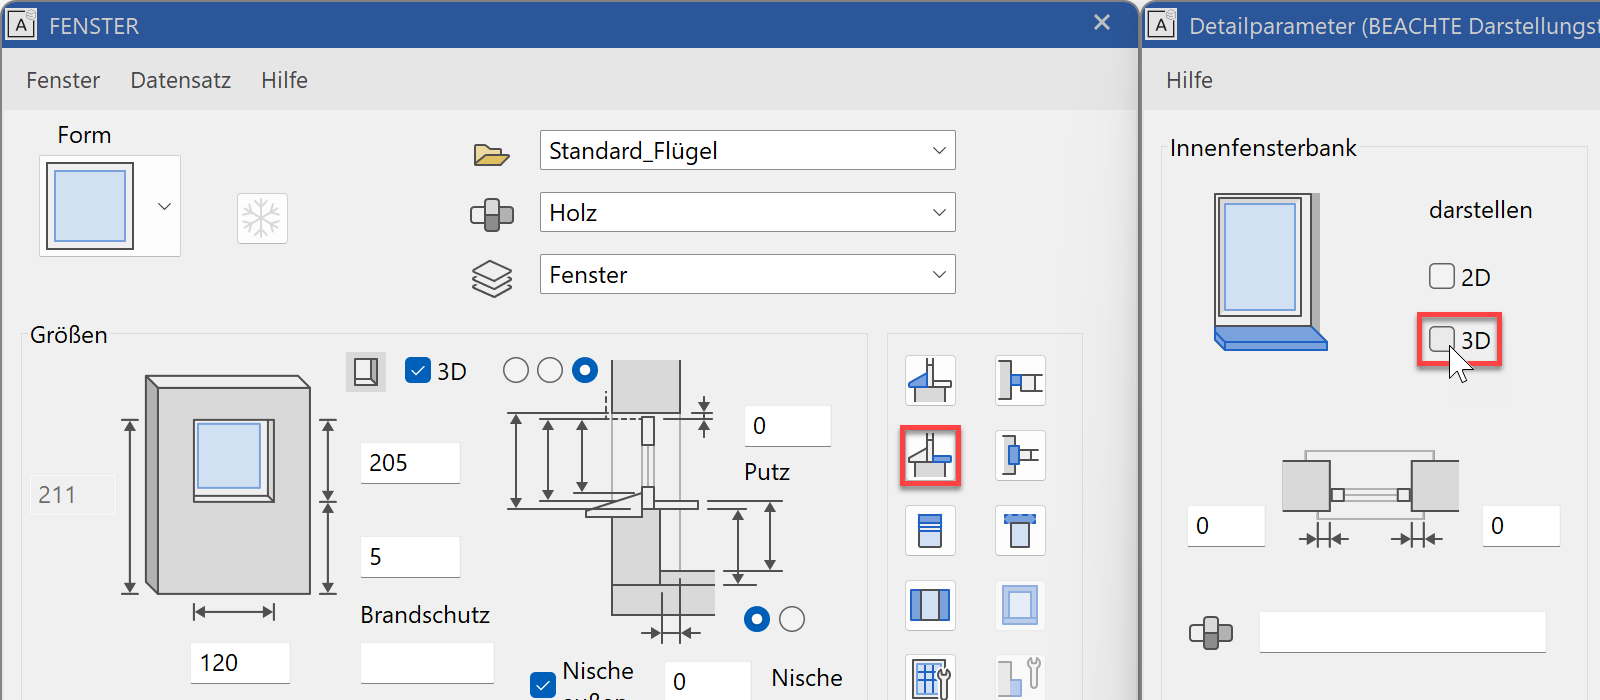
- Switch to the detail parameter INNER SILL and switch off the 3D. If 2D and 3D are both switched off in the display, the element is switched off and the remaining values do not affect the window.
Close the dialog of the detail parameter again and click
in the window parameter dialog to apply the change to the windows in the model.
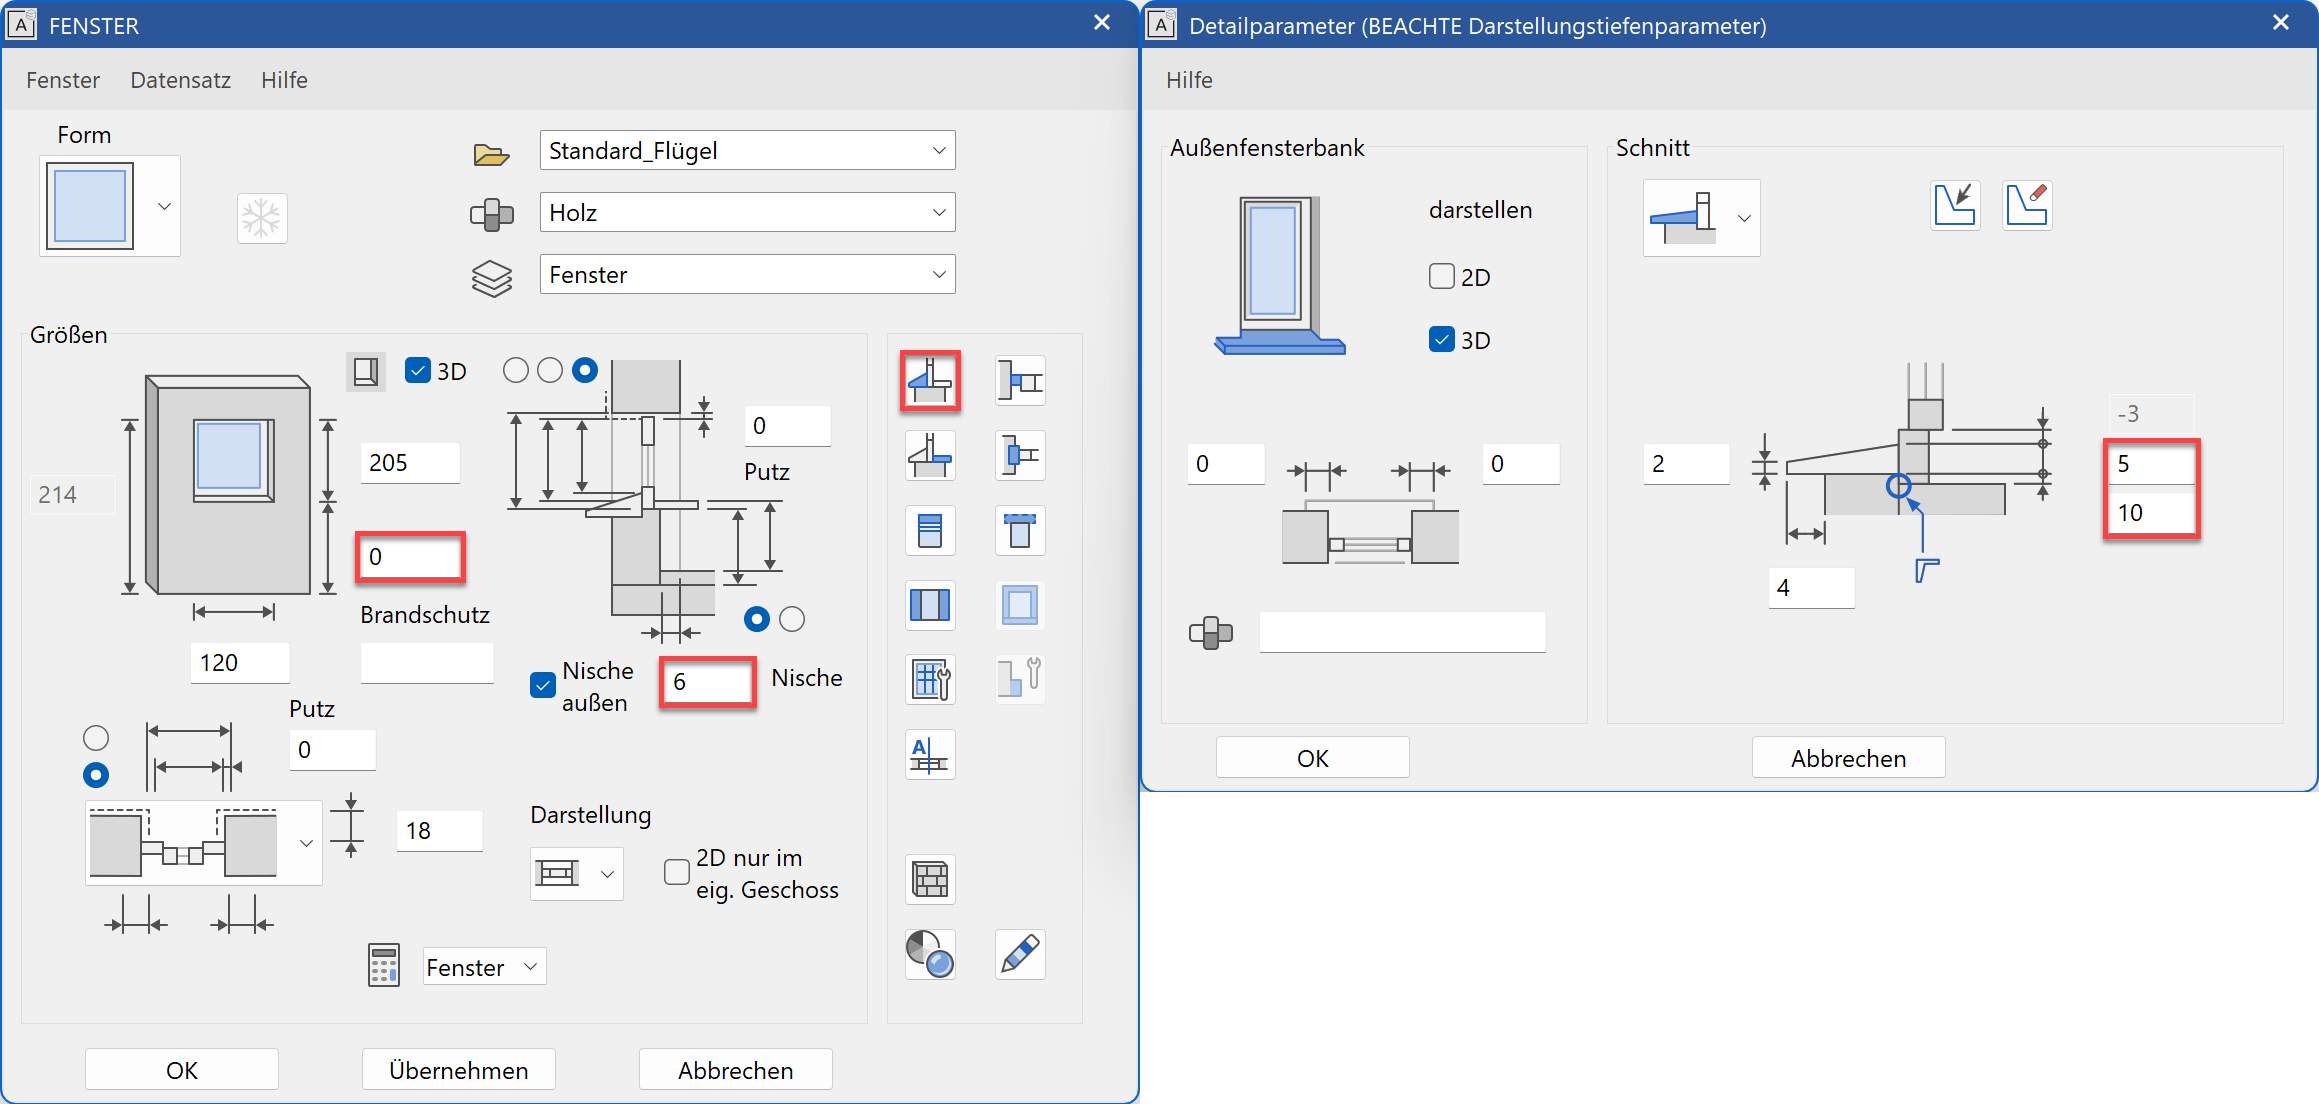
- Change the niche depth to 6 cm. Switch to the detail parameter OUTER SILL. The top edge of the window sill is +5 in addition to 10 cm for the finished floor. Add the values in the detail parameters dialog (you will adjust the frame in a minute).
- Switch to the detail parameter W. FRAME PARAMETERS and extend the base of the frame to 16 cm.
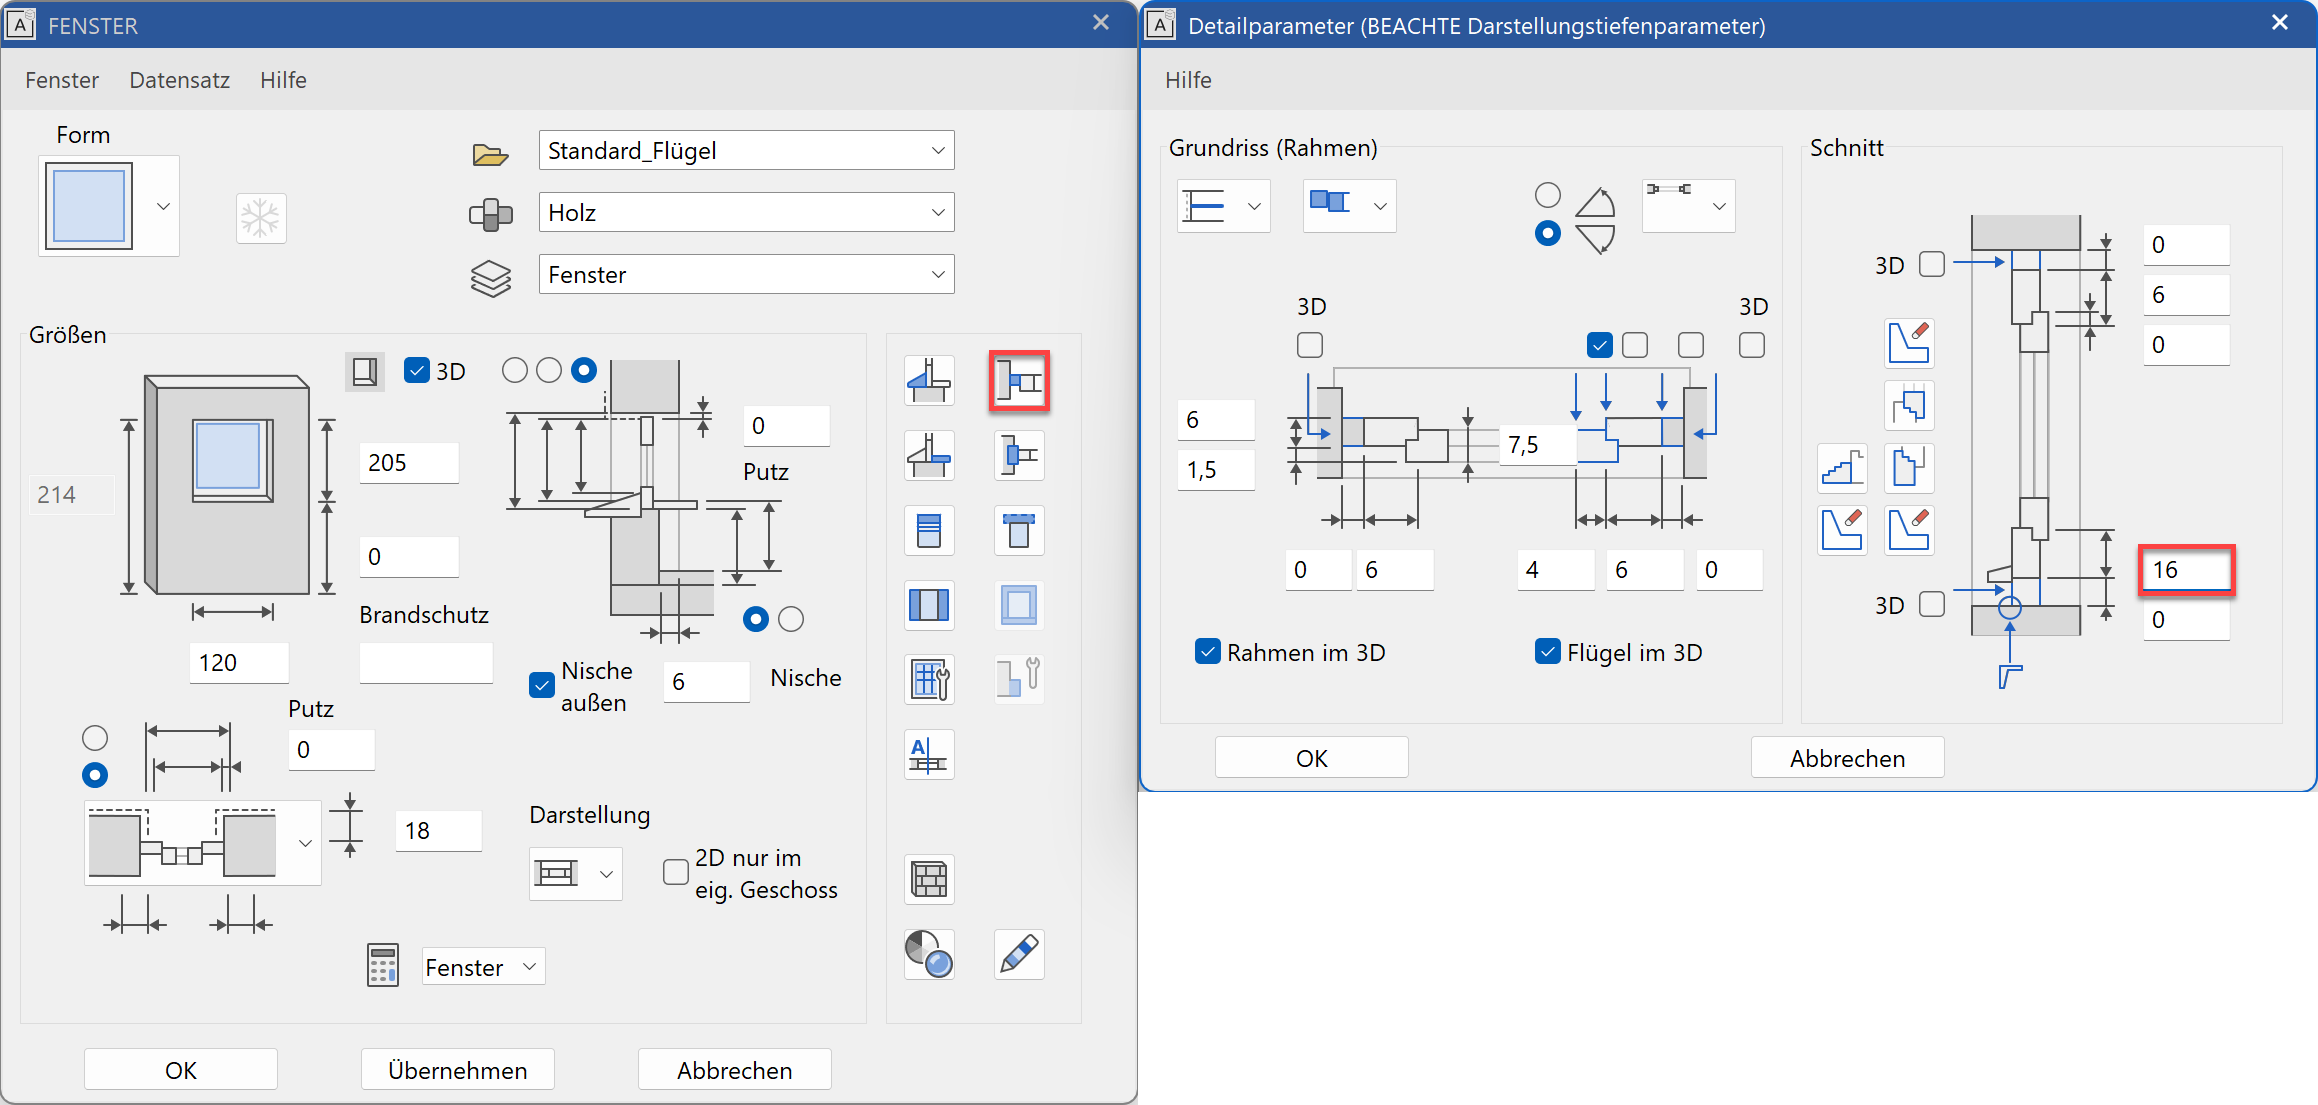
- Close all dialogs and check the window.

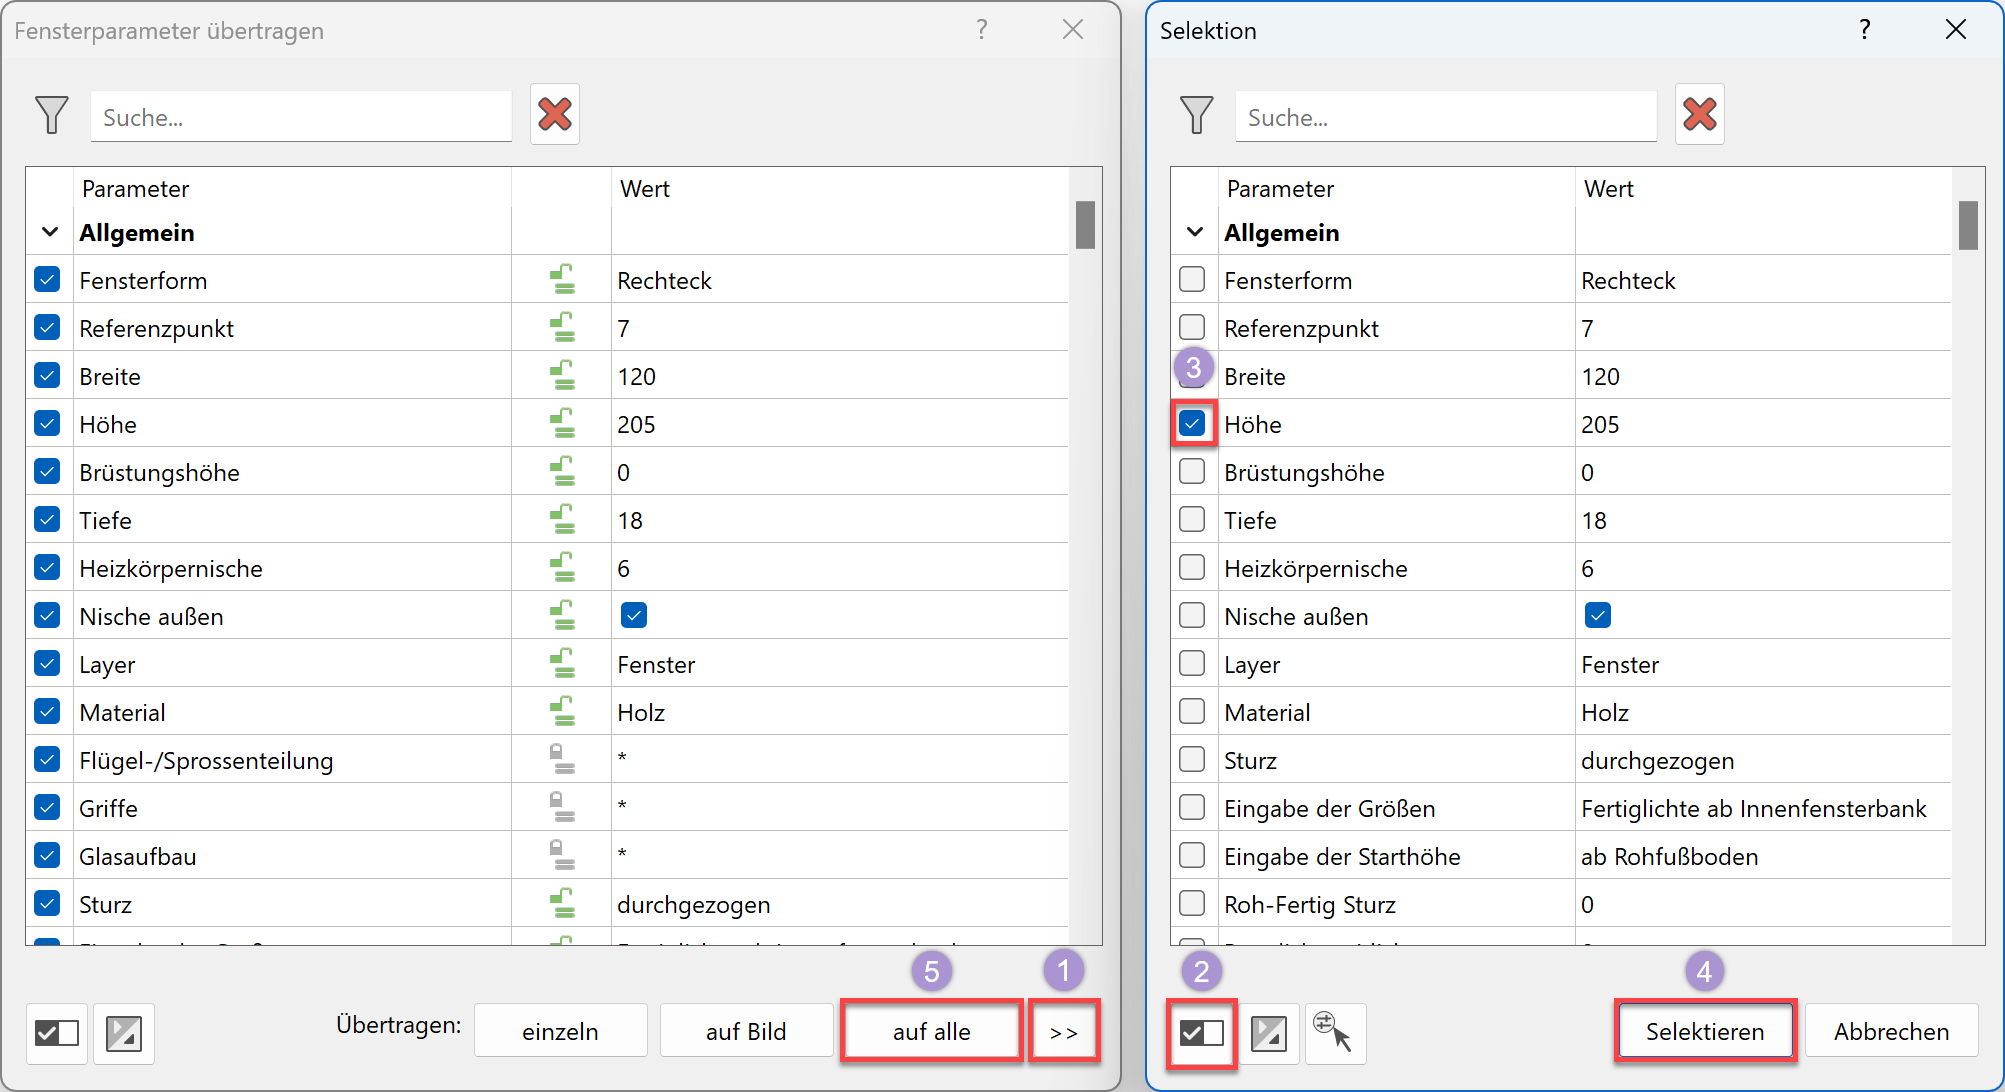
- These settings must be transferred to all window doors. Use the function TRANSFER PARAMETERS and select the corrected window.

- Fill in the dialog with the selection (1) since the change is only to apply to the window doors. The window doors have a height of 210 as a main feature. Select the height alone (2,3) and click the select button (4). The selection dialog closes and you can apply the change to all (5).
- Switch back to the start position current zoom Ctrl+Space and into the wire model Ctrl+D.
- Save a work copy with Ctrl+W.