Hatch
Hatches must be added to the views.
Workshop
- In the south view, you must add a vertical line hatch to the roof. First switch to the south view.

- Select the layer "Roof".

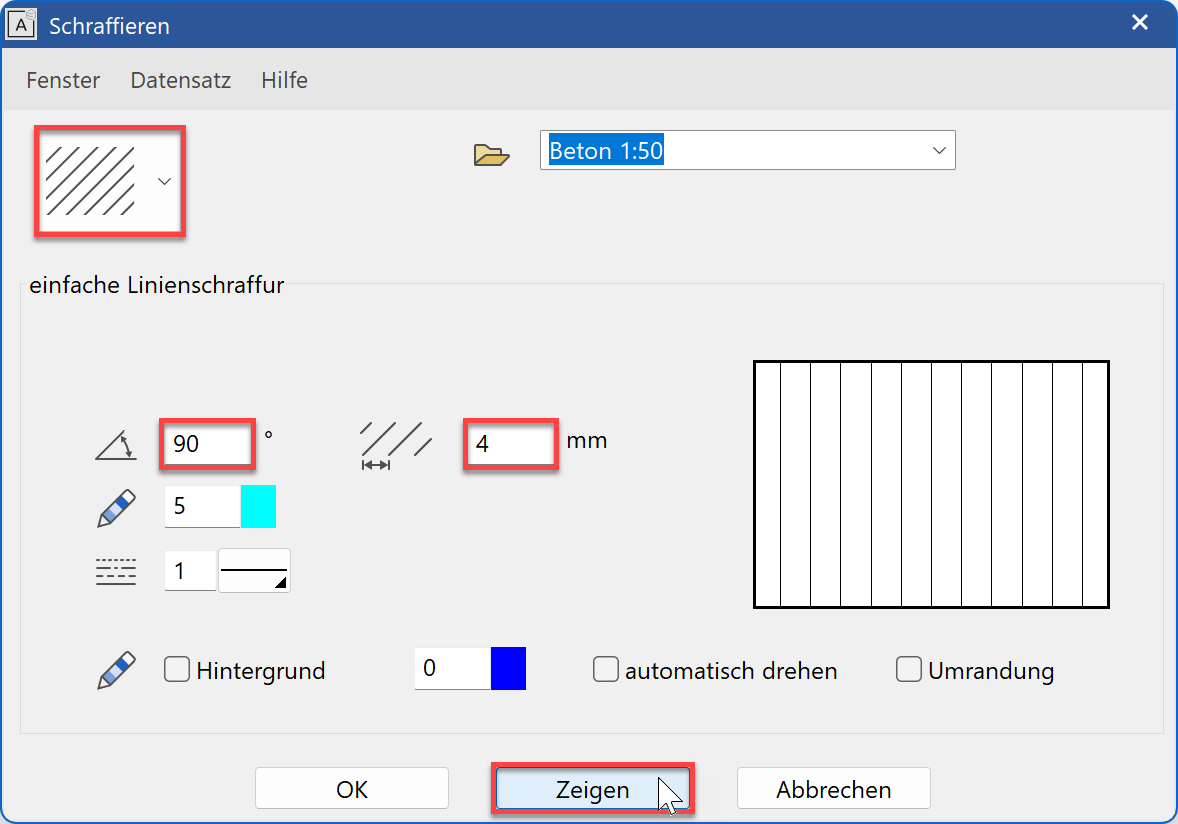
- Select the function AUTOMATIC HATCH and in the property bar the HATCH PARAMETER.


- Select "Simple line hatch" and adjust the values.
The angle of the hatch must be 90° and the distance of the lines is 4 mm. The unit "millimetre" is the actual value on the expression. The preview is updated when you click on SHOW.
- Now click on the roof contour P1. Ensure that you click on the page on which you wish to add hatches.

- Cancel the function.

Tip
The contour may be ambiguous, for example if certain parts extend into the contour.
In such cases, the contour can be followed up with the polygon functions.Polygon access in the property bar:

Input assistant with additional circular functions:

- Access the section A-A in Views Manager.

- Select the function AUTOMATIC HATCH and in the property bar the hatch type "black". So that the hatch receives the layer of the contour, the option "Hatch to contour layer" must be set.


- Click within the light shaft.

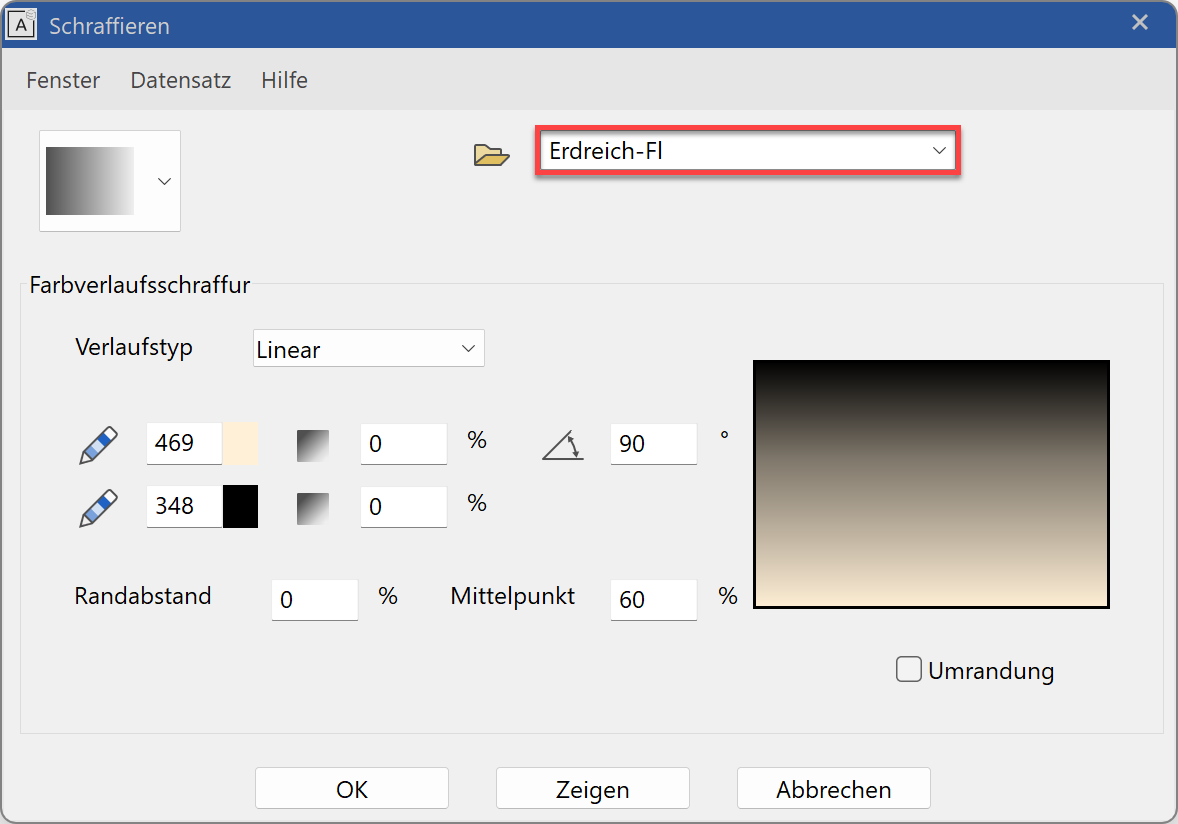
- Hatch the terrain with a colour gradient hatch. The hatch must be in the "surroundings" layer. This time the layer must be set since you will create the contour yourself.

- Select the colour gradient hatch and set the parameter correctly.
- The contour must be entered manually. Start the polygon with the function POLYGON in the property bar.
…

- Start at point P1, then 100 cm cm further down.
For the lower right point, you must set a temporary reference point on the corner of the tree > RP.
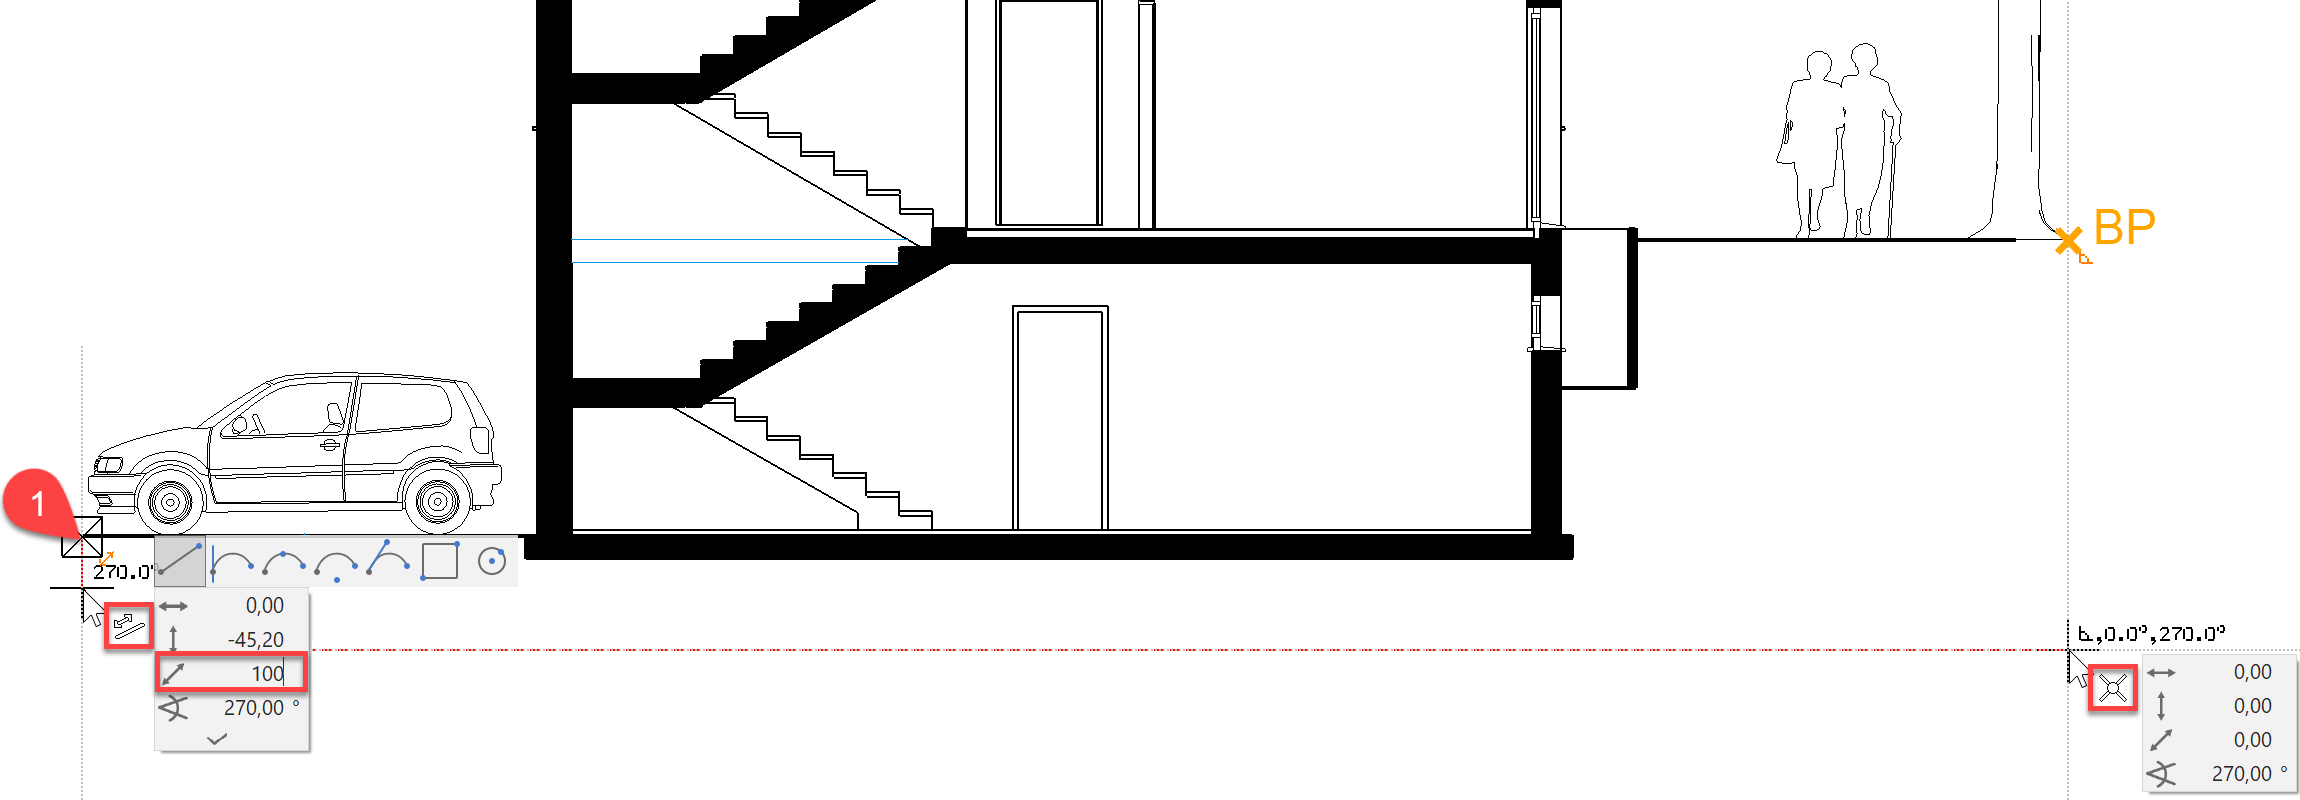
Move the polygon along the terrain and the foundation slab until you are back at point P1.
- Cancel the function.

- Switch to the south view to add the terrain hatch to this view as well.
- Select the layer "Surroundings".
Explaination
Until now you have used auto hatching. This has the specification that it automatically removes elements (lines, texts, dimension). The basement windows are located below the covering hatch already defined. The auto-hatch function would therefore remove these during hatching.

- Select the function MANUAL HATCH either from the Layout menu or by using the AUTOMATIC HATCH switch and start the polygon.
 …
… 
- Draw the polygon using the same procedure as for the section. When you complete the polygon, you have the option to select cut-outs or, as in this case, to end the hatching.
 oder Enter

- Now add the terrain hatches to the west view.
