Camera path
Camera paths are special objects assigned to the layer camera, depicted as 3D lines, which can even be stored separately. It is possible to have multiple camera paths in your model. There are two ways how camera paths can be generated. Either you can create a camera path in the walk mode or you create a path by selecting a sequence of camera positions (snapshots) and interpolate between them.
Automatically record camera paths
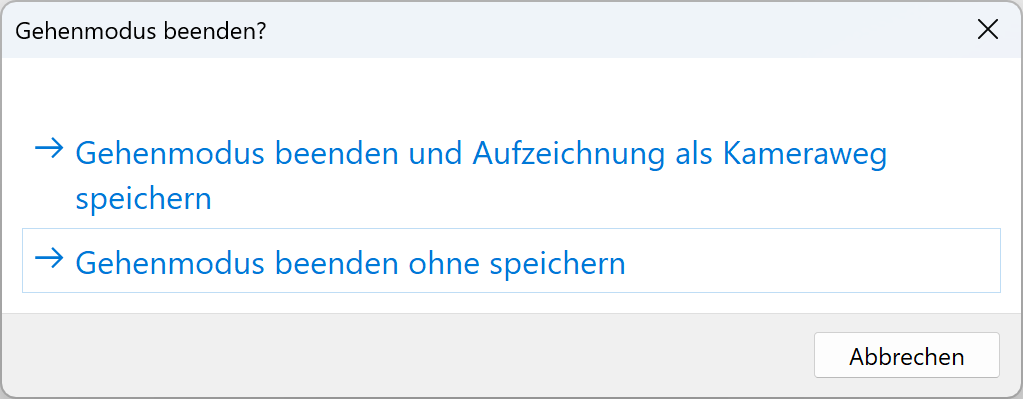
During walkthroughs in the model, ELITECAD always records all movements and stores them as intelligent camera paths. If the creation of a camera path is the goal, you can also use the function RESTART RECORDING and STORE RECORDING AS CAMERA PATH in order to manually define a certain start and end point of the path. Please note that the function RESTART RECORDING deletes all previously recorded movements and starts a new one. The function STORE RECORDING AS CAMERA PATH stores the camera path up to this point and keeps it for further recording.
The following diagram shows the properties of these functions in detail. The two functions can also be mixed.

When the function STORE RECORDING AS CAMERA PATH is used, the current camera path and the new camera path will be identical in the first section, which is visible when the path is selected.
Workshop
That way different camera paths are created which can be accessed individually.
-
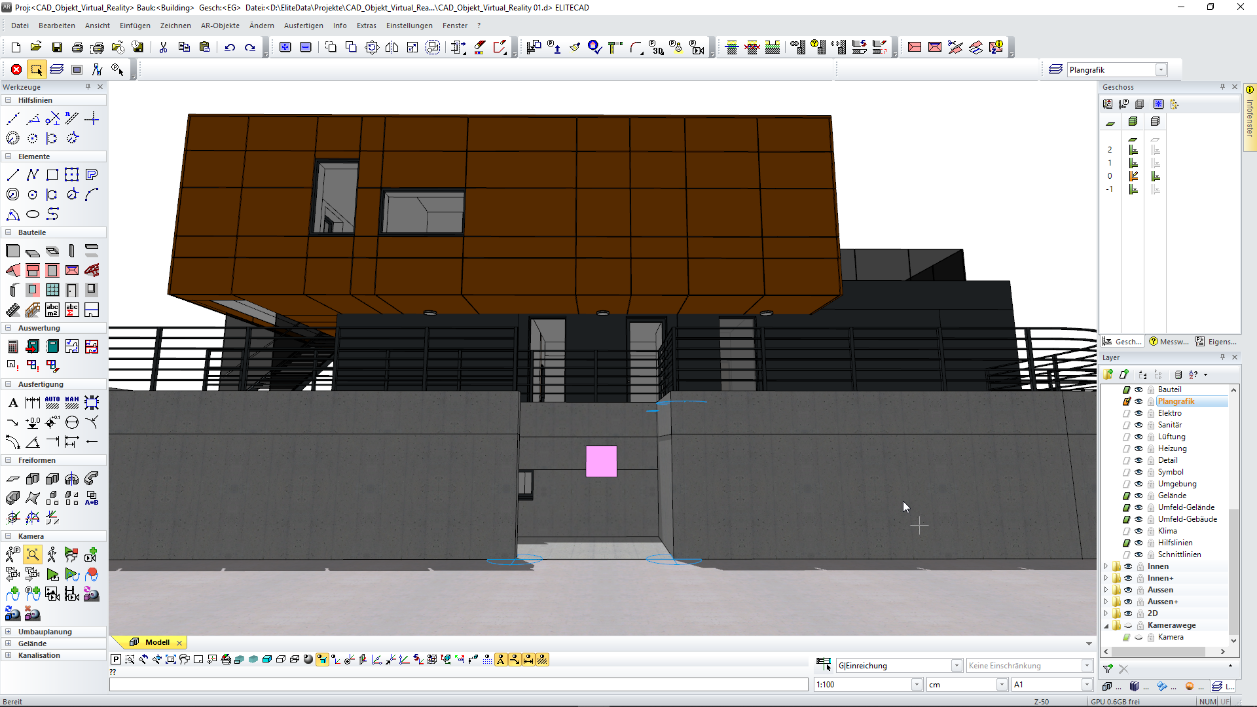
Let's only look at the layer “camera” for a minute and delete all existing camera paths. Then move to the camera position “Start outside” and activate WALK MODE.
-
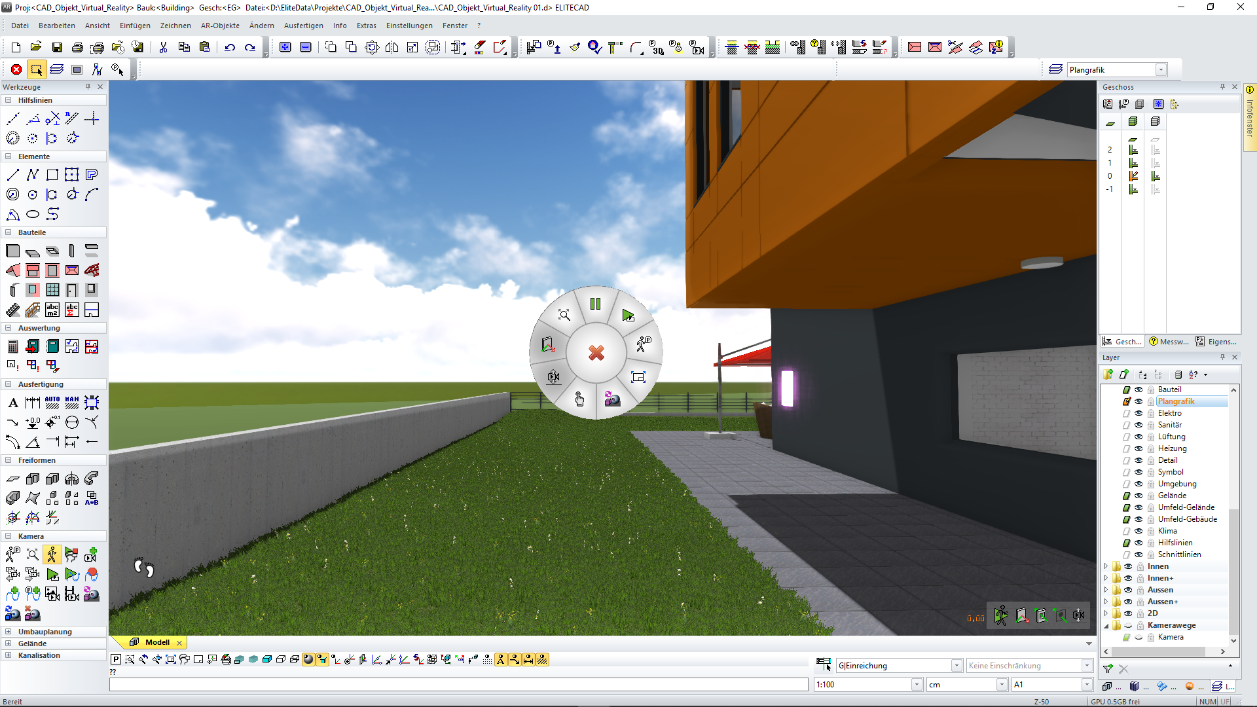
Now we walk up the stairs, stop on the grass approximately at half of the buildings length, and use the function STORE RECORDING AS CAMERA PATH. You can do this by clicking the right mouse button and then using the cursor to click the function.
-
Afterwards we continue walking around the pool until the pool entry ladder. We press the button RESTART RECORDING.
-
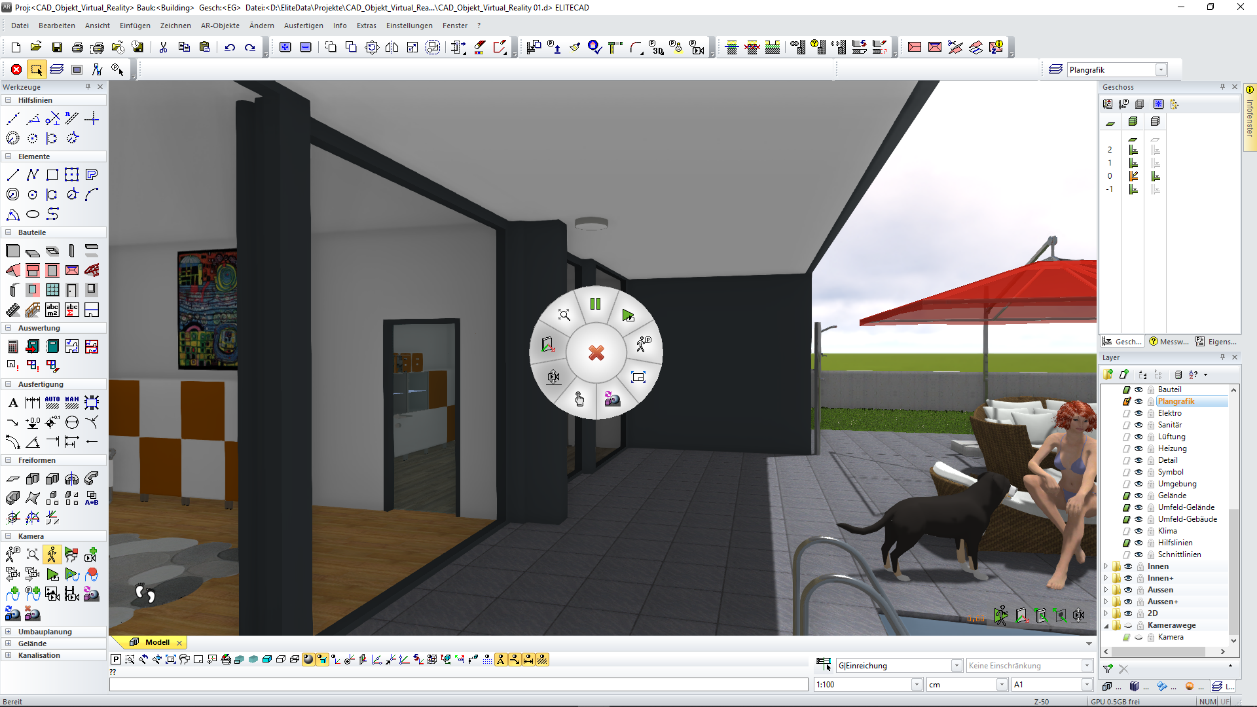
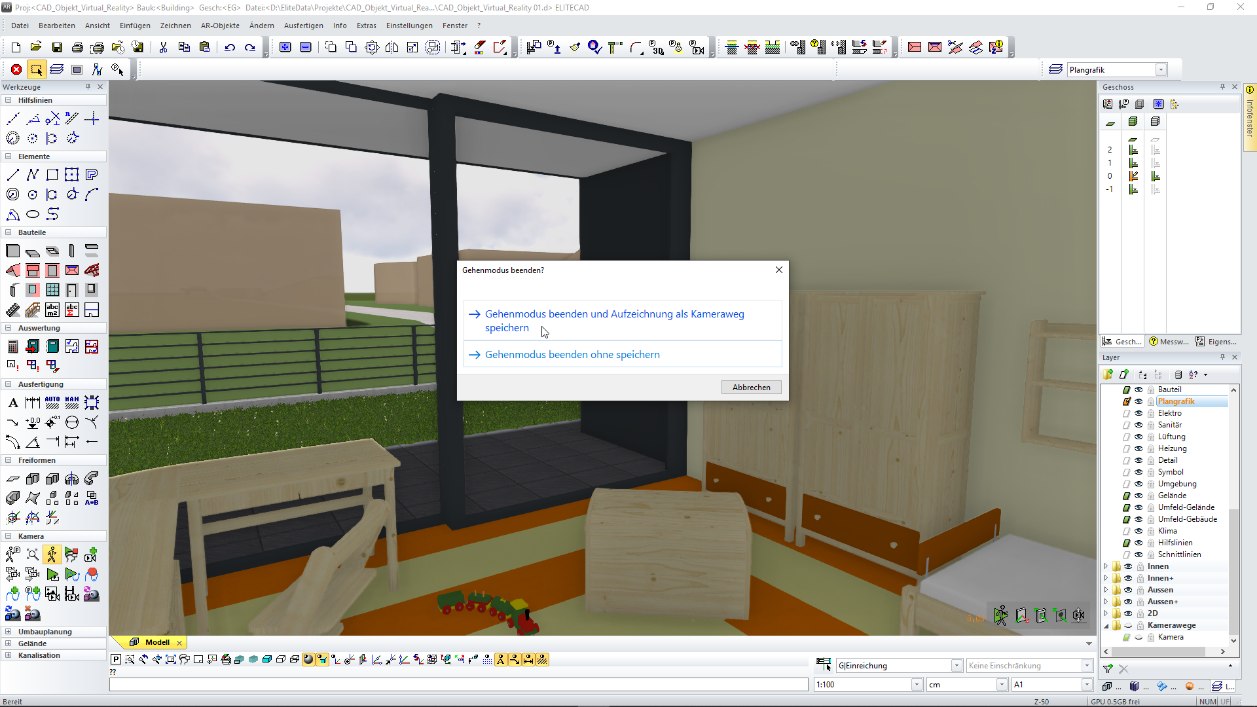
Finally, we walk left into the house, through the living room and the hallway into the kid’s room. Here we stop the WALKING MODE and thus save the camera path.
-
We are now back to CAMERA MODE ROTATE/MOVE and only activate the layer “camera”. Afterwards we should see an image similar to this one:

In order to get a better picture of the three generated camera paths, the next image shows them shifted a little bit, so you can see the individual paths.

-
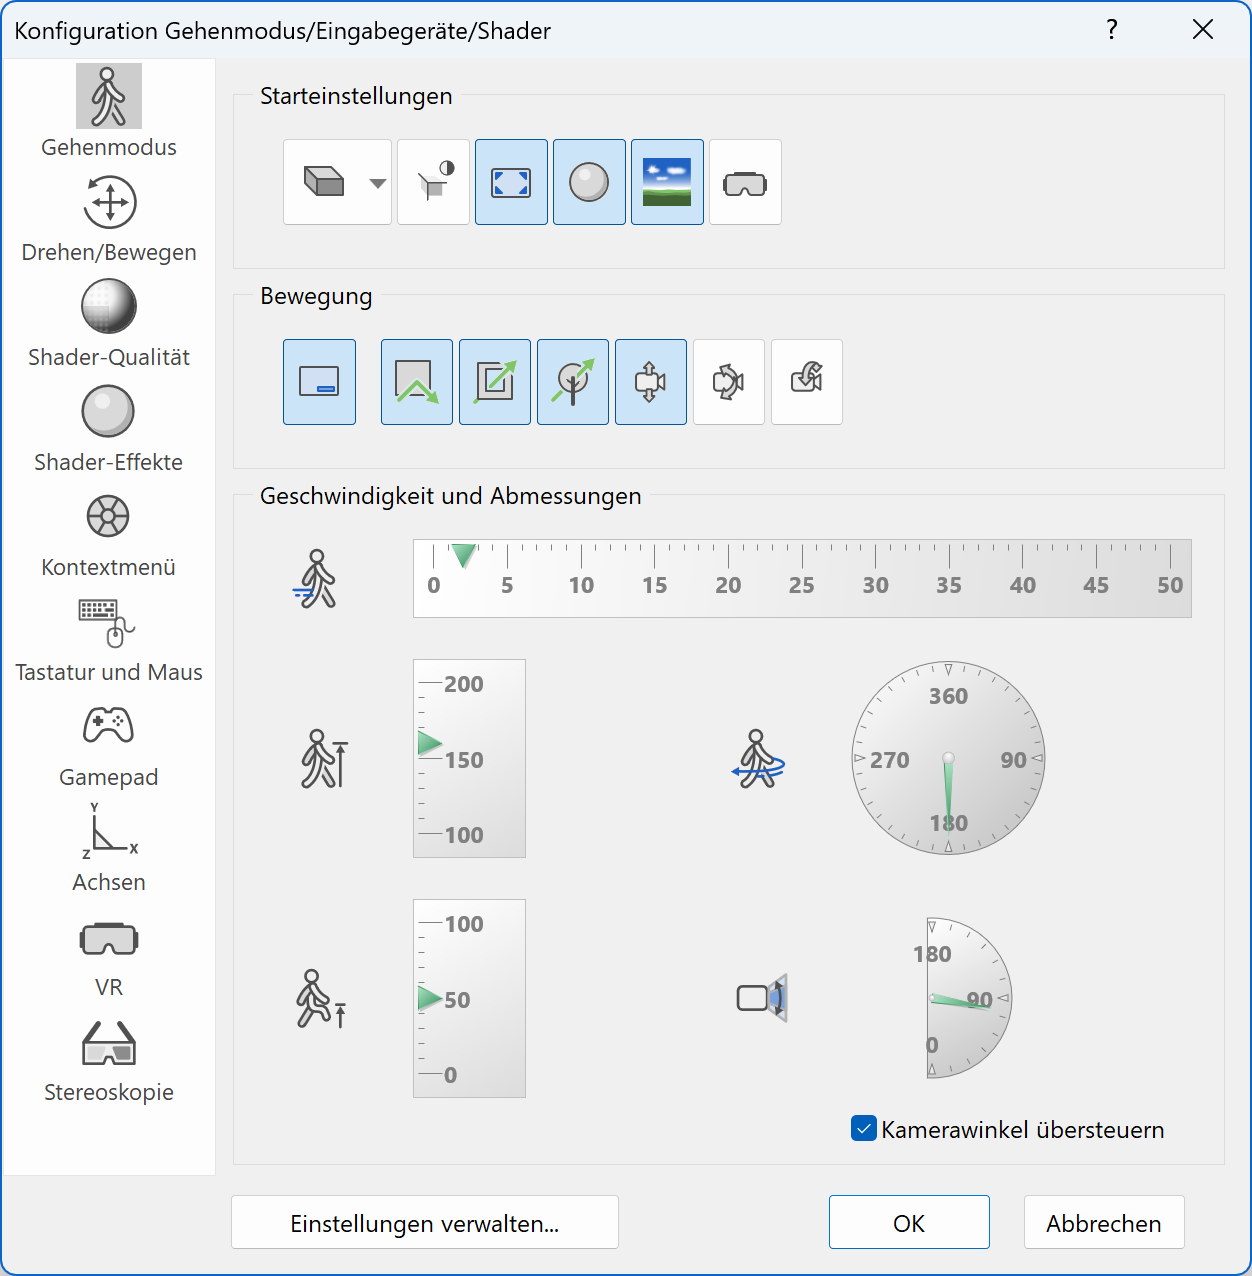
If we want to generate the same camera paths without using the CAD user interface, we have to add more functions to our context menu: RESTART RECORDING and STORE RECORDING AS CAMERA PATH. In order to do this, we need to open the parameter dialog for the WALKING MODE CONFIGURATION and add the two functions in the tab context menu. In addition, we change the start parameters of the walking mode to full screen.

-
Let's start again at the position “start outside” and switch on WALKING MODE. We walk towards the building and go up the stairs to our left. Nest to the building, we stop and activate the function STORE RECORDING AS CAMERA PATH.

-
Afterwards we walk around the pool to the ladder and activate the function RESTART RECORDING.

-
After we have reached the children’s room again, we stop the WALKING MODE and save the camera path.

Now we have reached the same result, but without using the CAD user interface like before.
tip
If you add the functions restart recording and store recording as camera path to your gamepad, you can create camera paths even quicker.
Definition of camera paths
Camera paths can also be generated by linking multiple stored camera positions (snapshots) together. After choosing the fixed camera positions, the system interpolates between these positions and the user can choose the overall duration or the time between the individual snapshots. With only a few clicks, it is possible to create a sequence based on snapshots, which results in a configurable camera path. This easy way or defining camera paths is the basis for the creation of stable videos with smooth camera movements.
Workshop
-
Let's position ourselves at the entrance of the building, switch to WALKING MODE and create the first snapshot. The name, which was assigned to the camera position, is displayed at the bottom right corner of the screen. We continue walking through the building and create further snapshots at the staircase, the living room, in front of the office room and in the office in front of the desk.


-
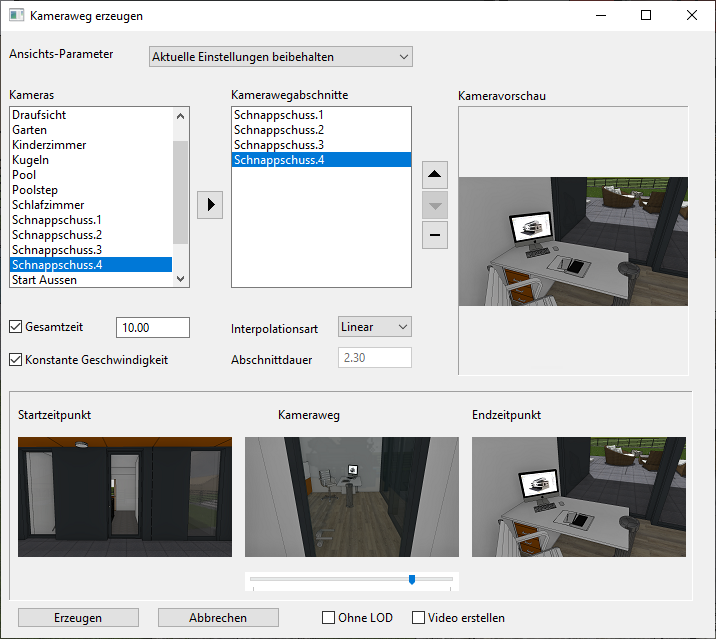
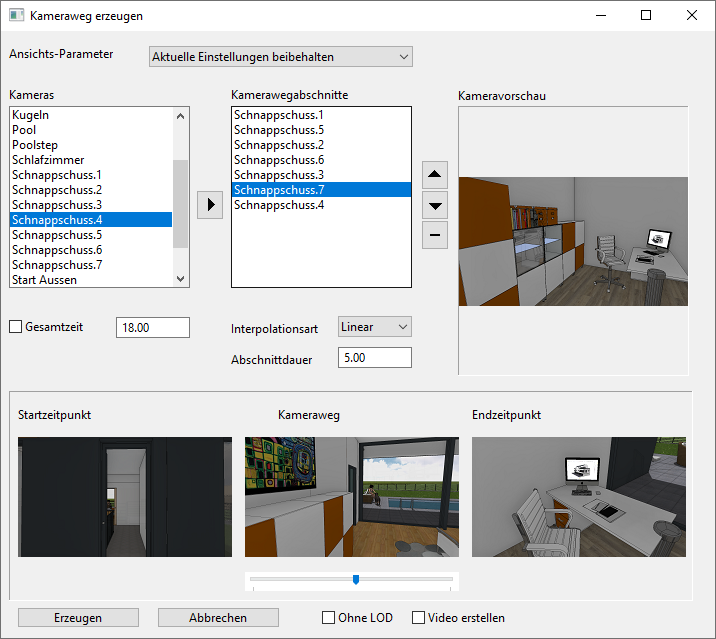
After we have defined and saved our snapshots we activate the function CREATE CAMERA PATH. The following screen appears and we move our snapshots to the field CAMERA PATH SECTIONS. By clicking the checkbox “constant pace”, we can choose, whether the individual sections have the same duration or if a constant pace should be calculated.
-
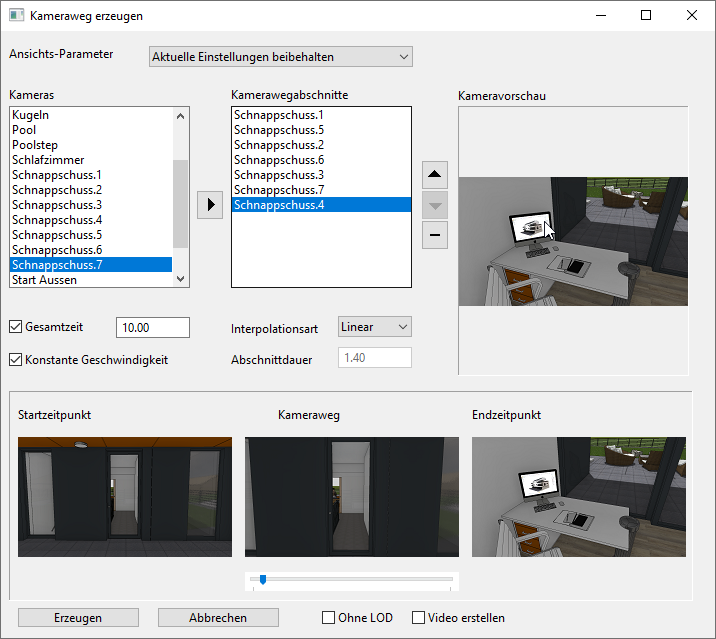
If we look at the CREATE CAMERA PATH dialog and check the preview in the bottom centre, we can see that our camera path is not very smooth. By adding more positions in-between, we can refine the result and create a smoother and optimal camera path. So Let's define three more snapshots at the entrance, in the living room and in the office.


-
We insert the new snapshots at the appropriate positions and follow the result in the preview window. Of course, it is also possible to remove added snapshots from the list again.
-
The next step is to remove the checkmark at the checkbox for total time, which allows us to configure the individual times between the sections. That means we can assign a specific time slot to every section in the video and the total time will be calculated as a result. Let's now define a duration of five sections for the second snapshot (Snapshot 2) and for the second last snapshot (Snapshot 7). To all the other snapshots, we assign a time of 2 seconds, so in the end we have a total time of 18 seconds.
-
After we have reached our desired result we can click GENERATE to create the new camera path. If we now only show the layer “camera”, we can inspect the newly generated camera path.

Play videos
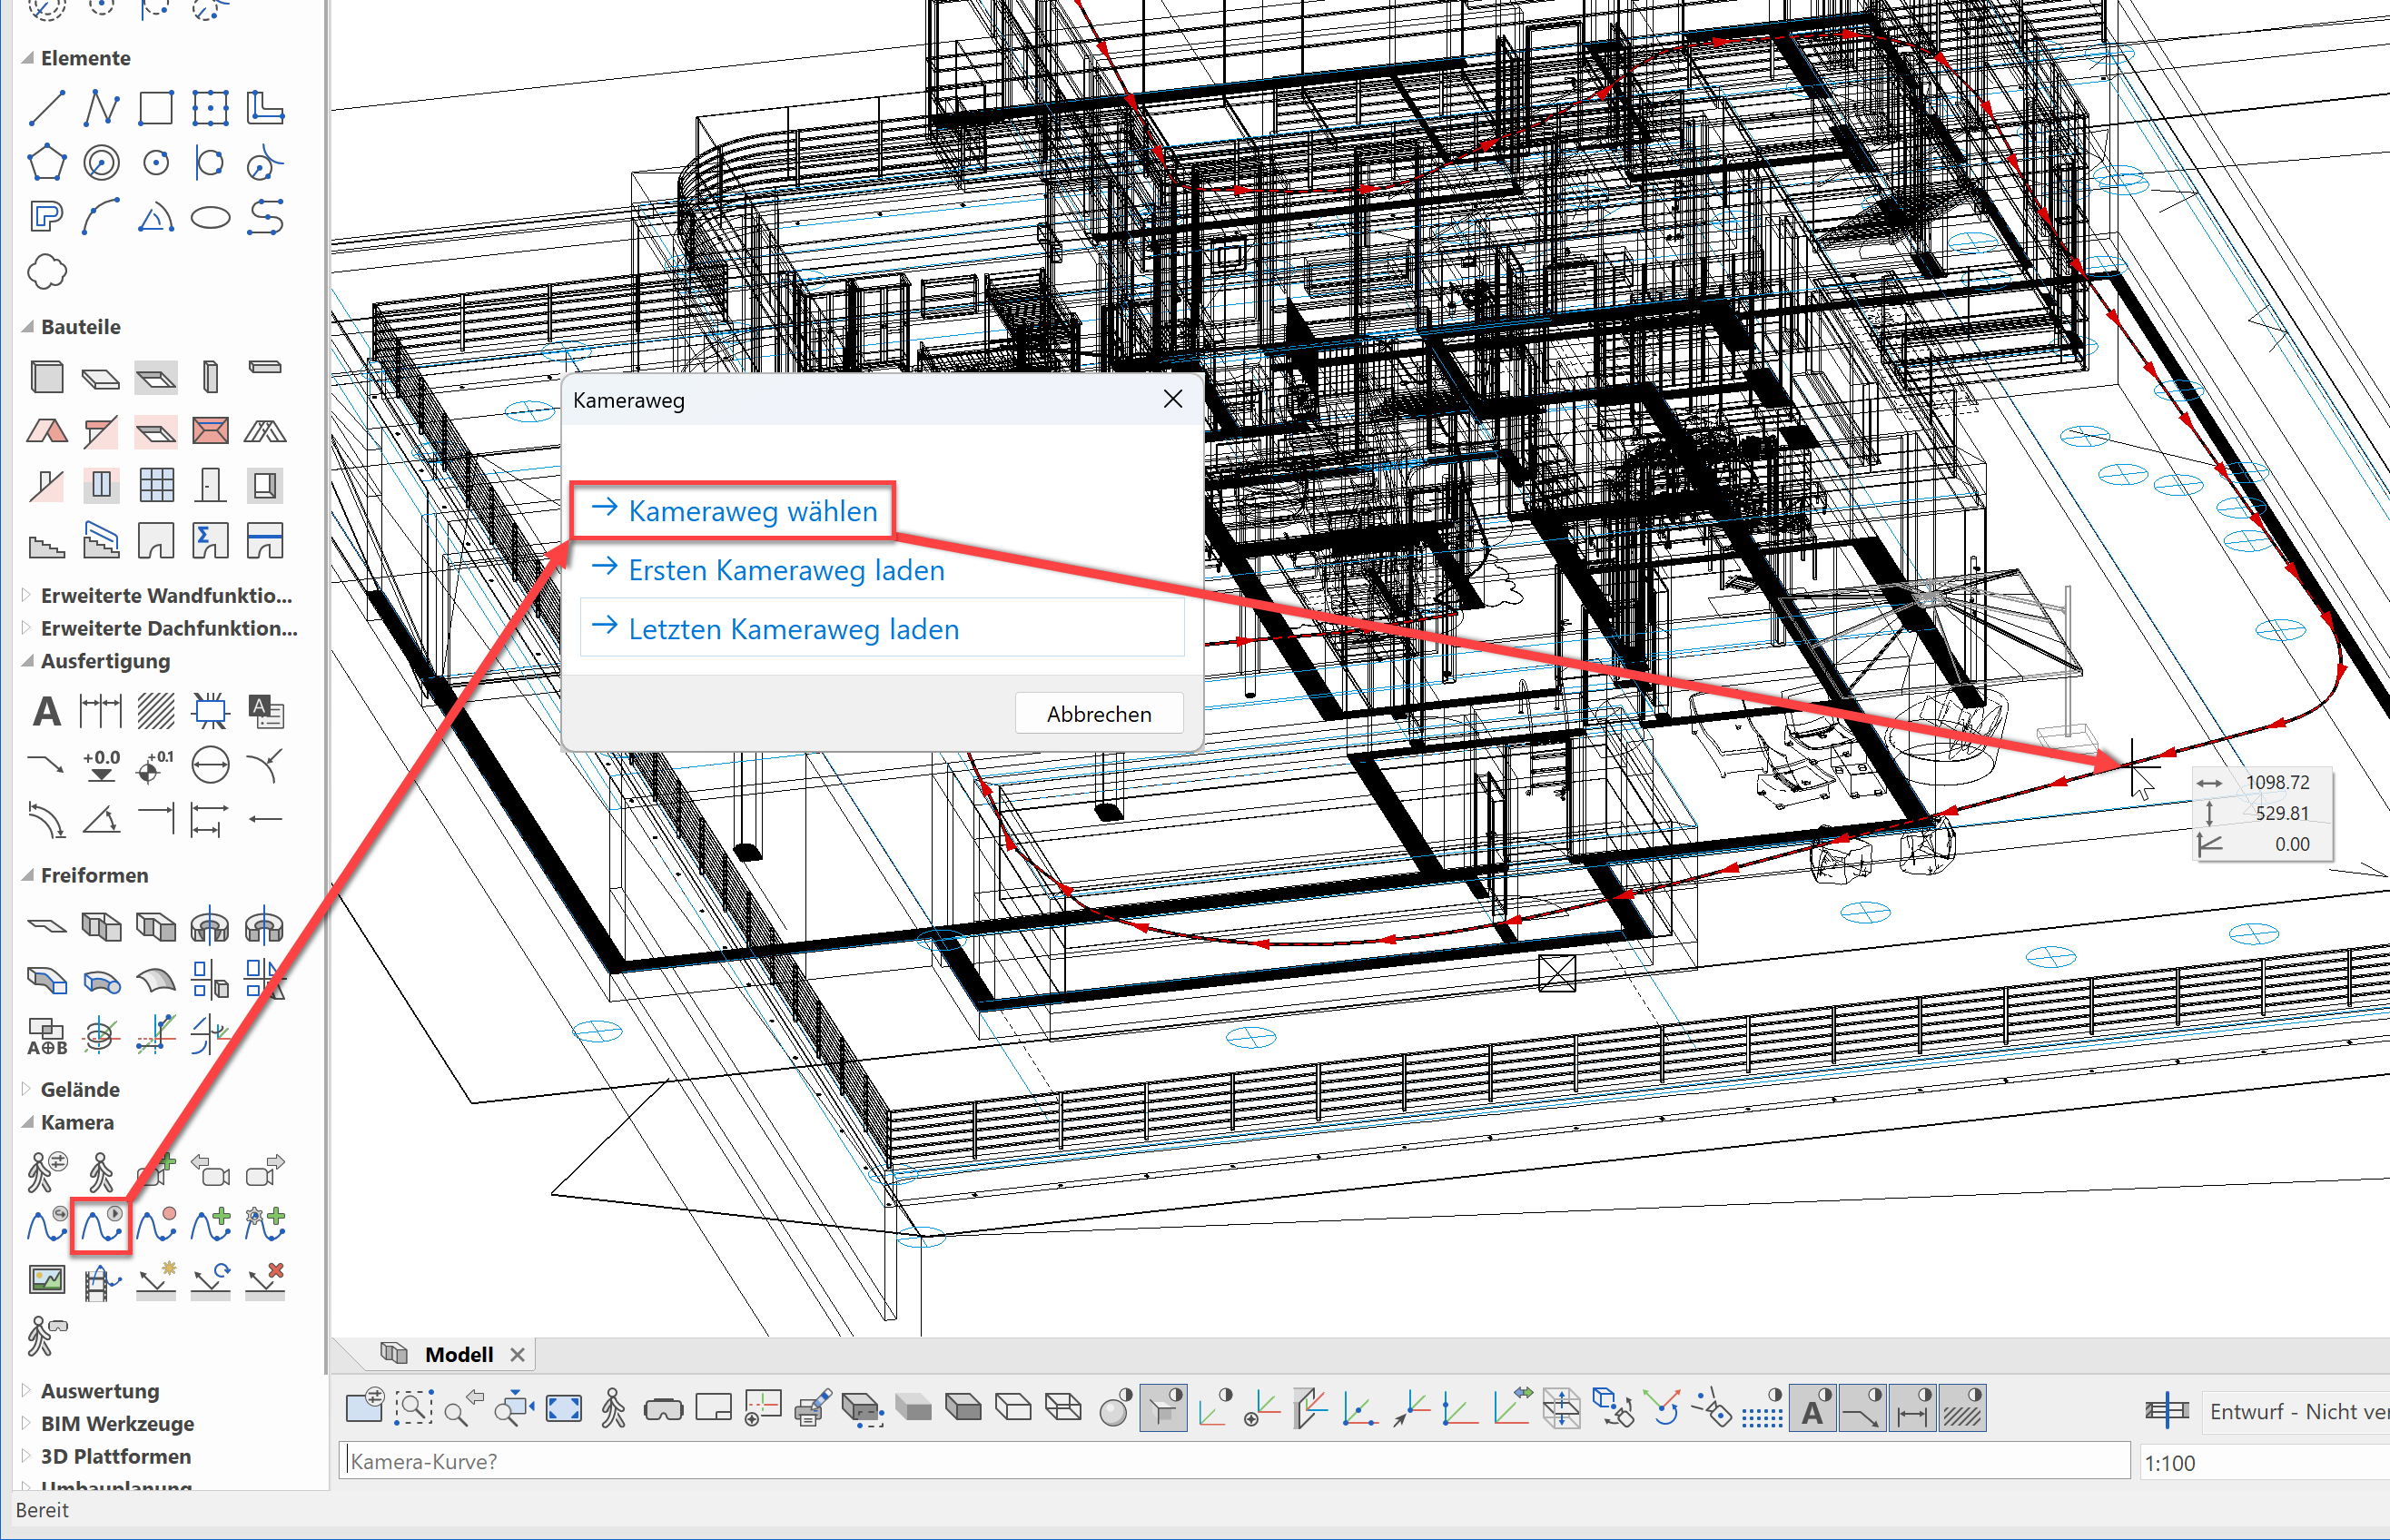
Using the function LOAD AND PLAY CAMERA PATH, we can select the desired camera path and it will be played during walk mode. The selected camera path is depicted with a red dotted line with arrows, and we only need to confirm our selection.
Afterwards we can select whether the selected camera path should be played in an endless loop or just once.

After we have made the selection, our camera path will be played in WALKING MODE.
Safari
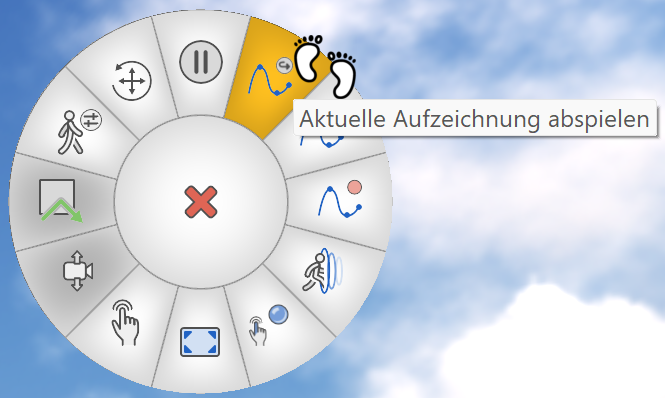
While the camera path is being played, it is always possible to interrupt the video using Esc. Analog to a real safari, it is possible to walk around during a stop and take snapshots. If we want to continue the camera path, we can just click CONTINUE REPLAY in the context menu and the journey through the model will continue from the last position. If the replay of the camera path was interrupted, all movements and actions are recorded again and can be saved as a new camera path as well.
Save camera
![]() During the camera path replay, we have the possibility to use the snapshot functionality. Without opening the save camera dialog, a new snapshot will be created automatically using previously defined quality settings. Furthermore, this snapshot is automatically added to the list of cameras. That way it is possible to switch back to interesting positions later on.
During the camera path replay, we have the possibility to use the snapshot functionality. Without opening the save camera dialog, a new snapshot will be created automatically using previously defined quality settings. Furthermore, this snapshot is automatically added to the list of cameras. That way it is possible to switch back to interesting positions later on.