Create snapshots
![]()
Using the function CREATE SNAPSHOT it is possible to create high quality images of our model.
Create images
Workshop
-
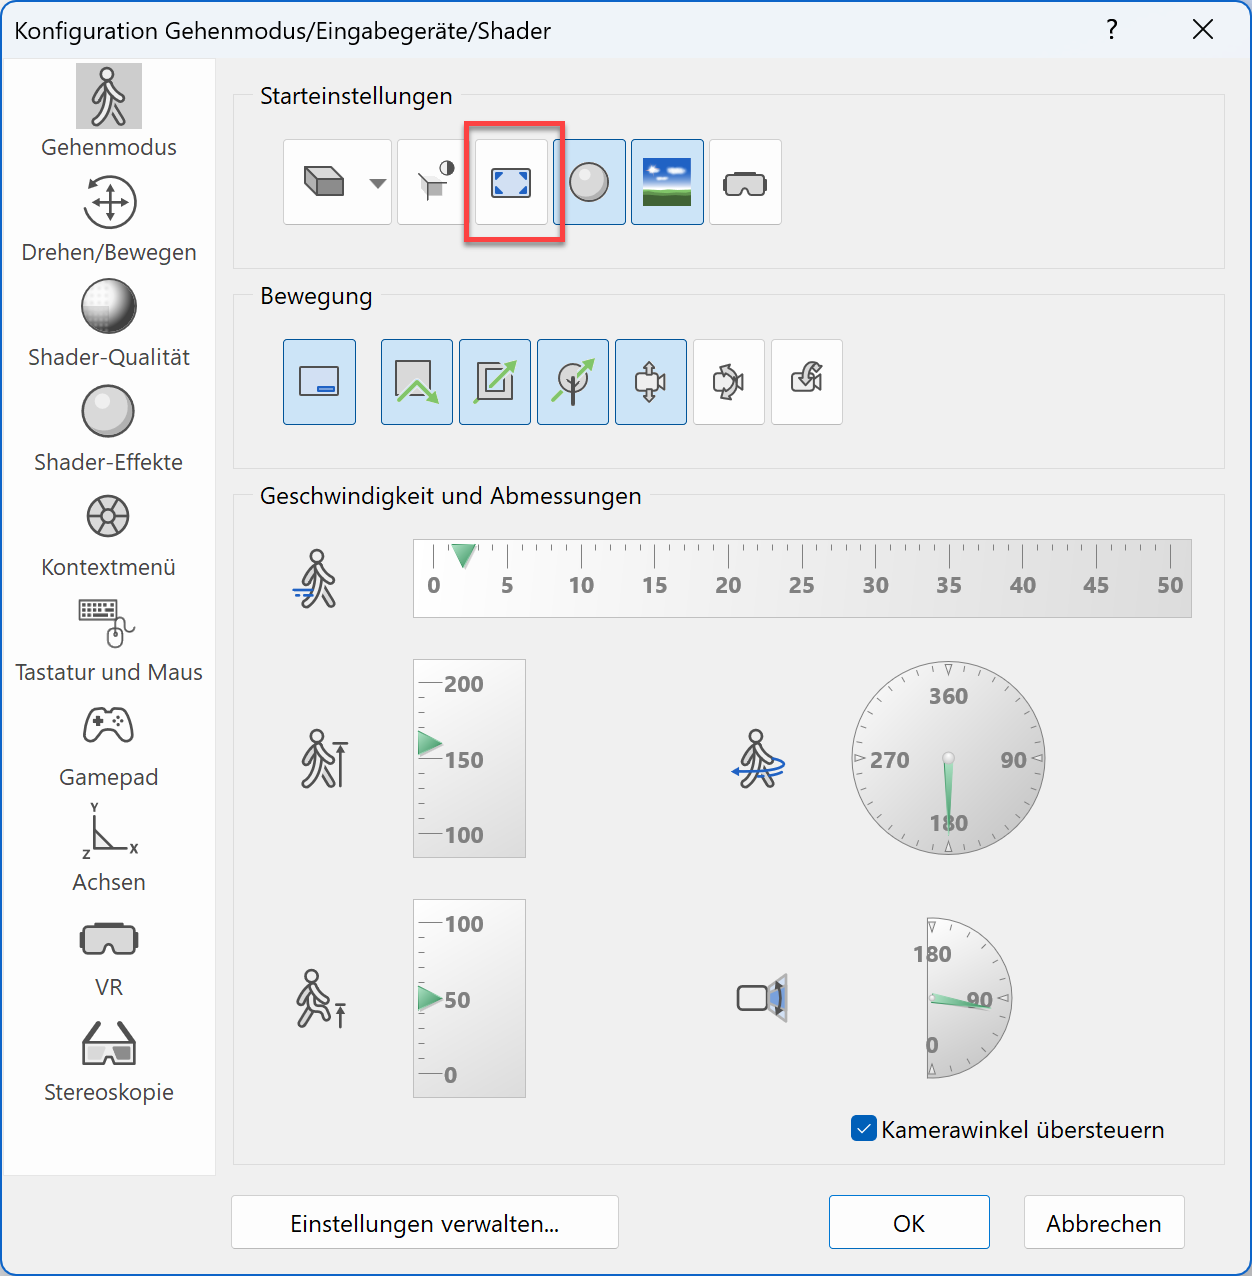
After we have loaded the file CAD_Object_Virtual_Reality_01.d, we open the WALKING MODE CONFIGURATION and change the following parameters accordingly.
It is important that the full screen mode is deactivated.
-
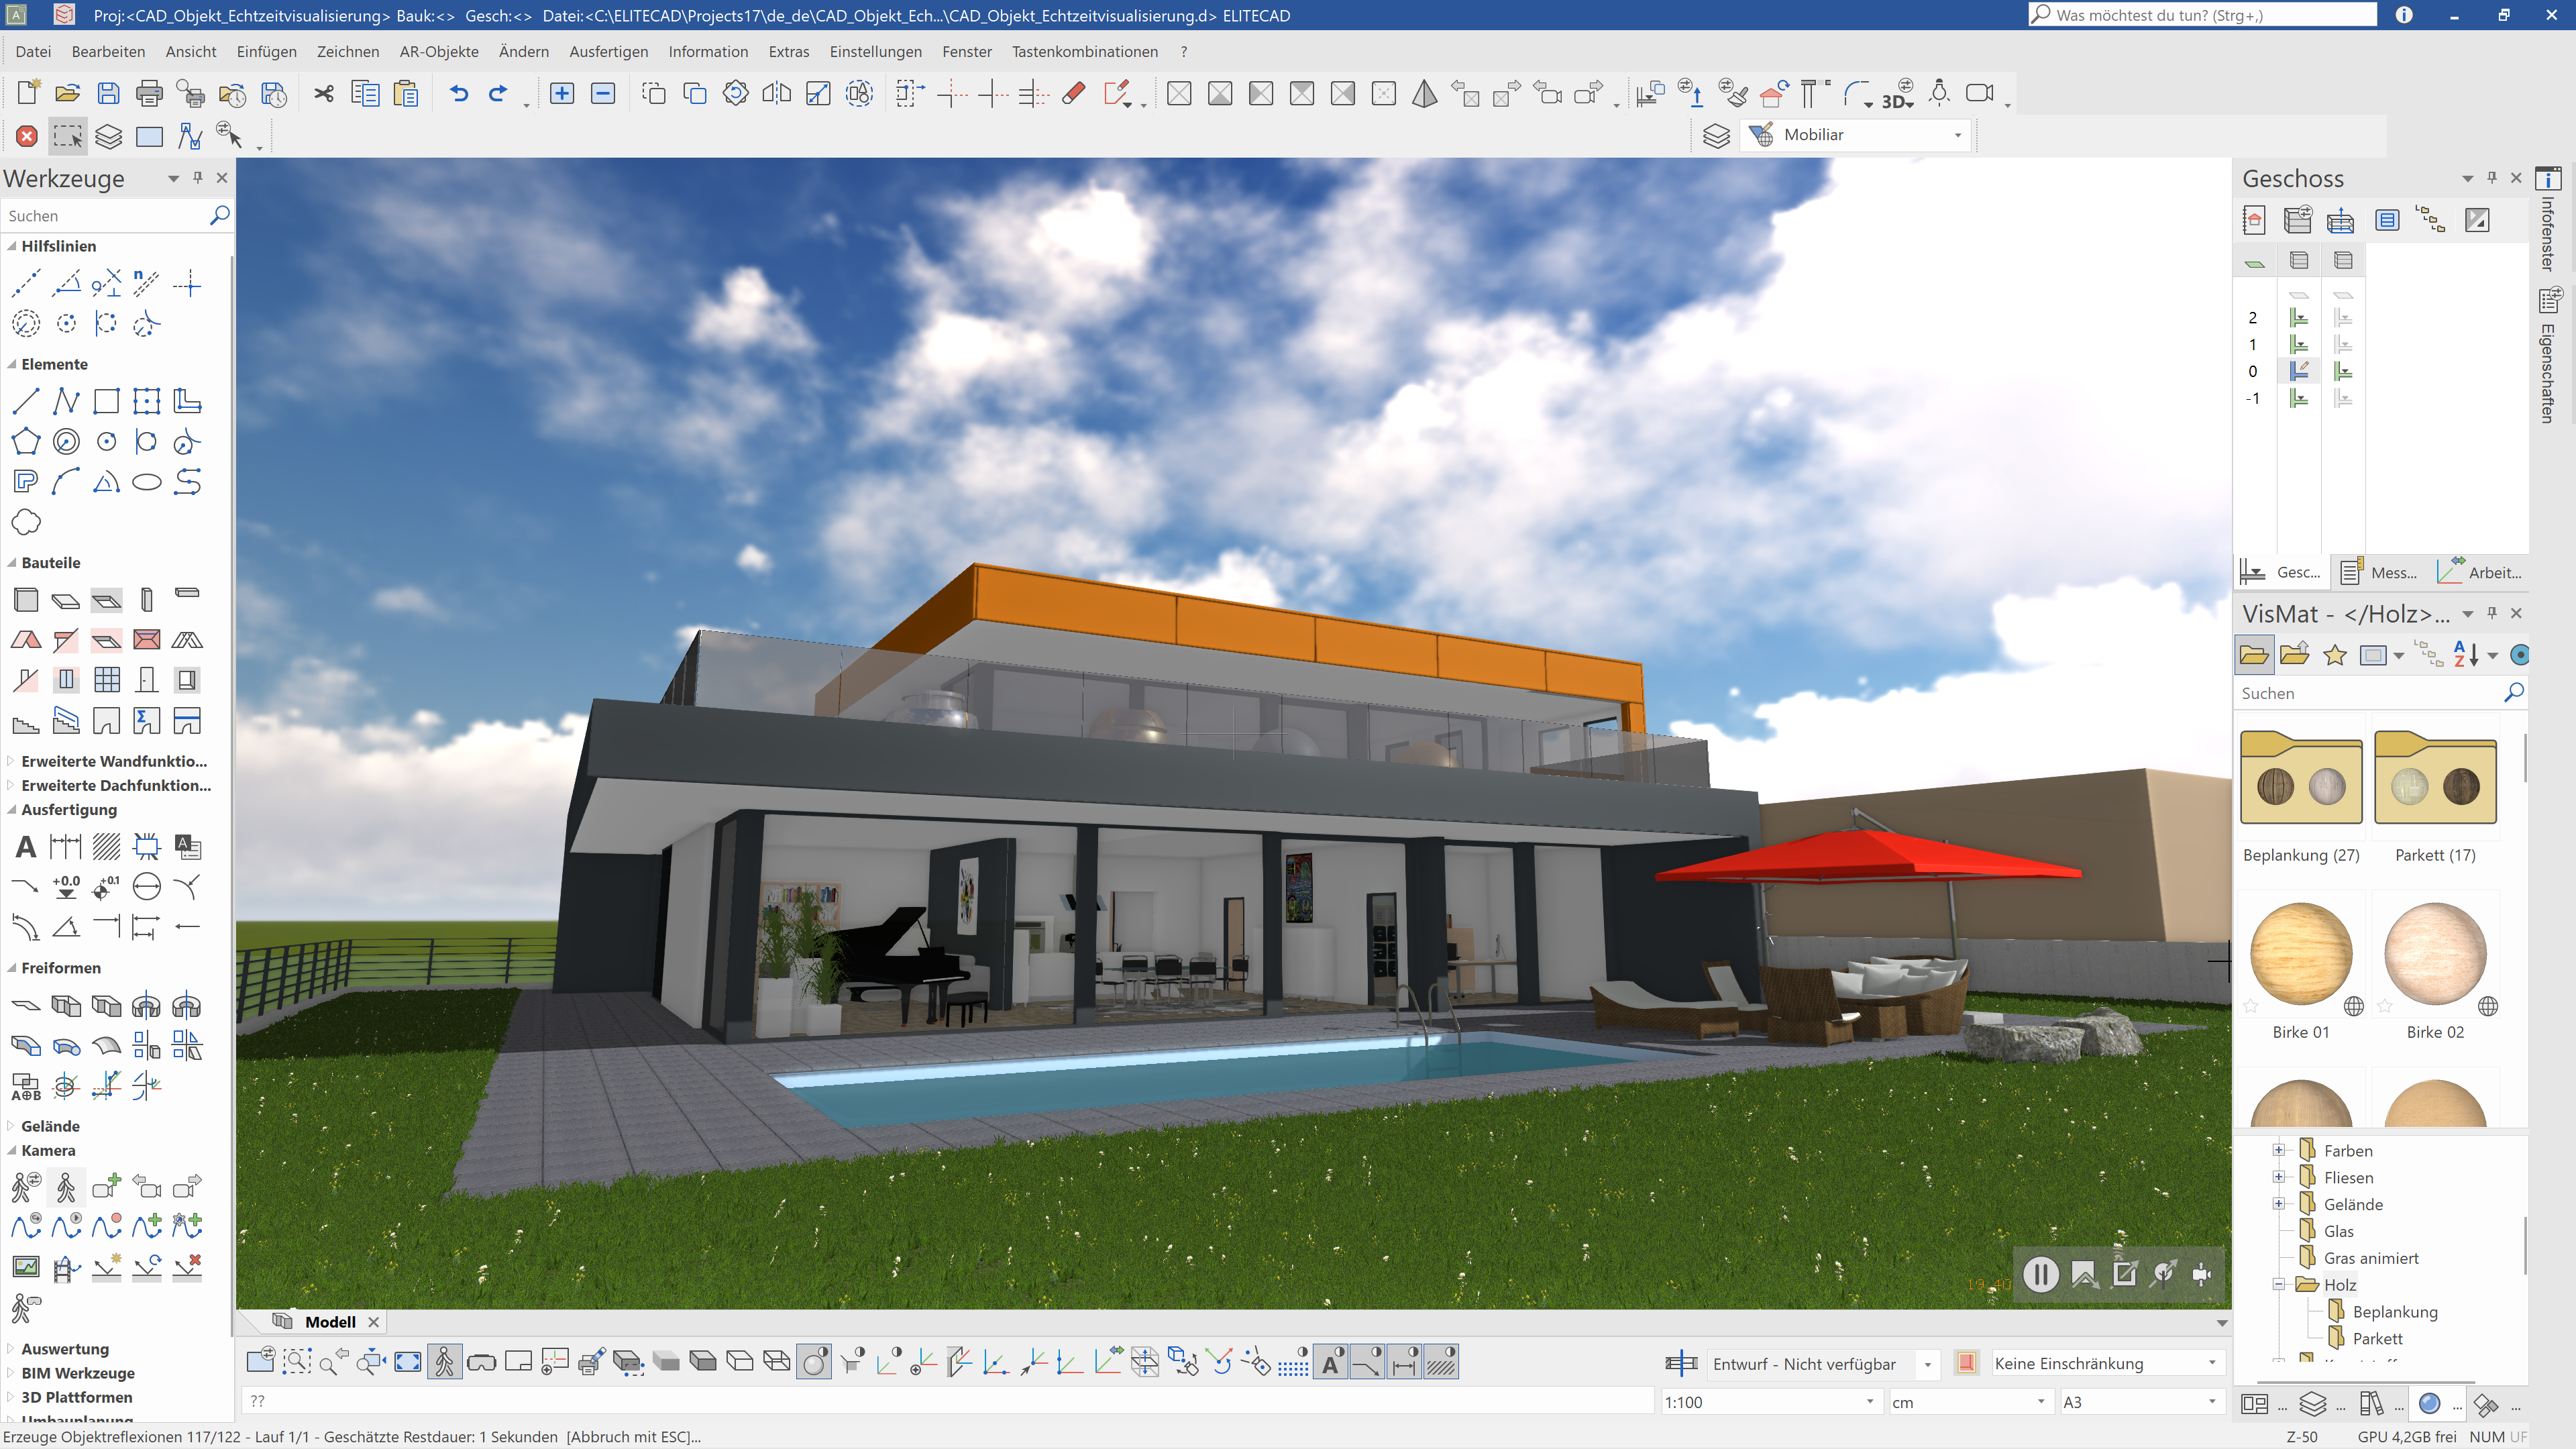
After that, we switch to WALKING MODE and position ourselves to the position „pool“ using the function LOAD NEXT CAMERA. The name of the camera position is shown in the bottom left corner as a status message. After we also activate the shaders, we should see the following image on our screen.
-
The next step is to start the function CREATE A SNAPSHOT.

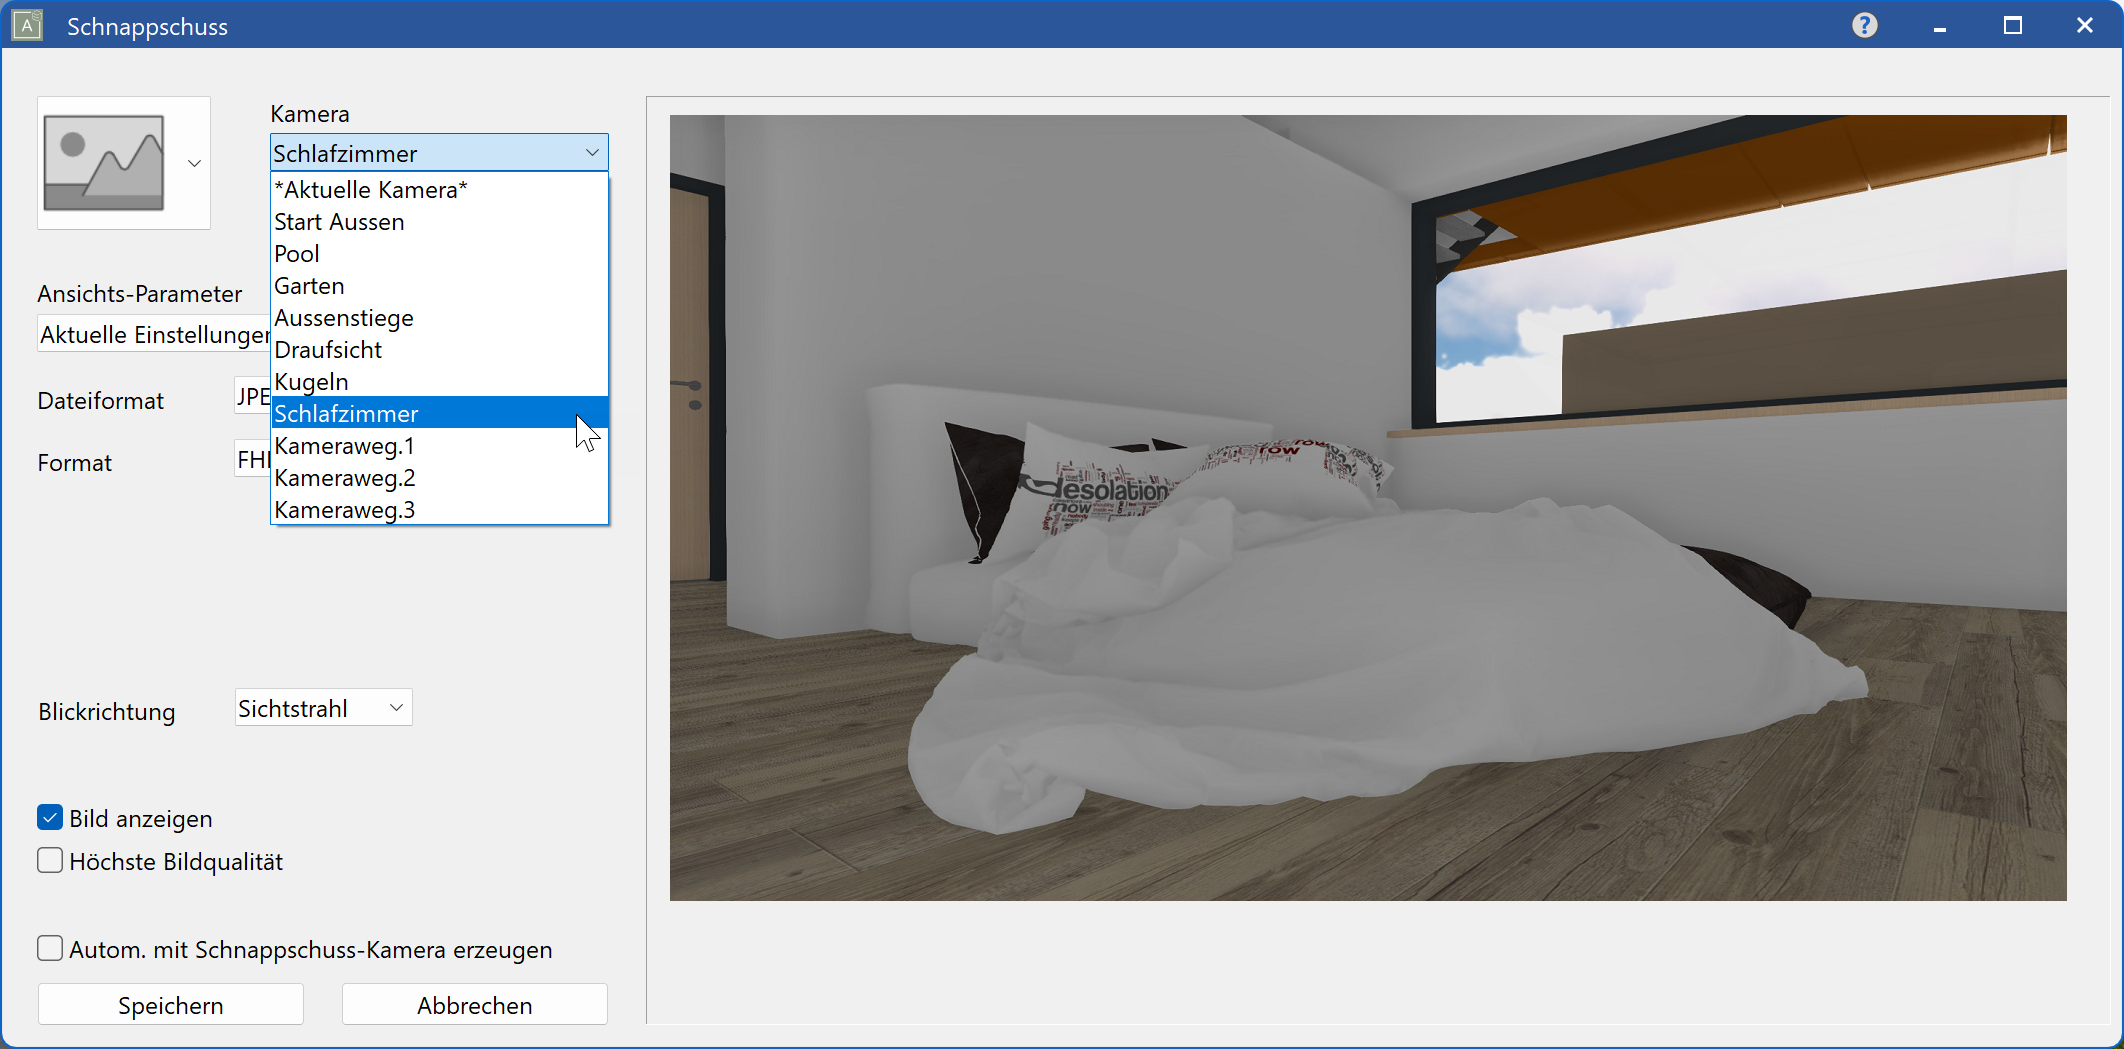
The dialog shows the current configuration for generating snapshots.
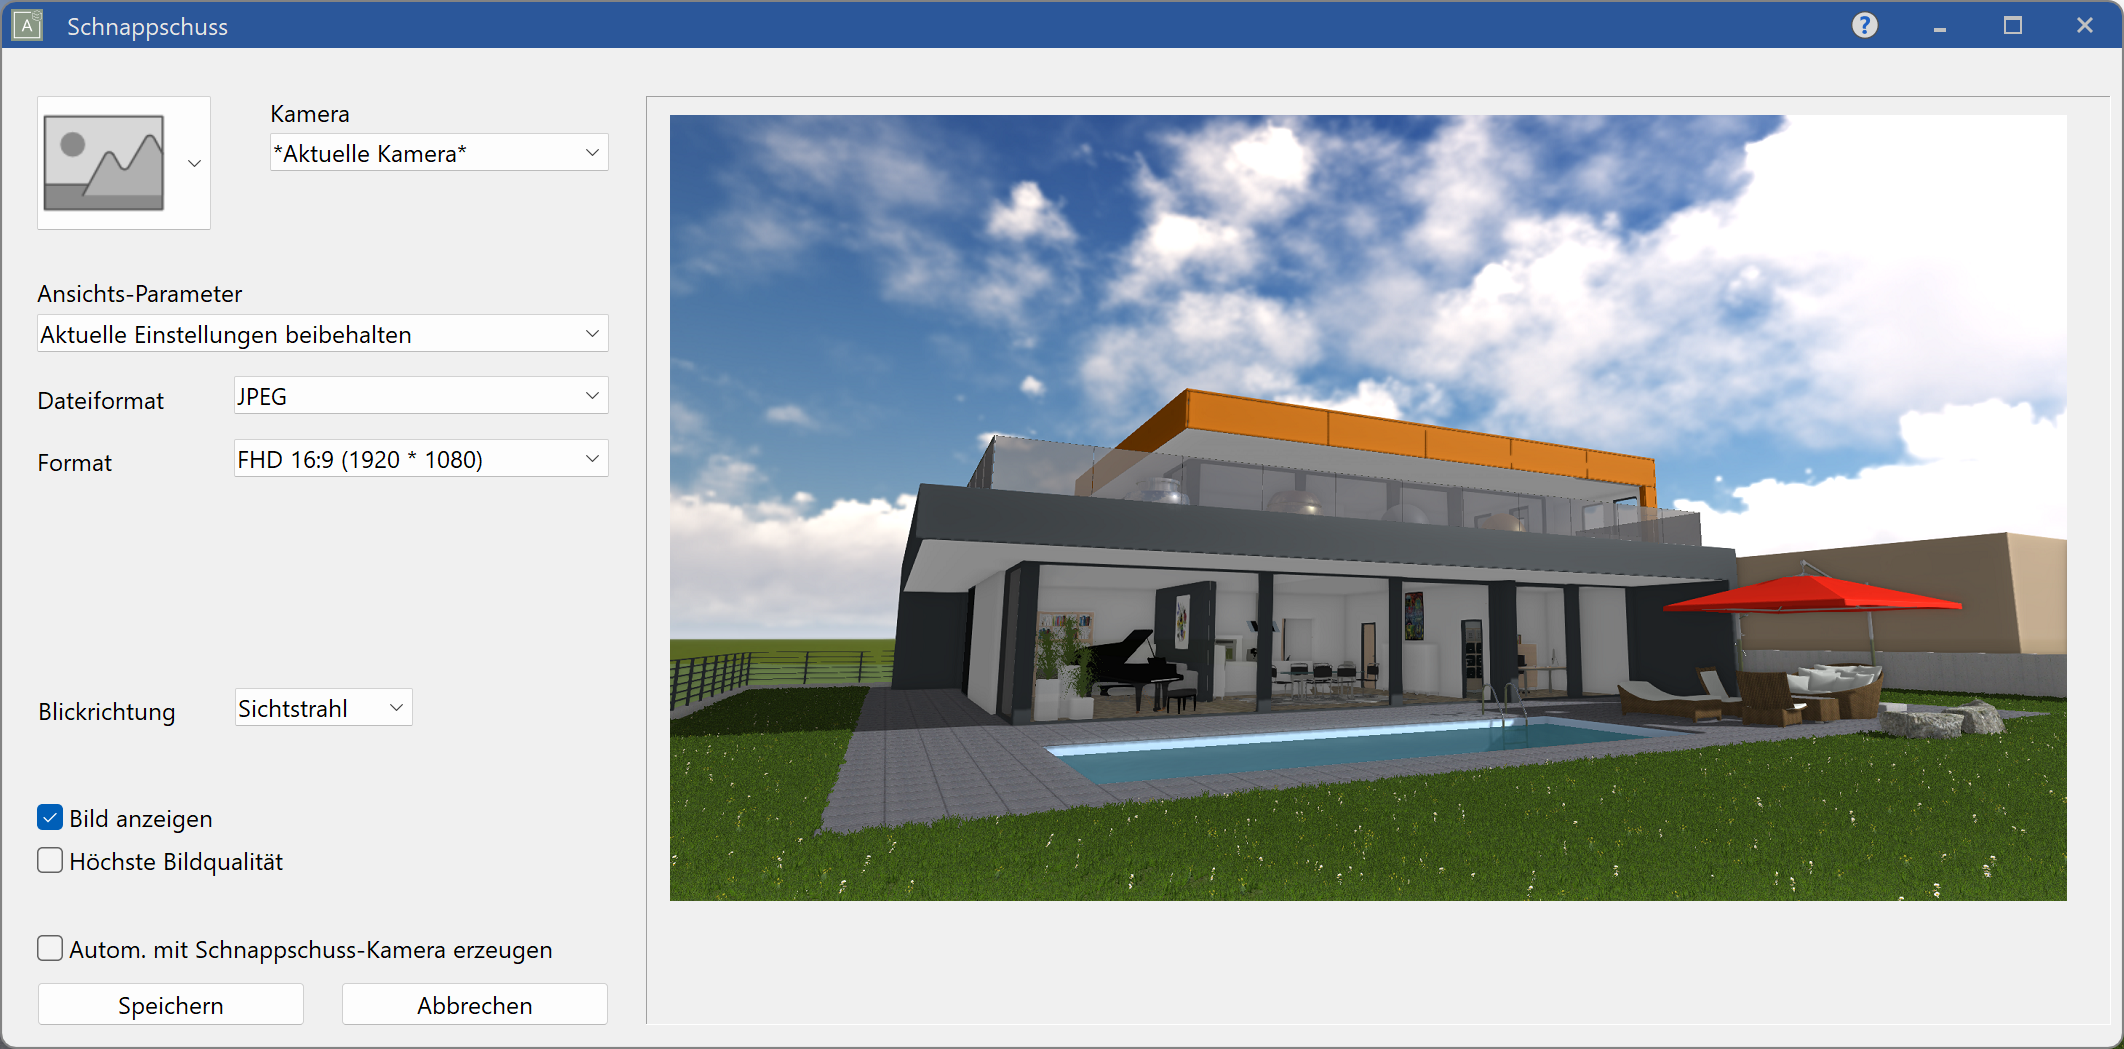
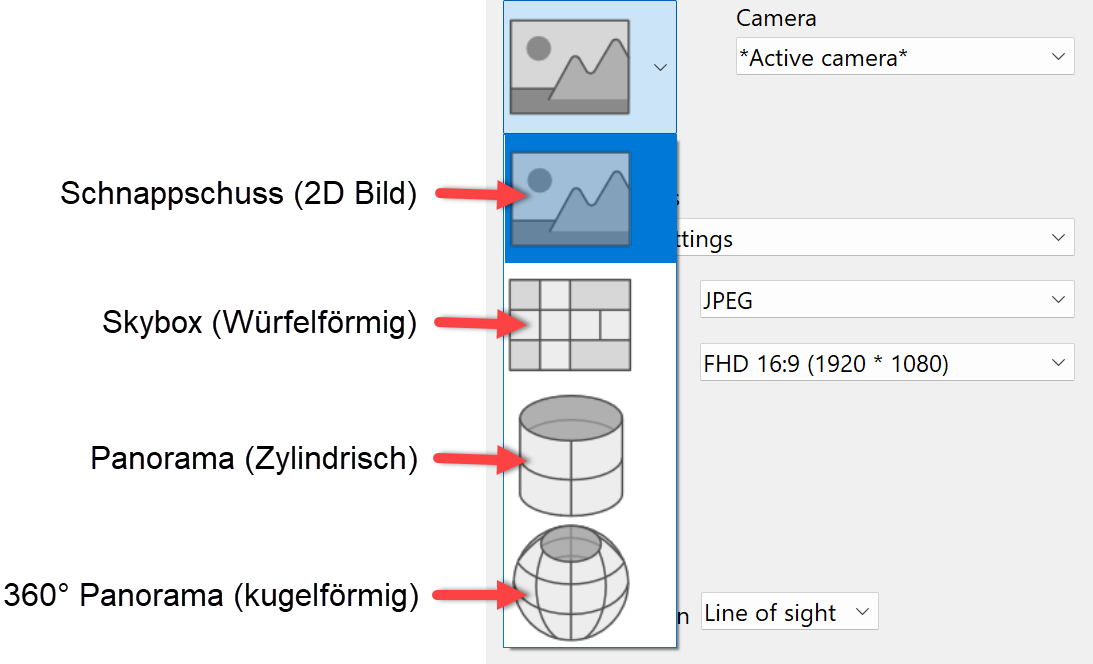
Here we could select the type of snapshot, but we want to keep the setting for creating a 2D image. If we want to create background images or panorama images, we can do this by setting the corresponding configuration.
-
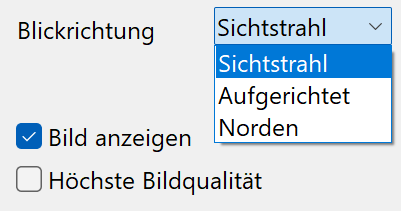
It is important to also configure, whether the viewing direction should be the line of sight or raised, since the raised viewing direction compensates for perspective errors when the head is kept straight.
-
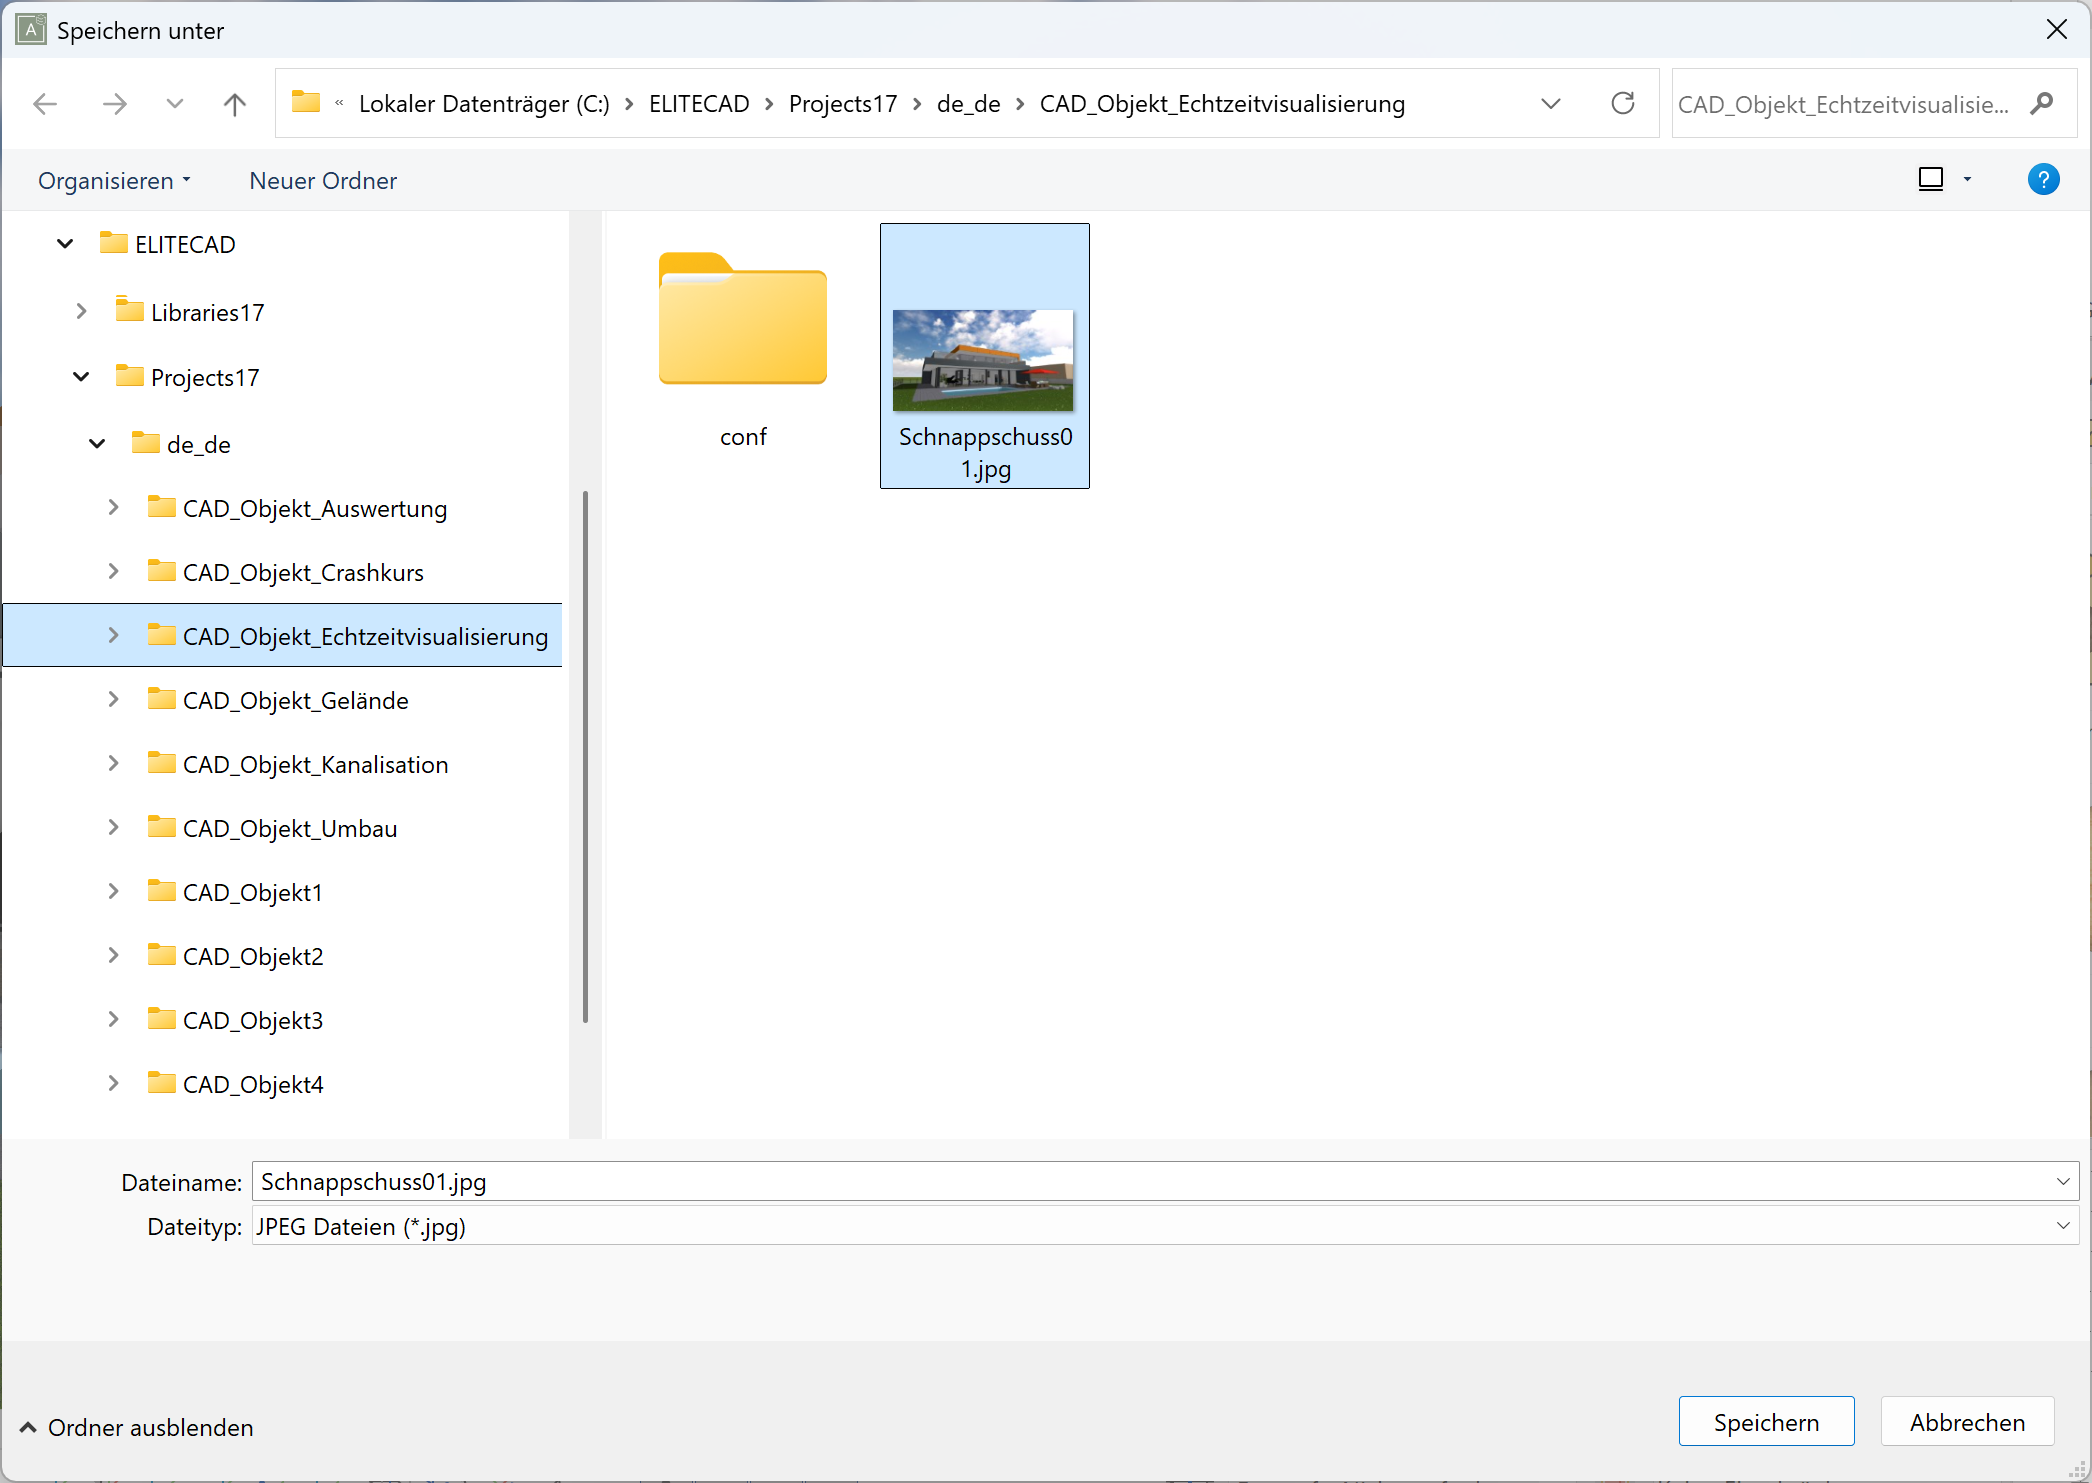
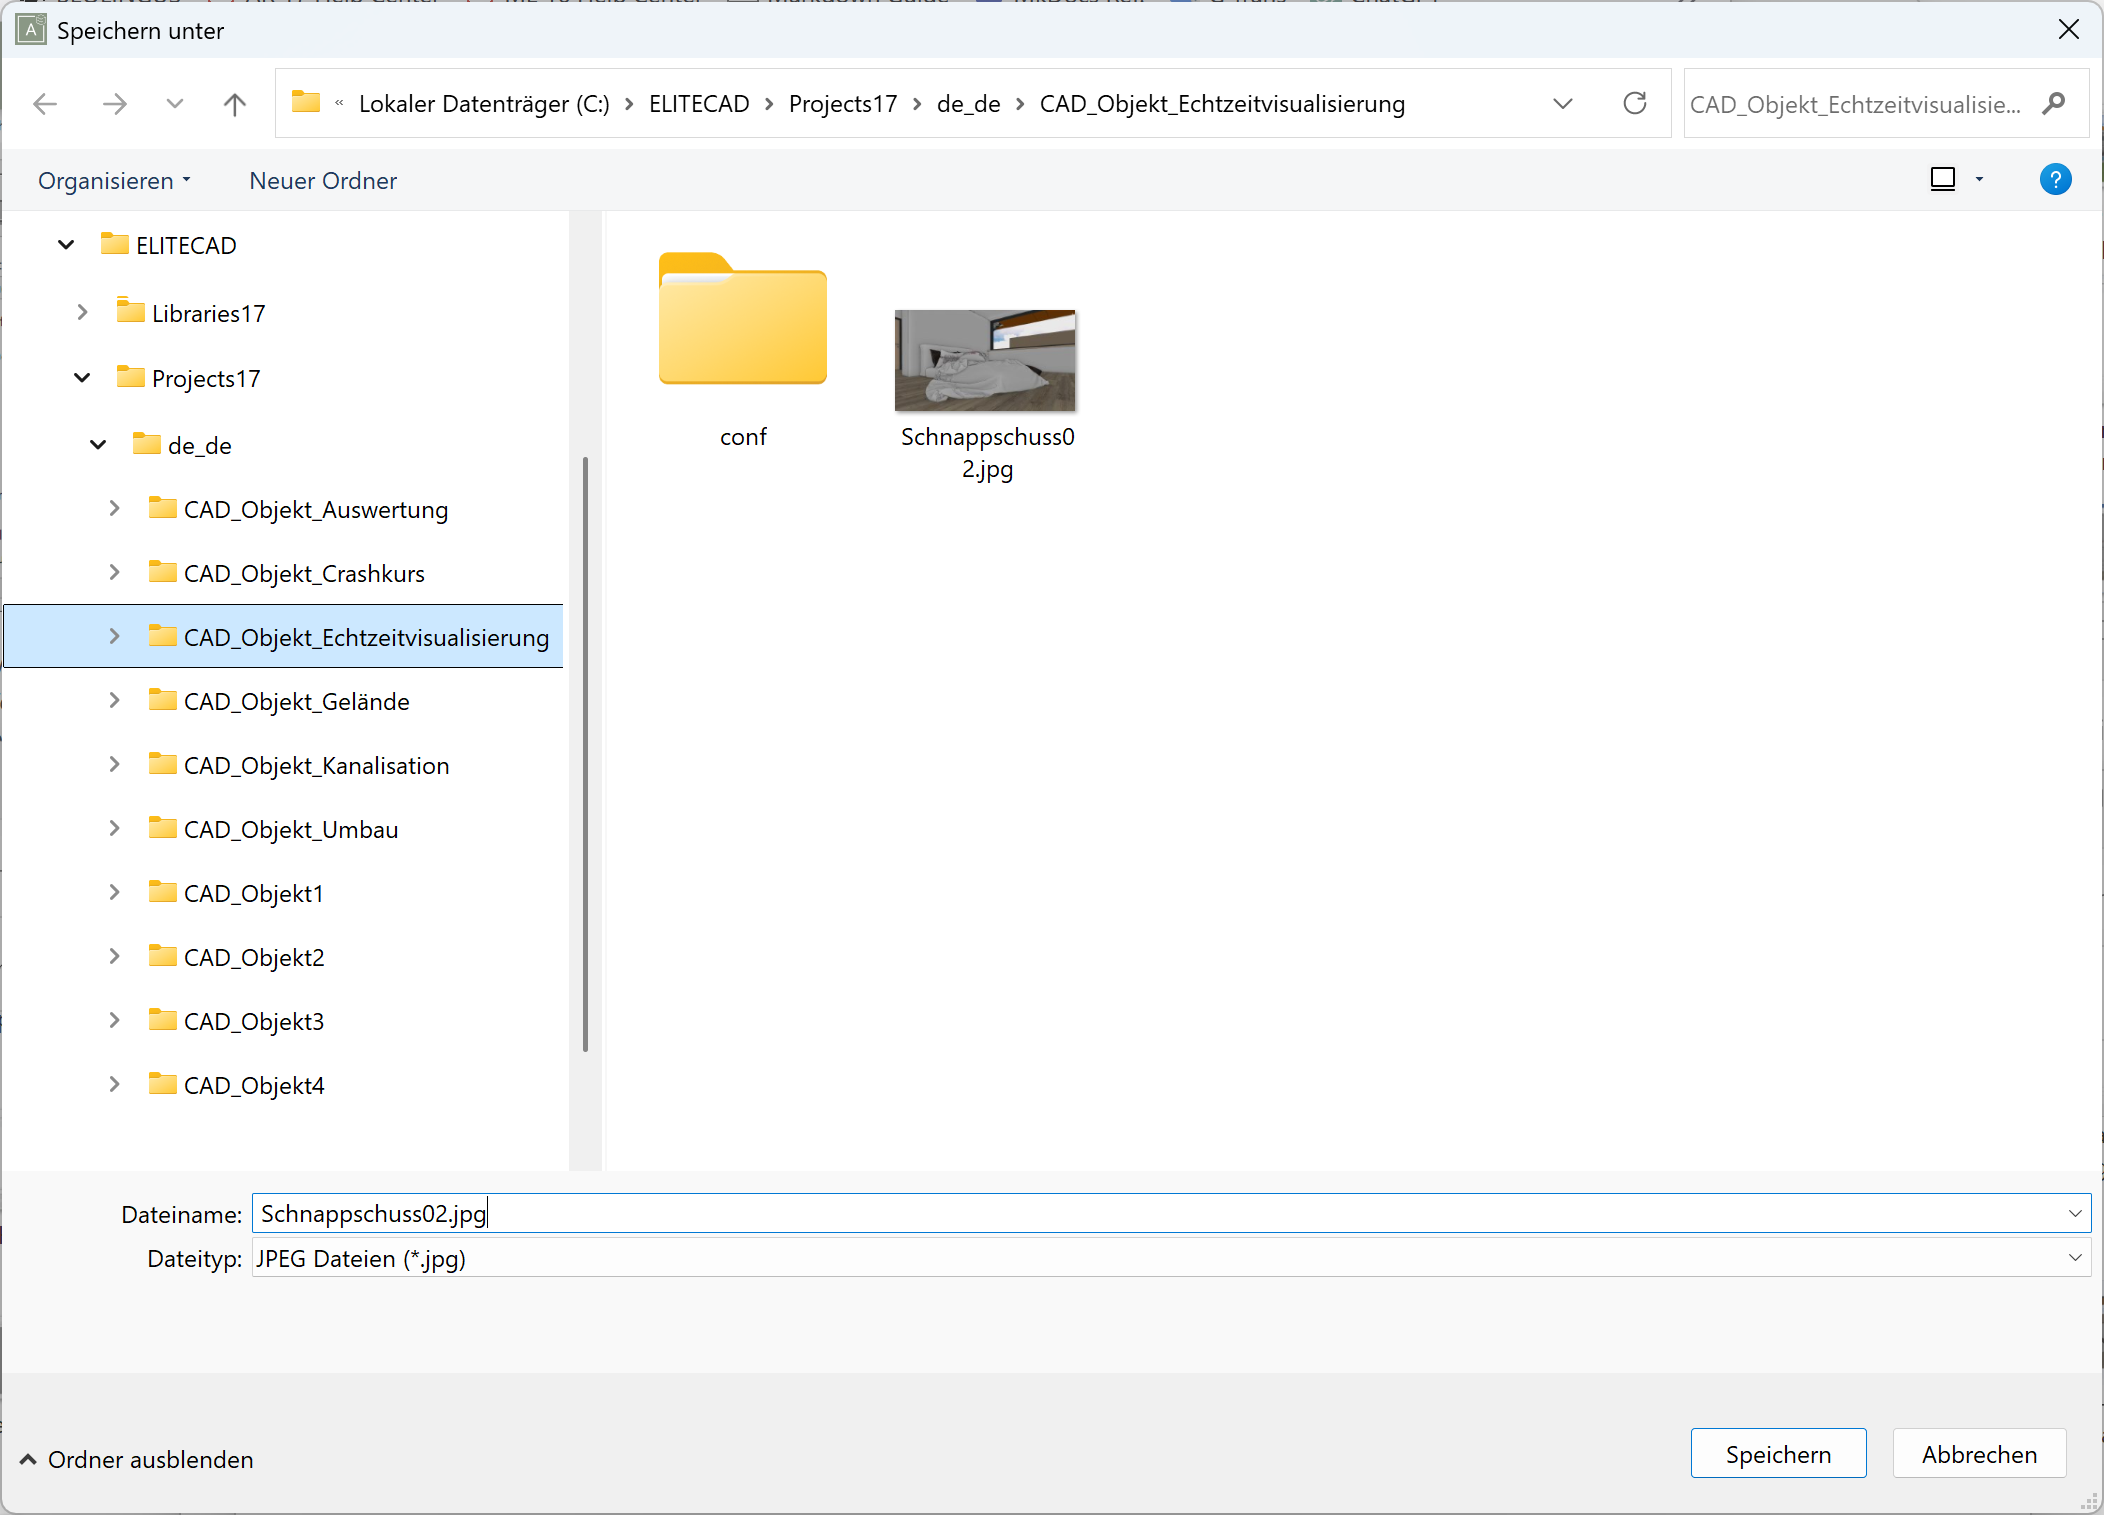
We use the configured parameters to save the generated image in the project folder ...\Projects\CAD_Objekt_Virtual_Reality and assign the name Snapshot01.jpg. After clicking the save button, a dialog opens where we can set the path and name for the file.
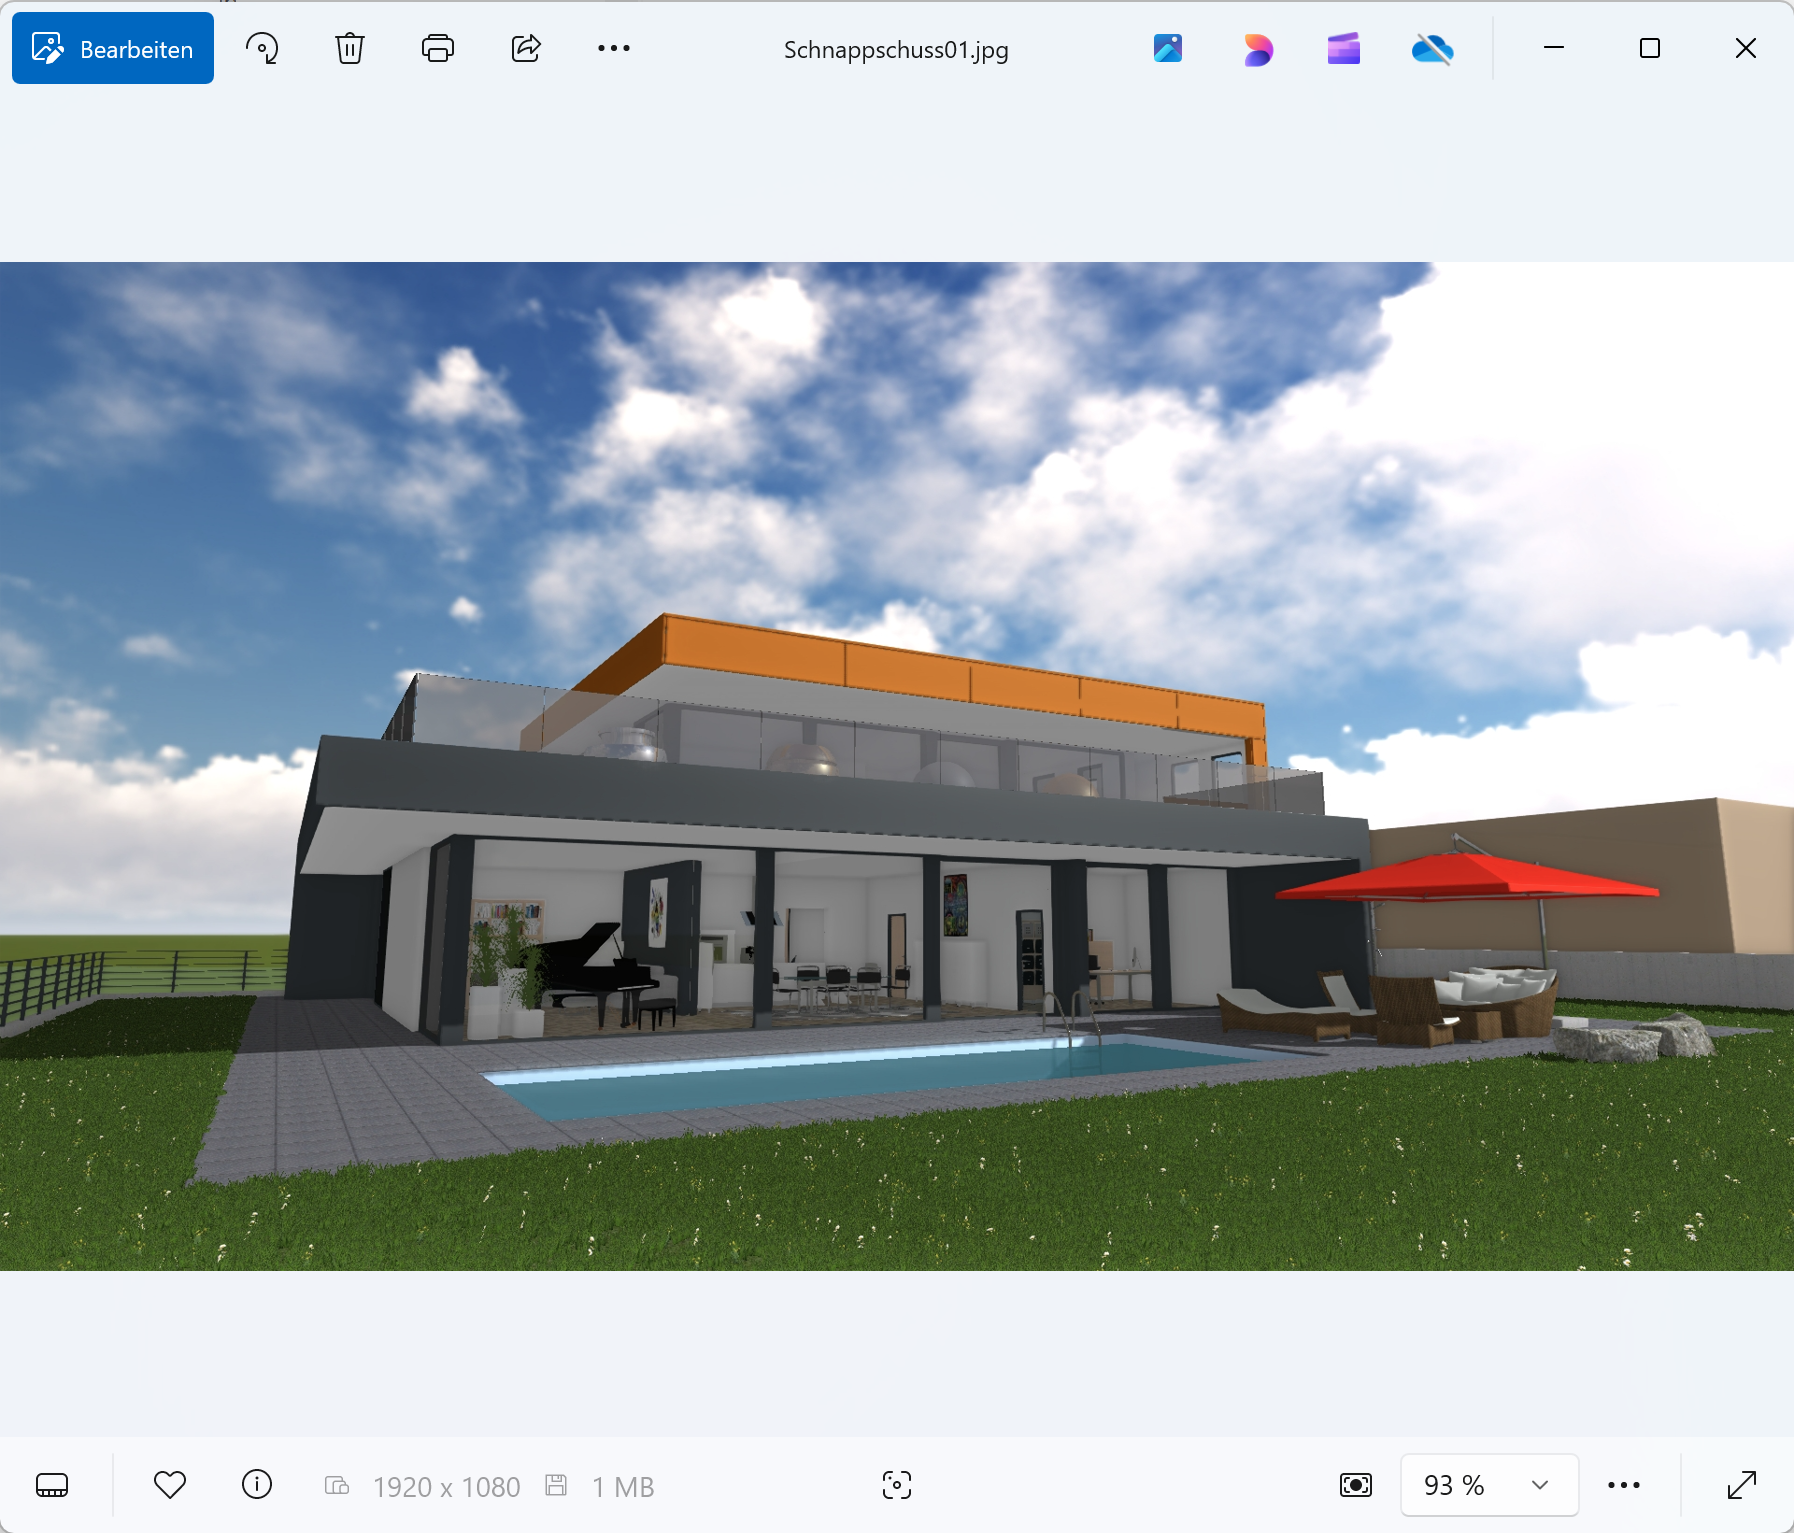
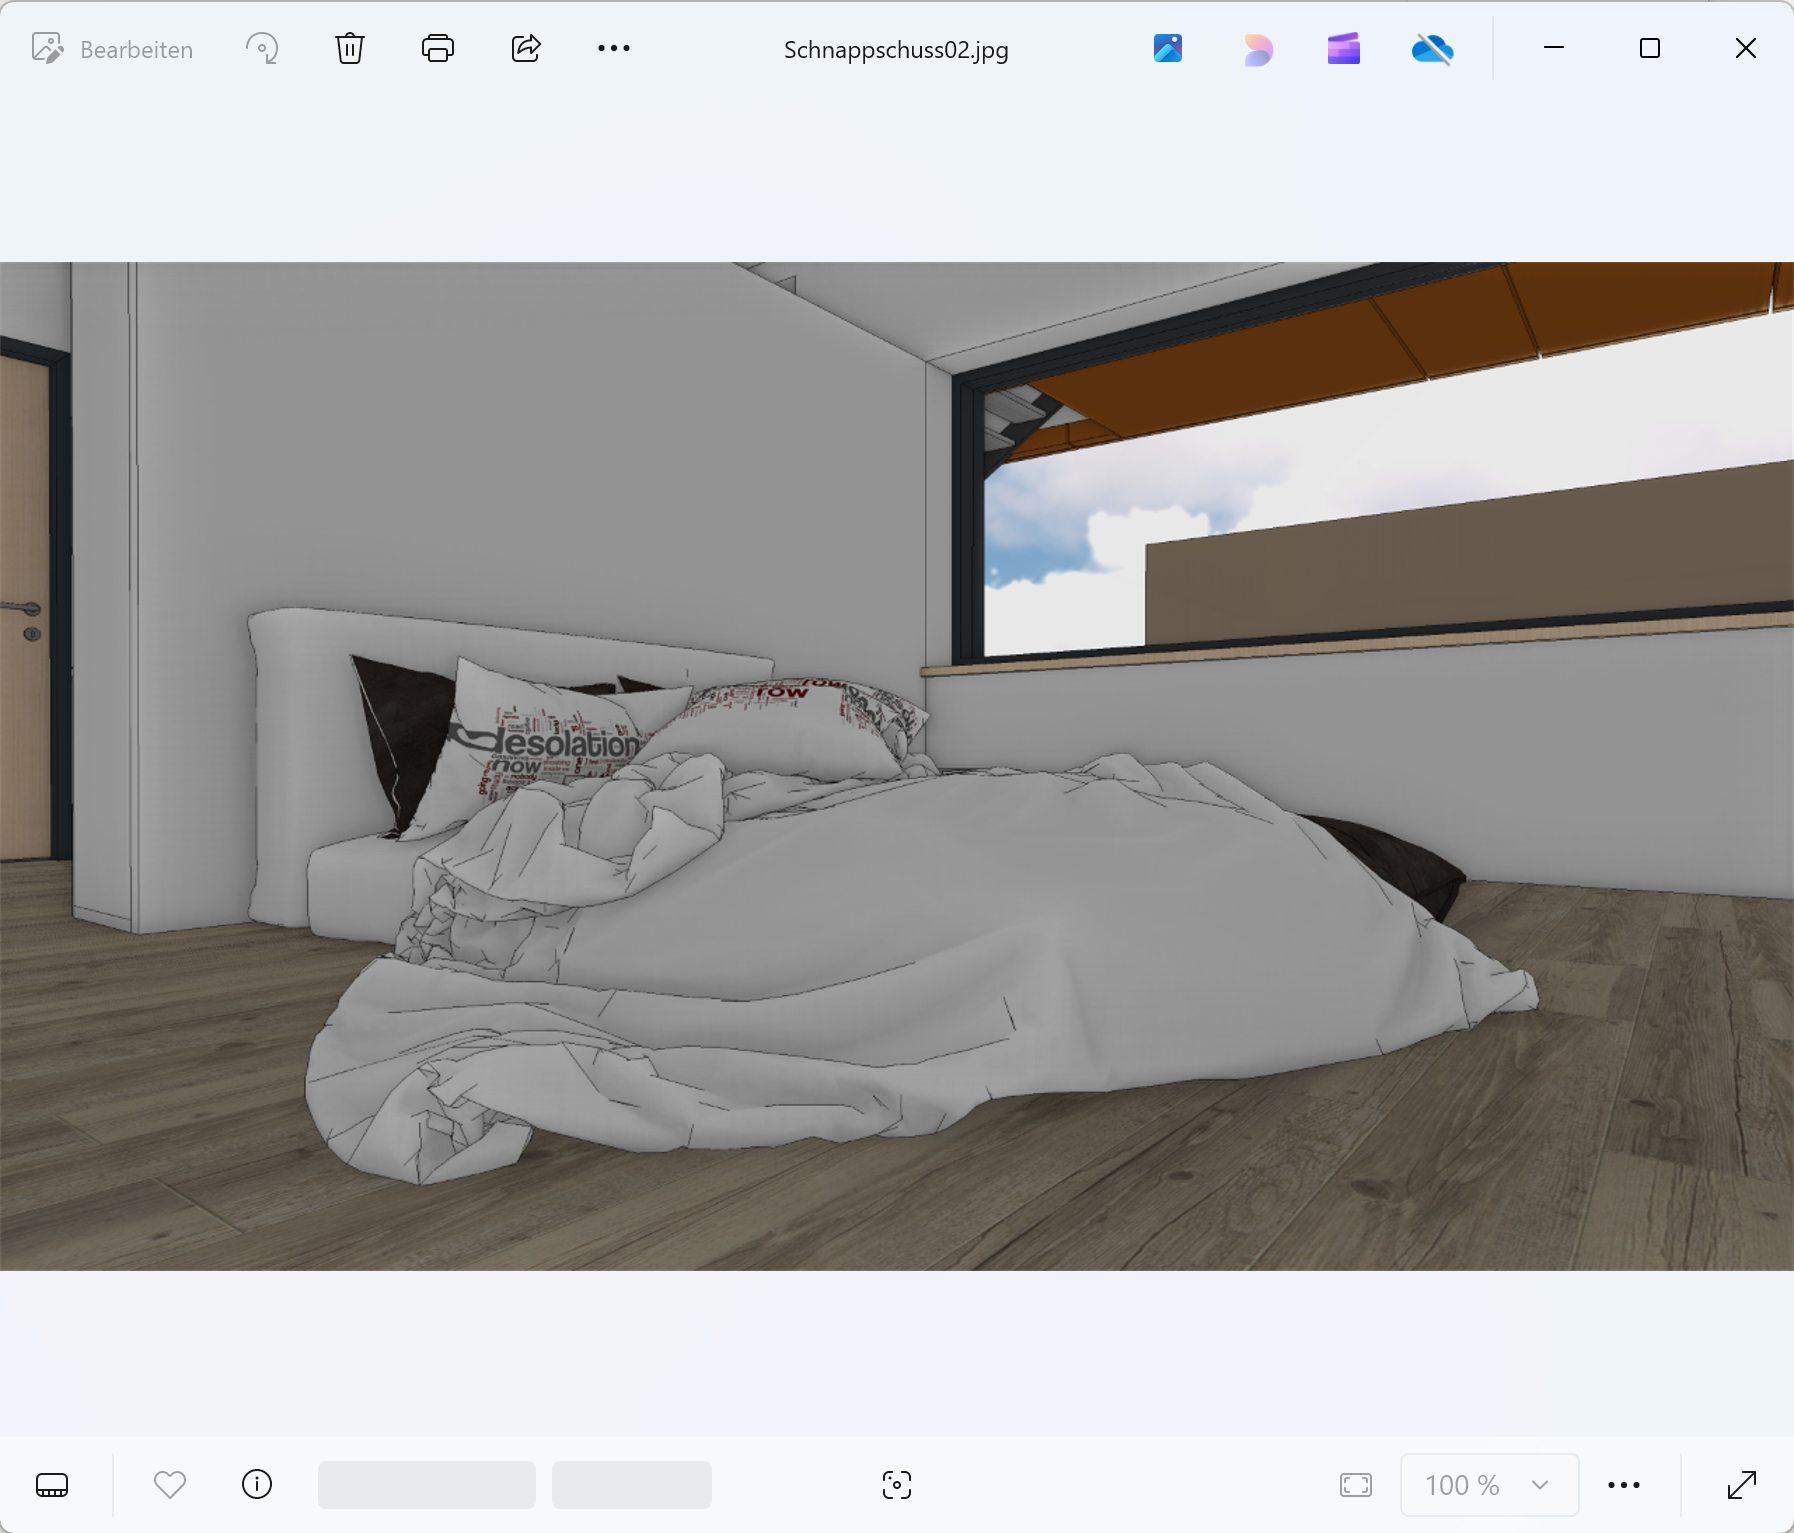
We have now created our first image and it will be shown to us using the windows standard tool for opening images, which in our case is the windows tool “Photos”.
In the next workshop, we will learn about more parameters.
Create images extended
Workshop
-
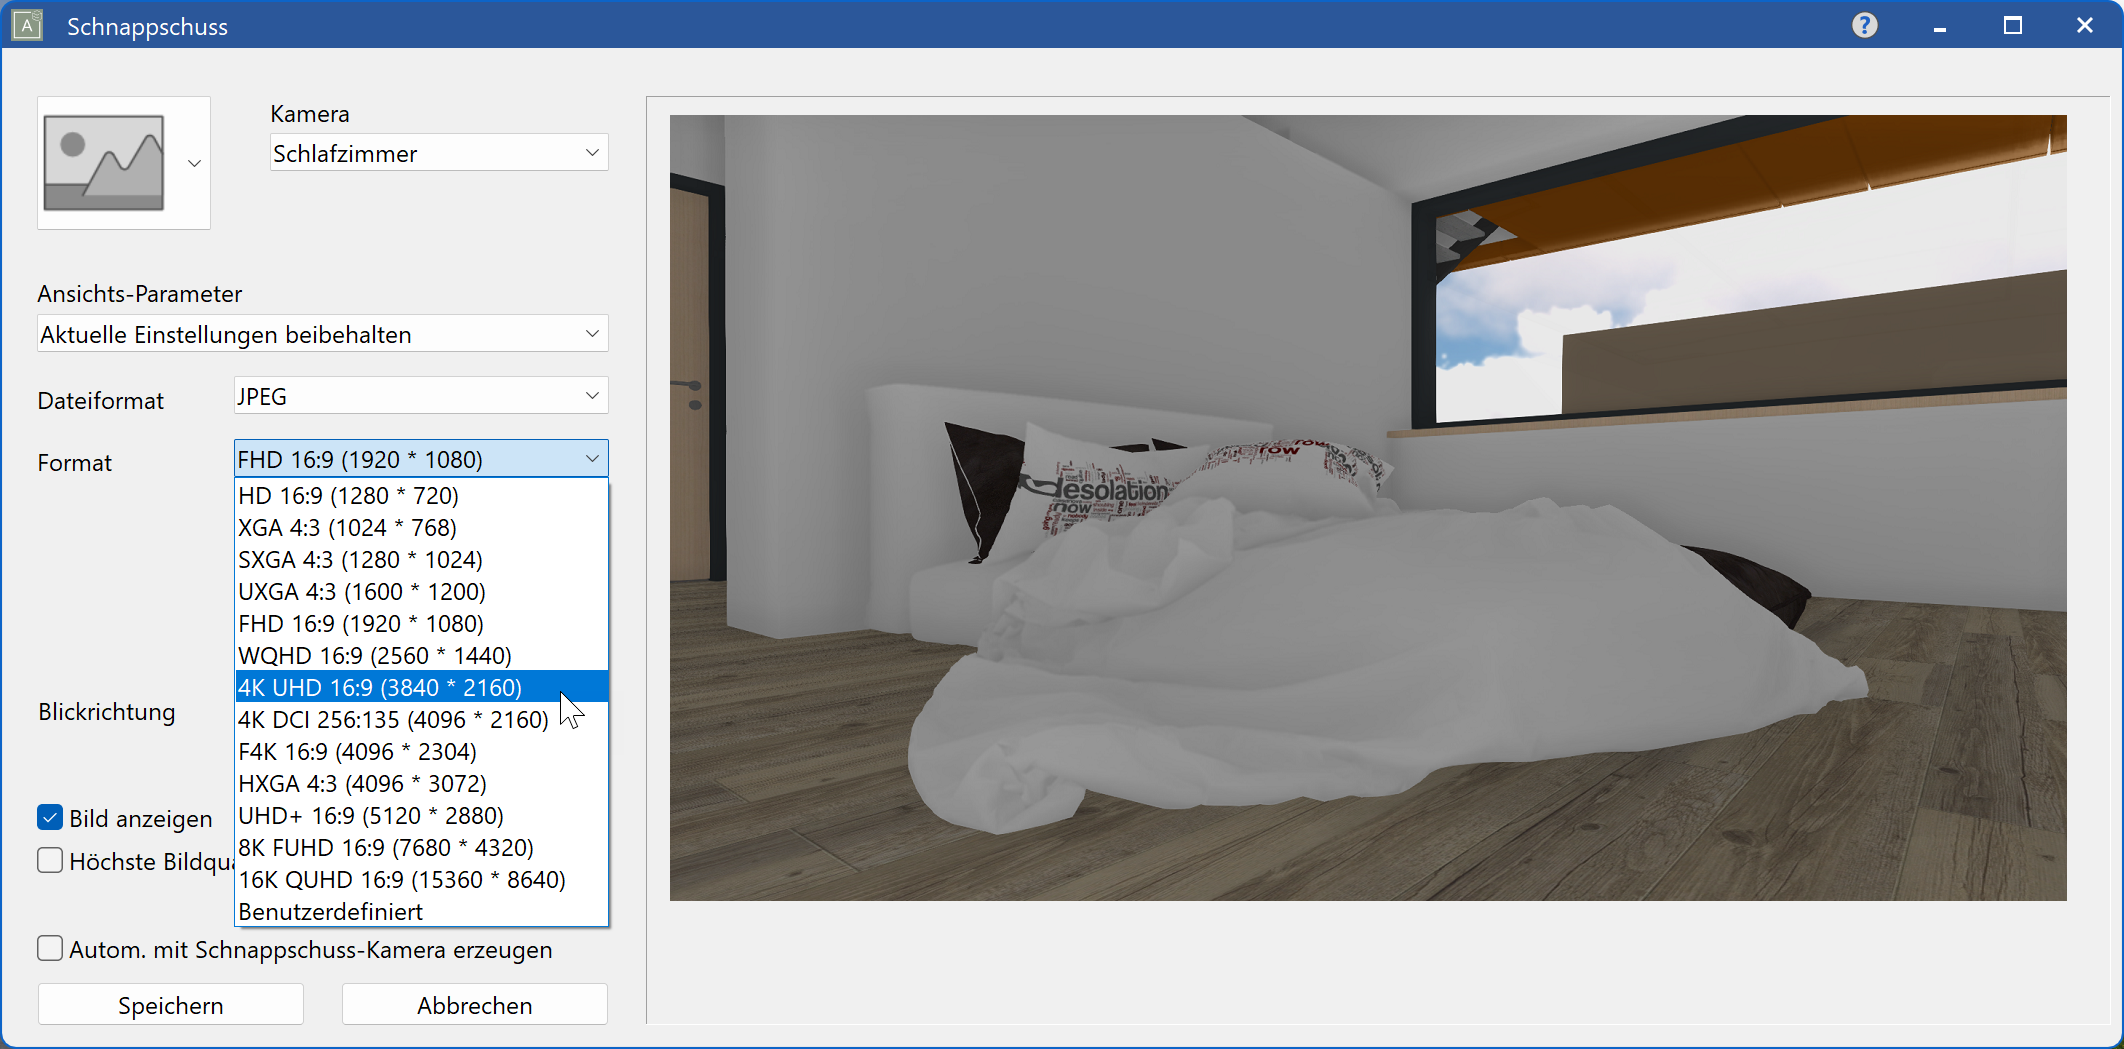
We leave the settings as they are and once again open the dialog CREATE A SNAPSHOT, where we can see the currently active settings.
-
Now Let's select a predefined position (snapshot “bathroom”), from which we want to create a new image in PNG format with 4K UHD resolution.
In the next step, we select the desired camera position from the pulldown menu “camera”.
-
Afterwards we select the desired file format as well as the image format.

-
We use the parameters, save the generated image in the project folder \Projects\CAD_Object_Virtual_Reality, and assign the name Snapshot02.png. After pressing SAVE, a window opens where we can set the path and name of the generated file.
We now have created our second image, and it will be displayed by the windows application Photos again.
Tip
If we use higher resolutions and formats, we have to take care that there is enough disk space available. Using high resolutions (4K, 8K, 16K) will increase the file size dramatically.
In general, the function CREATE A SNAPSHOT can be used to create various images (2D, views, model, sections etc.) in high quality.