Overview

Consistent renovation planning with ELITECAD AR is possible in 2D and 3D. The depiction of the states demolition, existing construction and new construction is freely configurable from the 3D model down to the plans.
All project states exist simultaneously and can be set visible or invisible with a single mouse click. Classification is done at the construction element level without the need to use the layers manager.
Numerous functions for construction use this state information and manage tasks automatically (i.e. closing of a wall opening when setting a window to demolition state), saving precious processing time. More information in the model leads to more secure plans. This enables, for instance, the Automatic dimensioning to focus only on meaningful combinations of renovation states.
Plan views, views and sections naturally consider each of the states as well as provide representations of renovation projects that conform to the standards without any additional effort.
The fully integrated renovation planning in ELITECAD supports the user not only in 3D modelling and with layouts, but also in the calculation of dimensions and quantities as well as the generation of reports for the various project states.
During the BIM process, the interfaces grant the transfer of state information.
Preparations
Load model
Workshop
-
This course unit requires the project CAD_Object_Renovation_Planning.
Please start by loading the corresponding project. -
Open the project (Please ensure that the correct region is set in the ELITECAD configuration)
Toolbar FILE > OPEN
Choose the correct model, depending on your region and open it.
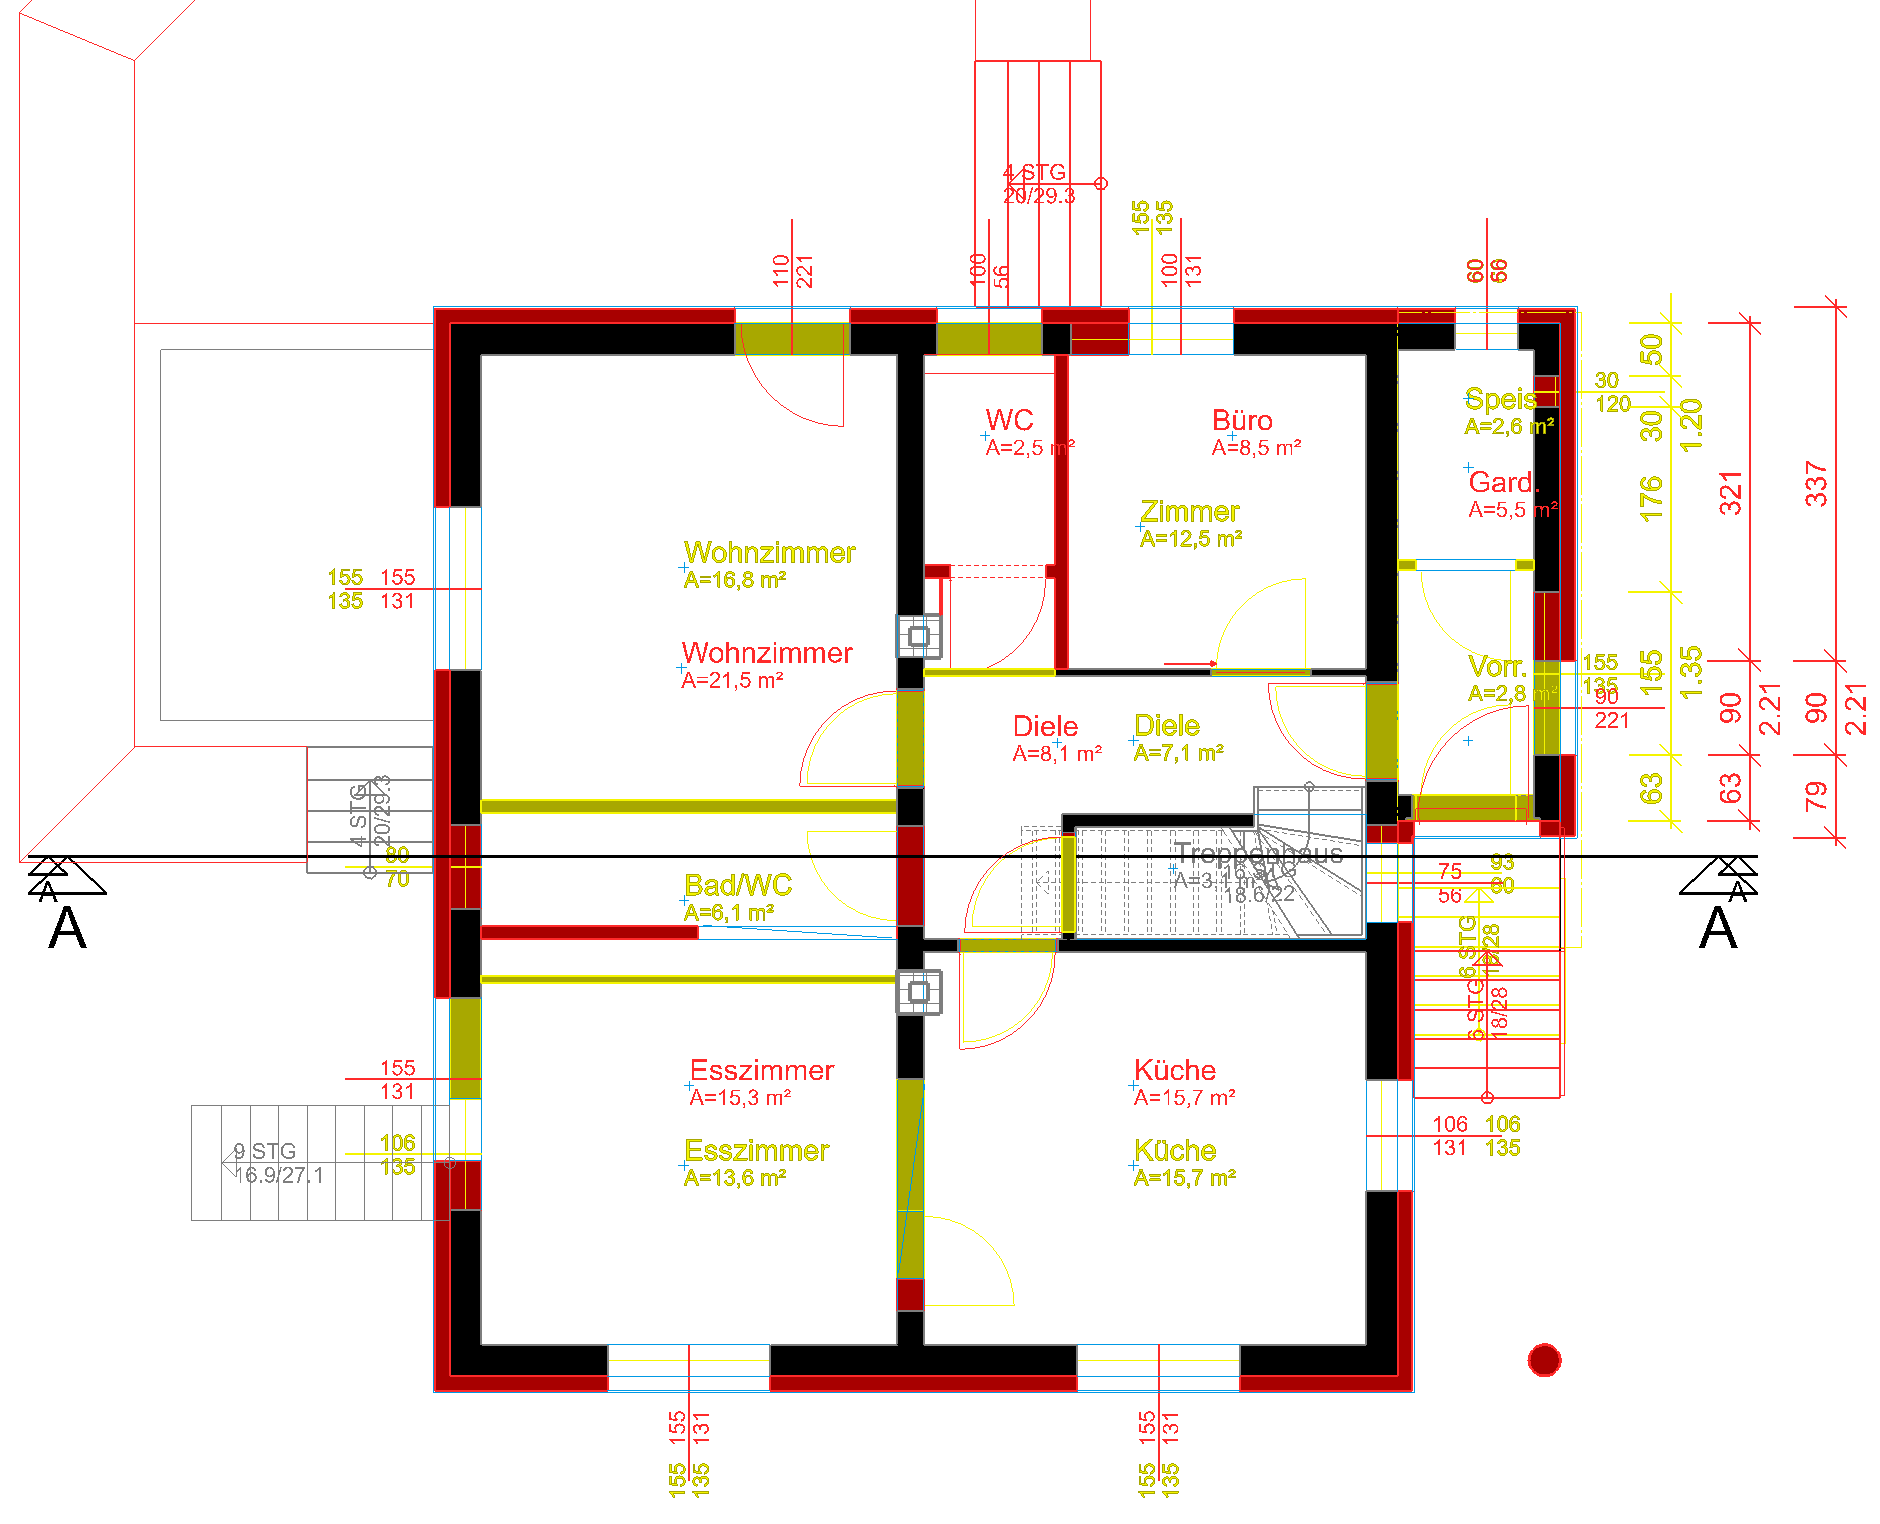
UK/US: CAD_Object_Renovation_Starting_Position.dThe loaded model should look like this:

- Enable the renovation planning functionality in the menu SETTINGS > OPTIONS > WORK PARAMETERS > ARCHITECTURE.
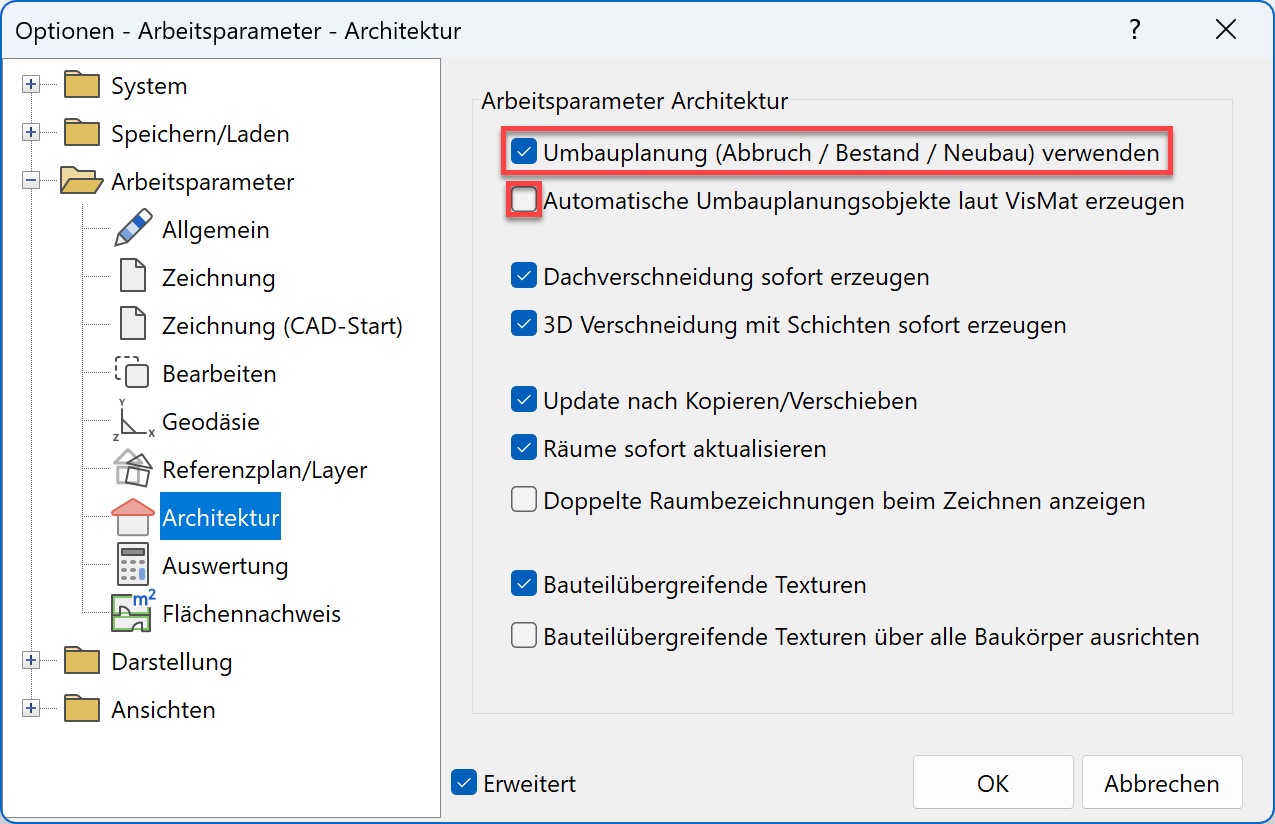
Please note that the second setting “Create renovation planning objects according their material automatically” is not enabled. This would result in the renovation planning objects being depicted according to the materials, as described in the “Graphical depiction/ Depiction of renovation” chapter.
Note
Not all users have the optional terrain module installed. In order to achieve the same result for all users, the terrain is already prepared for the final state of the renovation, where the basement is given a new insulation layer.
Depending on your region and various updates over time, some parameter names and screenshots might look different than in the course unit.
Tip
The name Renovation planning refers to the states of a renovation planning project. Some objects might be part of the Existing construction, while some will be Demolition and others will be New construction. Furthermore, there is a state for Unknown. In order to work with the renovation planning, first the renovation planning has to be enabled in the settings. Only after this, will all settings be available. If renovation planning is not required, the workflow with ELITECAD remains unchanged.
Renovation planning states are a new property and completely independent of layers.
Toolbar Renovation planning
Workshop
The toolbar for renovation planning can be loaded by right-clicking onto the toolbars and choosing “customize…” in the context menu. Under the toolbars tab, enable the toolbar Renovation planning and choose where you want to place it in the menu.
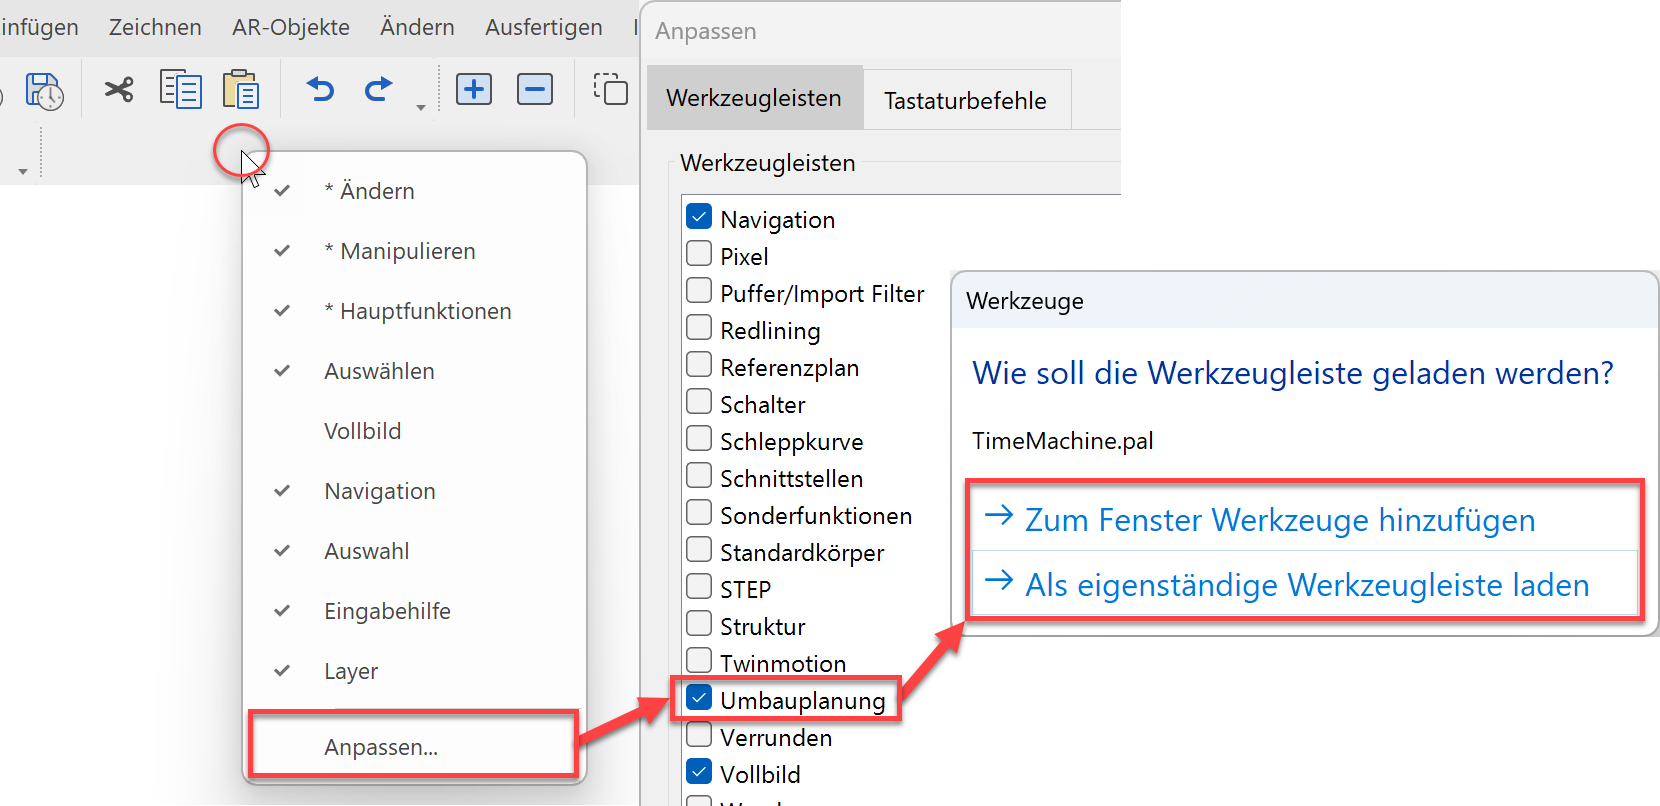
This is what the toolbar looks like if you load it into the Tools manager:

This is what the toolbar looks like if you load it as an independent (floating) toolbar: