Define height line
Workshop
- Start the terrain function.

- For the sake of clarity, we recommend temporarily switching off the depiction of height lines and the slope.

- Select the function NEW HEIGHT LINE.

Create the height lines one after the other as shown in the sketch. - In the property bar, enter the value -250 for the height (z). Watch for the adjusted units, because the unit for the terrain is configurable in the terrain parameters.

- Draw the first height line by tracing the template (Line 1). You do not need to set very many points because the curves are interpolated following termination.
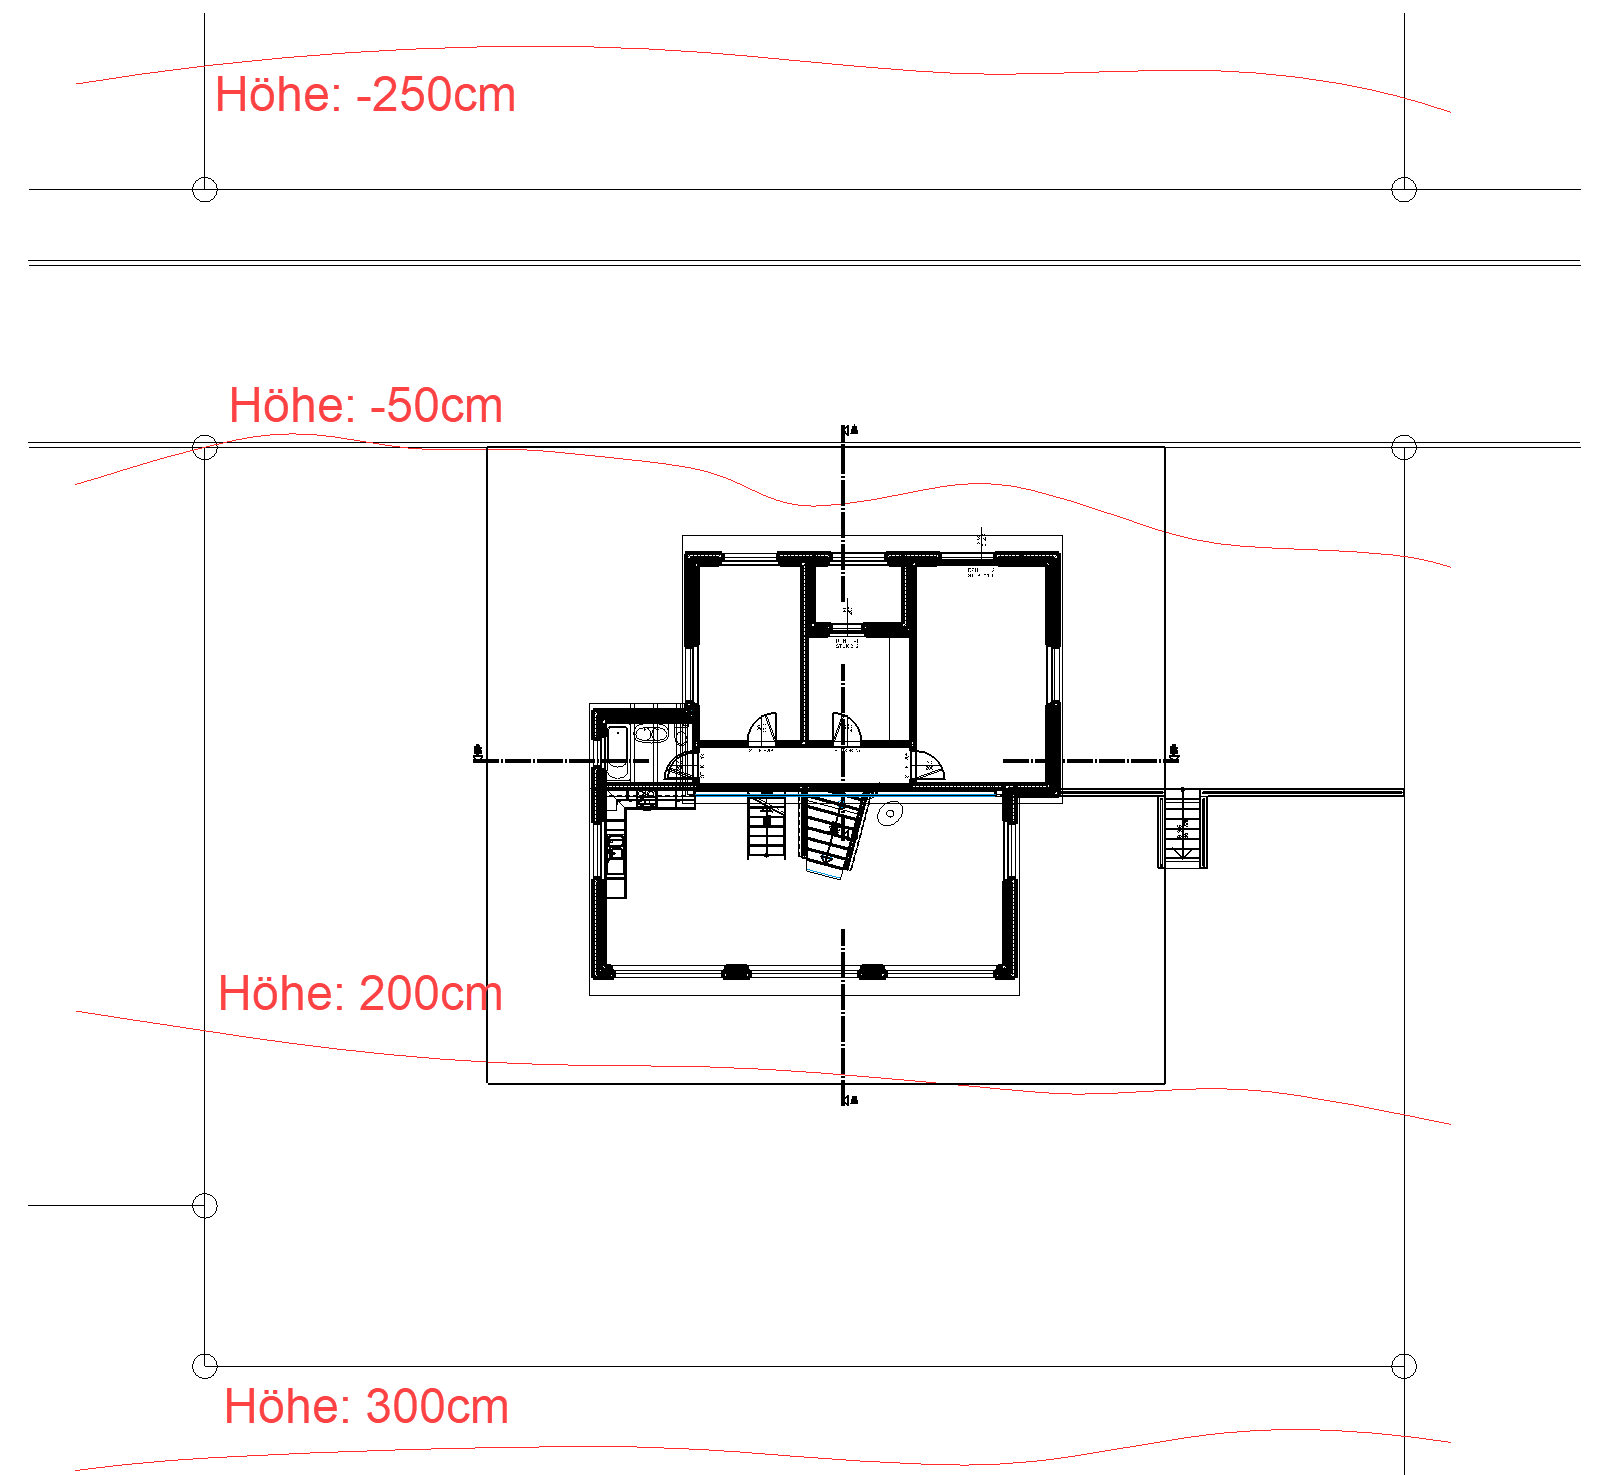
- To finish the height line, select the function NURBS END or Enter.

- Start the second height line with NURBS BEGIN and enter the height -50 for the Z value.

- Draw the second height line by tracing the template (Line 2).
- End the second height line with the function NURBS END or Enter.
- Next, draw the 3rd and 4th height line in exactly the same way as you drew the first two. Ensure that you enter the correct heights.
- Now switch to the solid model Ctrl+D and check your entries.

- Cancel function Esc, save work copy Ctrl+W
Tip
To change the height of a height line later on, click on the nurbs curve to open the property bar. There you can change the value of the height or you can remove a height line using the function DELETE CURVE.
