Area render
For larger design models, the complete rendering process may take a long time. That is why there is an option to use range rendering to depict a specific range of the drawing as a rendering design model. The active render parameters are taken into account. The rest of the image is preserved in the previous depiction.
The function remains active so you can change the render setting and view the results, until you cancel range rendering using Esc.
Workshop
- In the Visualisation materials manager, right-click on a folder or click on a visualisation material and select the point "Edit VisMat over surface", and then click on the glass.
- On the left-hand side, left-click on the name of the visualisation material and activate "Mirroring" from the possible effects.
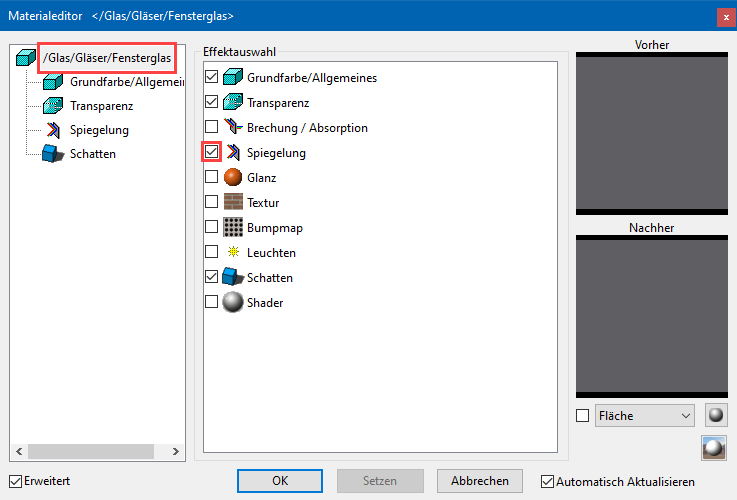
- On the left-hand side, click on the effect "Mirroring" and under intensity set the slider to 10.
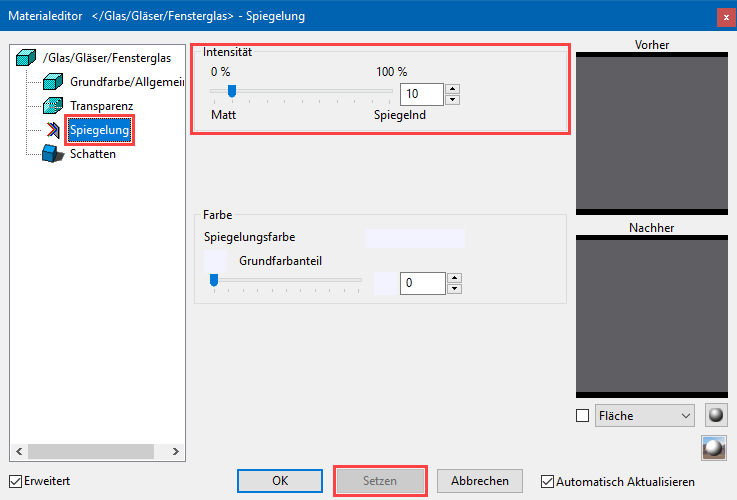
- Click
 and confirm the prompt with
  .
.
- Switch to Area render mode.

- first point
Click on point P1. - second point
Click on point P2.
The relevant area is now shown as rendered.

- Set the slider in the Visualisation material editor to 20 and click .
- Click again on the points P1 and P2 or on a different section.
- Repeat until you are happy with the result. Afterwards, cancel area rendering with Esc and then close the Visualisation material editor.