Door detail parameters

Here you will find other setting options for an individually customised door. Each of the buttons shown leads to another separate parameter window.
Tip
Various settings in the detail parameter window depend on the representation level. This means that when the representation level is refreshed, the doors are regenerated and adapted to the settings in the representation level.
Representation levels create the conditions for covering several planning phases with one design model. This means that by simply switching, a door can be generated without a door jamb for the entry planning, and with a door jamb and an additional lintel height label for the work planning, for example. This always relates to the same door. Please also refer to the Views chapter.
If the representation levels are switched on (LAY-OUT > REPRESENTATION LEVELS), their settings take precedence. If you switch the representation levels off at this point or modify a door, the detail parameter window settings are taken into account. For more information in this regard, please refer to the Representation levels chapter.
In order to express this dependency clearly, the respective sections of the representation level dialog windows are listed in addition to the detail dialog windows shown below.
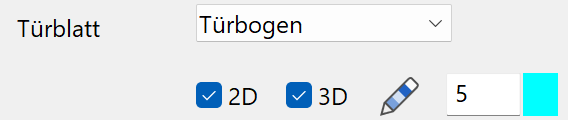
Door leaf parameters
![]()

The 2D and 3D check boxes activate the door leaf for 2D and 3D views.
Symbol
An opening symbol and angle can be selected for the door leaf. The opening angle only relates to the representation of the 3D door leaf; in the plan graphics the door curve is always shown as 90°. Note that all opened doors are hidden when creating a building section.
Dimensions
The dimensions for the 3D door leaf depend on the door type.
Door leaf settings in the representation level
Labelling parameters
![]()
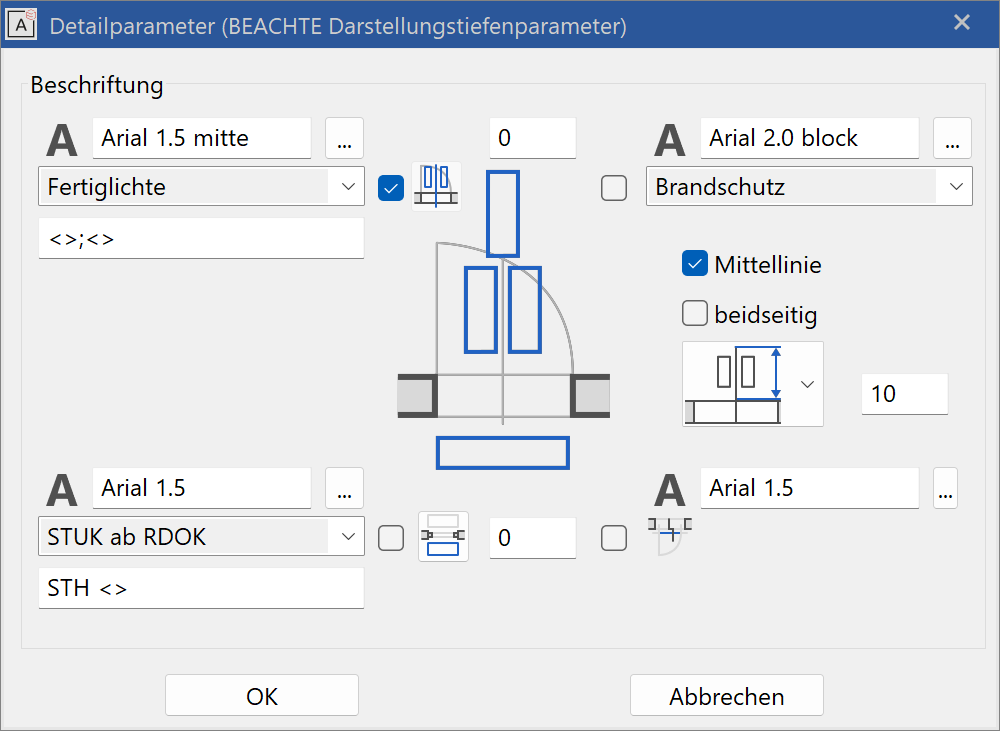
This dialog window covers the representation of automatically generated door labels. These can be fully switched on or off using the three check boxes.
The pen can be selected for the centre line. The length of the centre line can be entered absolutely or relatively to the length of the label.
Tip
Even when the centre line is switched off, the length of the centre line is used to determine the distance of the text from the door.
The label is divided into three blocks, inside and outside the door.
Opening-side label (top left)
- "Raw clearance" is the size of the wall opening (height of top of slab up to lintel bottom edge).
- "Finished clearance" is the finished door opening (height of top edge of finished floor level up to door jamb bottom edge).
- "Stop raw clearance" is the size of the exterior wall opening of a stop door (height of top of slab up to lintel bottom edge).
- "Stop finished clearance" is the size of the inner wall opening of a stop door (height of top edge finished floor level up to lintel bottom edge).
- "Raw clearance from FFL/THR." measures the height of the finished floor level top edge up to the lintel bottom edge.
- "THR:+LIN: (raw)" Swiss standard: here the lintel and threshold height of the door is counted towards the opening side depending on the setting of the specified lintel height parallel to the door.
In the second selection box, the associated text parameters can be selected from the text database. The text parameters themselves can only be manipulated in the text parameter window.
Label of the specified lintel height (bottom left)
- "LH from TFS" is top of slab up to lintel bottom edge.
- "Net lintel height" is top of slab up to door jamb bottom edge.
- "LH from FFL" is top edge finished floor level up to lintel bottom edge.
- "LH from 0.0" is ±0.00 up to lintel bottom edge.
In the second field, the text parameter can be selected.
In the third field, a pre-text or post-text can be entered.
A placeholder "< >" must be entered for the calculated value.
![]()
![]() - Label distance and position inside/outside
- Label distance and position inside/outside
Fire proofing labelling (top right)
- "fire proofing" is oriented along the centre line.
- "fire proofing rotated" is oriented perpendicular to the centre line.
In the second field, the text parameter can be selected. The check box enables or disables fire-proofing labelling. The fire-proofing class is entered in the main dialog window.
Tip
The (finished) floor height defined in the structure settings for the storey is taken into account for the FFL height. However, if a room name has been assigned, the (finished) floor height used in it takes precedence over the "general (finished) floor height" in the structure settings.
All settings options in this dialog window depend on the representation level.
Label settings in the representation level


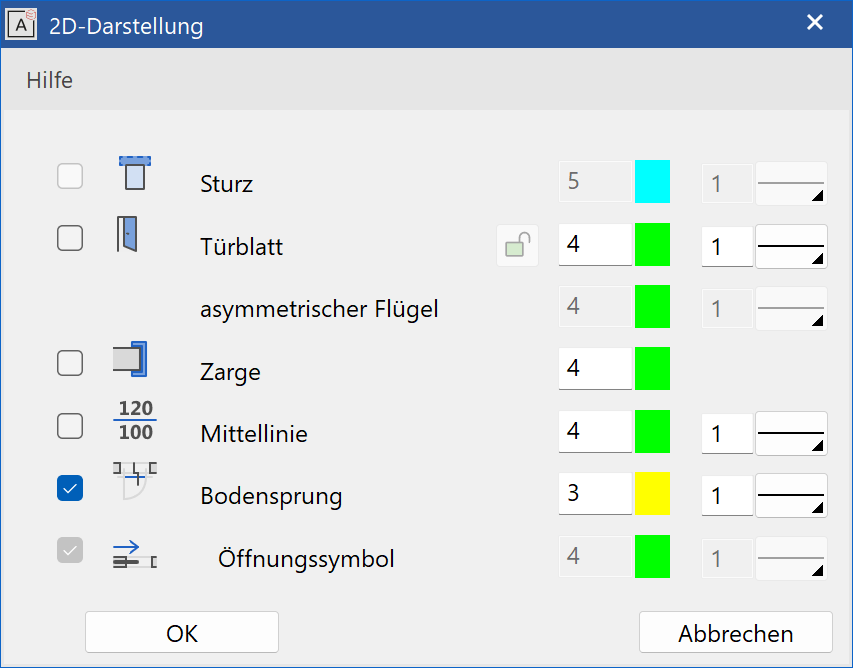
Door jamb parameters
![]()
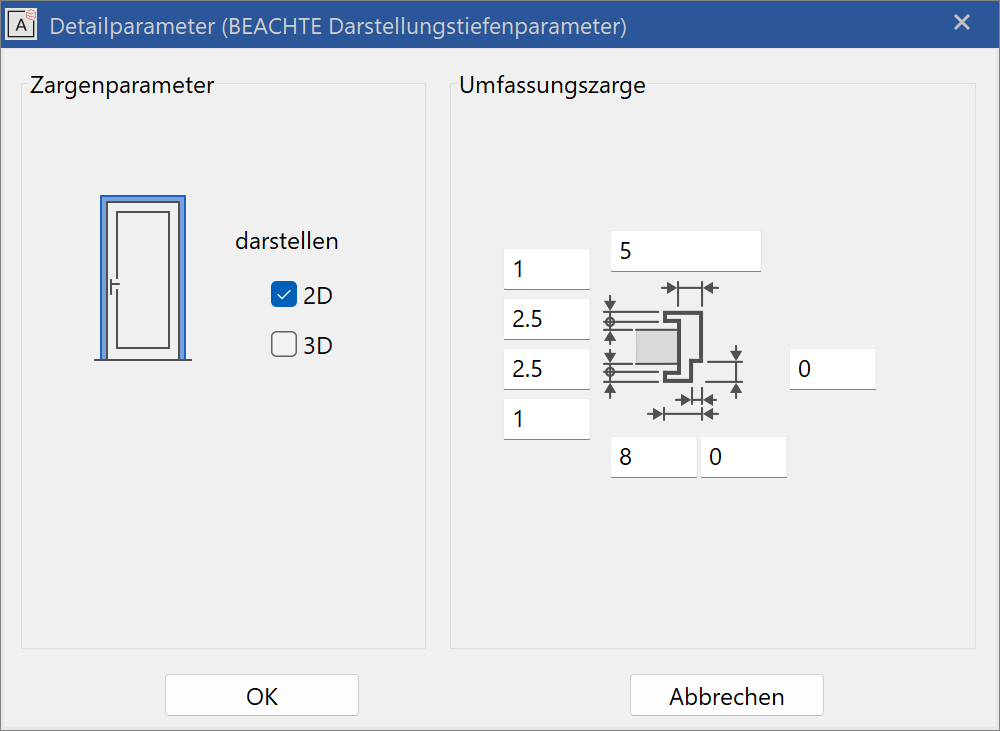
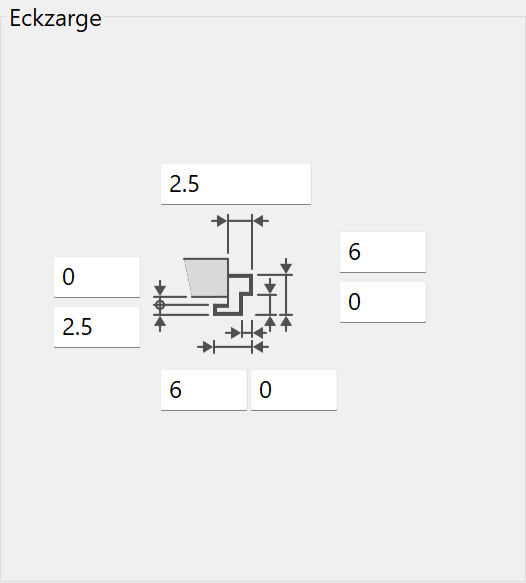
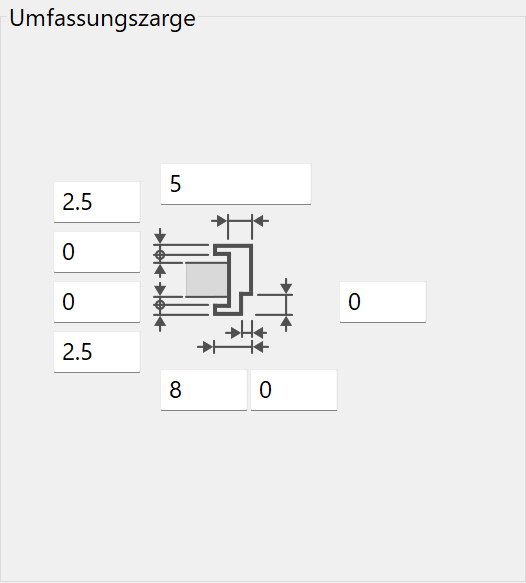
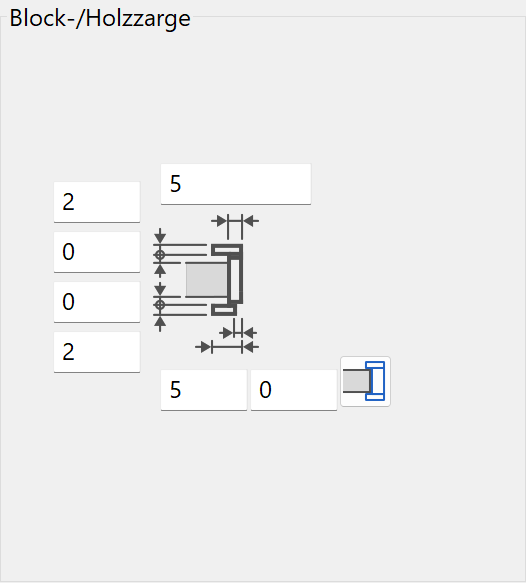
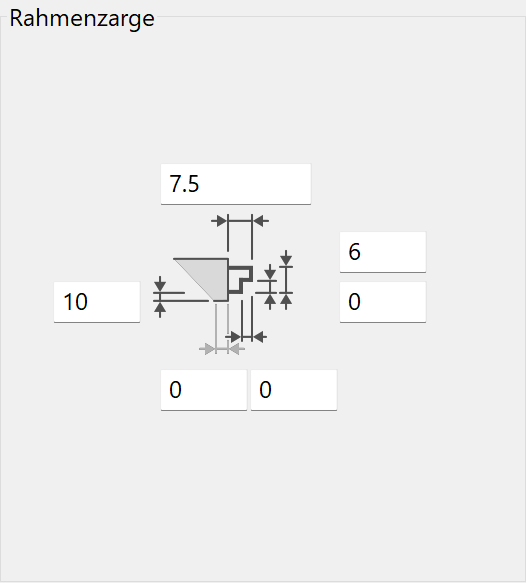

The dimensions of the different door jamb types can be entered here. The dialog window appears differently depending on the door jamb type selected.
In the left-hand column, the door jamb can be switched on/off in 2D and 3D.
Door jamb settings in the representation level

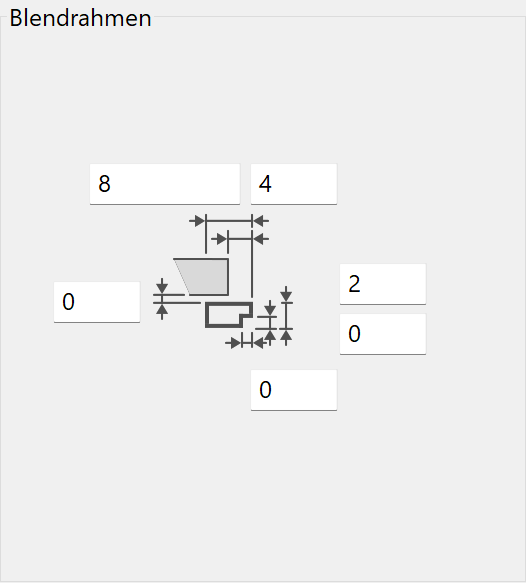
Lintel parameters
![]()
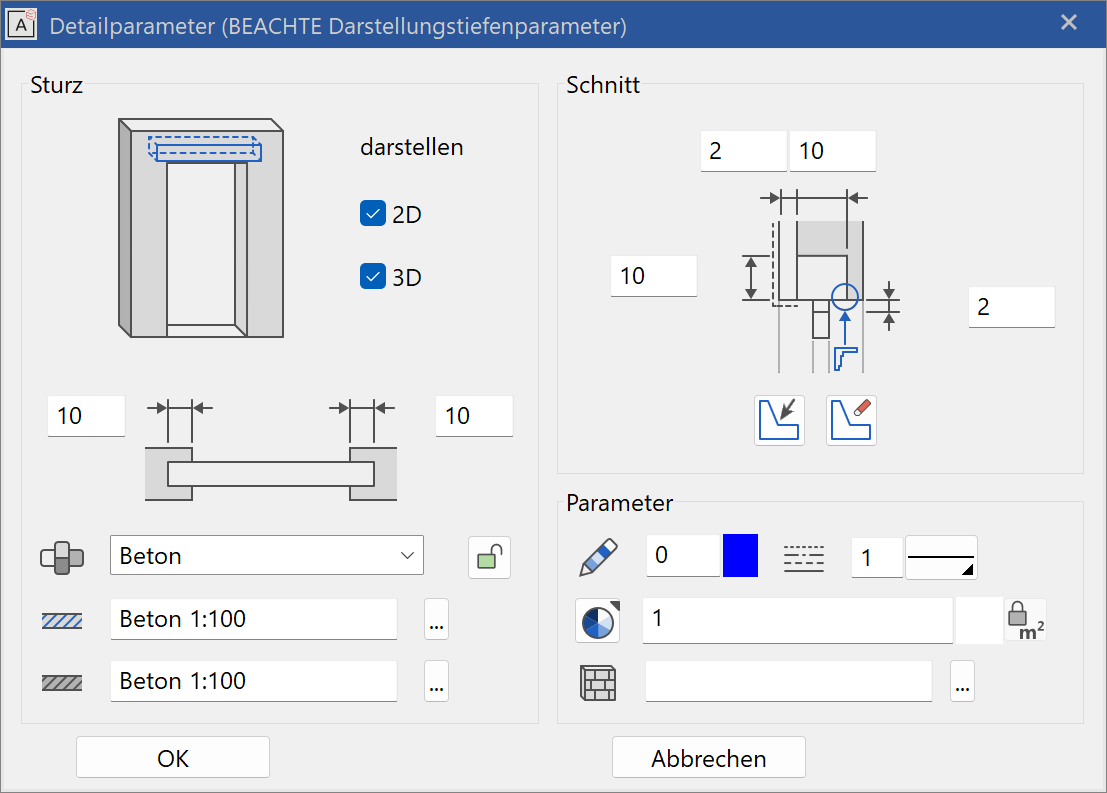
The lintel parameters for the door are identical to the lintel parameters for windows.
Stop parameters
![]()
Stops for doors can be defined in the stop parameters. Settings in this dialog window only make sense if the stop is activated in the main parameter window.

The shape of the individual wall layers in the stop area depends on the wall construction. As the wall composition is yet unknown when placing a new door, there is no preview and no settings can be configured yet.
The correct layer gradient of the wall can only be determined when the existing door is edited.
The stop editor for doors is identical to the stop editor for windows.
Slab elevation parameters
![]()

In the 2D-depiction parameters, you can specify the pen colour and line type of the slab elevation symbol.
Door handle parameters
![]()

The 2D and 3D check boxes activate the door handles for 2D and 3D views.
Symbol
A library part for the handle can be selected here.
The drop-down menu selects which of the handles are configured. (There are 4 options: stop side and opposite side and two more for a double casement door). If the first lock is closed, the settings of stop side and opposite side are identical. If the second lock is closed, the settings for both door leafs are identical.
Dimensions
The height and distance are measured relative to the door leaf.
Colour mode/material mode
![]()
![]()
This switch allows you to toggle between colour mode and material mode. For more details, see the Colours and Materials chapters.
3D hatch

The door handle can be assigned a hatch that appears in the calculated hidden line views.
Door editor
Improved · 16 R1 · Improvements
![]()
The door editor can be launched using the button in the door parameter or from the property bar.
This tool allows you to set the window divisions manually. The functionality is explained in the Glass element section.