Doors
|
|
Construction parts toolbar |
| AR Objects menu > Door |
Click on the CREATE DOOR function to enable the settings for the most recently placed door. The door can now be placed. The Position of door query appears in the entry line.
Door property bar

The property bar becomes visible as soon as the CREATE DOOR function is launched or if an existing door is edited.
You can manipulate the main values in the door's property bar.
| Function | Description |
|---|---|
| Door parameters | |
 |
Type |
| Renovation planning state | |
| Door shape | |
| Symbol type | |
| Elevation in floor plan | |
| Door width | |
| Door height | |
| Threshold height | |
| Vault height (only active for segment curve door and Pointed arch door) | |
| Opening angle | |
| Modify door stop (only active when modifying) | |
| Close openings automatically (renovation planning) | |
| Lintel depiction | |
| Finished clearance / gross clearance | |
| Door jamb type | |
| Switch stop on/off | |
| Door handle parameters |
Door parameters
![]()
You can open the door parameters from the property bar or by double-clicking the door to be modified.
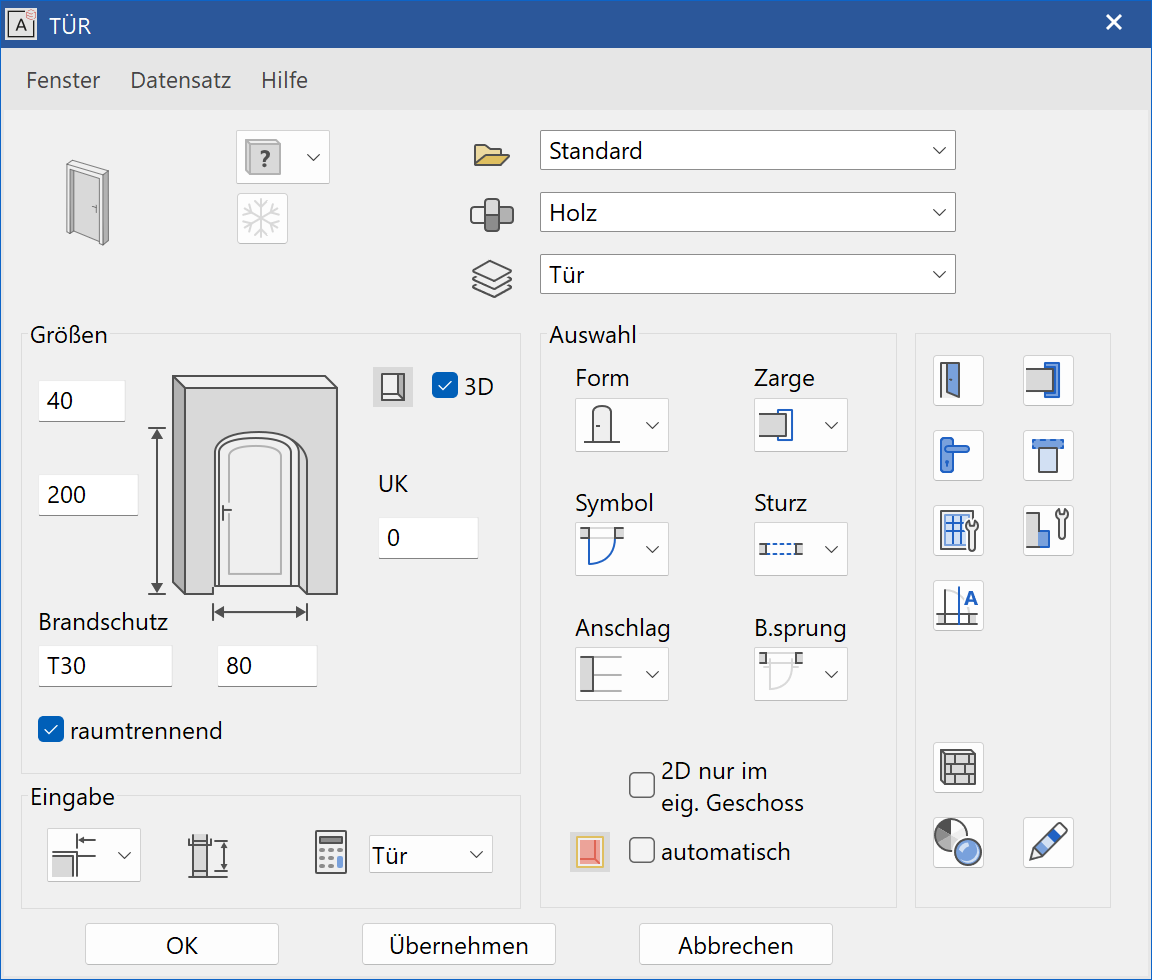
General parameters
 Renovation planning state
 Freeze
 Type
Type Layer
Layer
The general parameters for architectural objects are described in chapter Architecture objects.
Material
The material is taken into account in the report. Any name can be chosen from the dropdown or simply entered into and confirmed with Enter . If you want to remove a name from the dropdown list, enter it with a preceding minus sign and confirm with Enter .
Dimensions
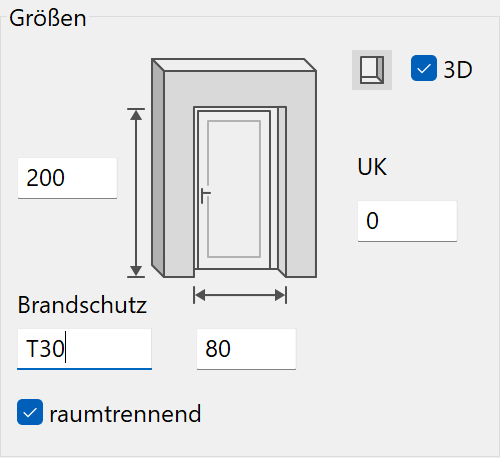
Door height
The door height depends on the entry style: Finished clearance, gross clearance, gross clearance from "finished raised floor"
Tip
If a threshold is higher than the defined floor, the height is calculated from the threshold.
Door width
The door width depends on the entry style: Gross clearance or finished clearance
Tip
If a pre-existing door is edited, the original placement point of the door is indicated. A modification to the door width always takes effect from this point.
The point can be moved to the reference points on the left, right and in the centre using the mouse.

Threshold height
The threshold must always be entered from "raw slab", regardless of which entry style setting is active.
Fire protection
In addition to the labelling of the door, the fire protection class is added. Doors have the option for fire proofing labelling. Any symbol that follows a tilde "~" symbol, will be depicted subscripted. The tilde symbol itself is not depicted.
Opening in 3D

This setting is generally active. The setting to create an opening into the 3D wall may be deactivated. In that case, only a 2D depiction of a door is generated in the wall.
Room-dividing

If a door is room-dividing, it is recognized as a boundary when calculating room areas.
Entry
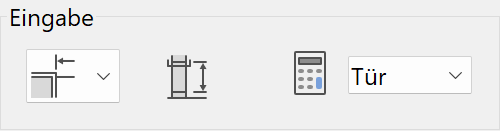
In order to account for different entry styles, there are various options available for entering dimensions.
Finished clearance
![]()
The finished clearance describes the finished passage dimension: the width between the door jambs and the height from the finished higher floor to the lintel door jamb. If a threshold higher than the floor is defined, the height is measured from the threshold.
Gross clearance
![]()
The gross clearance describes the width of the raw wall opening.
If you select gross clearance as the entry style, an additional dropdown box opens for entering the height of the raw dimensions.
Upper edge finished floor level up to lintel lower edge
![]()
Height from higher finished floor up to gross lintel lower edge. If the threshold is higher than the floor, the dimension is measured from the threshold.
Tip
The (finished) floor height defined in the structure settings for the storey is taken into account for the FFL height (top edge of finished floor height). However, if a room name has been assigned, the (finished) floor height used in it takes precedence over the "general (finished) floor height)" in the structure settings.
Top of slab up to lintel lower edge
![]()
Height from raw slab to lintel lower edge entered. If a threshold is entered, the dimension is measured from the threshold.
Report object as
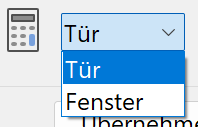
Using this setting a door can be reported as a window in the quantification.
Selection
Door shape
![]() - Rectangular door
- Rectangular door
![]() - Segment-curve door
- Segment-curve door
![]() - Round-arch door
- Round-arch door
![]() - Pointed-arch door
- Pointed-arch door
Four door shapes are available; rectangular door, segment-curve door, round-arch door and pointed-arch door. If the segment-curve or pointed-arch door is selected, the segmental arch height can be entered in the door parameters under dimensions or in the property bar using the segmental arch height symbol.
Door jamb
![]() - Without door jamb
- Without door jamb
![]() - Corner jamb
- Corner jamb
![]() - Embracing jamb
- Embracing jamb
![]() - Wooden jamb
- Wooden jamb
![]() - Dummy jamb
- Dummy jamb
![]() - On wall frame
- On wall frame
![]() - Free contour
- Free contour
Here you can specify the style of door jamb. Note that the settings in the door jamb parameters have an effect on the difference between finished clearance and gross clearance. The detailed setting of individual door jambs can be configured in the door parameters in the detail parameters.
Door symbol
![]() - Standard curve
- Standard curve
![]() - Symmetric double casement
- Symmetric double casement
![]() - Asymmetric double casement
- Asymmetric double casement
![]() - Sliding gate
- Sliding gate
![]() - One-sided sliding door
- One-sided sliding door
![]() - Two-sided sliding door
- Two-sided sliding door
![]() - Swing door
- Swing door
![]() - Double swing door
- Double swing door
![]() - Passage
- Passage
Symbol selection first only refers to the symbol type. The stop direction and stop side are specified by the flip cursor when installing the door. If you need to modify the stop direction later, you can do this with the MODIFY DOOR STOP function in the property bar.
When installing a double door with different door leaf widths (asymmetric), you are asked for the width of one of the casements when installing. The installation side can then be specified with the flip cursor.
Elevation in floor plan
![]() - None
- None
![]() - Line
- Line
![]() - Symbol
- Symbol

You can specify whether a threshold or a height difference of the floor should be depicted.
The representation can be switched off, or displayed as a line or as a line with symbol.
The detailed setting of the slab elevation can be configured in the detail parameter of the slab elevation.
Door stop
![]() - Without stop
- Without stop
![]() - With stop
- With stop
If "with stop" is selected, on the left you have the option to set the door depth (in frame). Here the door depth (in frame) describes the thickness of the stop.
The detailed setting of the stop can be configured in the detail parameter of the stop.
Door lintel
![]() - Type 1
- Type 1
![]() - Type 2
- Type 2
![]() - Without lintel
- Without lintel
![]() - Not visible
- Not visible
The lintel line depiction in the floor plan is set using this button. There are two different types of lintel lines, which can be specified. The types are set in the representation levels: The top selection option here is type 1, the middle type 2. Type 1 is dashed by default and type 2 is a solid line. The third selection switches the lintel line depiction off, and the hatching is continuous in the fourth.
Lintel lines setting in representation level

2D only in active storey

The 2D depiction for multi-storey doors can be either in the own storey or in other storeys.
Renovation planning – fill automatically
If the status of a door is changed to demolition, the automatic generation of a wall that fills the hole can be triggered with this option.
Modification Functions
Modify door stop
![]()
This function is only active when the door is being edited. Once the door is placed, this function allows you to modify the hinge side and the opening side again.
Placement points
If a pre-existing door is edited, the original placement point of the door is indicated. A modification to the door width always takes effect from this point.
The point can be moved to the reference points on the left, right and in the centre using the mouse.

Tip
After selecting the door, click on a handle or gripper of the contour to access manipulation functions directly in a toolbar or by using Tab with the cursor.
2D/3D depiction
Improved · 16 R1 · Improvements
 |
 |
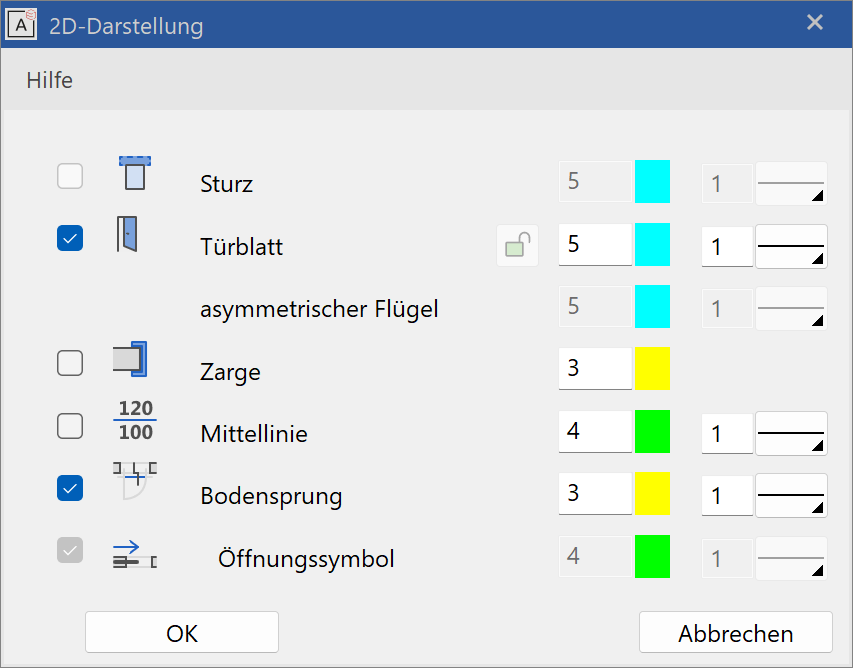
2D depiction
Setting the pen and line type 2D depiction for all door parts activated in the dialog windows. The 2D can be switched off with the check boxes.
The grey background means "undefined".
This makes the components of the door immediately apparent.
Jamb in special case: The line type of the jamb is taken from the door leaf parameters.
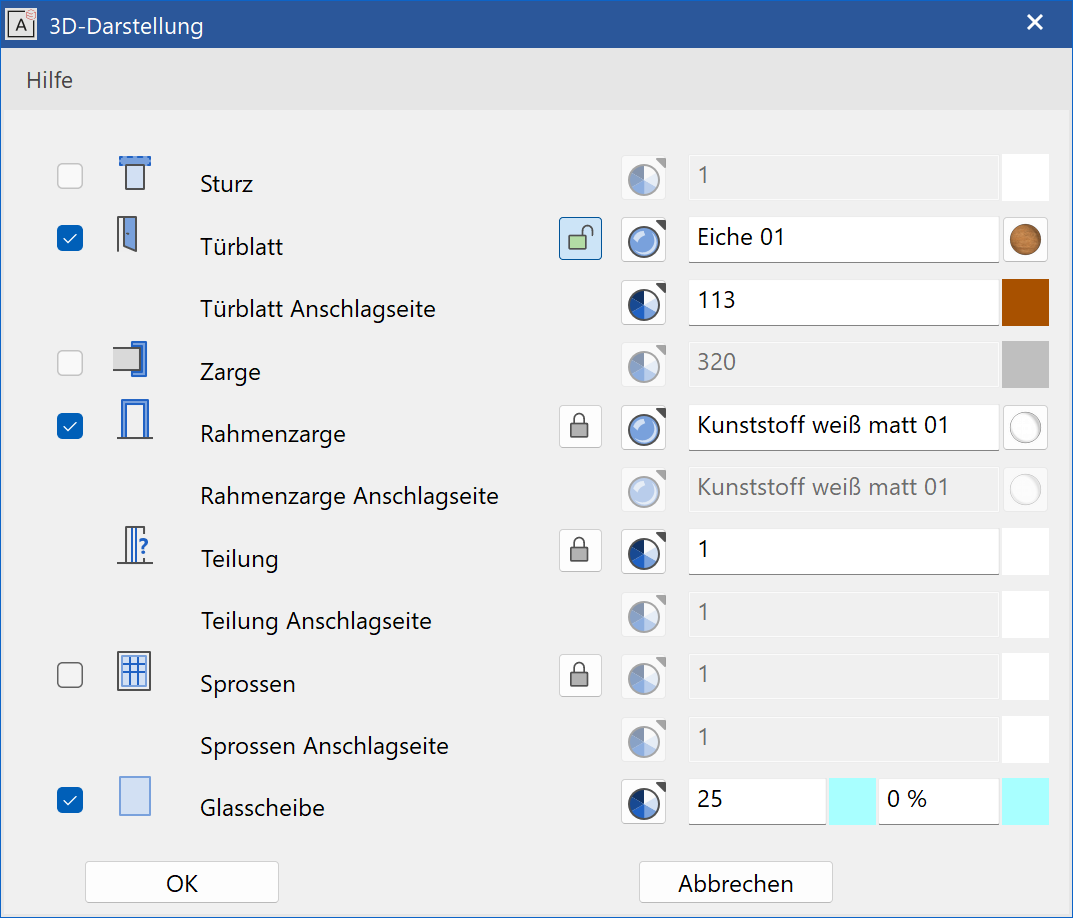
3D depiction
For some sub elements different visualisation materials can be defined for inside and outside. The default case is an identical material for inside and outside. In order to define different settings, the lock has to be opened and the setting for outside can be entered.
Colour mode/material mode
![]()
![]()
This switch allows you to toggle between colour mode and material mode. For more details, see the Colours and Materials chapters.
3D hatch
Improved · 16 R1 · Improvements
![]()
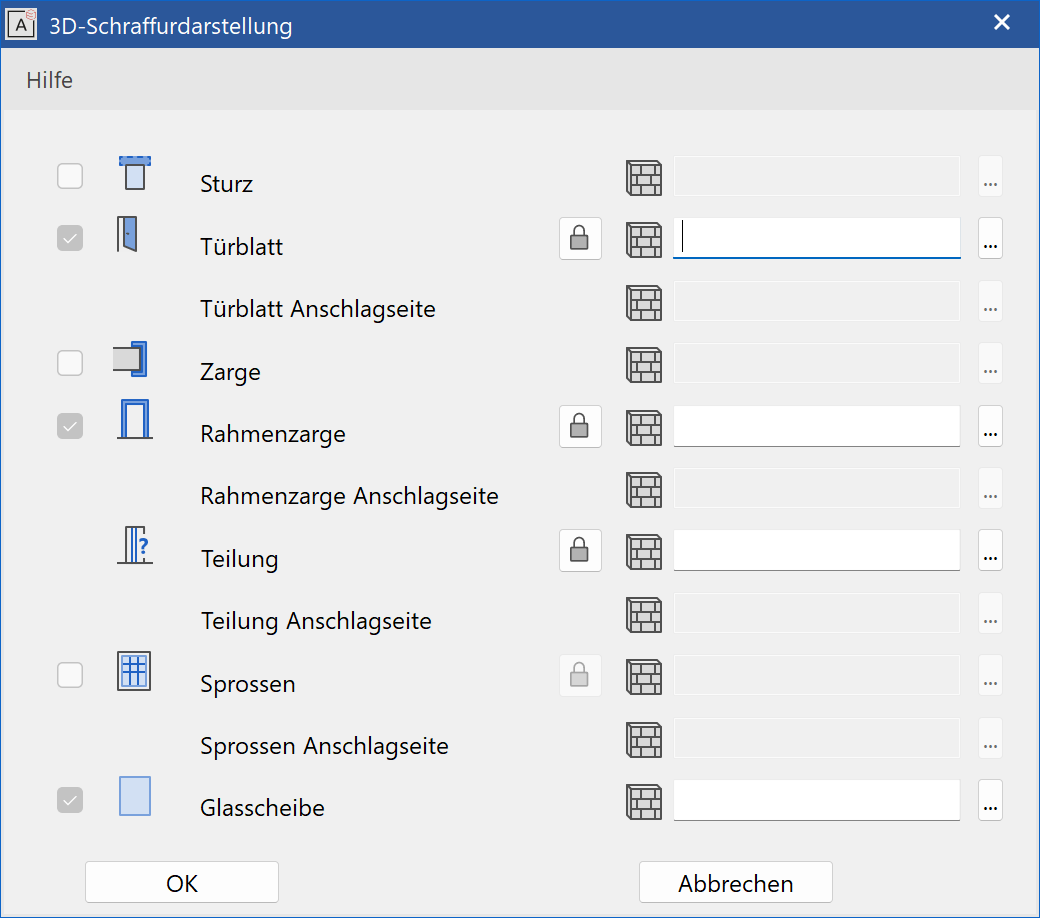
Every sub element of a window can be assigned a hatch that appears in the calculated hidden line views.
For some sub elements different hatches can be defined for inside and outside. The default case is an identical hatch for inside and outside. In order to define different settings, the lock has to be opened and the setting for outside can be entered.