Depiction
With window sills without window sills

Example with window recess and roll blind. Representation type 5 is shown above twice: the second-lowest series with window sills, roll blinds and recesses switched on.
No lintel lines are shown when window sills are switched on.
- Type 1 dotted lintel lines
- Type 2 solid lintel lines
- Type 3 no lintel lines
- Type 4 continuous lintel (hatch) with window (Roll blinds and recesses are switched off in the example.)
- Type 5 continuous lintel (hatch)
The window sills, roll blinds, recesses etc. can be switched on or off for all types in the 2D depiction.
Tip
For type 4 "Lintel continuous with window", the pen and line type for reveals and frames can be selected in the 2D representation.

Representation levels parameters
Type 1 + 2 are set in the representation levels parameters window.

If the representation level is refreshed or changed, then the settings of the representation level parameters are adopted.
Copy parameters

Labelling parameters
![]()

Option 1: Label inside, centre line and large text on centre line

Option 2: Height marker
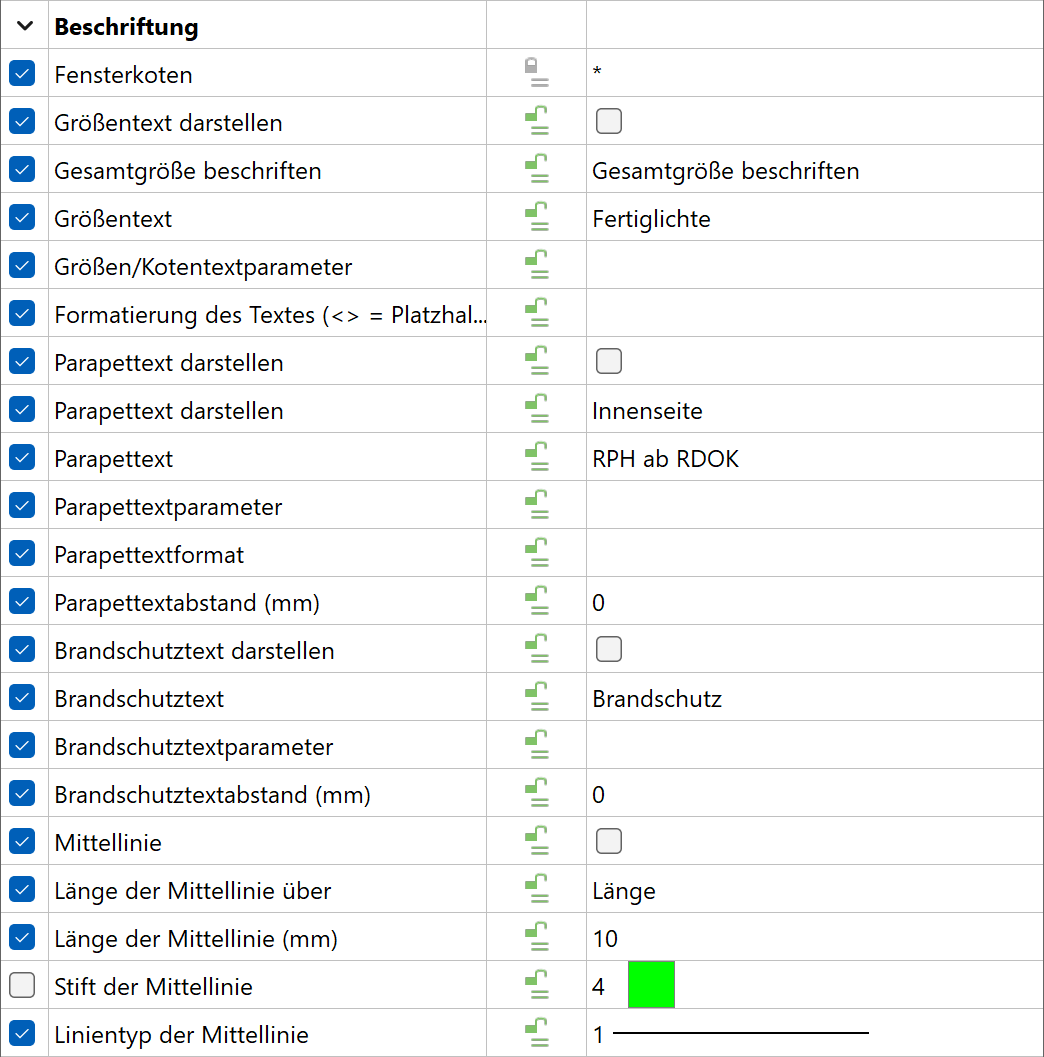
General
This dialog window covers the representation of automatically generated window labels. These can be fully switched on or off using the check boxes.
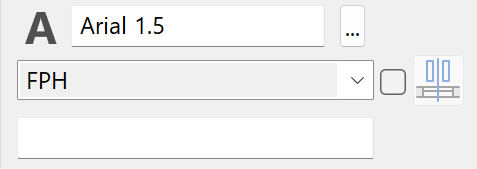
A pre-text and a placeholder with < > for the value calculated by the CAD are entered for each label field.
With < P > a m, cm/mm dimensioning is used.
The text parameters are selected from the general parameter database.
In order to manipulate text parameters, please select the dialog window for the text parameters in the menu LAY-OUT > TEXT > TEXT PARAMETERS.
Height marker (Switzerland)
The height markers are activated at the left centre. This switches off the large text on the centre line. If the selection box on the right of the roll blind is activated, the bottom edge of the roll blind is only given if a roll blind is present.
The pre-text (e.g. LF FFL:) and ±< > is written into the floor plan.
The font parameter is selected above. A parameter should be selected in the justified style for an optimal representation.
The distance of the text block is determined on the right (for the centre line).
Inside label (Austria) (bottom left)

Activation using the box beside the menu. The font parameter is selected above the menu. A format specification can be entered in the label field below the menu. If an option with multiple heights is selected, the values should be separated with ";" e.g.
RPH < > ;LH < >
![]()
![]() Labelling inside / outside and distance
Labelling inside / outside and distance
In the menu, the depiction of the values is selected.

The label corresponds to the specifications of Austrian standard OENORM A 6240-2.
RPH = Raw parapet height
FPH = Finished parapet height
LH = Lintel height, inner side
For RPH, FPH, LLH or combinations the initial height can be selected from the top face of the slab (TFS), finished floor level (FFL) or from ±0.00.
Tip
The types raw or finished dimension write the actual dimension of the drawn window into the plan graphics, regardless of which entry style is used for constructing the window!
The (finished) floor height defined in the structure settings for the storey is taken into account for the FFL height. However, if there is a room name, the (finished) floor height used in it takes precedence over the "general (finished) floor height)" in the structure settings.
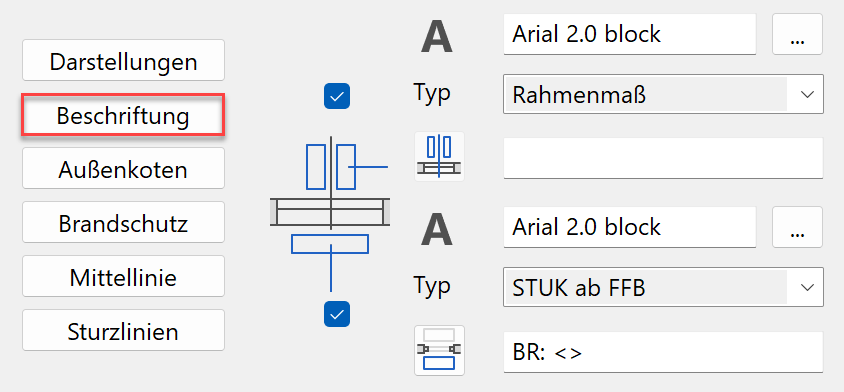
Dimension text on centre line (top left)
Activation using the check box beside the menu. This switches off the height markers. The font parameter is selected above the menu. A format specification can be entered in the label field below the menu. In the menu, the depiction of the values is selected.
You can select:
- Raw clearance
- Dimension of frame
- Frame inner side
- Finished clear dimension from the outer window sill (architecture clearance)
- Finished FPH clear dimension from the inner window sill (Austrian standard)
Total width labelling / Wing labelling
![]()
![]()
This switch toggles between an overall and individual wing labelling. If the wing labelling is active, the only option is a “Frame inner side”.
The raw dimensions are calculated without stop width when the stop type "Window with external insulation" is switched on.
Recommendation for finished clear dimension: Use FPH type when this style is selected for entering window dimensions.
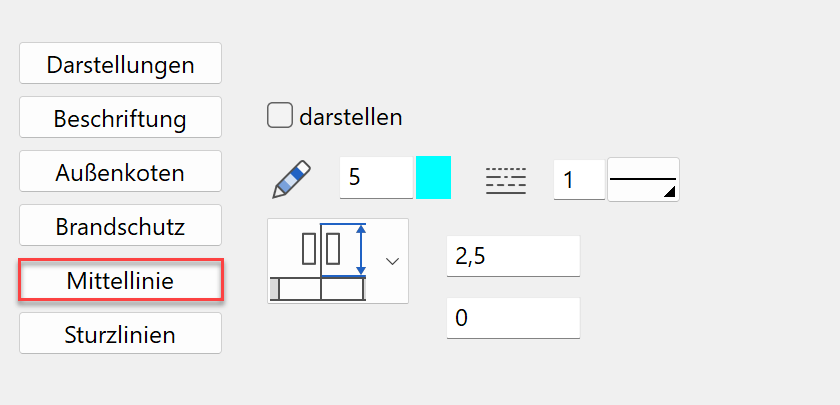
Centre line and distance of height marker to the window
On the right, the length of the centre line can be entered absolutely or relatively to the length of the label. The distance of the height markers is determined at the same time.
Fire proofing labelling (top right)
- "fire proofing" is oriented along the centre line
- "fire proofing rotated" is oriented perpendicular to the centre line
In the second menu, the text parameter can be selected.
The checkbox enables or disables fire-proofing labelling.
The fire-proofing class is entered in the main dialog window.
Representation levels parameters
The following settings are active when a representation level is changed or when refreshing the representation level:
The above font parameter also applies for the height markers.

The button on the right of the roll blind cabinet is used to label only the bottom surface of the roll blind when a roll blind housing is present.
Copy parameters
2D/3D depiction
 |
 |
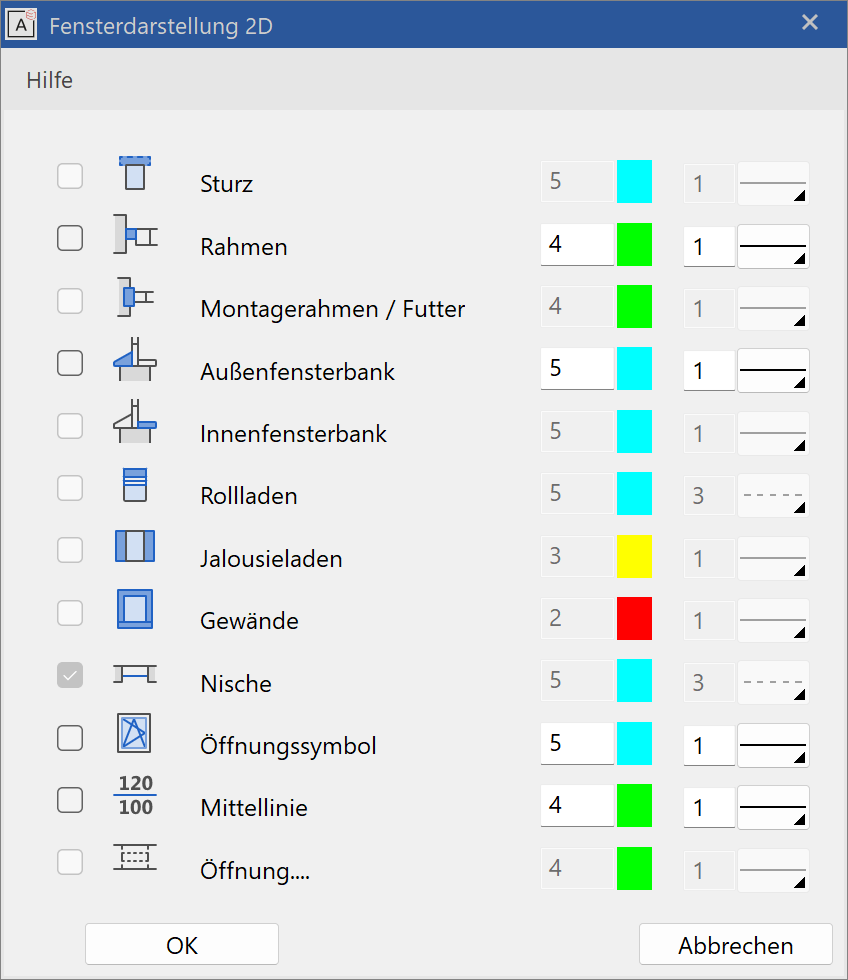
2D depiction
Setting the pen and line type 2D depiction for all window parts activated in the dialog windows. The 2D can be switched off with the check boxes.
The grey background means "undefined".
This makes the components of the window immediately apparent.
Opening in special case: Active if "Lintel continuous with window" is selected for the representation.
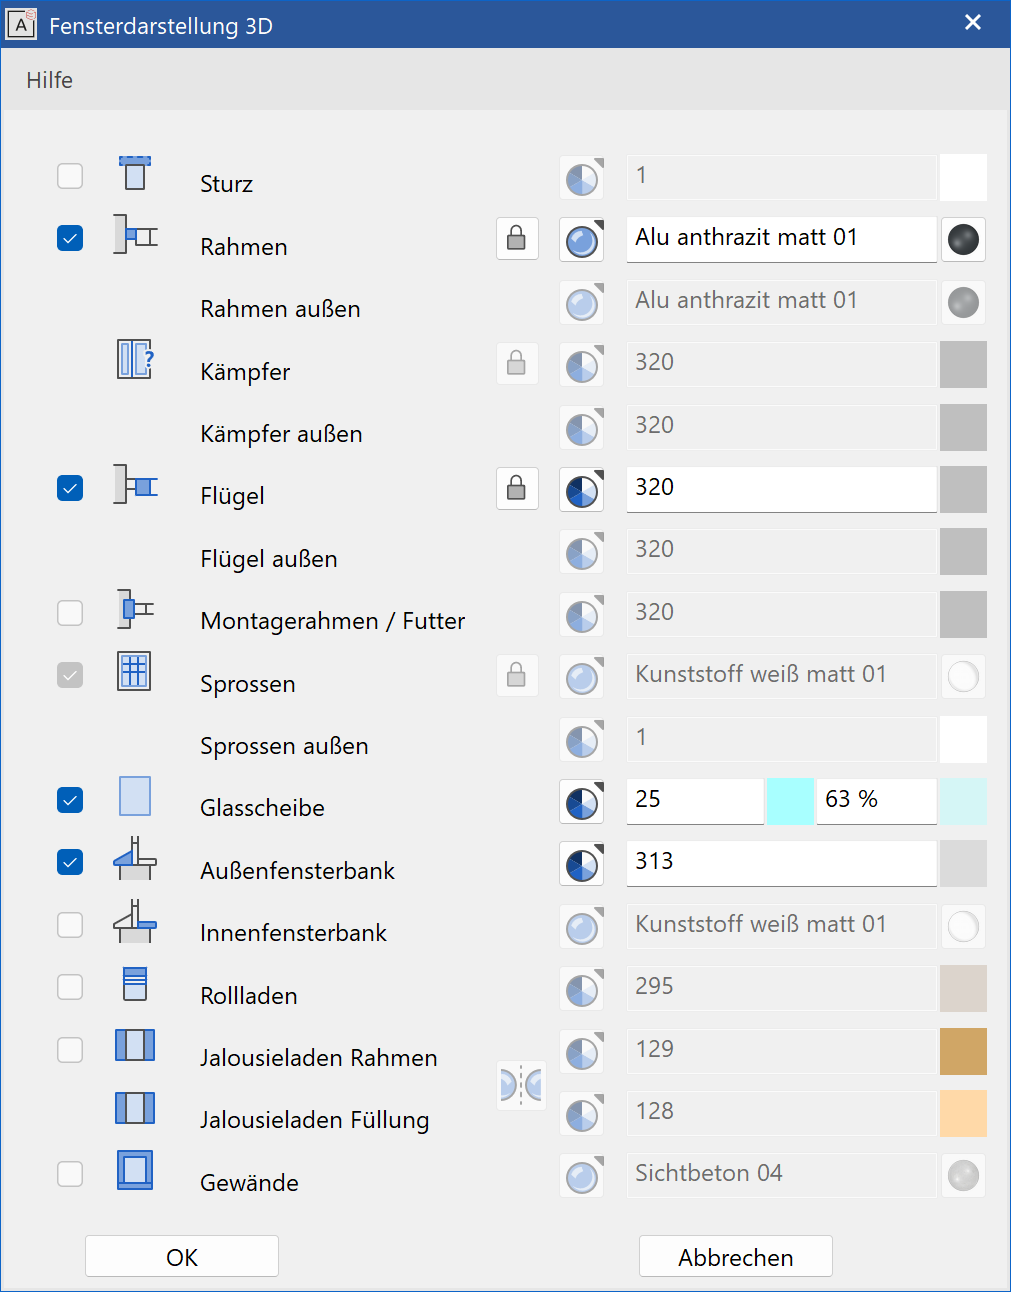
3D depiction
For frame, casement and muntins different visualisation materials can be defined for inside and outside. The default case is an identical material for inside and outside. In order to define different settings, the lock has to be opened and the setting for outside can be entered.
Colour mode/material mode
![]()
![]()
This switch allows you to toggle between colour mode and material mode. For more details, see the Colours and Materials chapters.
3D hatch
![]()
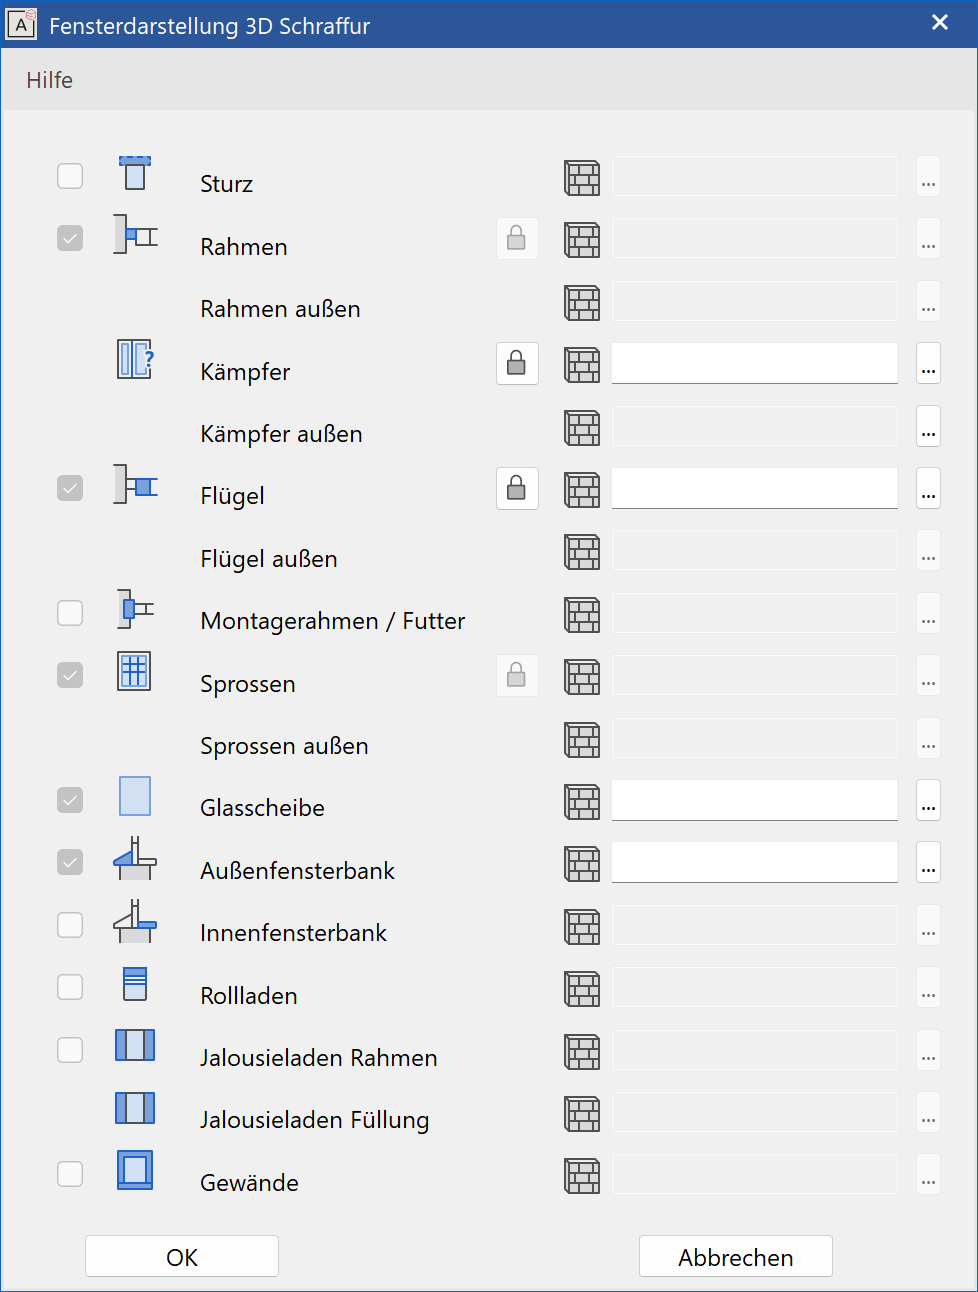
Every sub element of a window can be assigned a hatch that appears in the calculated hidden line views.
For frame, casement and muntins different hatches can be defined for inside and outside. The default case is an identical hatch for inside and outside. In order to define different settings, the lock has to be opened and the setting for outside can be entered.
Modification functions
Placement points
If a pre-existing window is edited, the original placement point of the window is indicated. Modifications to the window width always take effect from this point.
The point can be moved to the reference points on the left, right and in the centre using the mouse.

Move the placement point with the mouse.
Tip
After selecting the door, click on a handle or gripper of the contour to access manipulation functions directly in a toolbar or by using Tab  with the cursor.