Columns
Create columns
|
|
Construction parts toolbar |
| AR Objects menu > Column |
Click on the CREATE COLUMN function to enable the settings for the last column drawn. The column can immediately be placed.
Column property bar

The property bar is visible as soon as the CREATE COLUMN function is started or if an existing column is edited.
You can manipulate the main values in the column's property bar.


Column parameters
![]()
You can open the column parameters from the property bar or by double-clicking the column to be modified.
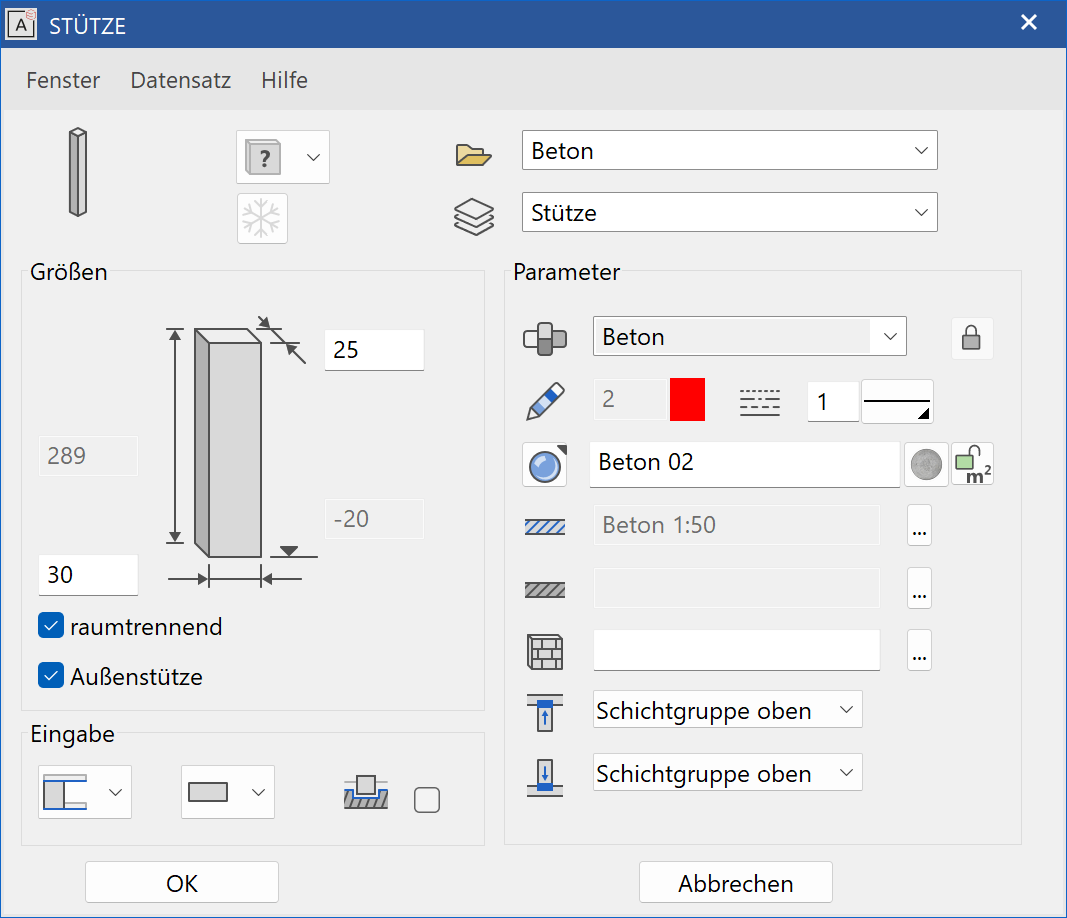
General parameters
 Renovation planning state
 Freeze
 Type
Type Layer
Layer
The general parameters for architectural objects are described in chapter Architecture objects.
Dimensions
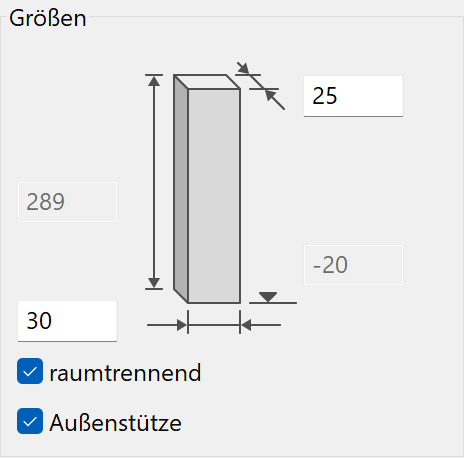
Depending on the selected height reference, you can configure the bottom edge and height values freely.
Exterior column
The report differentiates between interior and exterior columns.
Room-dividing
If a column is room-dividing, it is recognized as a boundary when calculating room areas.
Entry
Height reference
Choosing the correct height reference simplifies entry and has advantages for later modifications to the structure settings.
Columns that use a ceiling as a reference automatically adjust themselves if the ceiling is modified (height reference of ceiling: Storey slab or level floor). A free column never auto-adjusts.
Column from floor to ceiling (Standard)
![]()
Details in Wall > Property bar.
Column from underside floor to ceiling
![]()
Details in Wall > Property bar.
Column to ceiling
![]()
Details in Wall > Property bar.
Column from floor
![]()
Details in Wall > Property bar.
Column from underside floor
![]()
Details in Wall > Property bar.
Free columns
![]()
Free columns do not reference floors or roofs.
Column shape
![]()
![]()
![]()
![]()
You can select pillars with a rectangular, square, round or free cross section. For a free column, you must create a closed polygon in advance.
![]()
When you create a circular column, you can also specify an angle-dependent circular resolution in 3D.
Tip
A hollow column can be generated as a free column using 2 concentric circles, for example.
Remove column from wall

If you select this option, walls in which columns are placed have automatic cutouts created in 2D and in 3D. Allowing for columns to be directly drawn into a wall.
Parameter
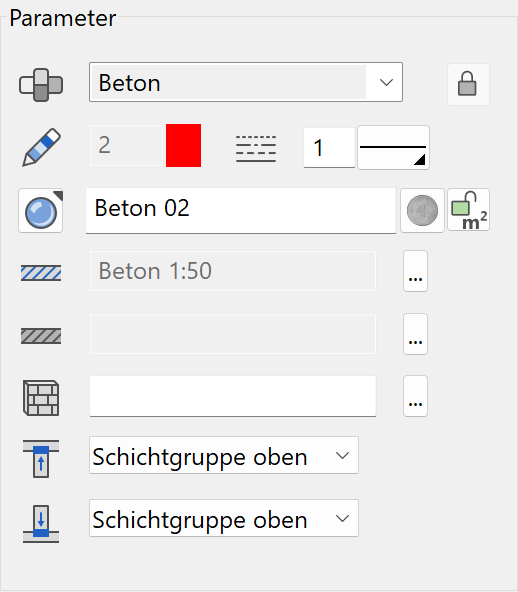
Material and its linkage

Details in Wall > Property bar.
Pen and hatching parameters

Details in Wall > Property bar.
Colour mode/material mode


Details in Wall > Property bar.
Material for room label
![]()
Details in Wall > Property bar.
3D hatch

Details in Wall > Property bar.
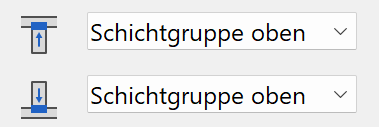
Column intersection top/bottom
Details in Wall > Property bar.
Modification Functions

When a column is being edited, modification functions are available at the end of the property bar.
Modify column contour
![]()
You can modify an existing column contour.
After the function is launched, the column is reduced to the 2D contour.
You can use the 2D drawing functions to edit the contour. To complete the function, you must click the COLUMN CONTOUR READY function. This appears in the top left of the work area.
Tip
If you click a handle or gripper after selecting a column from free contour, manipulation functions are available in the Input assistant.
Edit columns
![]()
The function enables you to add pillar heads with forked columns or supports. The pen of the column is used for the groove or bracket. You also can call up the function from the MODIFY menu > WALL.
Forked column
![]()
You can only add forked heads to square or rectangular pillars.
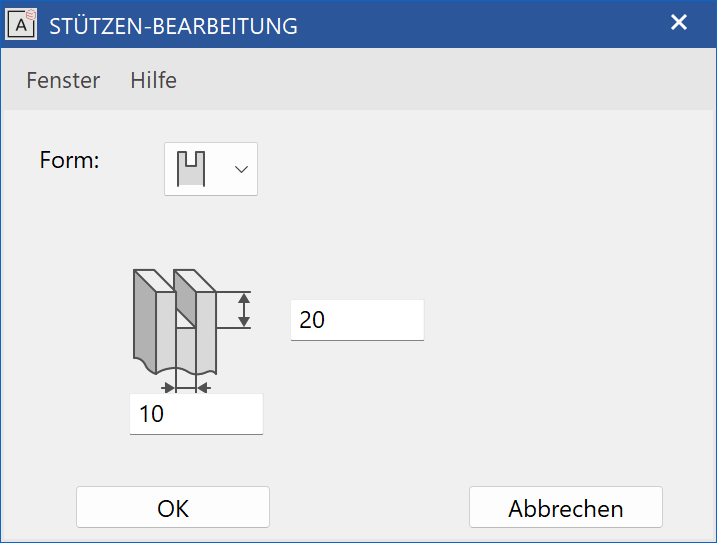
The forked column is always centred on top. When prompted connect to which side of column, click the side on the floor plan that should be grooved.
Tip
To delete the groove, you can select it as a sub-object in the floor plan and delete it. The 3D depiction refreshes automatically.
Support
![]()
You can only add bearing brackets to square or rectangular pillars.
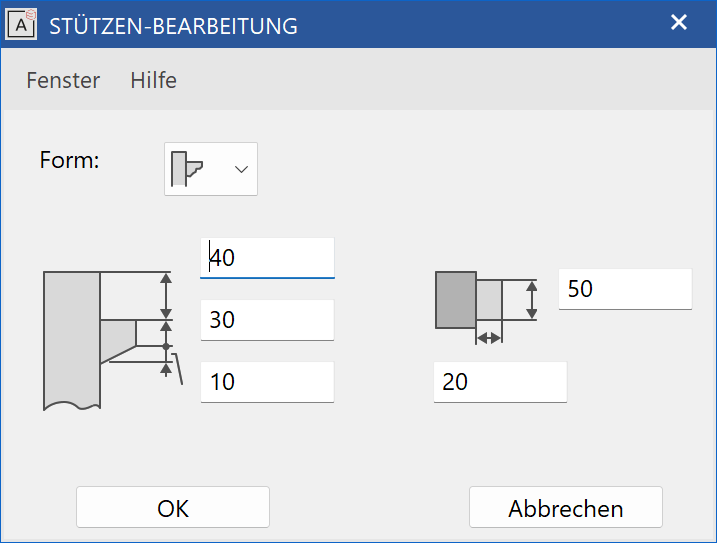
The bracket is always centred on the pillar's cross section. When asked connect to which side of column, click the side on the floor plan that should be given the bearing bracket.
Tip
To delete the console, you can select it as a sub-object in the floor plan and delete it.