Create Roof
|
|
Construction parts toolbar |
| AR Objects menu > Roof |
When you click the CREATE ROOF function, the settings of the most recently drawn roof are active and the path of the roof can be drawn immediately. Depending on the selected setting for the ENTRY MODE option, the first contour query appears in the entry line, e.g. Start point.
The roof is created on the storey in which the walls are sectioned with the roof. A roof can also be defined over multiple storeys.
Workshop
Draw roof
In the storey list, select the top floor of your project and draw the outline of the eaves or gables.
![]()
![]()


Now click the CREATE ROOF function and define the values as shown below.
![]()

Once you are satisfied with the settings, click on the previously drawn polygon. As the height marker, you can select a building corner, for instance.


Roof property bar

The property bar is visible as soon as the CREATE ROOF function is started or if an existing roof is edited.
You can manipulate the main values in the roof's property bar.
| Function | Description |
|---|---|
| Roof parameters | |
 |
Type |
| Renovation planning state | |
| Roof shape | |
| Entry mode | |
| Roof thickness | |
| Thickness direction | |
| Roof height | |
| Roof pitch | |
| View with envelope | |
| Roof section on/off | |
| Display extended roof functions | |
 |
Properties of roof (depiction) |
| Modification functions |
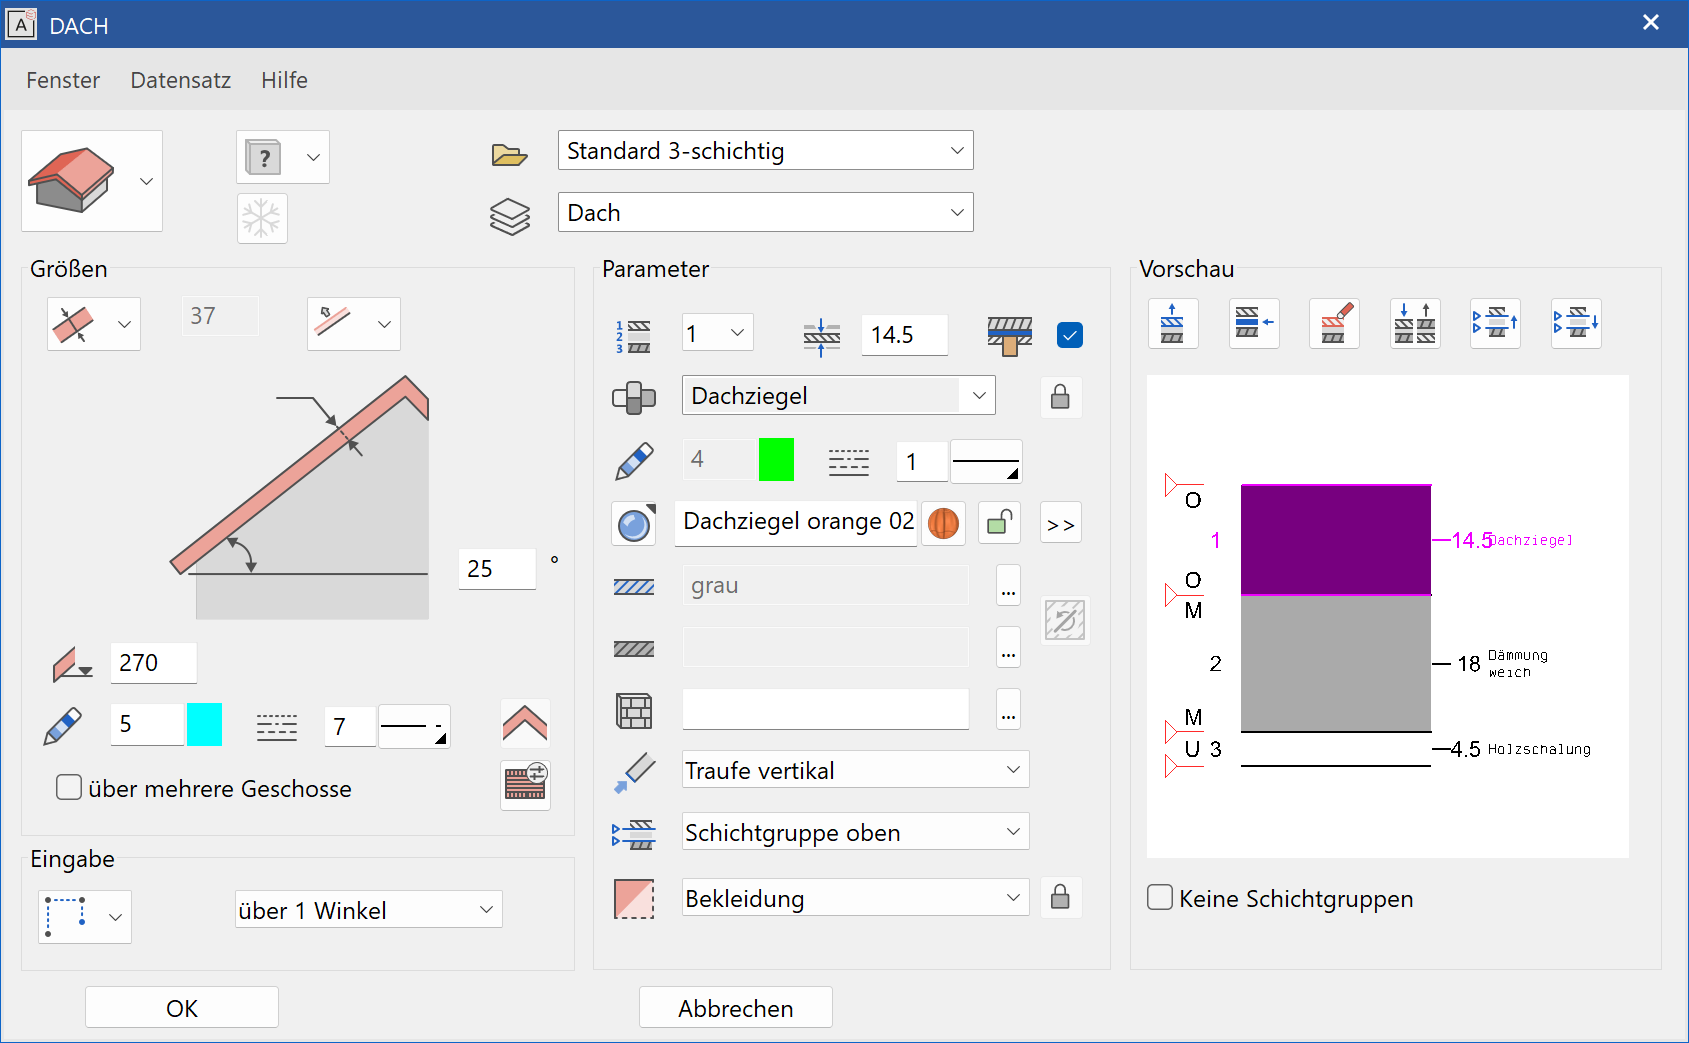
Roof parameters
![]()
You can open the roof parameter window from the property bar or by double-clicking the roof to be modified. The parameter window has three columns. First, the dimensions including the sizes and entry, then the parameters of each layer and finally the layer preview.
General parameters
 Renovation planning state
 Freeze
 Type
Type Layer
Layer
The general parameters for architectural objects are described in chapter Architecture objects.
Dimensions

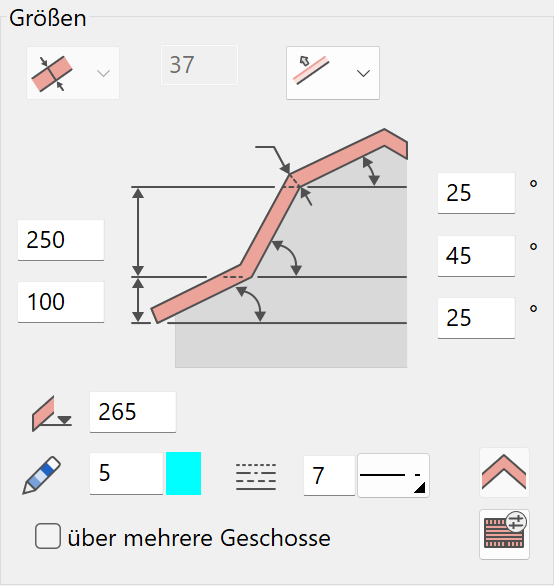
Thickness
The roof thickness is the sum of all individual layers.
Thickness indication

You can enter the thickness indication as either normal or vertical to the roof surface.
Thickness direction

Starting from the height marker, the roof is generated upward or downward.
Height
![]()
When you place the roof, you are asked for the point at which the height is to be measured.
The height measurement is relative to the raw slab of the active storey.
Angle

Pen/line type of floor plan depiction
The floor plan depiction corresponds to the main contour of the roof. Manually modified layers are not depicted.
View enveloping body
![]()
![]()
If you do not want to have a line at the location and eaves of each layer, you can activate the VIEW ENVELOPING BODY option.
Roof over multiple storeys


Walls are only intersected with the roof if they are located on the same storey as the roof. If the roof is to be sectioned with walls from other storeys, you must select this option. The first value specifies the number of storeys above and the second value specifies the number of storeys below. The roof section is only displayed on the storey in which the roof is created.
Detail parameters roof section in floor plan
![]()
The roof section is the cross sectioned depiction of the roof on the floor at a low jamb wall.
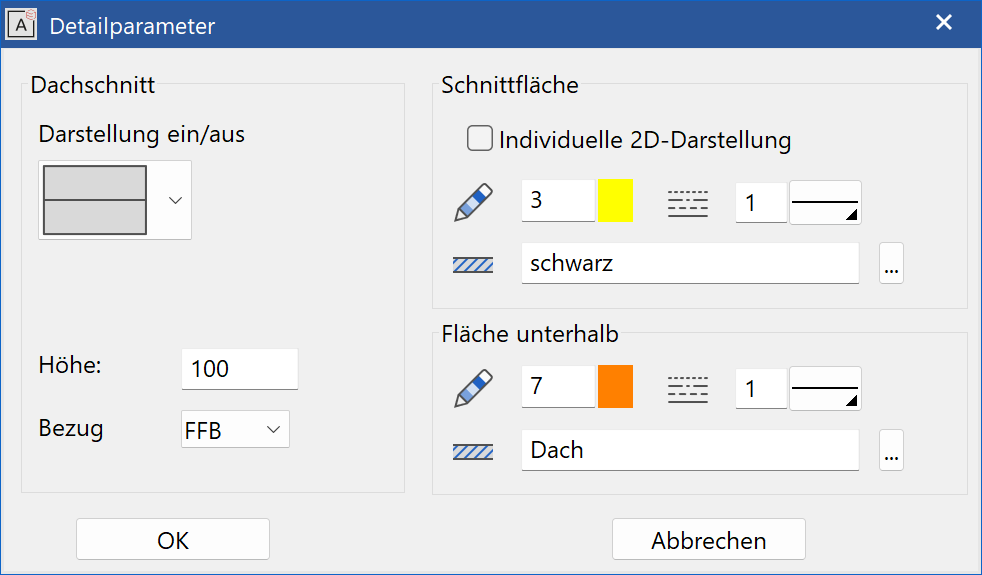
Depiction on/of
On: ![]()
Off: ![]()
Height/reference
The position of the roof section is controlled by the section height. The height measurement is relative to the raw slab or the finished floor.
Individual 2D depiction
If the option is active, the roof section is depicted similarly to the section. The settings are adopted from the individual layers.
For the general depiction, all layers are generated with the executed pen/line type and hatch.
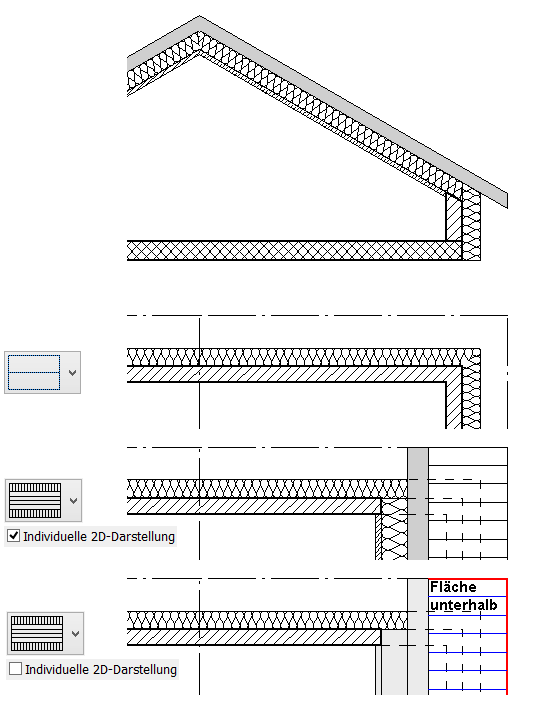
Bottom area
You can determine a hatch and a pen/line type for the depiction of the roof surface underneath the roof section (see graphic above).
The appearance of the parameter window and the types of queries are highly dependent on the selected construction part and are therefore described in more detail by roof types.
Entry
Entry mode
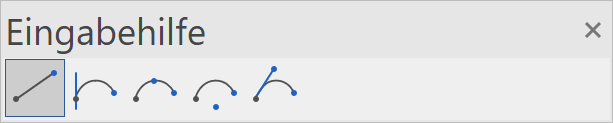
There are two entry types available:
Entry directly by polygon
Entry by a predefined contour
Draw roof contour manually
![]()
The Input Assistant offers the drawing options of POLYGON, RECTANGLE, CIRCLE, ELLIPSE and SPLINE.
Note
If you use polygon, make sure it is closed.
Create roof from existing contour
![]()
Before starting the ROOF function, you must draw an outline using the drawing functions. The ceiling is generated from this outline.
Parameter
The parameter section includes the settings of the active roof layer.
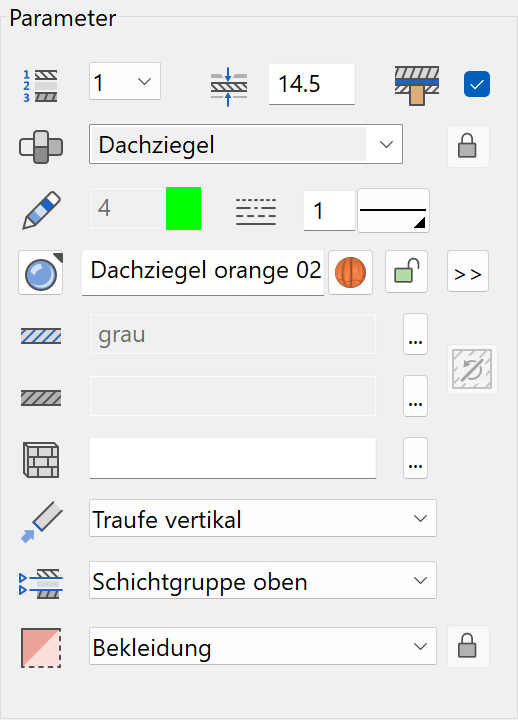
Number of active layer
![]()
For multi-layered roofs, you can select the desired layer in order to configure its settings. Instead of selecting the number, you can click directly on the layer in the preview.
Thickness of active layer
![]()
Layer reference to rafter structure

This option defines the layer under which the rafters are to be generated. This option can only be selected for one layer.
Material and its linkage

Details in Wall > Property bar.
This setting is only available in ELITECAD Architecture.
Pen and hatching parameters

Details in Wall > Property bar.
Colour mode/material mode


Details in Wall > Property bar.
Individual 3D depiction
![]()
When it is locked, only one colour or one material is used for the layer.
![]()
![]()
When it is unlocked, another option appears with extended settings for eaves, verge and soffit.

3D hatch

Details in Wall > Property bar.
Roof completion
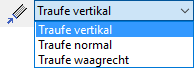
The eaves ending can be generated as either "vertical" (up and down), "normal" (perpendicular to the roof surface) or "horizontal". For the pent or shed roof, the endings for both sides can be selected.
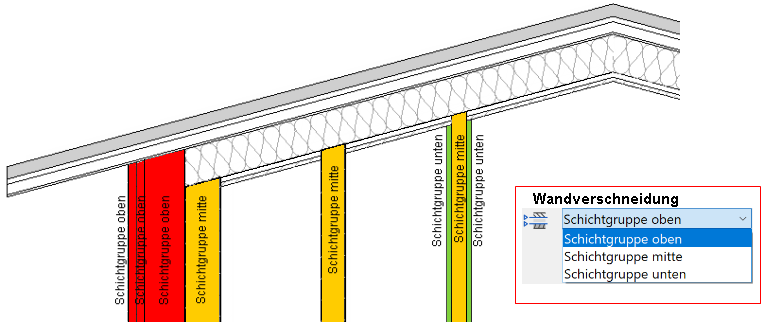
Layer group

The layers are divided into layer groups. Three layer groups are available: top, centre and bottom. The layer groups govern sectioning with the wall's layers. The sectioning is performed by assigning which wall layers should lead to which layer groups. For the assignment of a layer group, the entire construction with the wall must be accounted for.
Example: Section by top floor:
Situation

Assign each roof layer to a layer group.
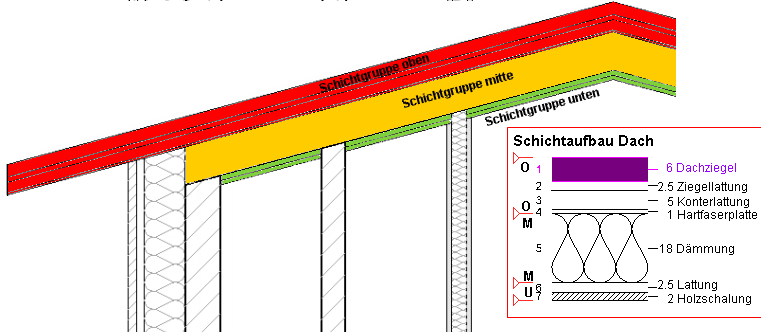
For the individual wall layers, use the LIMITATION TOP setting to assign the roof layer group at which they should terminate.
Layer type

Details in Wall > Property bar