Construction Parts
Rafters
![]()

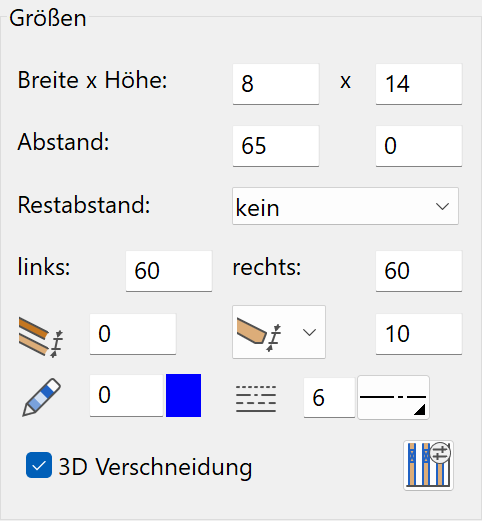
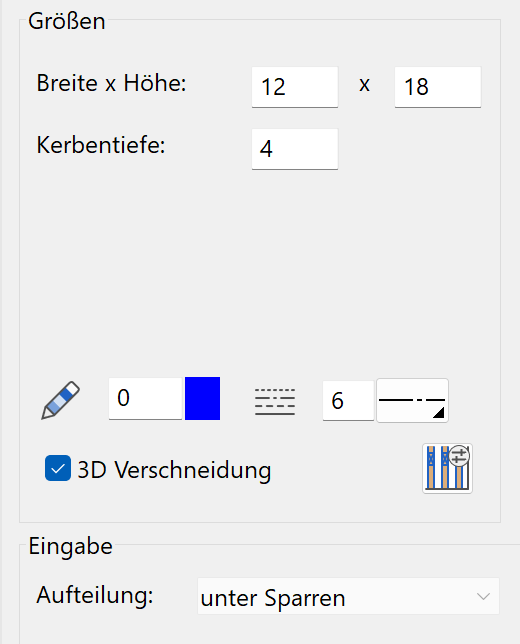
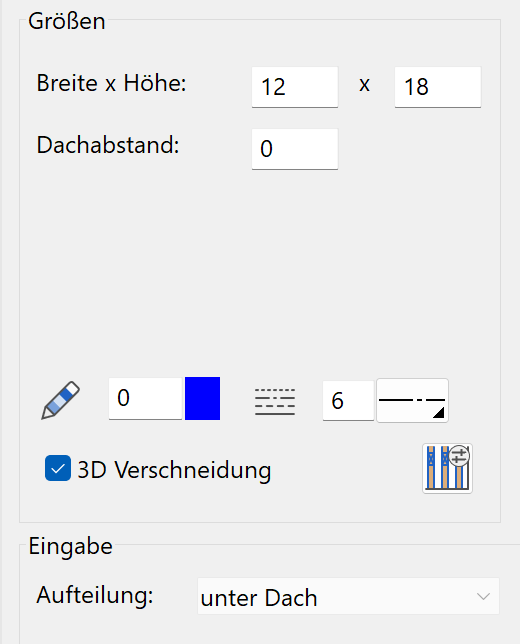
Dimensions
Enter the dimensions of the rafters with their "height" and "width". Depending on the separation type, you can enter a rafter distance (jump dimension) or the number of rafters. For the "Distance" separation type, a remaining distance is left over.
Remaining distance
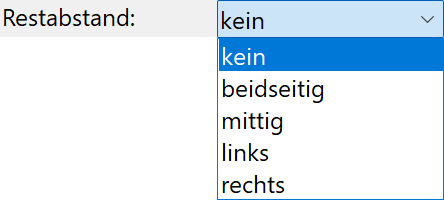
For the distance, there are various options as to how the remainder is treated.
"No" means that value for the distance is treated as a maximum.
| no | both sides | centred | left |
|---|---|---|---|
 |
 |
 |
 |
Offset left/right


If the rafters are distributed across the entire roof surface (TOTAL PLANE option), you can specify an offset on the left and right of the roof. The roof is always viewed from the side of the eaves. The offset distance is from the outer edge of the roof to the start of the first rafter.
Rafter distance to eaves edge
Here an automatic shortening (positive value) or enlargement (negative value) of the rafters to eaves edge can be configured.
Roof connection, Layer reference to rafter structure
In the Roof parameters, you can specify the roof layer under which the rafters are to be placed.
Roof distance
![]()
The rafters can be created at a distance from the specified roof layer. This is used for vaults located at a different height from the rafters if the rafters do not begin under a layer boundary or are used for large hall roofs as a connector (see image).

Rafter head
You can define the "rafter head" design as one of three options.
![]() Perpendicular (perpendicular to the roof pitch)
Perpendicular (perpendicular to the roof pitch)
![]() Horizontal/vertical (with specified front height)
Horizontal/vertical (with specified front height)
![]() Horizontal/normal (with specified front height)
Horizontal/normal (with specified front height)
![]() Vertical (Plumb Cut)
Vertical (Plumb Cut)
Floor plan depiction pen/line type
Plan graphics of rafters in the floor plan.
3D-sectioning
When this is activated, the truss elements make cut-outs in the walls.
Truss section in floor plan detail parameters
![]()
Details in Truss > Create truss.
Separation - Distance
The "Rafter distance" (axis distance) and the position of the remaining distance must be specified here. You can specify the position as "both sides", "centred", "left" or "right".
Total plane/range
The TOTAL PLANE setting distributes the rafters across the entire width of the roof surface. In addition, you can define remaining distances on the left and right sides. If this option is not used, they are distributed across a range defined by two points, which are to be specified from left to right from the perspective of the edge of the eaves up to the outer edge of the rafters.
Position
The rafters are distributed on the trajectory line of the roof pitch. You can combine multiple separation ranges and separations within the same roof surface.
Select to apply the roof surface.
Separation – Number
Generates a set number of rafters across the entire roof surface, accounting for the left/right offset or a range of the roof surface.
For the dimensions, specify the number of rafters.


Total plane/range (see above, under division by distance)
Select to apply the roof surface.
Separation – Single
Generates a single rafter across the entire roof surface.
Select the roof surface, and then define a point on the middle axis of the rafter.
Separation – Single (manually)
Generates a single rafter with its start and end point.
Select the roof surface, and then define the start and end points on the middle axis of the rafter.
Separation – Copy rafter lay out
Copies the dimensions and the rafter row of an adjacent rafter.
Select the roof surface, and then select a rafter from the adjacent roof surface.
Beam position
![]()

A beam is assigned to a slab, not a roof.
The settings are the same as those for a rafter except for values such as "Rafter head" and "Detail parameters truss section in floor plan", which do not apply.
Purlins
![]()
 |
 |
|---|---|
| "Bearer (straight purlin)" | "Binder (pitched purlin)" |
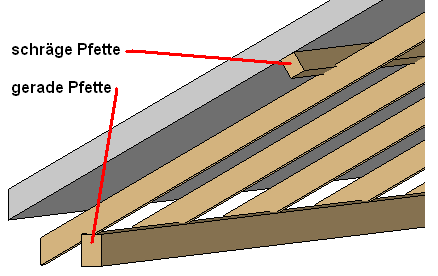
There are two available types of purlins. Depending on the separation type, a "Bearer (straight purlin)" or a "Binder (pitched purlin)" is created.
Enter the dimensions of the purlin with its "height" and "width".
Separation – Position
The position of the purlin is defined by the start and end points on the middle axis. The lower edge is calculated using the dimension of the rafter you click and the notch depth.
Separation – Lower edge
Define the "lower edge" of the purlin. When you click the rafter, the resulting middle axis position is shown as a dashed line, and you can now enter the start and end points. You can also determine the points outside of the displayed axis. If you do so, the position is projected normal to the middle axis.
Purlin distance to roof edge
Only active for "pitched purlin".
Here an automatic shortening (positive value) or enlargement (negative value) of the purlin to the roof edge can be entered.
Separation - Distance
Details in Truss > The construction parts.
Separation – Number
Details in Truss > The construction parts.
Separation – Single (manually)
Details in Truss > The construction parts.
Wall limitation

Only active for "bearer (straight purlin)".
You can use this option to section a specific range of a wall at the height of the purlin's lower edge. If the purlin rests on top of a cap stone, the range can be given a limitation using a 2D contour. This contour must be drawn first. After you define the position in the top view, you can select this contour.

Workshop
Purlin with wall limitation
The rafters must be placed before you can define a purlin.
Now draw a rectangle of the range that will become the height of lower edge of the purlin.

Open the "Truss" parameter window.
![]()
Select the PURLIN function then select the option for wall limitation.

Next, click  . Select the rafter under which you would like to place the purlin, and then select the position of the purlin. When the prompt Select contour for wall ending appears, click on the rectangle you drew earlier.
The height of all walls located under this wall limitation should now have changed.

Tip
You can also define a ridge piece using the PURLIN WITH WALL LIMITATION function. That way you can also specify the height for the walls' supports.

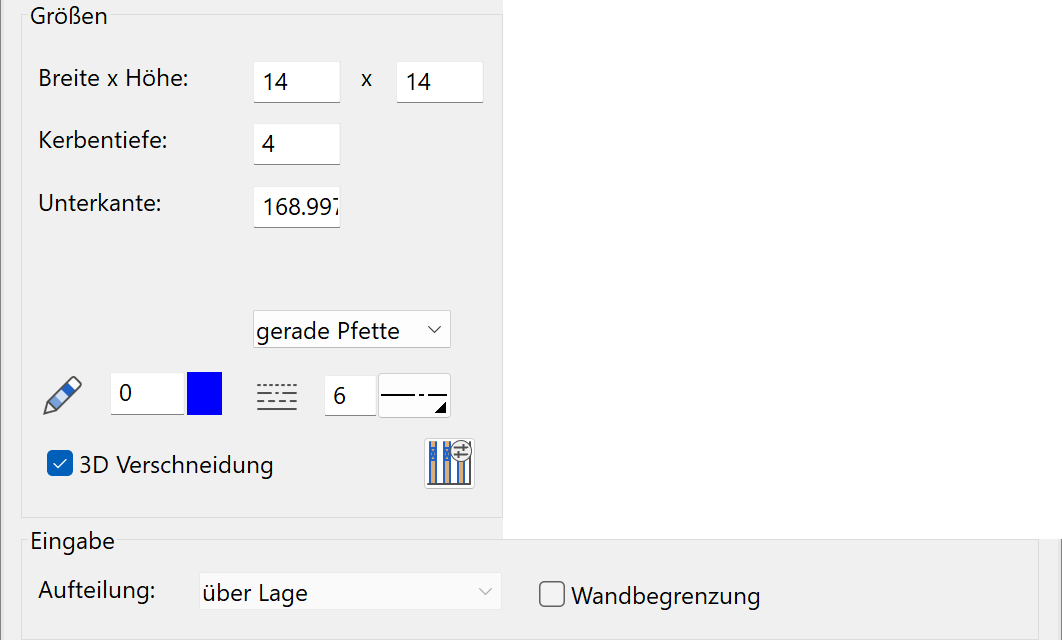
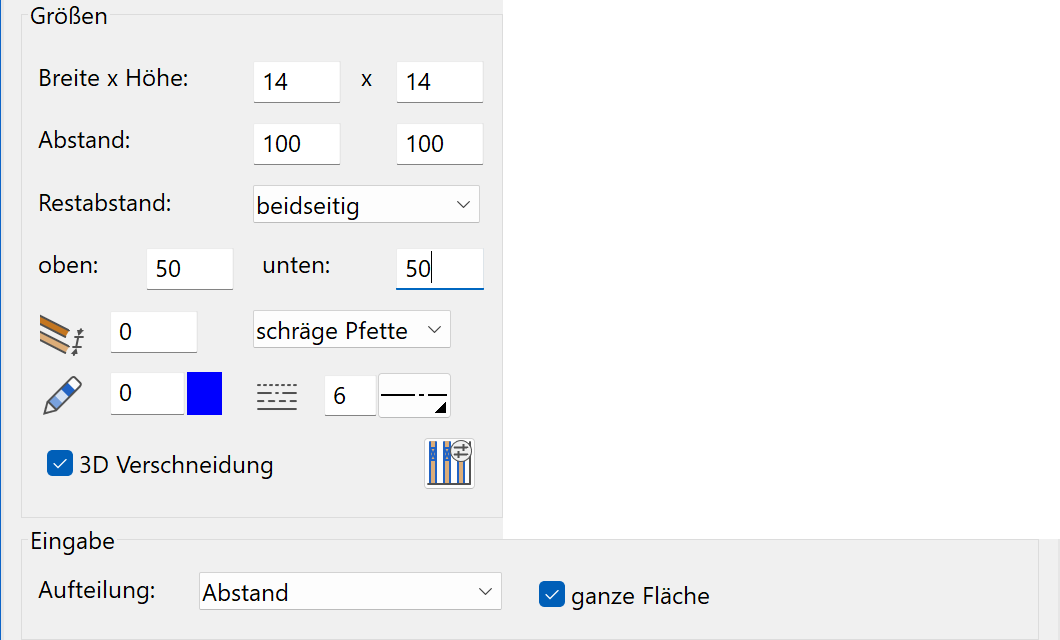
Ridge purlin
![]()
Dimensions
Enter the dimensions of the ridge purlin with its "height" and "width".
Floor plan depiction pen/line type
Plan graphics of ridge pieces in the floor plan.
3D-sectioning
When this is activated, the truss elements make cut-outs in the walls.
Truss section in floor plan detail parameters
![]()
Details in Truss > Create truss.
You can place the ridge pieces either below the roof or below the rafters
| "Below rafters" | "Below roof" |
|---|---|
 |
 |
 |
 |
| The "notch depth" defines the depth of the notch in the rafter normal to the roof pitch. | The beam cross section is positioned at the set roof distance from the defined roof layer. |
Limitation by roof
You cannot draw a ridge piece beyond the edge of the roof.
Beam
![]()
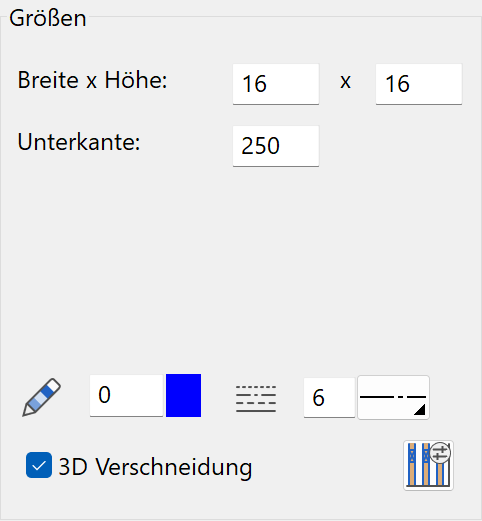
Dimensions
Enter the dimensions of the beam with its "height" and "width".
Height situation over lower edge/upper edge
For the positioning, you can switch between "lower edge" and "upper edge". The system always measures from the raw slab (storey level).
Floor plan depiction pen/line type
Plan graphics of beams in the floor plan.
3D-sectioning
When this is activated, the truss elements make cut-outs in the walls.
Truss section in floor plan detail parameters
![]()
Details in Truss > Create truss.
Assign to roof
The beam can be assigned to a roof.
The position is defined using its start and end points on the beam's middle axis.
The length can be modified by stretching.
Collar
![]()
Dimensions
Enter the dimensions of the collar with its "height" and "width". The distance between the collars is determined based on the rafter you click on.
Height situation
The height of the collars is measured with reference to the "lower edge".
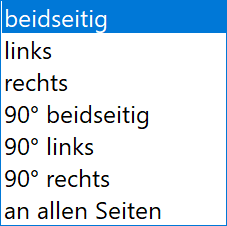
Execution
For the execution of the collars, you can select between "both sides", "left" or "right" as seen from the edge of the eaves of the specified rafters.
Define the range of the distribution by clicking on the first and last rafter. You should also select one of the adjacent rafters. The collars are limited by the upper edge of the rafters.
If the rafter cross section or rafter spacing is changed, the collars do not adjust themselves automatically and must be moved manually or recreated. If the collars in a certain area intersect a wall due to a recess in the building, you can move individual collars via the side view.
Floor plan depiction pen/line type
Plan graphics of collars in the floor plan.
3D-sectioning
When this is activated, the truss elements make cut-outs in the walls.
Truss section in floor plan detail parameters
![]()
Details in Truss > Create truss.
Hip rafter/valley rafter
![]()
![]()
Enter the dimensions with "height" and "width". If you specify "0" for the height, the rafter height results from the height of the connecting rafter clicked on.
Specify the position by clicking on the start and end points on the axis of the hip/valley.
Roof distance
![]()
The rafters can be created with an offset from the specified roof layer.
Rafter head
![]()
Currently, the only type of rafter head provided has a "vertical termination"(Plumb Cut).
Floor plan depiction pen/line type
Plan graphics of rafters in the floor plan.
3D-sectioning
When this is activated, the truss elements make cut-outs in the walls.
Truss section in floor plan detail parameters
![]()
Details in Truss > Create truss.
Redefining a hip/valley rafter does not automatically shorten the rafters. To do so, you must refresh the rafter separation in the Edit menu. If the hip/valley rafters already exist, the rafters are connected automatically.
The length can be modified by stretching. For the 3D to adapt too, you must edit the hip and confirm the dialog window with  or .
or .
Posts
![]()

Dimensions
Enter the dimensions of the cross section with its "height" and "width". The length of the posts is defined by its lower edge and top side. The angle defines the rotation in the floor plan.
Floor plan depiction pen/line type
Plan graphics of posts in the floor plan.
3D-sectioning
When this is activated, the truss elements make cut-outs in the walls.
Truss section in floor plan detail parameters
![]()
Details in Truss > Create truss.
Entry
When entering a post, you can either select a beam or enter a height value. This is available for the lower edge and top edge of the post.
Existing braces are not automatically adjusted to fit a new cross section.
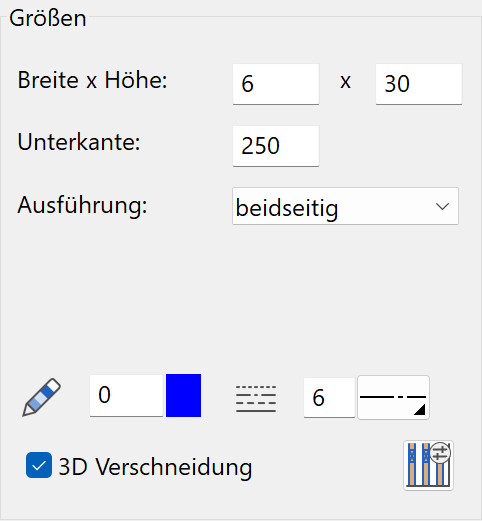
Braces
![]()
Dimensions
In addition to the dimension, enter the "issued dimension", the outer notch of the strut.
Execution
For the execution of the braces, you can select between following modes:
Floor plan depiction pen/line type
Plan graphics of braces in the floor plan.
3D-sectioning
When this is activated, the truss elements make cut-outs in the walls.
Truss section in floor plan detail parameters
![]()
Details in Truss > Create truss.
Entry
Braces can only be defined for posts that are positioned under a beam or purlin. Click on the post that is to be linked to the braces. The braces are created on the middle axis adjacent to the beam/purlin above them.
If you change the post's cross section later, the braces are not automatically adjusted. You must delete them and recreate them.
Trimmer
![]()
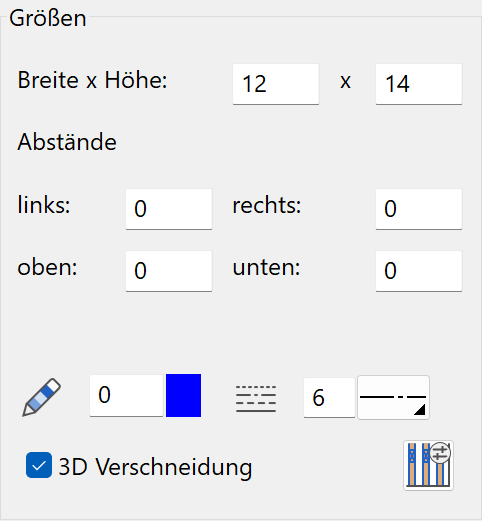
Dimensions
The cross section of the trimmer is defined with its "height" and "width". The lateral filler wood is executed in the cross section of the rafters.
Distances
You can enter a distance for the opening from all four sides.
Floor plan depiction pen/line type
Plan graphics of trimmers in the floor plan.
3D-sectioning
When this is activated, the truss elements make cut-outs in the walls.
Truss section in floor plan detail parameters
![]()
Details in Truss > Create truss.
Entry
Define the clearance opening of the trimmer with a diagonal via two points on the floor plan.
If the rafter spacing is changed, the trimmers do not adjust themselves automatically. You must edit them and confirm the dialog window with or .
Tip
A lateral filler wood is not shown until the clearance distance to the rafters is greater than the rafter width.

Edit truss

Construction parts of the truss can be edited and modified later by double-clicking them. The parameter window with the corresponding settings opens.
Once the height situation is set, you can only edit it for beams, but not for purlins or posts.
You can move or delete individual rafters using the modification functions in the property bar.
![]()
![]()