3D Printing
New · 16 R1 · Improvements
|
|
Interfaces toolbar |
| File menu > Export > 3D Printing |
General
The 3D printing interface in ELITECAD offers the user the ability to export a model as an STL file that can be used with most 3D printers. STL files only contain information about surface geometry without any information about colour, texture or other attributes making it an ideal choice for 3D printing.
Once selected, the 3D printing dialog opens.
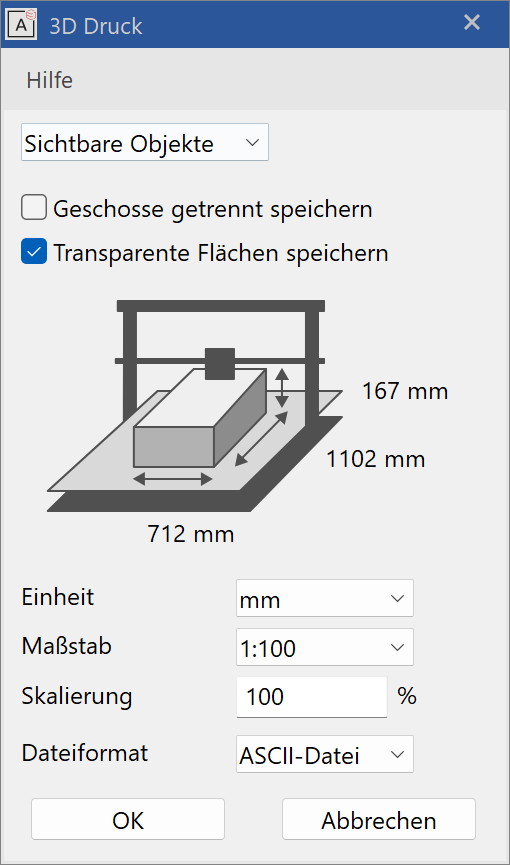
Export options
Choose which objects should be printed.
Visible objects: Only exports objects shown in the graphics window.
All: Exports all shown and hidden objects for the entire drawing.
Active storey: (Only for ELITECAD Architecture) Only exports the currently active storey. For drawings with multiple structures, this storey will be included from all structures. This includes hidden objects.
Tip
Be sure to keep a close eye on the dimensions as they will give you an idea how large the end print will be and they are adjusted immediately with every selection. When selecting All or Active storey it is especially important as there may be hidden objects that may make the print size larger than anticipated.

When active, each storey (for all visible structures) will be exported as an individual file. The storey name is automatically added to the end of the given file name so that each file has a unique name.
The dimensions always show the largest dimensions from the different storeys, i.e. the tallest storey will be used for the height value.
This option does work in ELITECAD Mechanics but only if the model was created in ELITECAD Architecture first so the story information is present.
When inactive, the objects selected from the top dropdown menu will be exported all together. The total drawing size is used for the dimensions as the resulting file will be printed as one unit.

Transparent surfaces (i.e. glass panes of windows, doors or glass elements) will either be included or not.
| active | inactive |
|---|---|
 |
 |
Dimensions
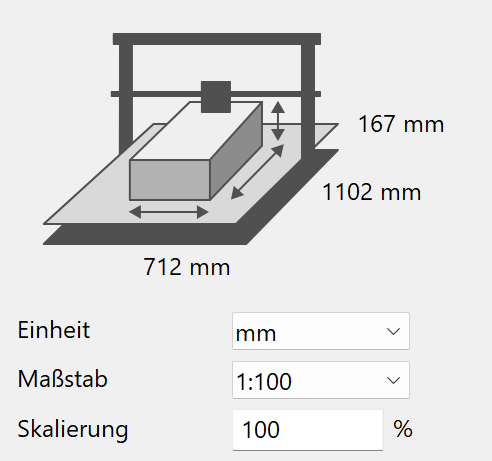
The dimensions are adjusted in real-time so the size of the end printed product can be assessed.
Unit
Select the unit of measurement to be used for the dimensions from the dropdown menu.
Scale
Select the scale from the dropdown menu.
Scaling
The scaling is represented by a percent and can be used to further adjust the print size beyond the regular scale options.
File format

There are two file formats from which to choose. While both types are essentially saving the same data, there are some differences.
ASCII
ASCII files tend to be a bit larger and therefore usually have a slower processing speed but it is a more commonly used format for 3D printers.
Binary
Binary files are smaller and therefore usually have a faster processing speed. It is also a very commonly used format but older printers may only accept ASCII.
Tip
It is recommended for printing a house to print each storey individually so that the finished print can be stacked and unstacked and the interior of each storey can be individually seen. Furthermore, we recommend setting the roof and truss to hidden and then making an additional file with just the roof and truss. Otherwise, the top storey will be printed with a fixed roof and the interior of the top storey will not be visible.