Print
|
|
Toolbar *Main functions |
| File menu > Print |
To see instructions for 3D-printing, please click here.
This function is used to output a print copy. All printers in Windows can be communicated with, however. Each device must have been setup under Windows as a printer ( key + I > CHANGE PC SETTINGS > DEVICES > ADD DEVICE).
UNIX printers in the network can be communicated with by adding a connection with "LPR Port" and a host and spool name.
All images and vector graphics can be output. The colour and pen widths of the lines and the infill hatches are determined under OPTIONS….
If colour gradient hatches or transparencies exist in plans, certain printer drivers may not print them as transparent. In this case, the option PRINT IN HIGHEST QUALITY must be selected under SETTINGS > OPTIONS > SYSTEM > CONFIGURATION.
The following entry dialog window appears after activating this function:
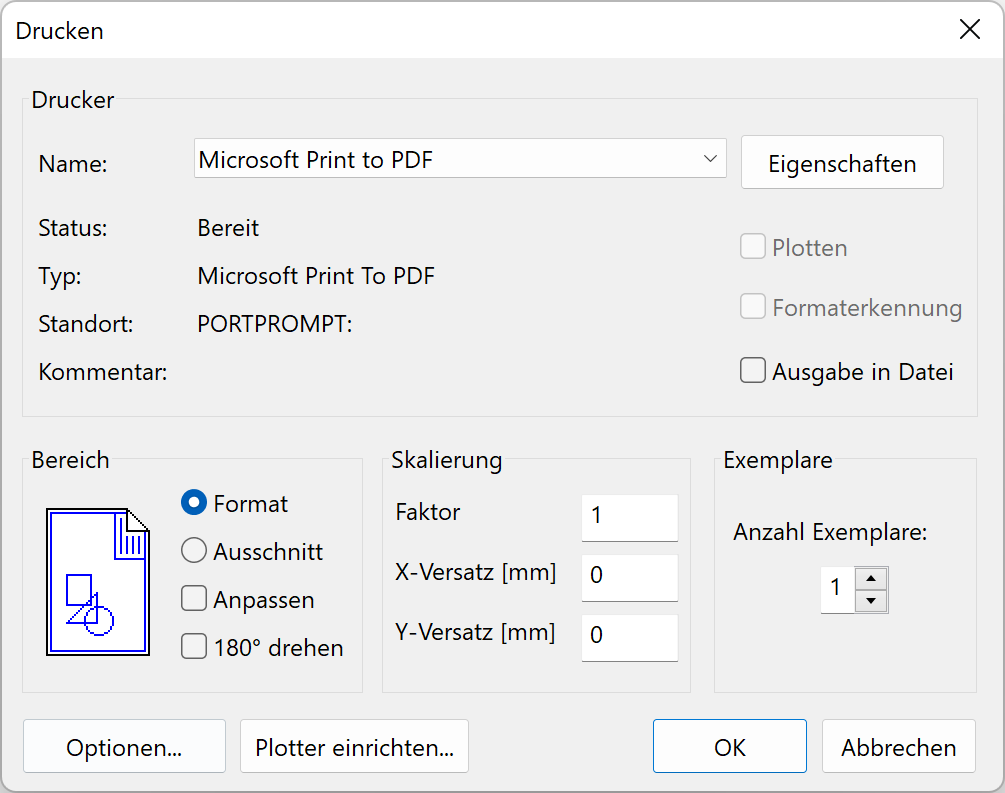
Name
Names of available printers. The user can select a type of printer as an output device.
Properties
Opens the driver of the printer set. The format and resolution are defined here.
Print
The print format can be used for all printers and plotters.
Plot
The plot format is used for printers or plotters that support HP/GL2. This check box is only available once a corresponding assignment is made with SET PLOTTER.
Format detection
This check box is only available in connection with plotting. If the check box is ticked, the current drawing format is used. However, if this is not required or possible (e.g. A00 or oversize format), this check box must be deactivated and the corresponding paper format (paper size, portrait/landscape format) selected under Properties.
Output in file
If this check box is ticked, the output files are redirected into a file. The dialog field Save file appears.
Format/cut-out
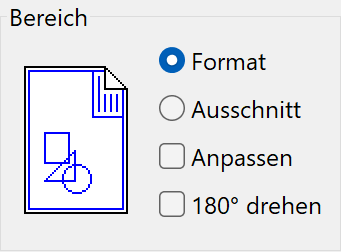
Users can select here whether the entire drawing or the currently zoomed cut-out of the drawing is to be printed.
Modify
If this check box is ticked, the drawing is adjusted to the selected output format. The ISO page border becomes visible. The check boxes Cut-out and Modify must be ticked in order to print a zoomed area to fill a page.
Rotate 180°
Selecting this function prints the entire printout rotated 180°.
Tip
If the check box Modify is ticked, scaling is not possible.
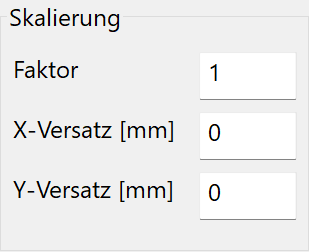
Factor
Enter here the value that should be used for scaling.
x-offset/y-offset
The user can state moves of the printout in X- and Y-axis direction. Given in mm. This is necessary in the event that the printout is centred on the format but is to be placed on the margin of the page.
Number of copies
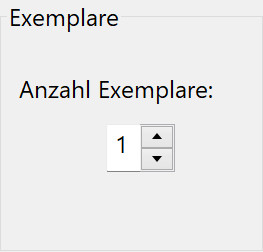
This check box is used for defining the print run.
Options
Printing parameters can be set here. The same window opens as under SETTINGS > COLOUR PROPERTIES.
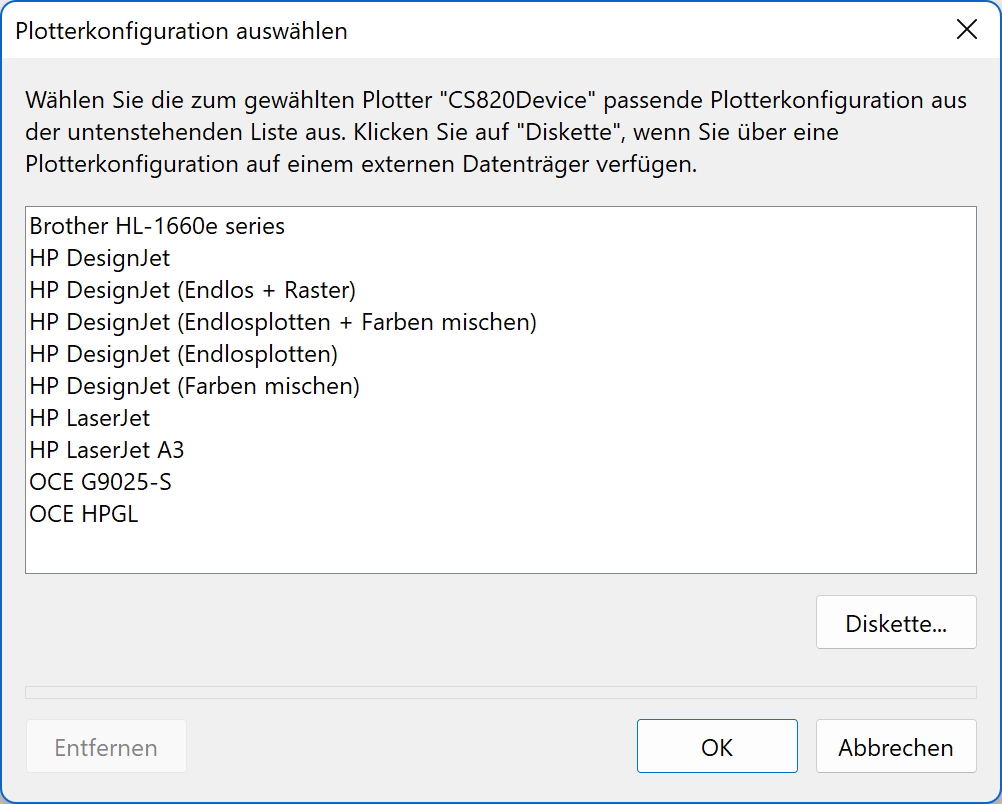
Set plotter
A plotter configuration can be assigned to the selected printer/plotter with this button. This creates a file in the directory <ELITECAD installation path>\u\<version>\cad\glob\hpglconf with its name consisting of the type designation (entry for type in the main printing dialog window) and the file extension .hgc. The Plot check box can now be ticked and plotting can commence.
During plotting (on a laser printer e.g. LaserJet), as the drawer is determined when creating the device (e.g. A4 drawer, manual feeder), it is not possible to switch between different drawers later on for outputs (e.g. A3/A4 drawer). Multiple plotters can be created for the same printer.
Diskette
This check box is used for loading a plotter configuration from an external data carrier.
Remove
If a configuration has already been assigned to a plotter, it can be deleted with Remove.
Vanishing point plotting
The configuration HP DesignJet (vanishing point plotting) must be selected for vanishing point plotting. A vanishing point plot occurs if the drawing protrudes over the edges of the format boundaries, e.g. width A1 and length 2 A1 (594 x 1682 mm).
Tip
You can also generate and print a .TIFF, .JPEG or .BMP file to print a solid view with FILE > EXPORT > GRAPHICS.