Modify terrain surfaces
Workshop
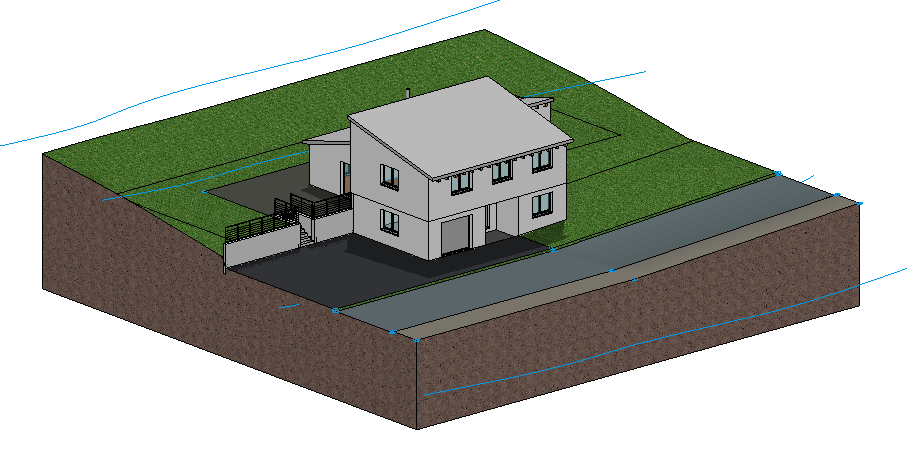
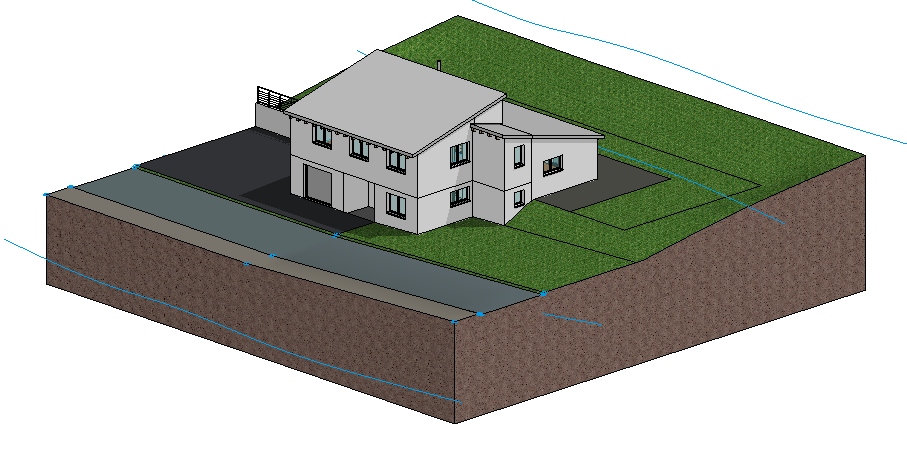
The street is to have a slope after the area in front of the house. To do so, the contours must be adjusted.
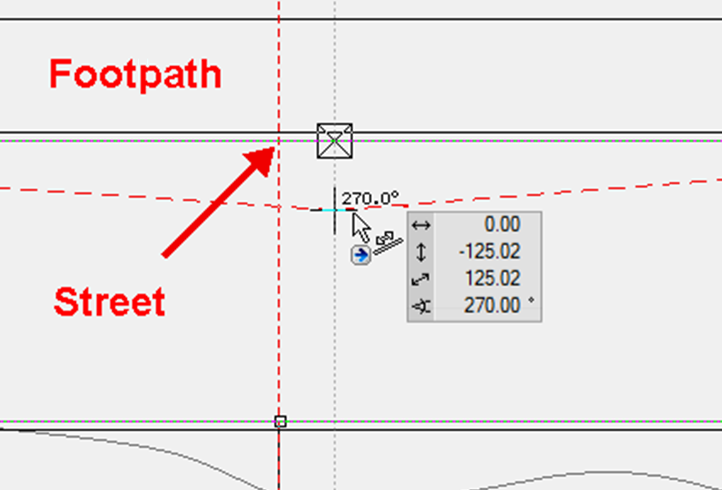
- First, draw a vertical help line onto the edge of the forecourt.
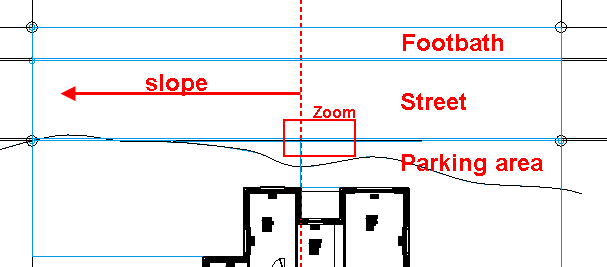
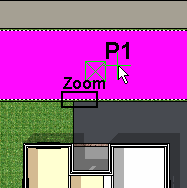
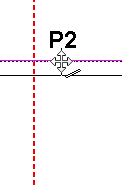
- Change to the solid model and then select the terrain surface of the street P1. Change back to the wire-frame and zoom the picture to the given area. Move the cursor onto the lower element of the polygon until the double arrow appears. With one click P2, you activate the current manipulation function in the Input Assistant. To display the function selected directly on the cursor, press the Tab key.
- Select the function INSERT POINT and set a new point on the auxiliary line P3.


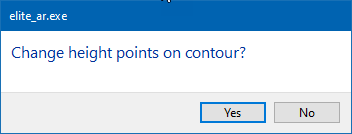
The following prompt can be answered with
 .
.
- The street is still selected. Move the cursor to the upper element of the polygon until the quadruple arrow appears again. Click once to activate the manipulation function. The function last selected INSERT POINT is still active and the new point can be inserted on the help line. The following prompt can be answered with .
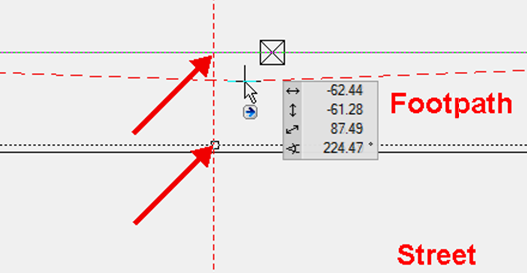
- Do the same for the footpath. Select the terrain surface and move the cursor onto the lower element of the polygon until the double arrow appears. Click on the element and insert a new point. Repeat for the upper element.
- The height points can now be changed and/or new ones added. First, change the existing points by clicking on a definition point.
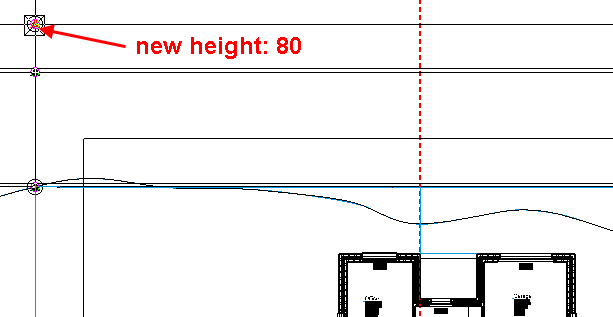
- In the property bar, enter the height 80 for the z coordinate and then cancel the function with Esc.

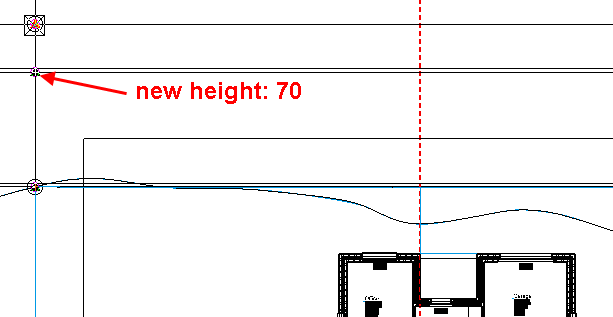
- Click on the next point and change the height to 70.
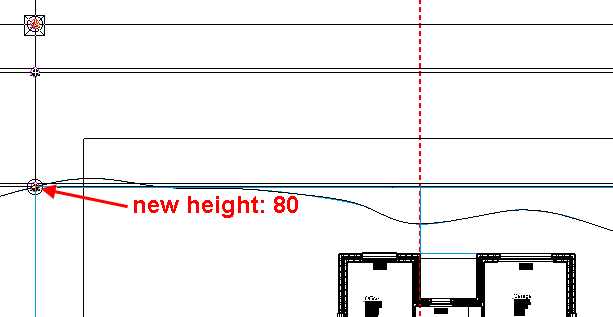
- Also change the last point to the height 80.
- New heights must now be assigned to the terrain surfaces. Start the function NEW DEFINITION POINT.

- For the z coordinate, specify the height and set the points onto the corners and 3D nodes of the terrain surfaces. Complete the function with Enter.
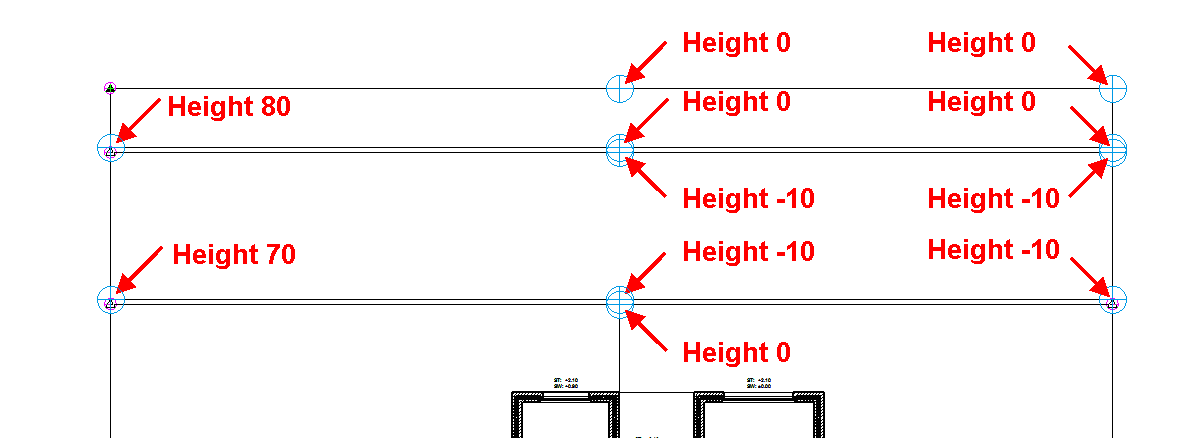
The terrain should now look as follows: