Demolition
Define your building as existing construction
Workshop
If you select an existing component or create a new one after activating the renovation planning, it will show the renovation planning state as unknown.

-
Ensure that all components and the terrain are visible.

- Select MODIFY > AR-OBJECT ALLOCATION in the menu.
Assign the state Existing construction to all objects:
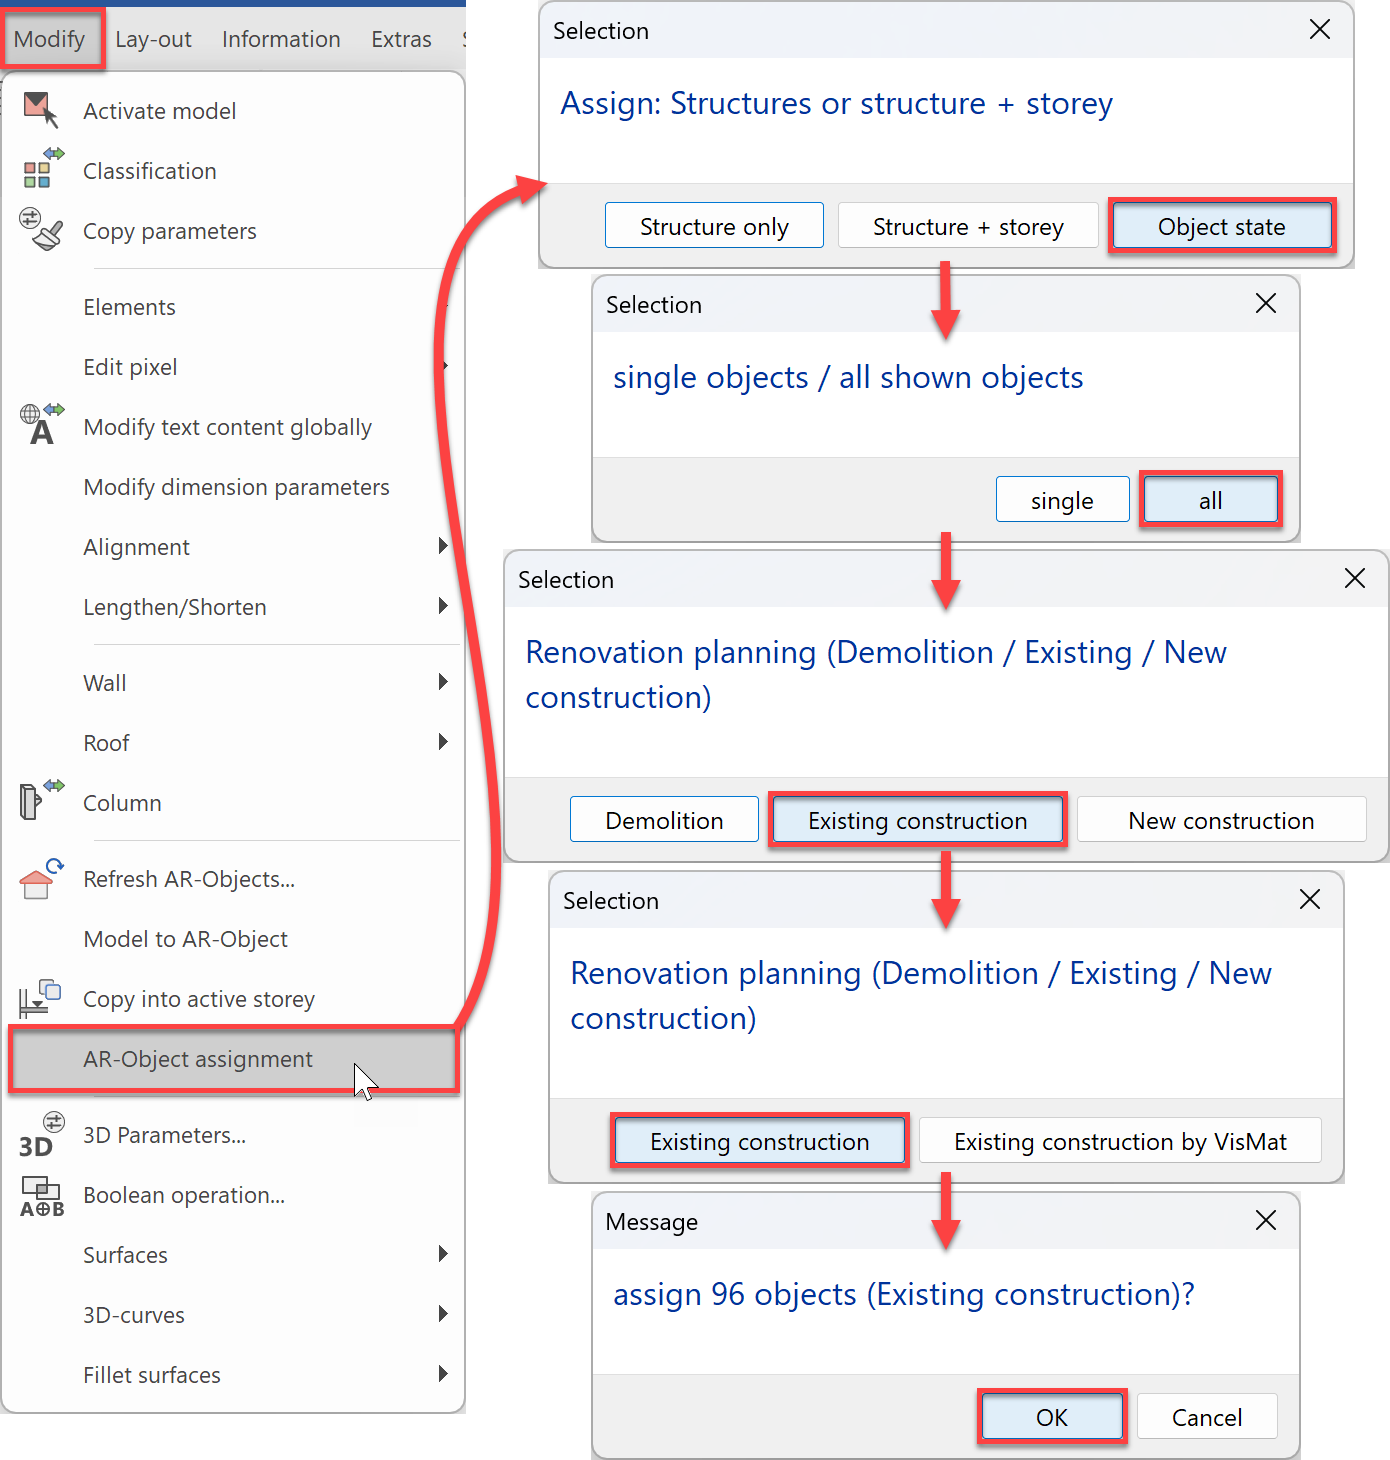
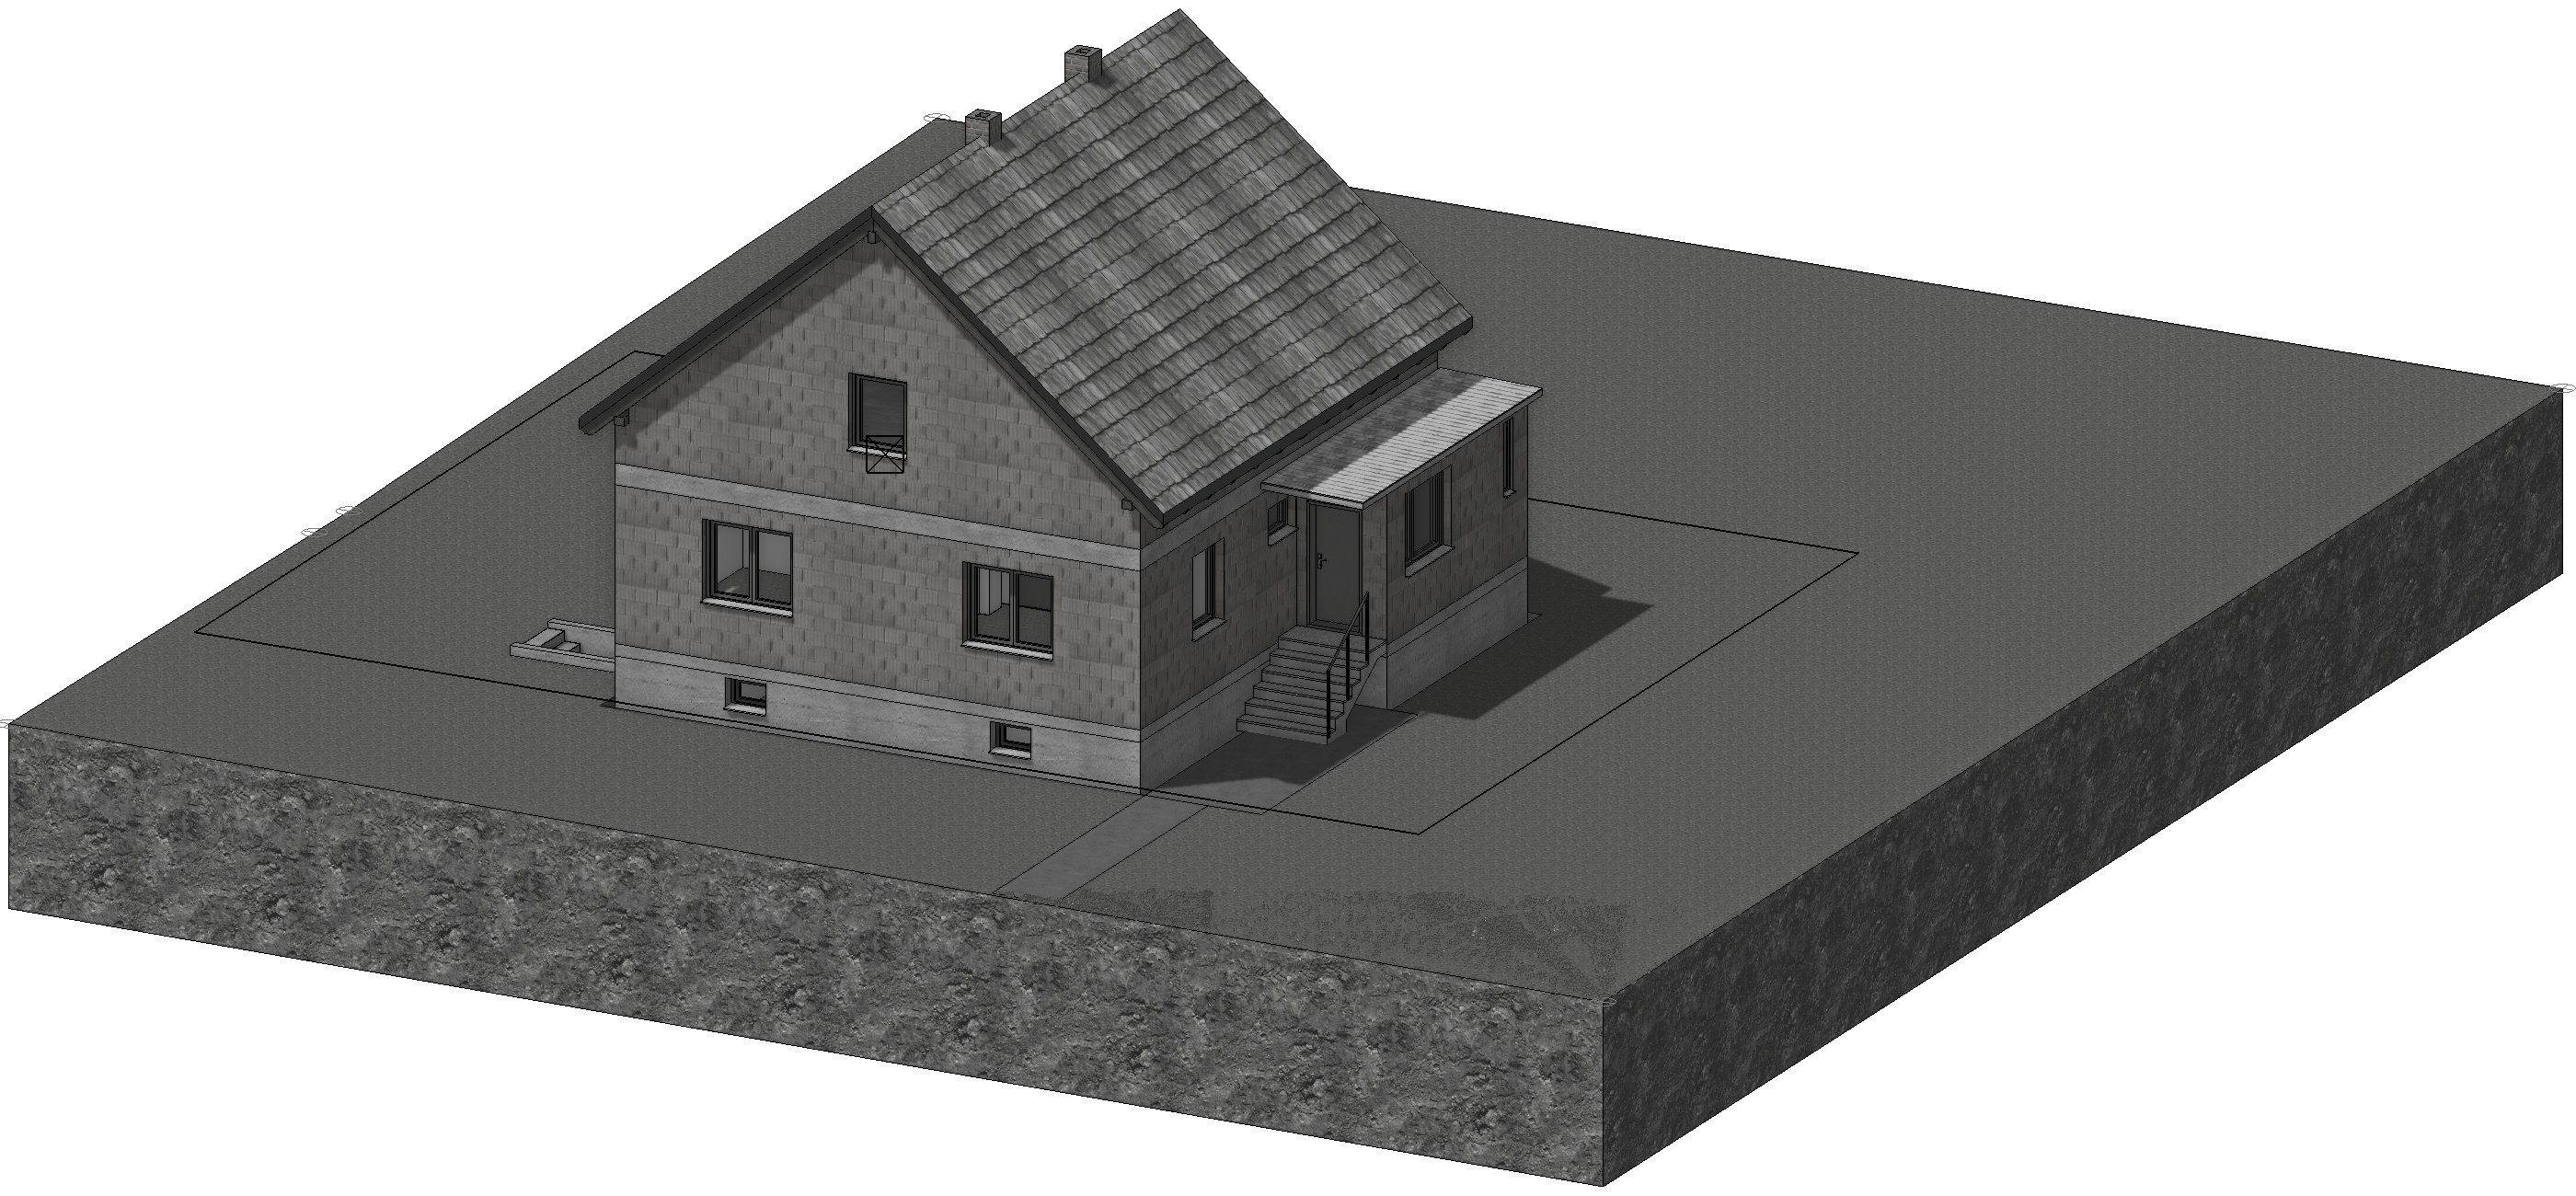
- All components are now tinted grey to show they are marked as Existing construction.
Renovation of the building – mark demolition objects
Workshop
Now Let's start to remodel the building. Please note, that the demolition of a window, door or any other kind of opening results in the removal of this opening. The corresponding opening is filled. As an example, we need to remove a window by marking it as Demolition, the remaining opening in the wall would then be filled with a wall marked as New construction, which is linked to the wall that had the opening. This new piece of wall is by default associated with the window and the wall, and therefore adapts to changes to those elements.
-
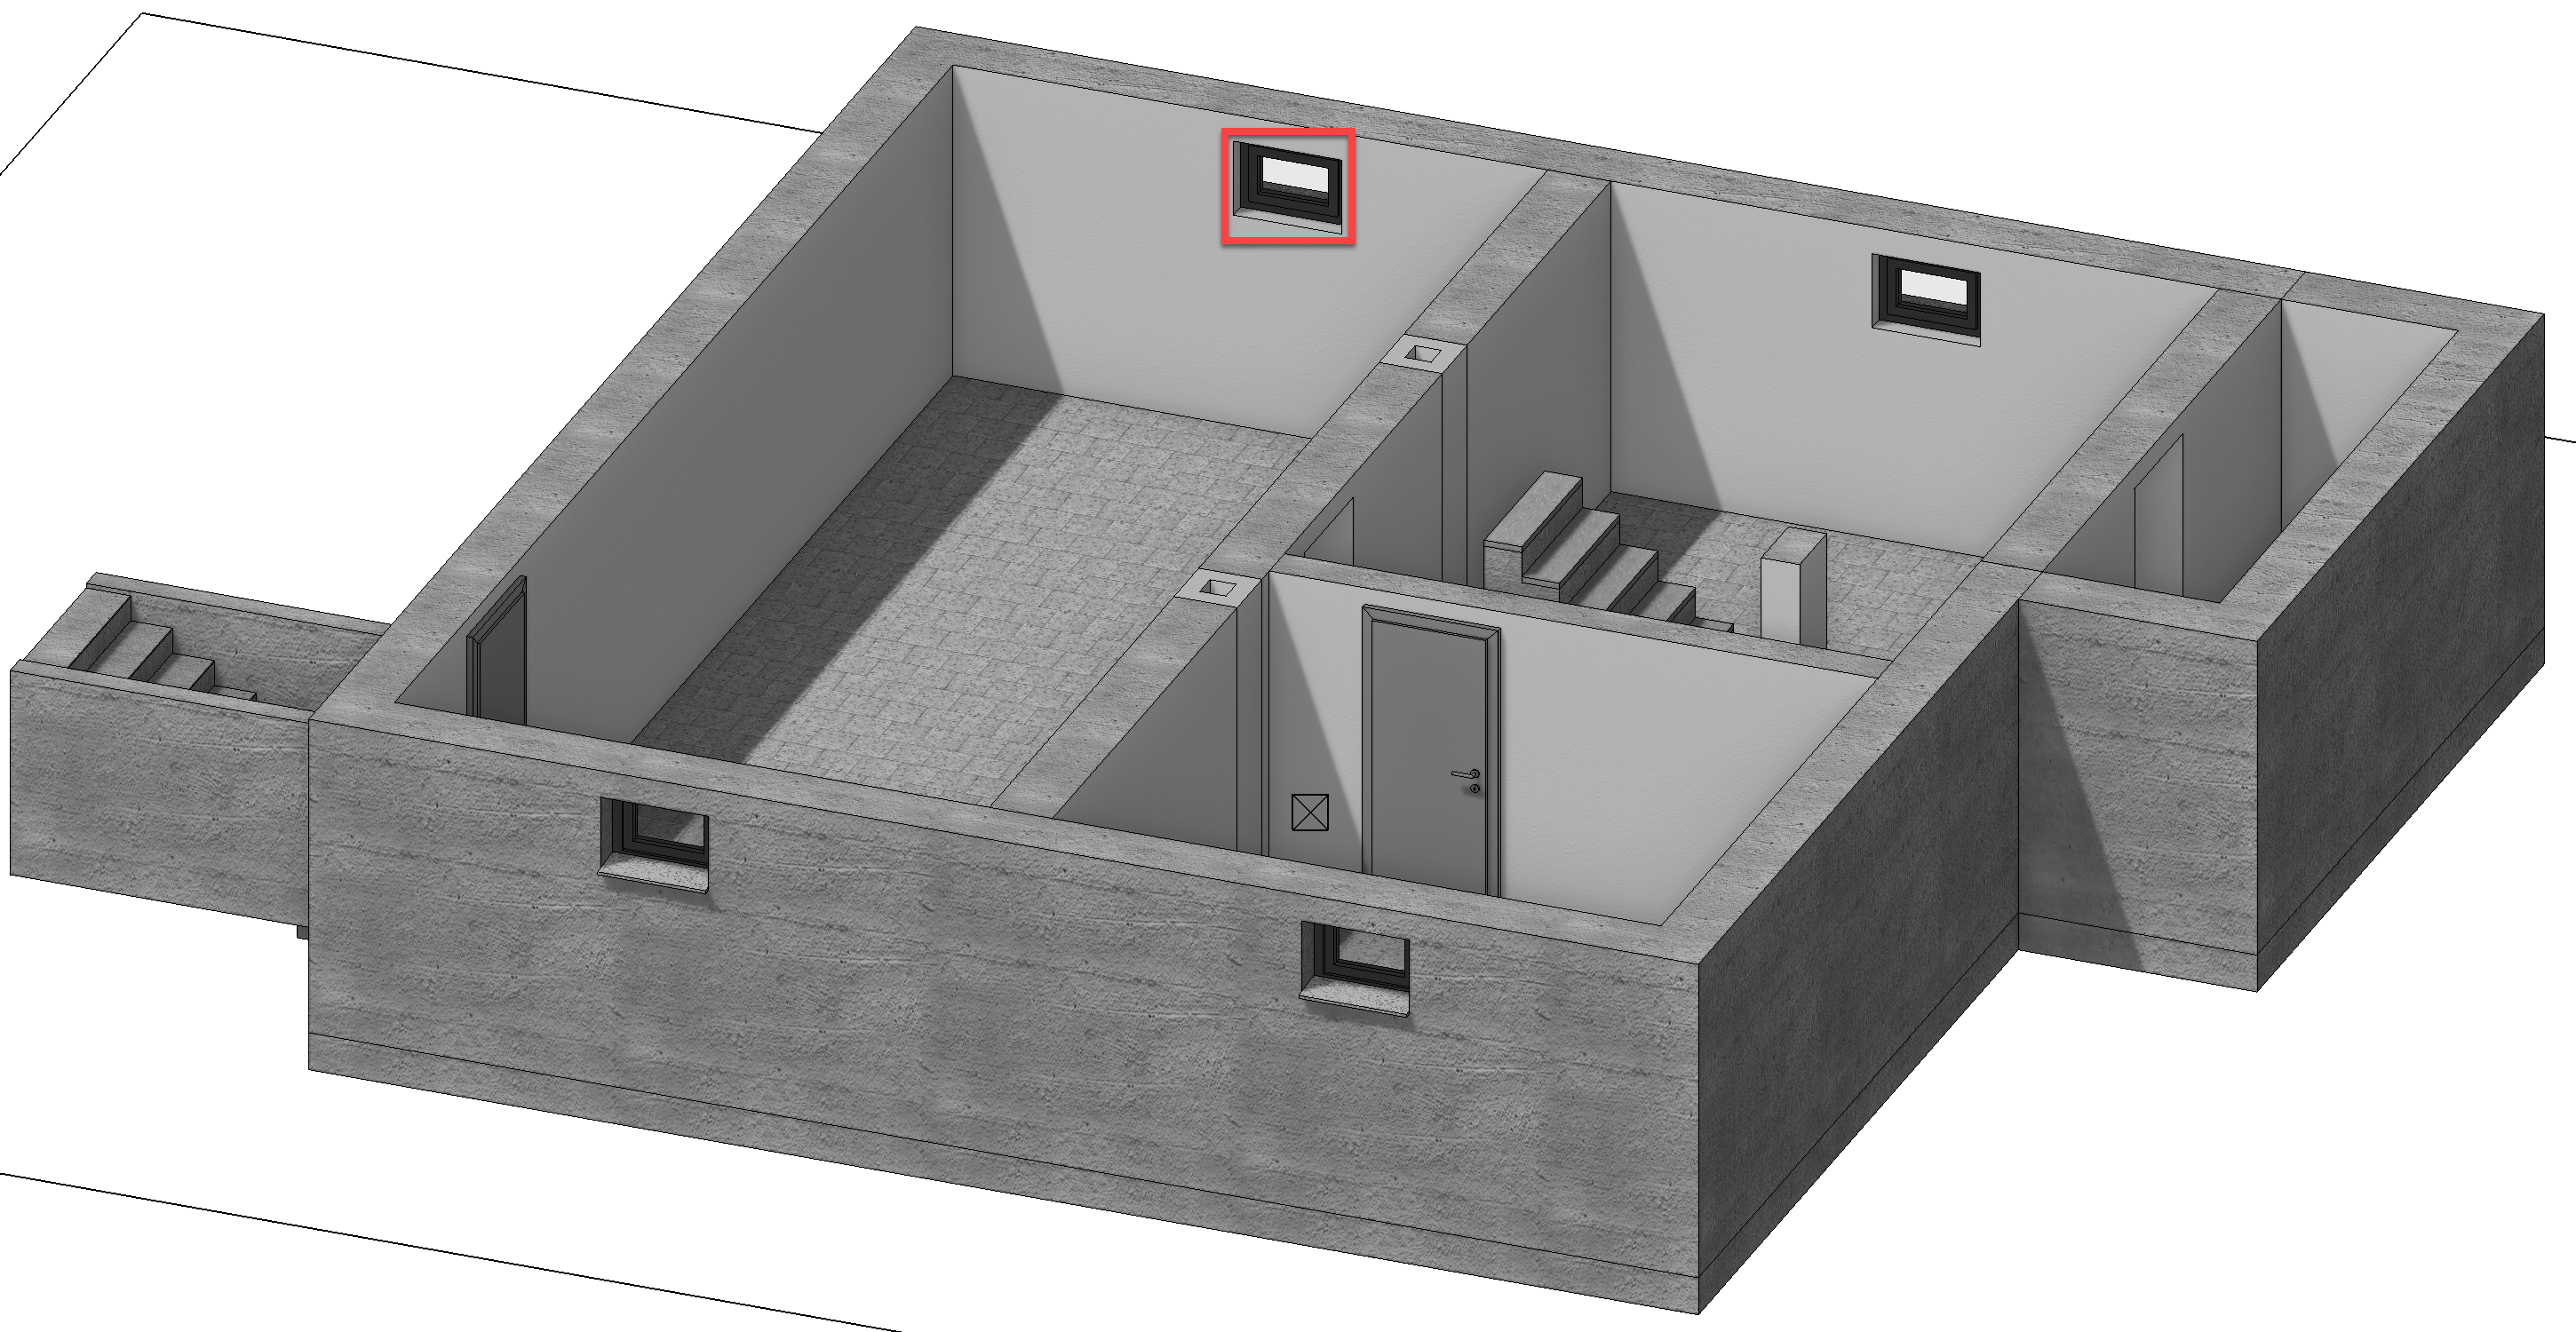
Reduce the visibility to the basement, select the basement window and assign the state Demolition:
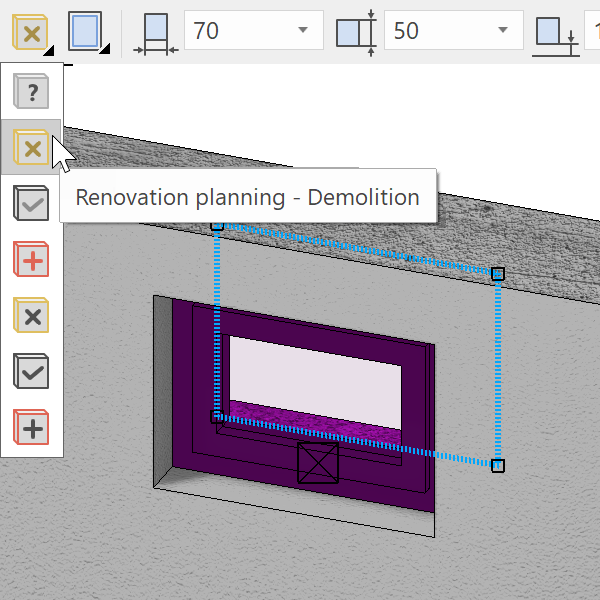
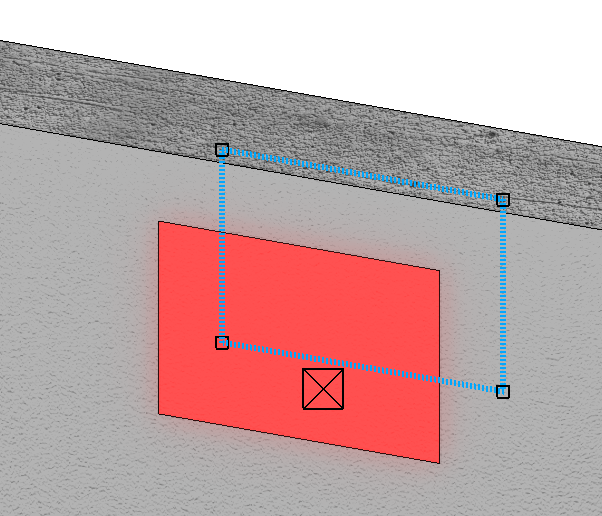
The opening is filled with a red piece of wall. Beside the select representation level input field, you will find the input field Depiction renovation planning which currently shows no restriction.
-
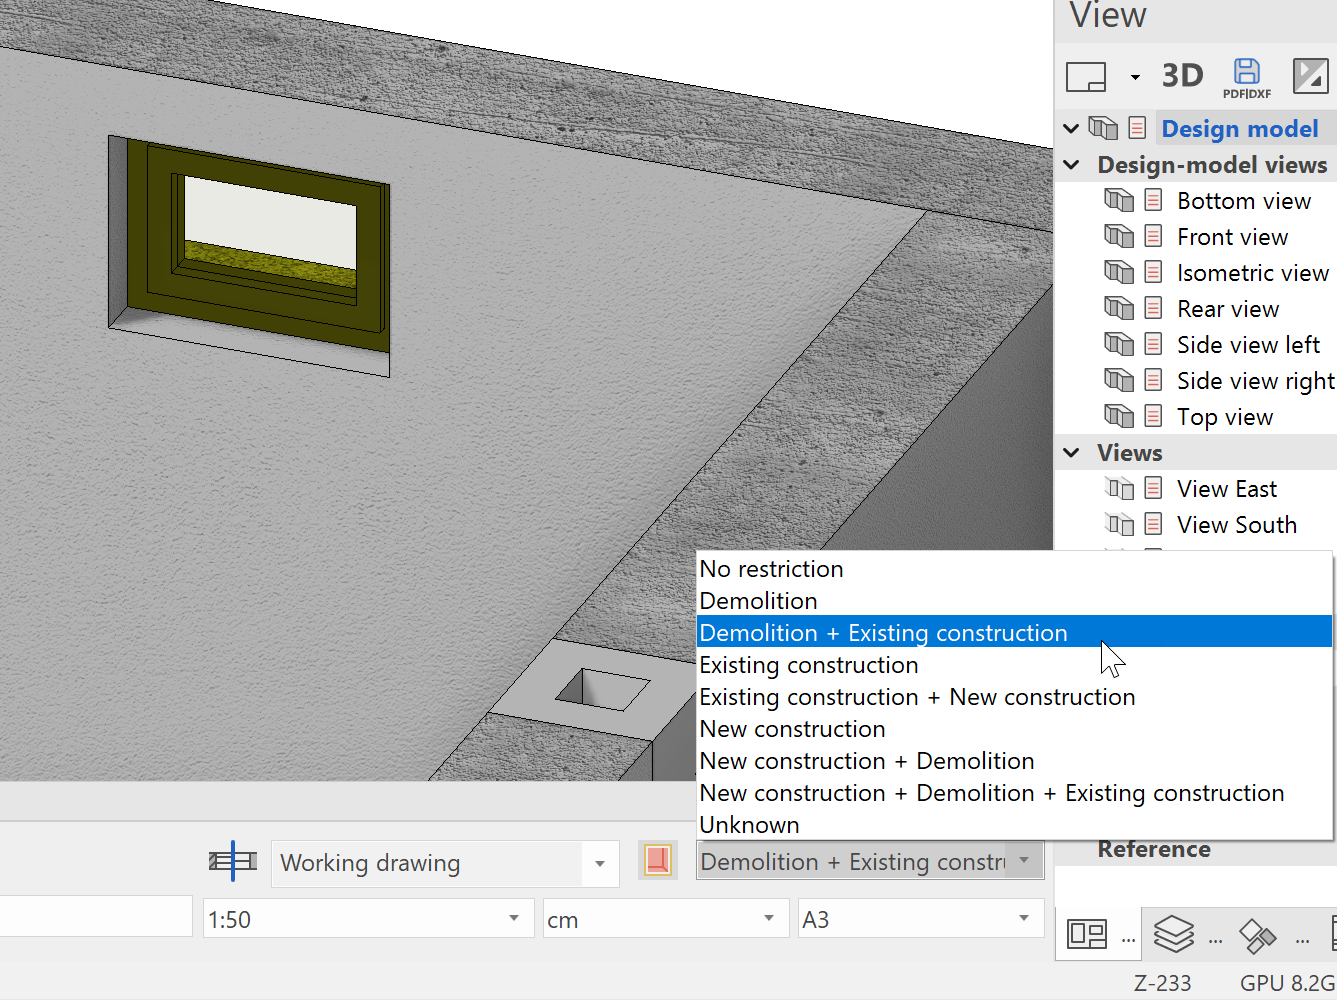
Select Demolition + Existing construction. Now you should once again see the window, which is to be removed.
If you have enabled the option CREATE RENOVATION PLANNING OBJECTS ACCORDING THEIR MATERIAL AUTOMATICALLY under SETTINGS > OPTIONS > WORK PARAMETERS > ARCHITECTURE the fill object will not be formatted according to the renovation planning settings (in our case red), but according to the material of the parent wall.
-
Make the ground floor visible, and mark the following components for demolition:
All windows, the entrance door, the exterior entrance stairs, the pent roof at the entrance as well as the two inner walls indicated below:
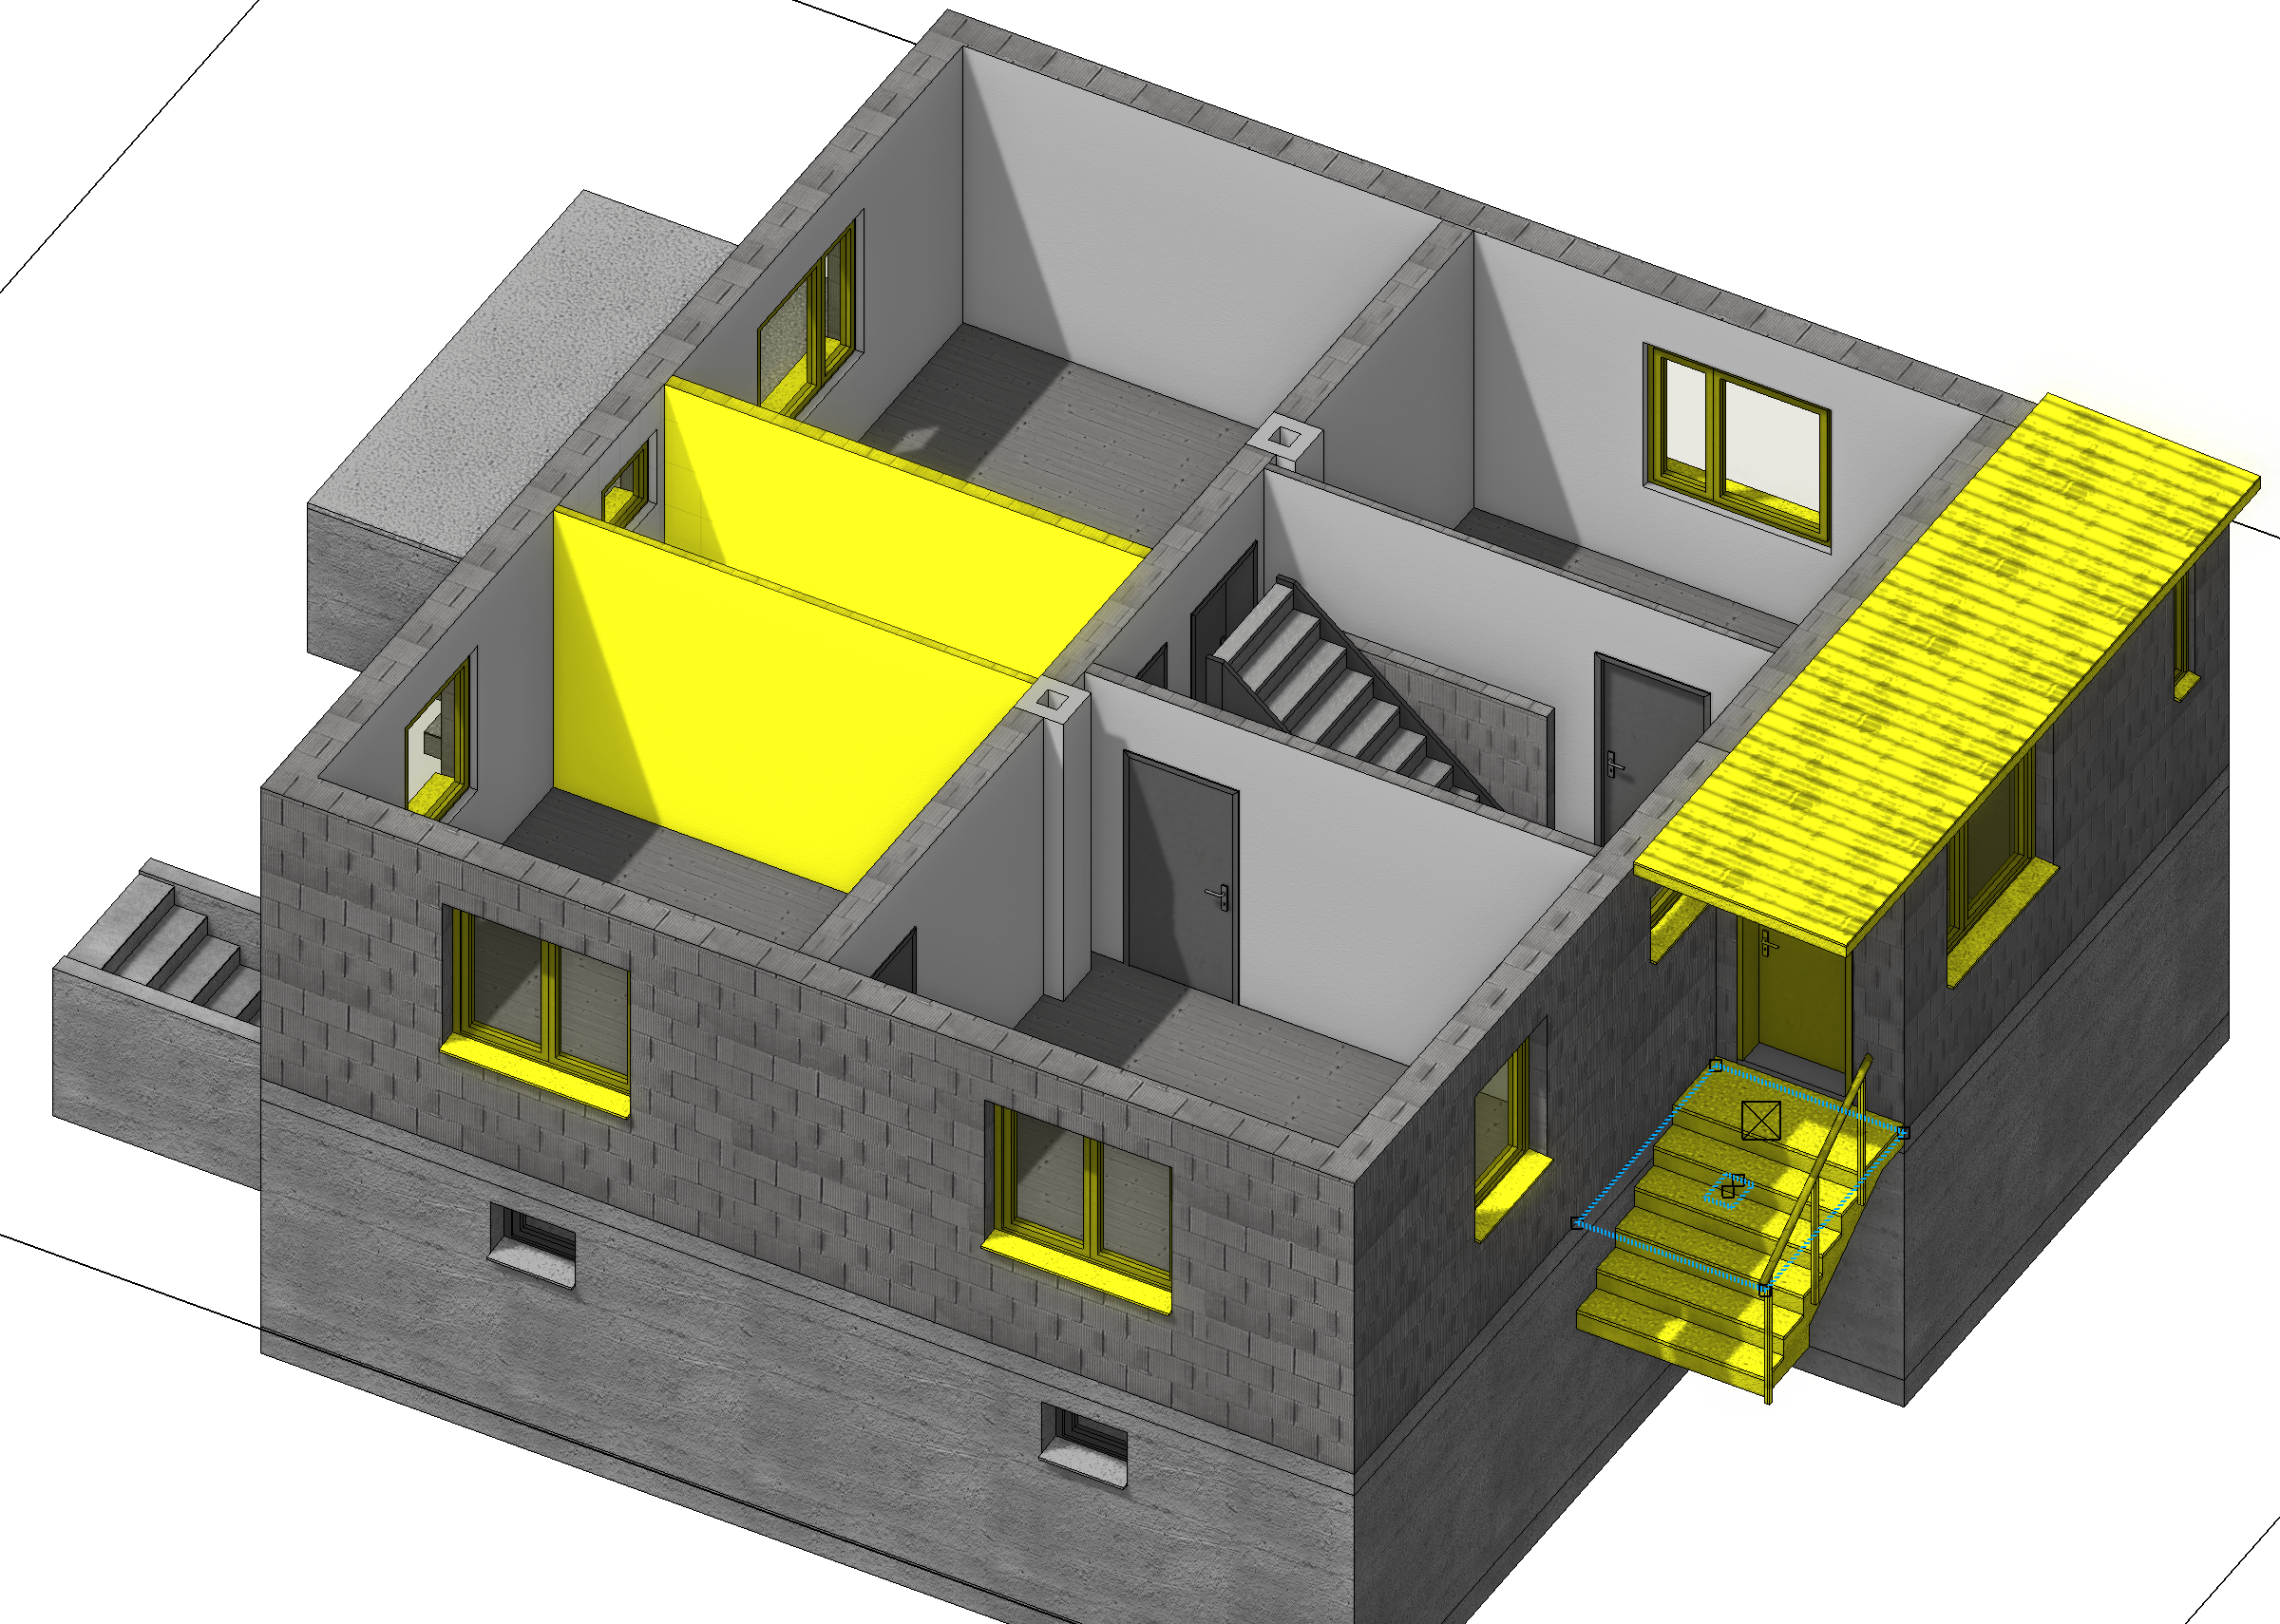
Click on a window and switch the state from Existing construction to Demolition. If you do not want to do this for every window separately, you can use Shift + Left click to select multiple windows at once and afterwards set all selected windows to Demolition.
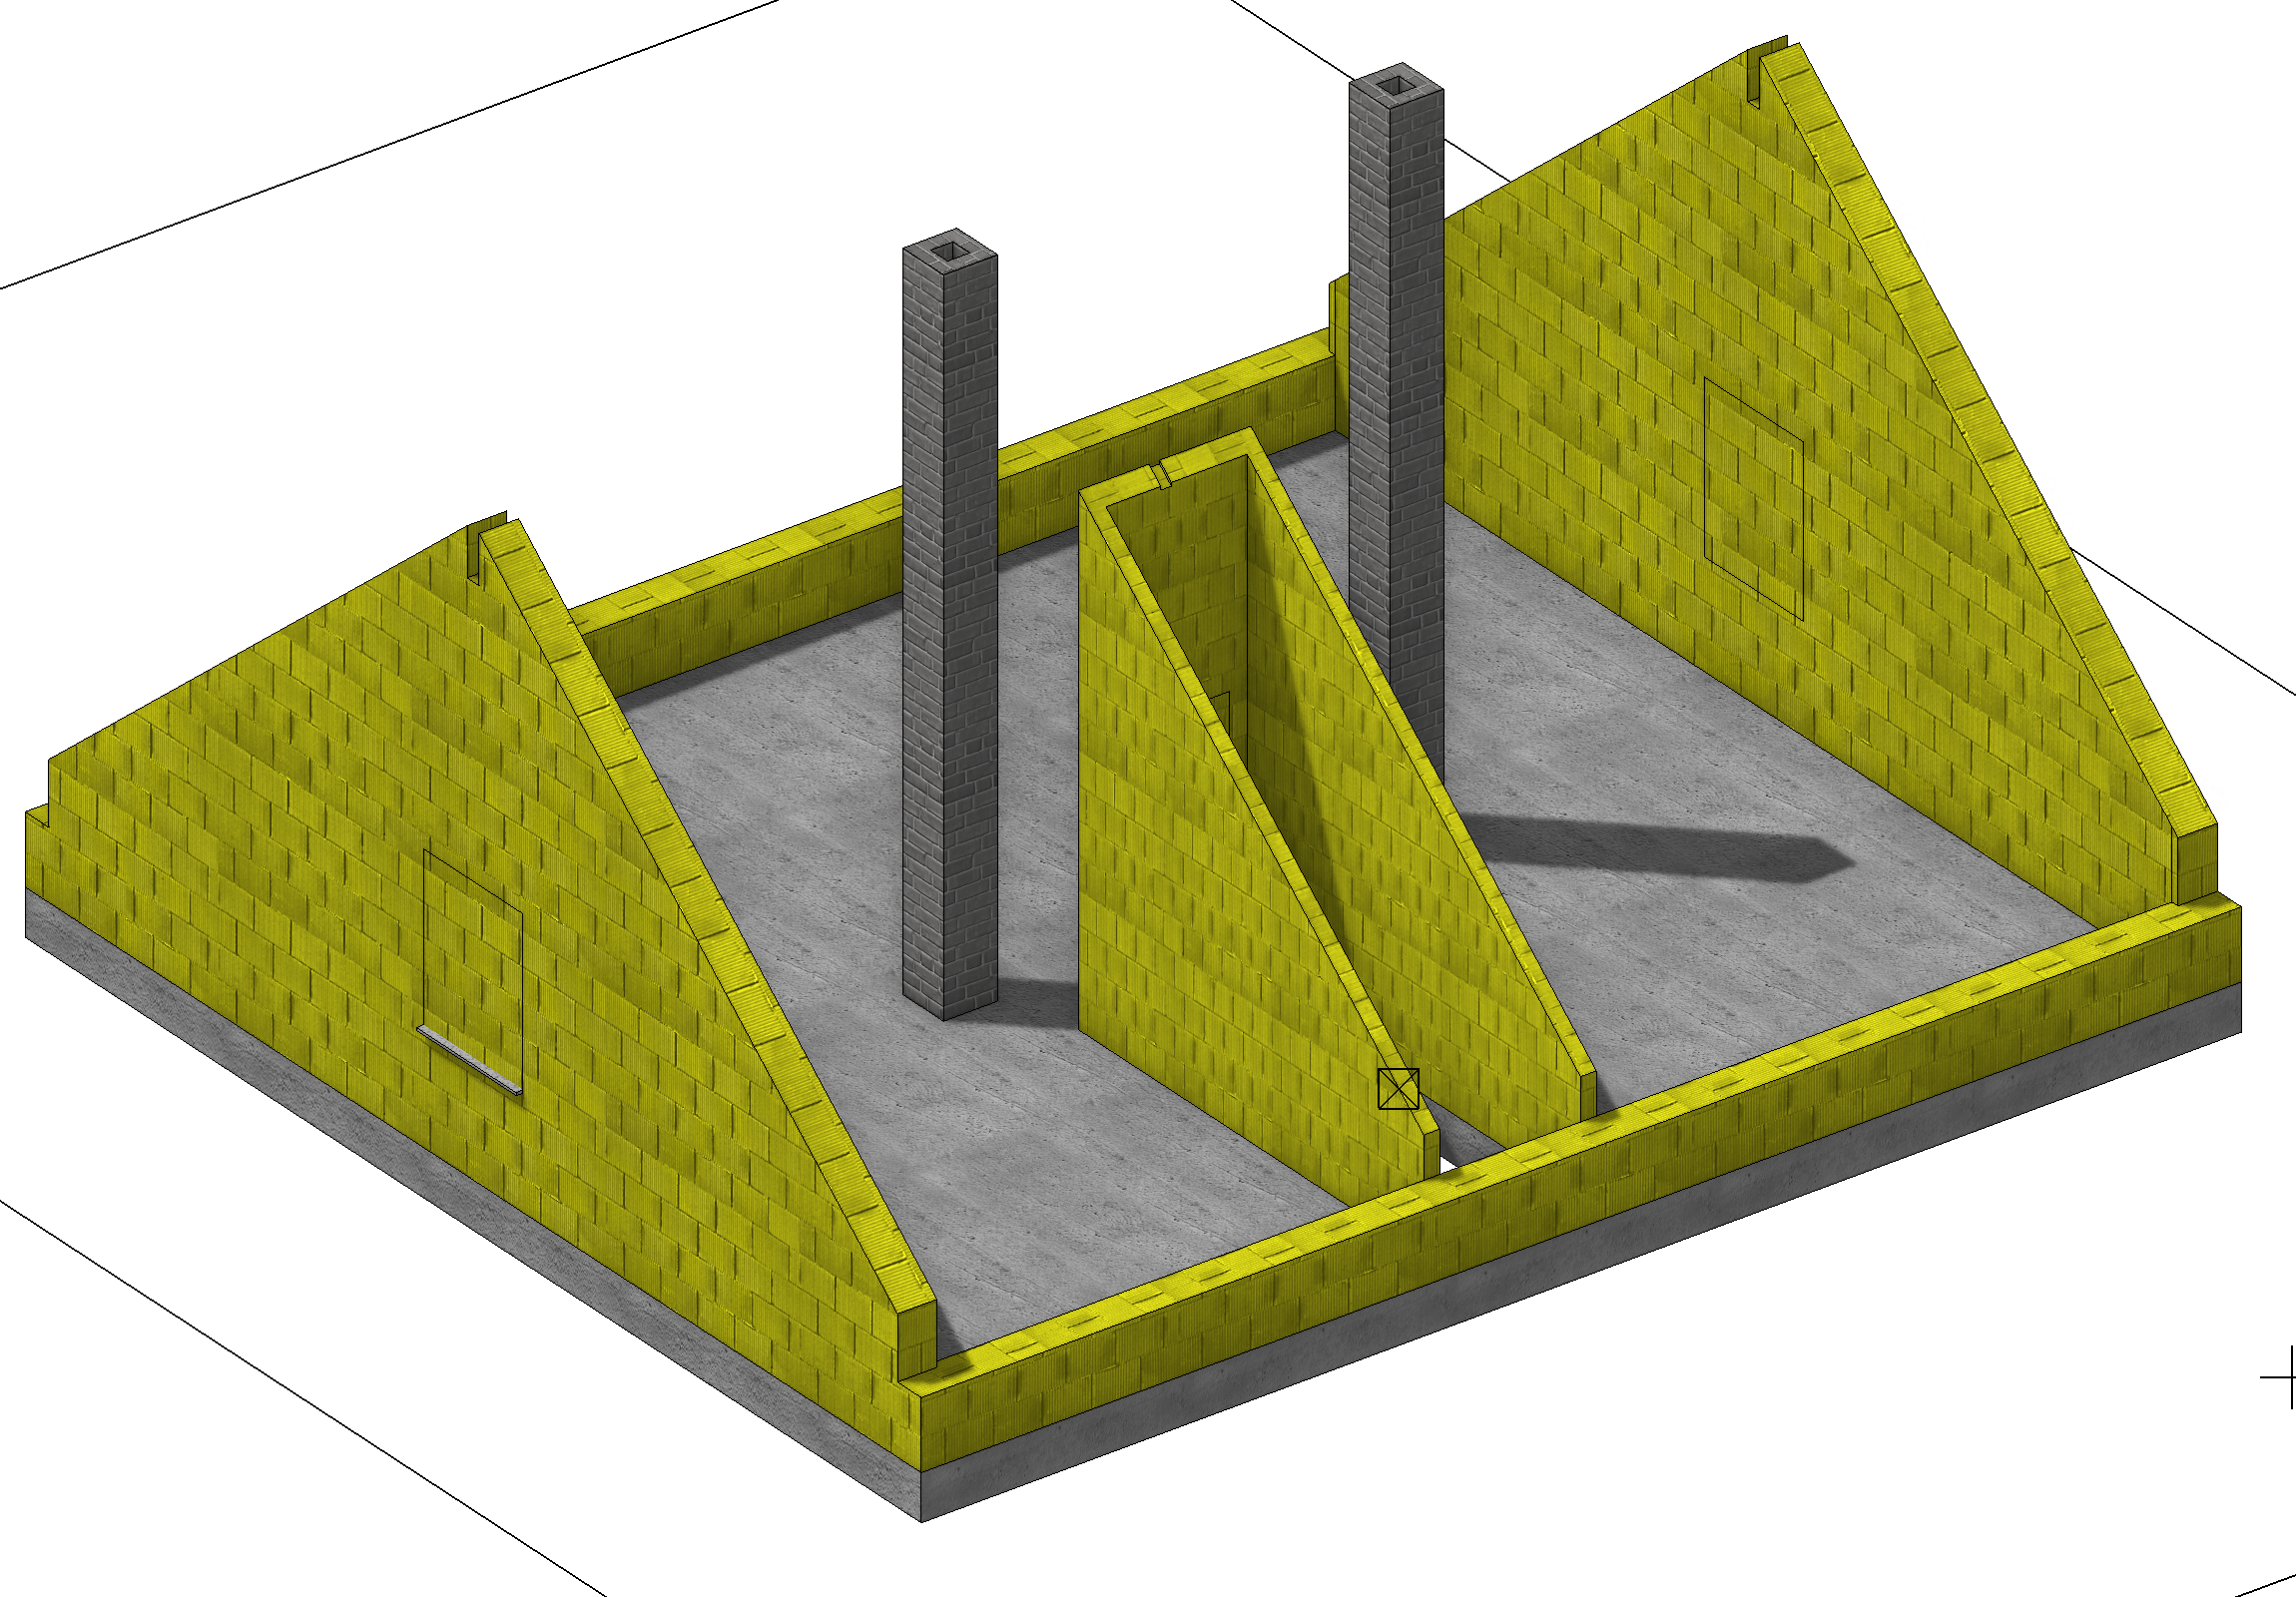
- Now for the top floor. Here we first mark the entire roof including the truss (layer: Wood construct) for Demolition and then we hide it.
-
Afterwards the walls, windows and the door should be set to Demolition as well.
Note
The change of the wall purlin might only be applied after confirmation in the input menu.
-
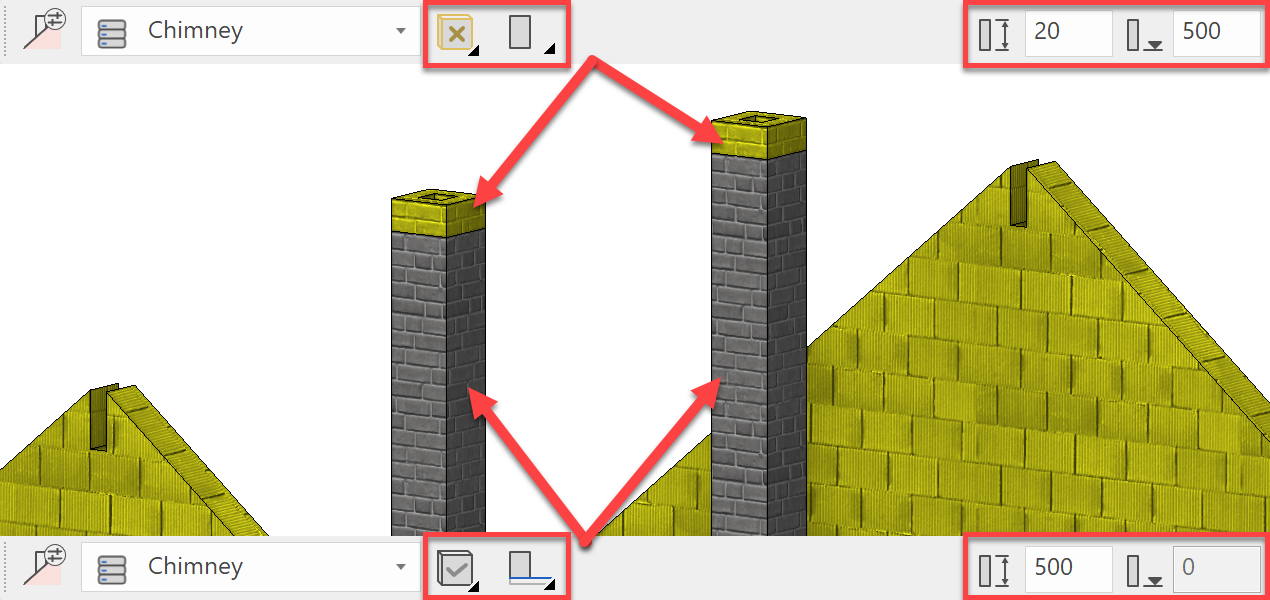
The chimneys are only shortened. Shorten the existing chimneys and set chimneys with free height on top of them. Mark those for Demolition. You can activate the chimney using adopt parameters, then before placing it, set the correct height and mark it as Demolition.
- Use the switch Depiction renovation planning to see the various combinations of the current state of the renovations.