New construction
Automatic model update upon changes of walls
Other typical requirements in renovation planning are dividing walls, demolition of walls and/or the construction of new walls. Walls intersect floors and roofs and limit rooms. During these actions, it is ensured that only appropriate objects will be intersected. Demolition and New construction objects do not influence each other. For instance, the intersection between a demolition wall and a newly constructed roof would make no sense; for this reason, the demolition wall will ignore the newly constructed roof.
Just like wall changes have effects on other objects; the walls themselves take care to only intersect with appropriate walls.
Take care with the visibility of the renovation planning state!
Please note, that components as well as auxiliary lines and text are assigned the state Unknown whenever they are used for the first time in the drawing!
![]()
When you are working on the model, you sometimes might filter for different states, but only the states No restriction and Unknown will show the objects with the state Unknown.
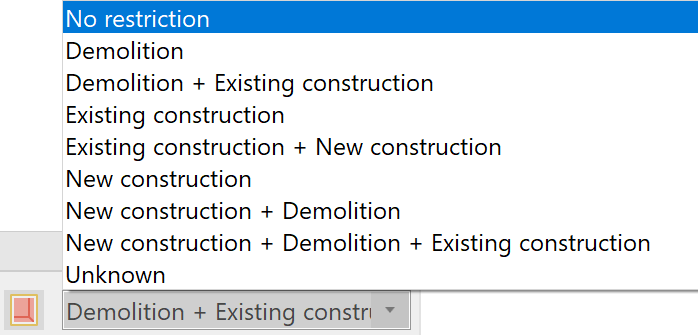
In case you draw something, and it is invisible or you cannot seem to find it, the probability is high that it will reappear when you set the filter to No restriction. Then you can assign the correct state to it.
Modification of walls
Workshop
-
Double-click on the ground floor in the Storeys manager to show it alone and switch to the wire model view with Ctrl + D. Make sure that the No restriction filter is activated in the Display renovation planning input field.
Now the interior walls of the house are being rebuilt. -
Divide the wall between the foyer and the room as shown 125 cm from the left end using the Divide wall function:

If necessary, add an auxiliary line.
-
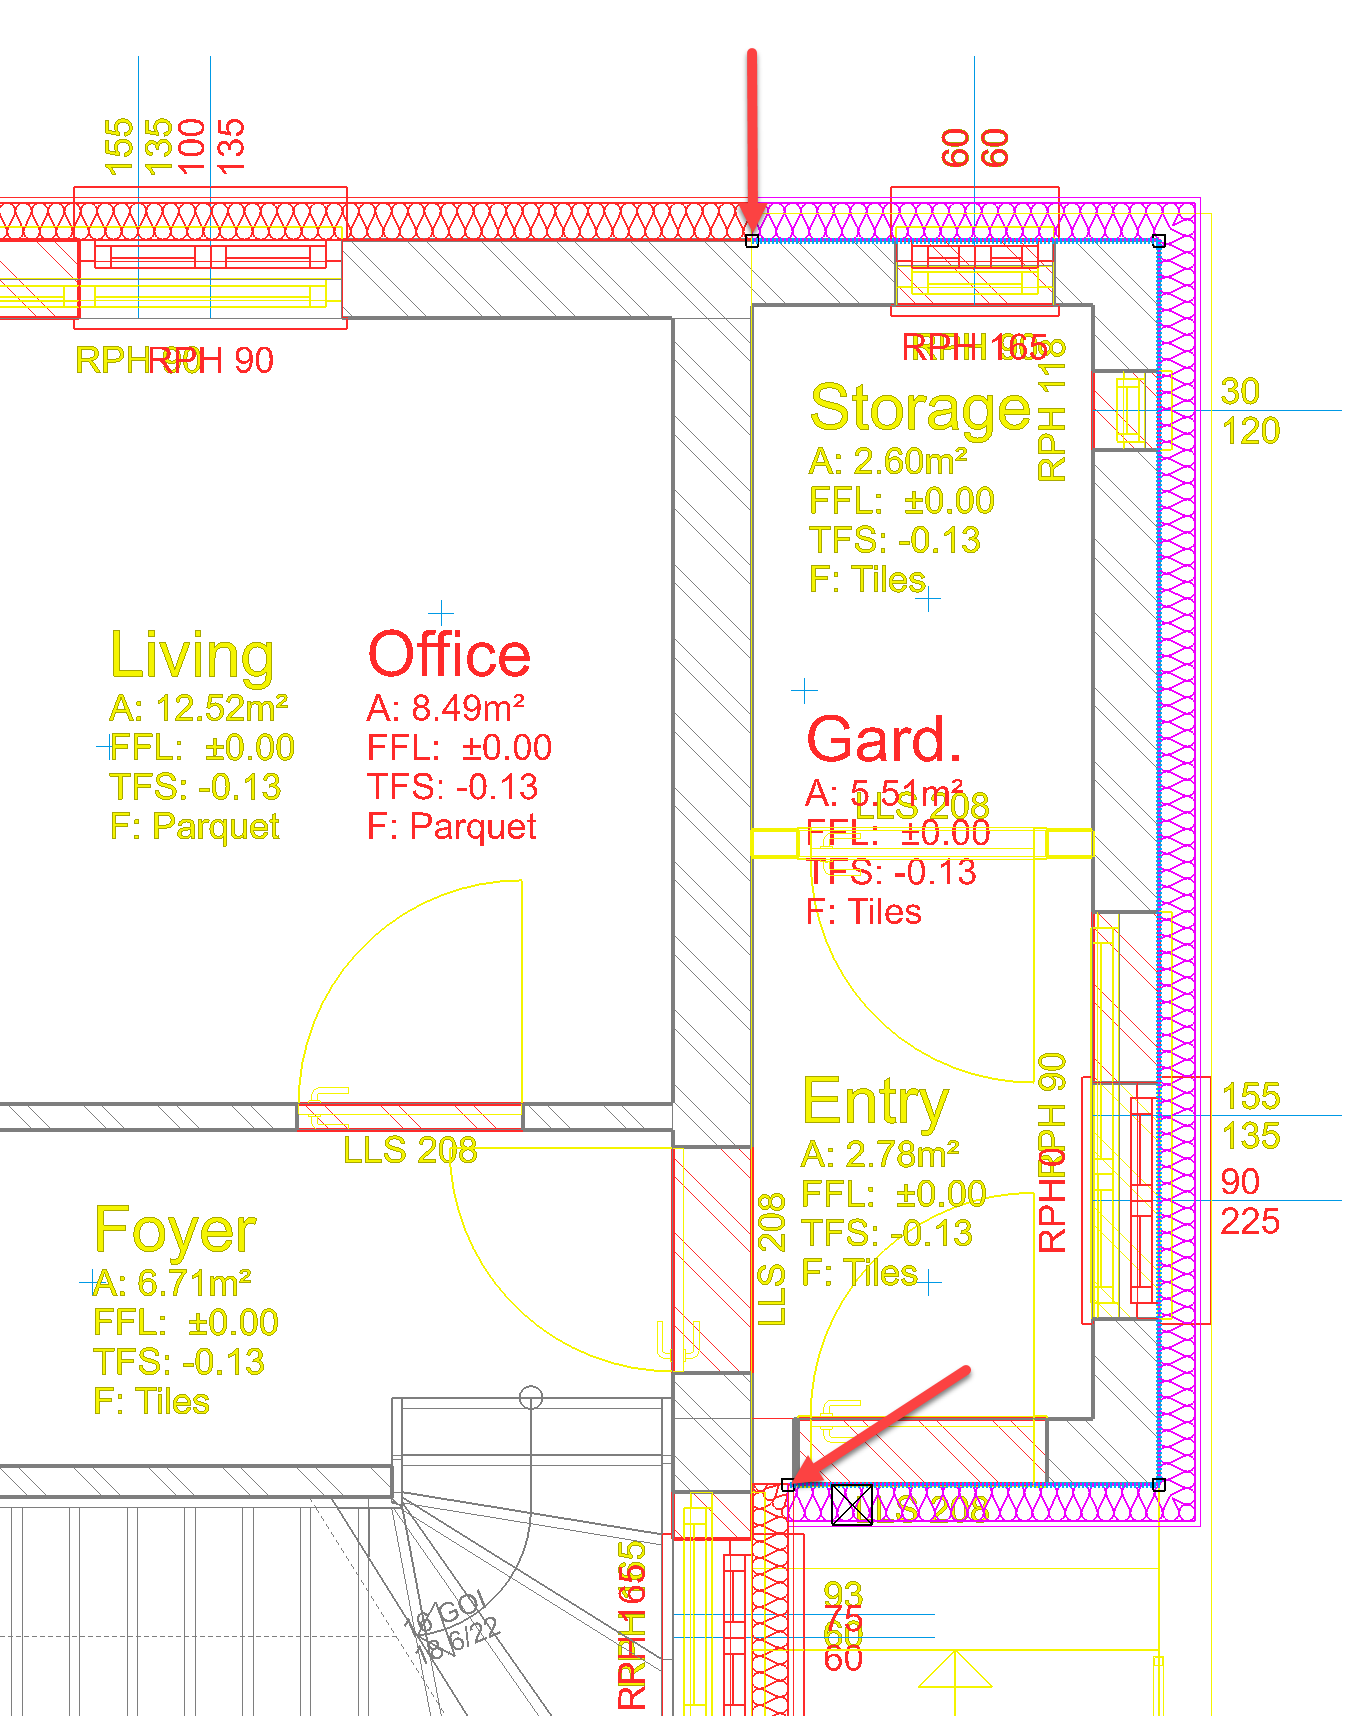
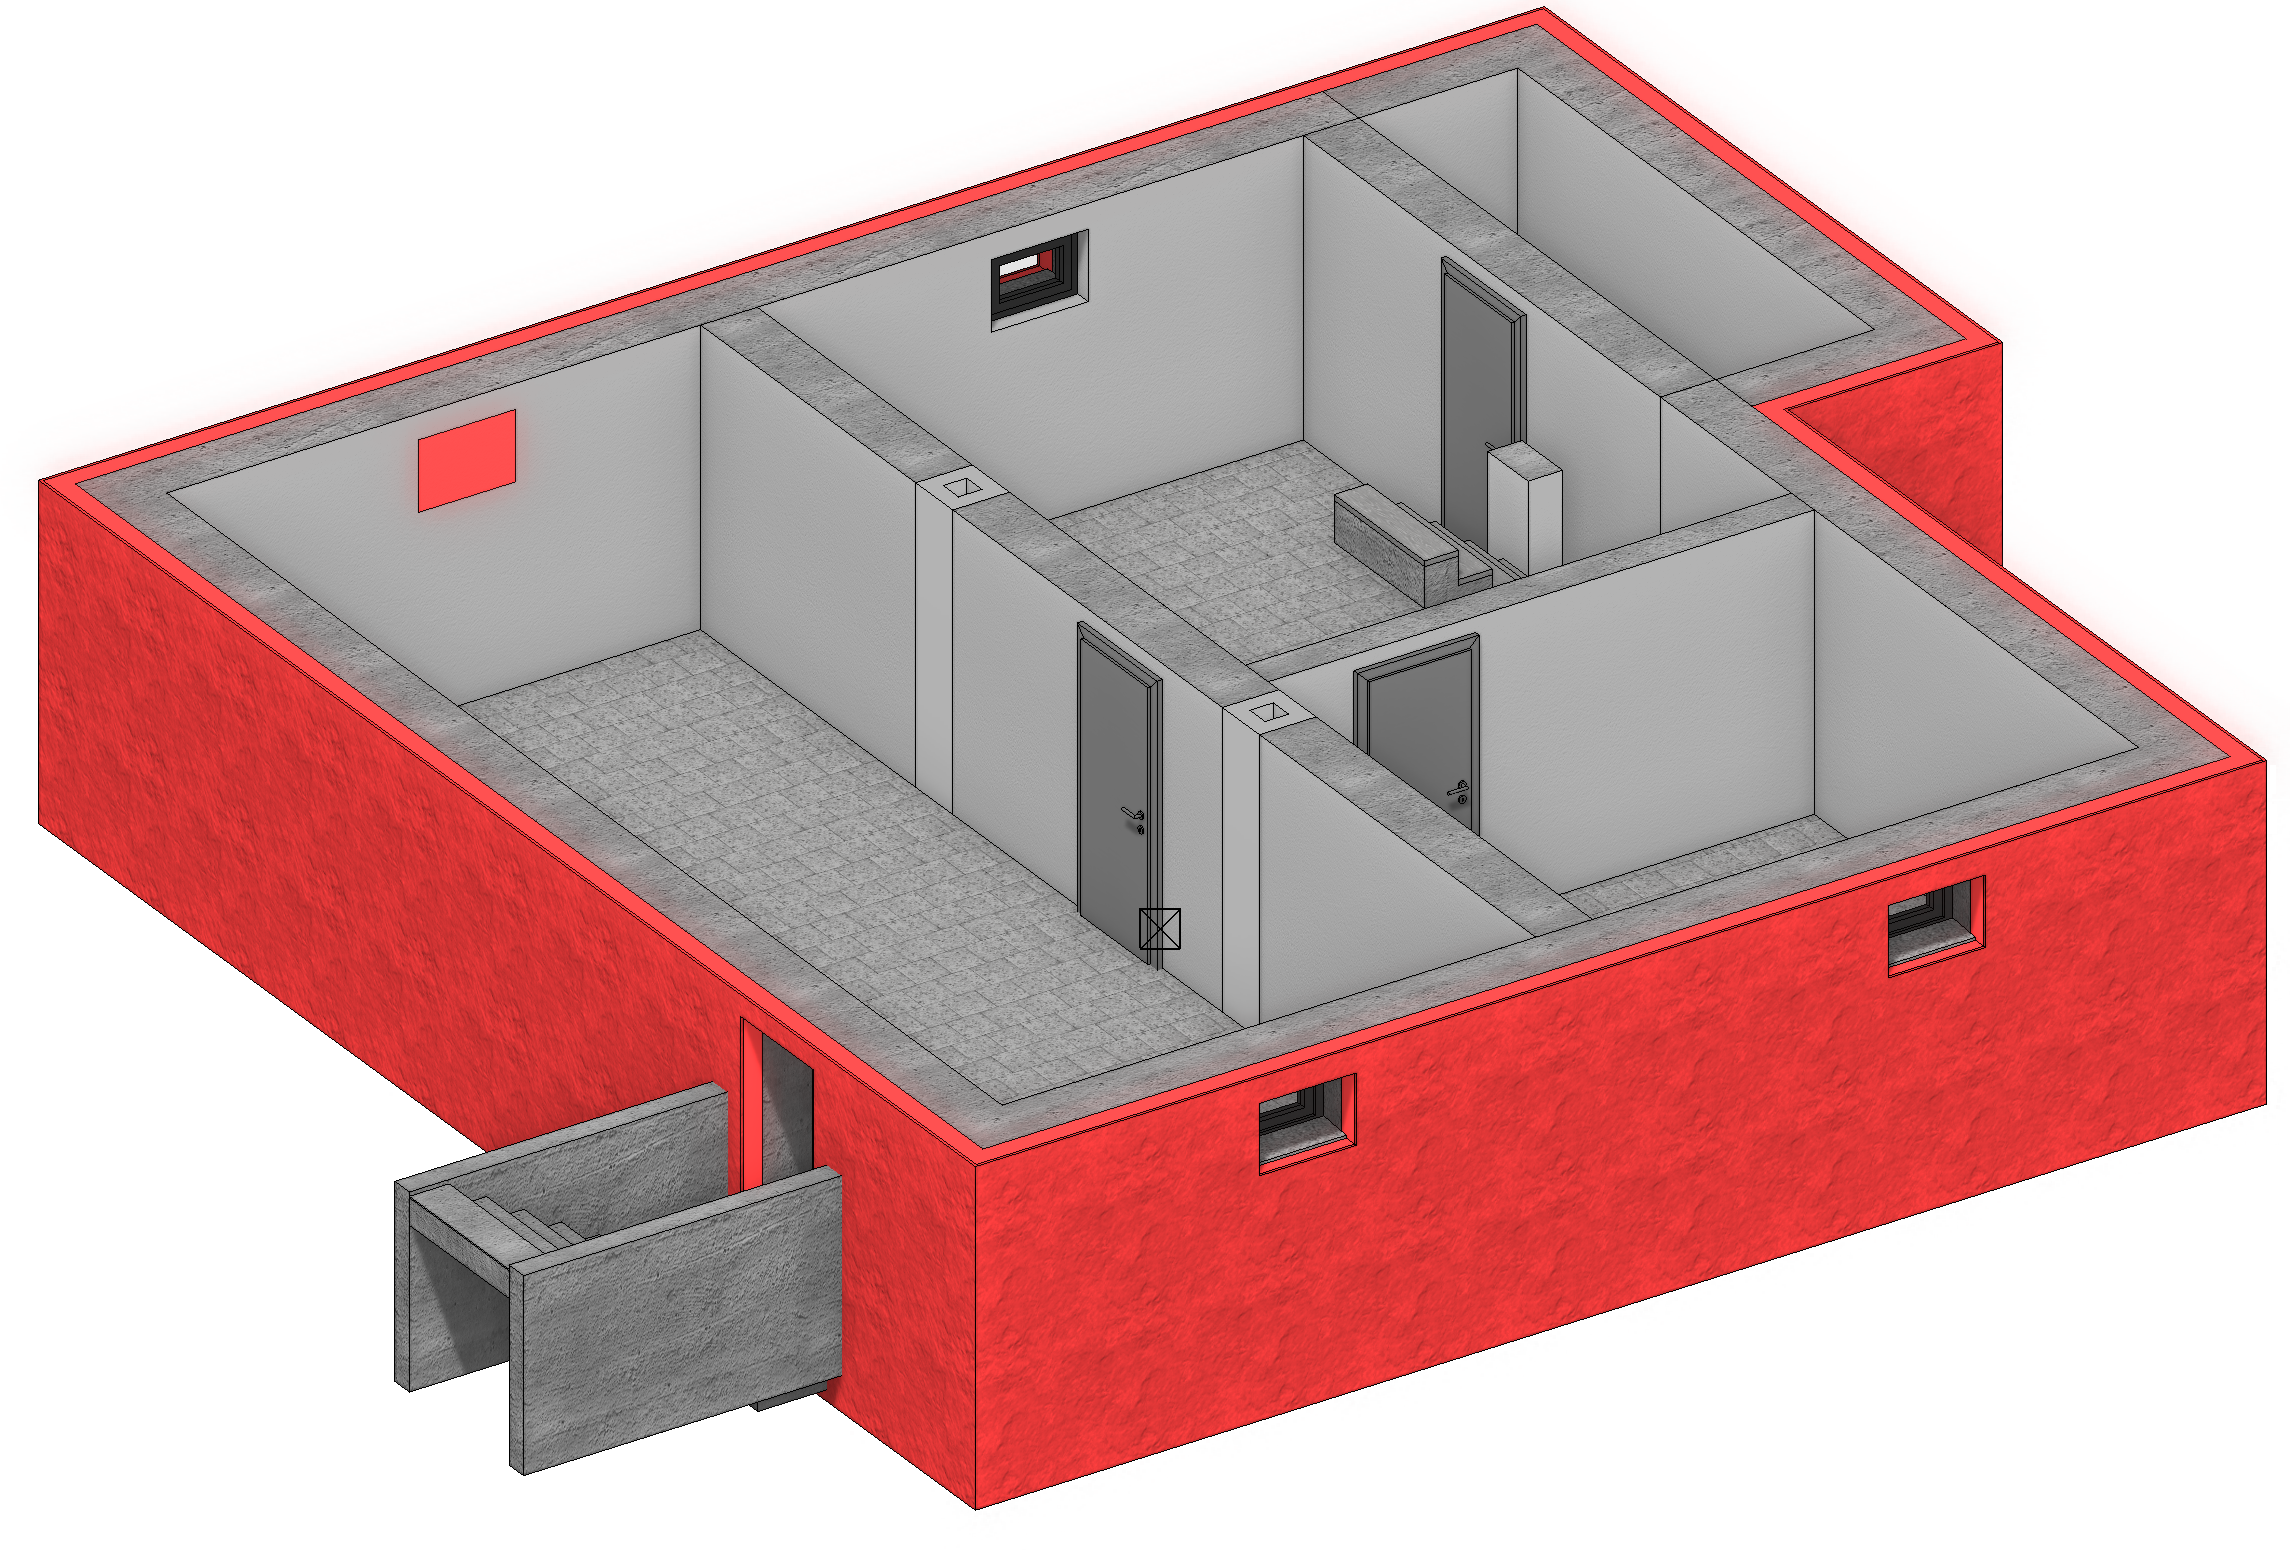
Mark the left section and the displayed doors for Demolition. Then draw new 12 cm thick interior walls with the state New construction as shown in the picture.
The installation wall behind the toilet is drawn as a simple parapet wall. (see settings in the pictured toolbar)
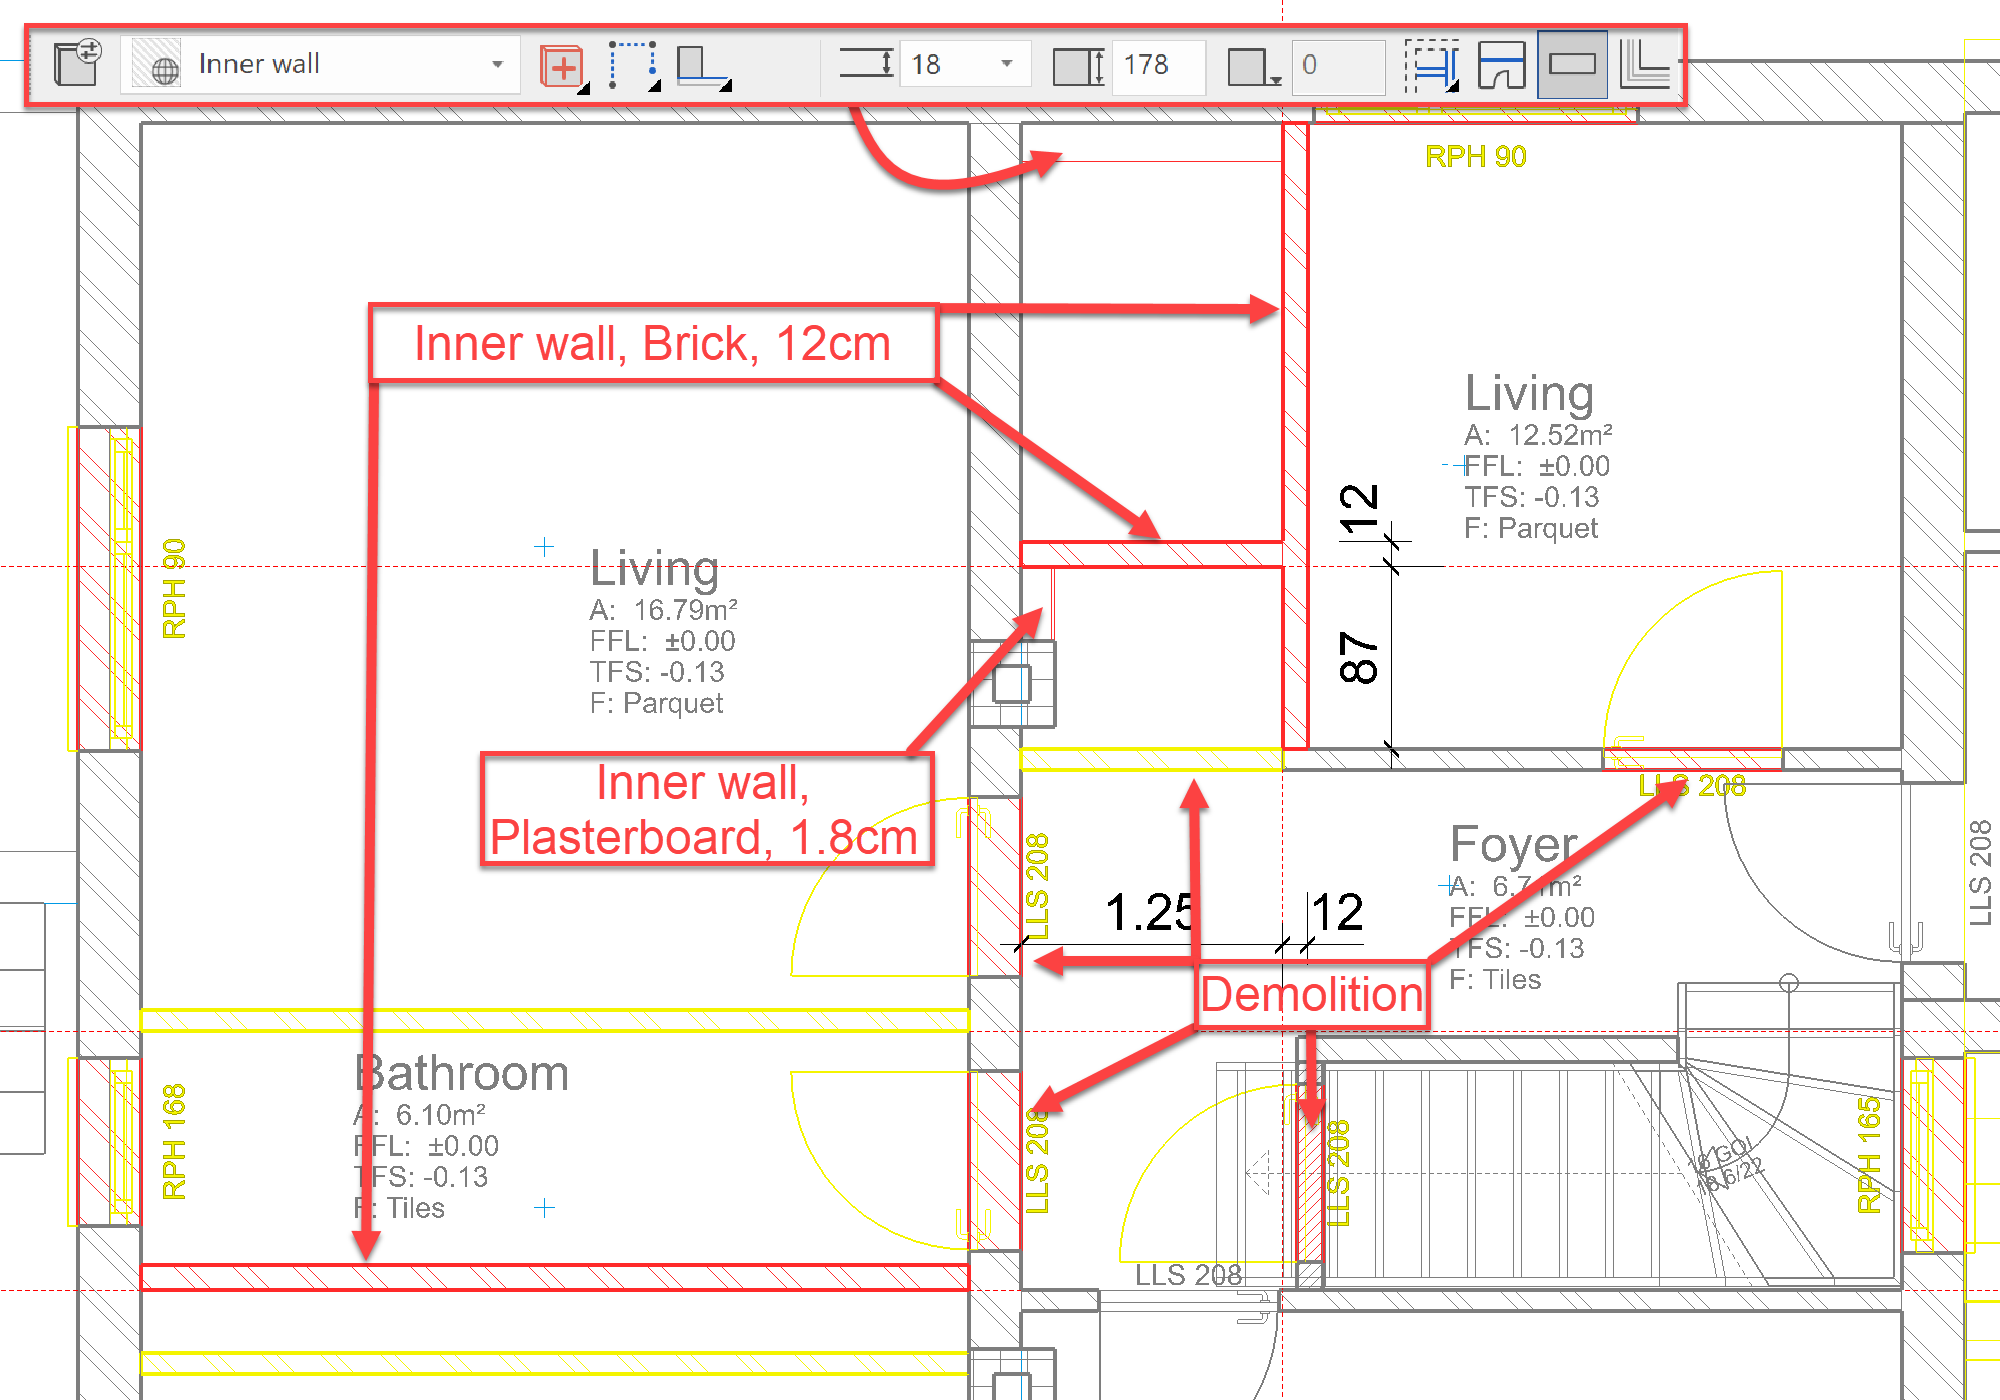
-
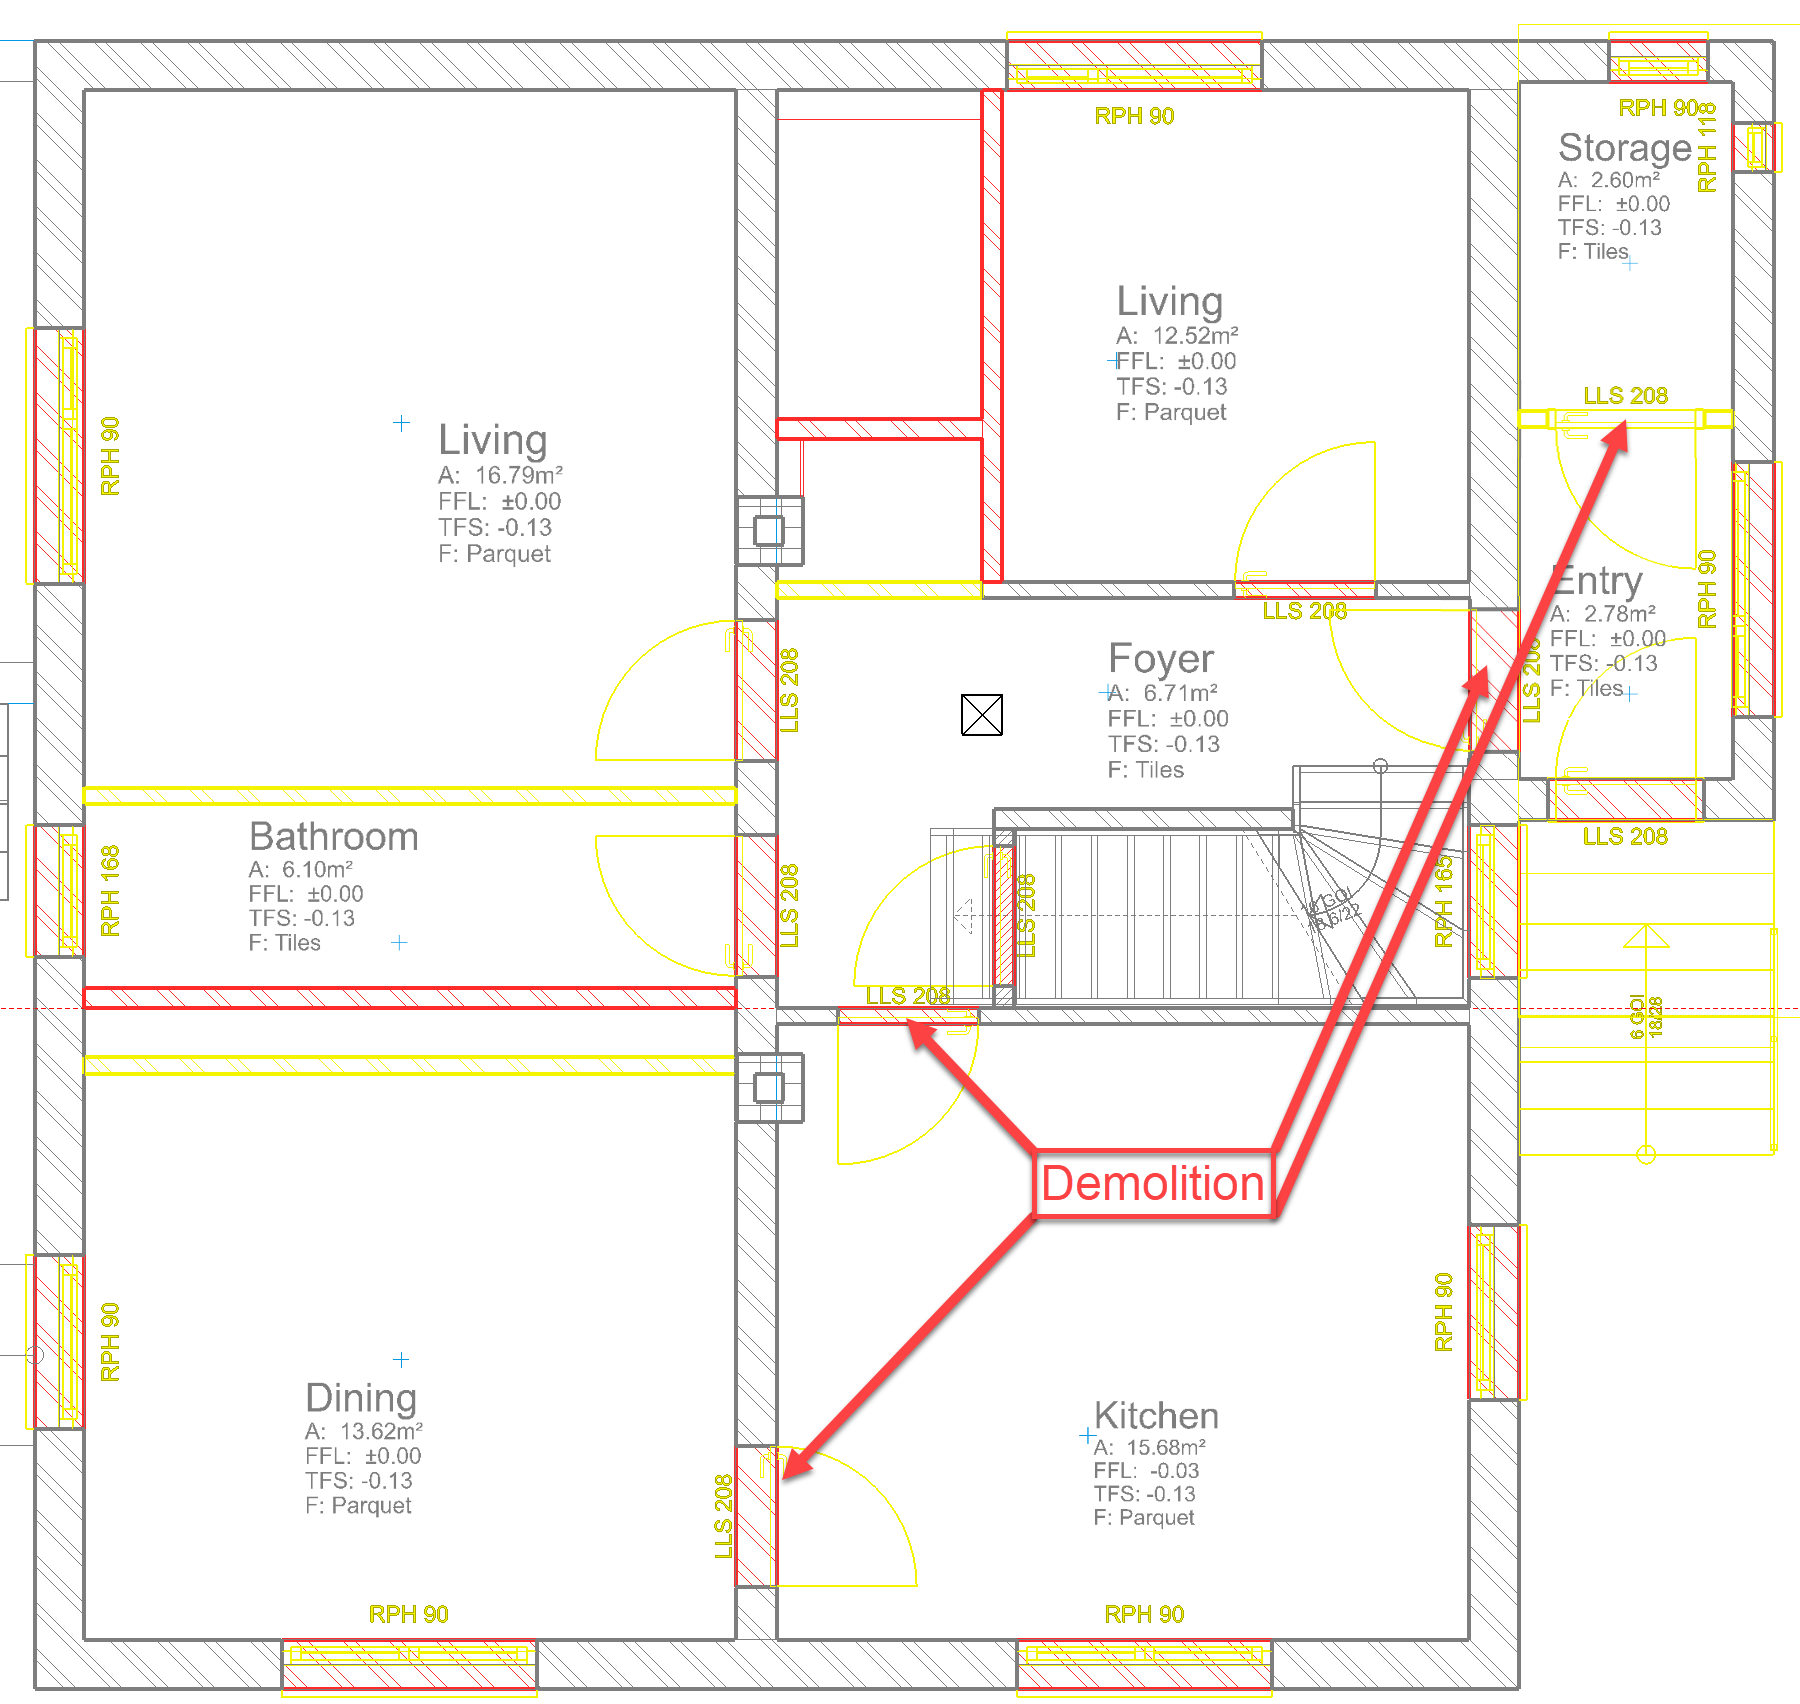
Demolish the partition wall including the door in the entrance area, the door between the entry and the foyer, as well as the two doors that lead into the kitchen:
Modification of rooms
Workshop
Automatic model update for changing or configuring rooms The rooms themselves can also be in a state of renovation planning. A room with a certain state only interacts with meaningfully suitable walls, e.g. a demolition room with existing and demolished walls, a new construction room with existing and new walls. Changing walls also has an impact on the room. Rooms can be divided or merged. As a result, the demolition area and the new building area can partly be in the same position. However, this is not a problem because these two rooms have no influence on each other.
- Now set all the rooms to Demolition and, using New construction, set the new rooms that correspond to your new floor plan. It is best to adopt the parameters of an existing room and change the state to New construction and, if necessary, the flooring before placement.
- Use laminate for the living rooms and kitchen, and tiles for the new toilet, foyer and wardrobe. If necessary, move the demolition room stamp to make room for the new construction room stamp.
Note that the newly build rooms ignore the demolition rooms and vice versa. Both, however, pay attention to the existing construction:

Independence of the filling objects
Wall openings
If you set a wall opening - a window, a door or an empty opening - with the state Demolition or New construction in an existing wall, the opening is automatically filled with a piece of wall of the other state. So, if you tear out a window, its opening will be "bricked up" and if you add a new window, a piece of wall must first be removed.
These filling objects can be influenced. You can switch the automatic creation of the fill objects on or off:

Please be sure that you also have the display of the respective renovation state activated in order have the result displayed.
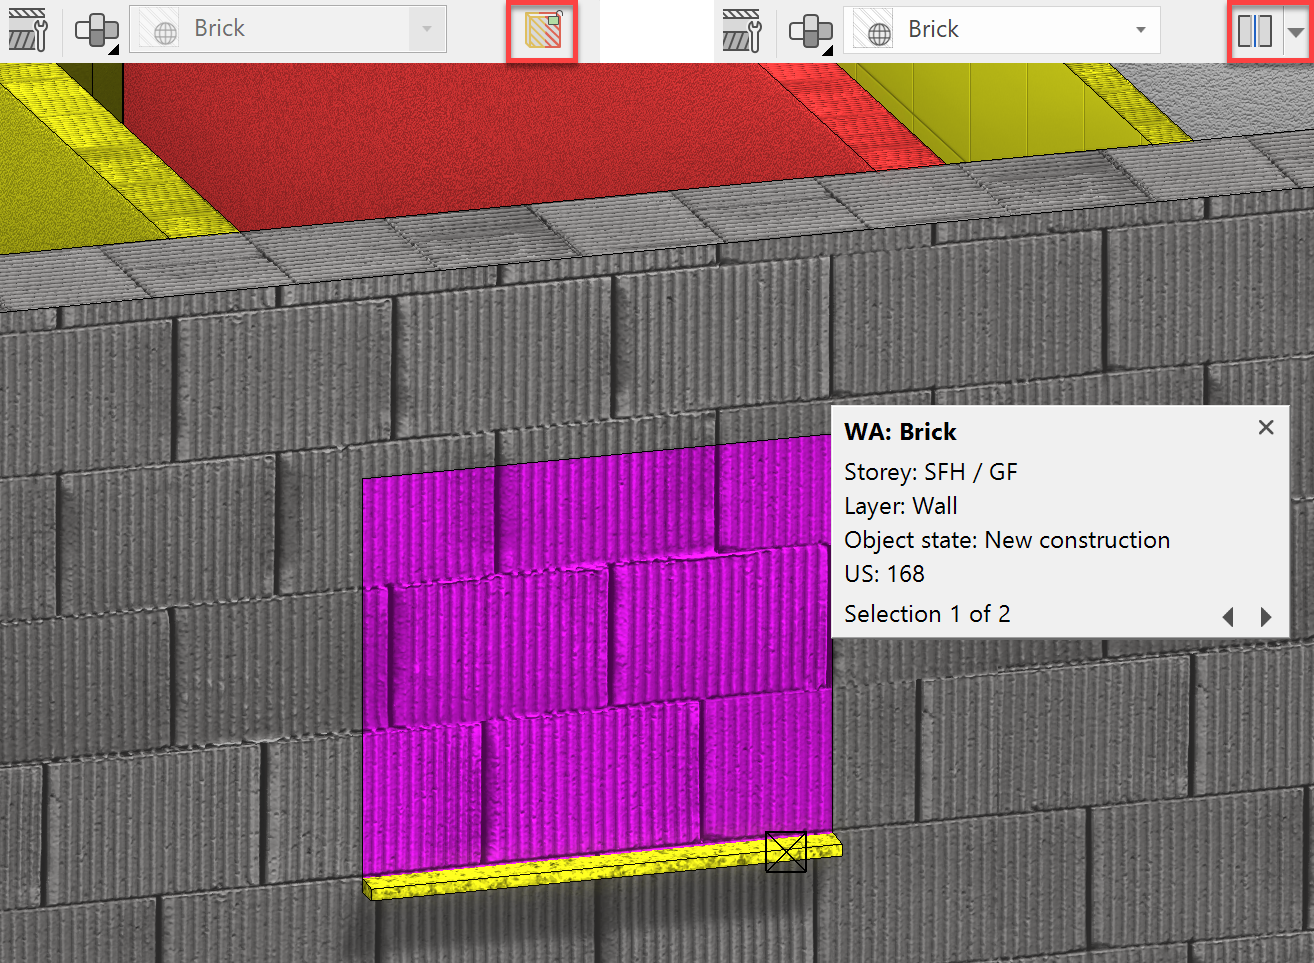
If a filling object is created automatically, it cannot be edited because it is always automatically adapted to the wall as well as to the position and size of the opening. Therefore, when selecting the filling object, its parameters are greyed out and inactive:

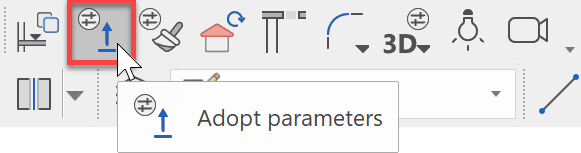
In order to edit it, it is uncoupled from its wall opening with the button Renovation planning - make filling objects independent and can now be edited as an independent wall segment.
The associated filling object thus becomes a wall with free height and can be edited or deleted throughout.

However, if the option Renovation planning - fill opening automatically (see above) is activated again when the window or the door is selected; an automatic filling object is also generated again.
If there is still an independent filling object in the same place, it should be deleted beforehand so that there are not two overlapping objects.
Thermal renovation - thermal insulation on existing wall
In order to provide an existing wall with thermal insulation, the insulation can be drawn around the existing wall as a new wall. In order for window and door openings to run synchronously with the existing wall, these two walls must be linked.
Modification of windows
Workshop
-
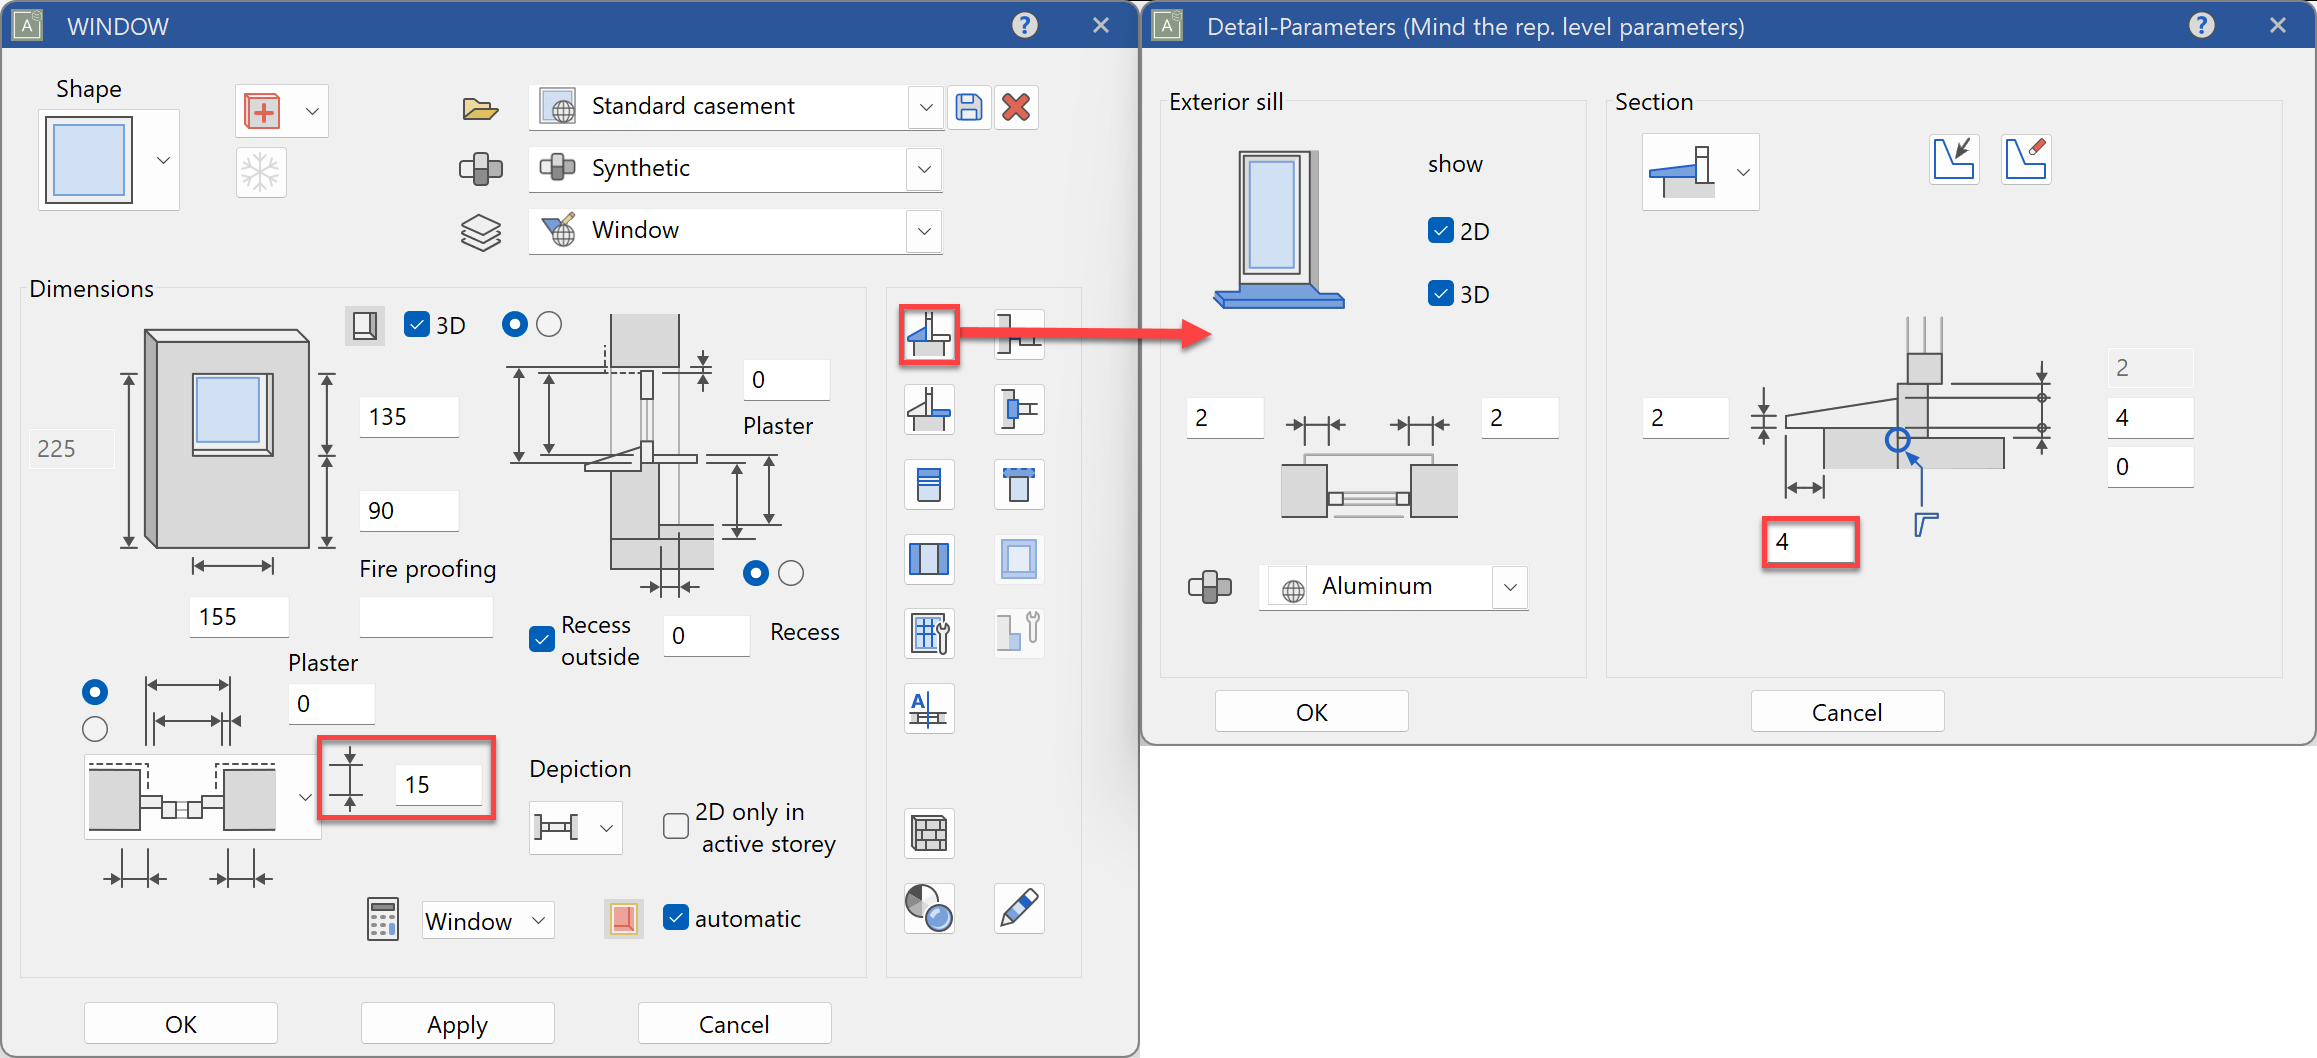
The new windows should be set flush with the existing wall so as not to break through the future insulation level. Select the double-casement, dining room window to be demolished and copy the parameters using Adopt parameters.
-
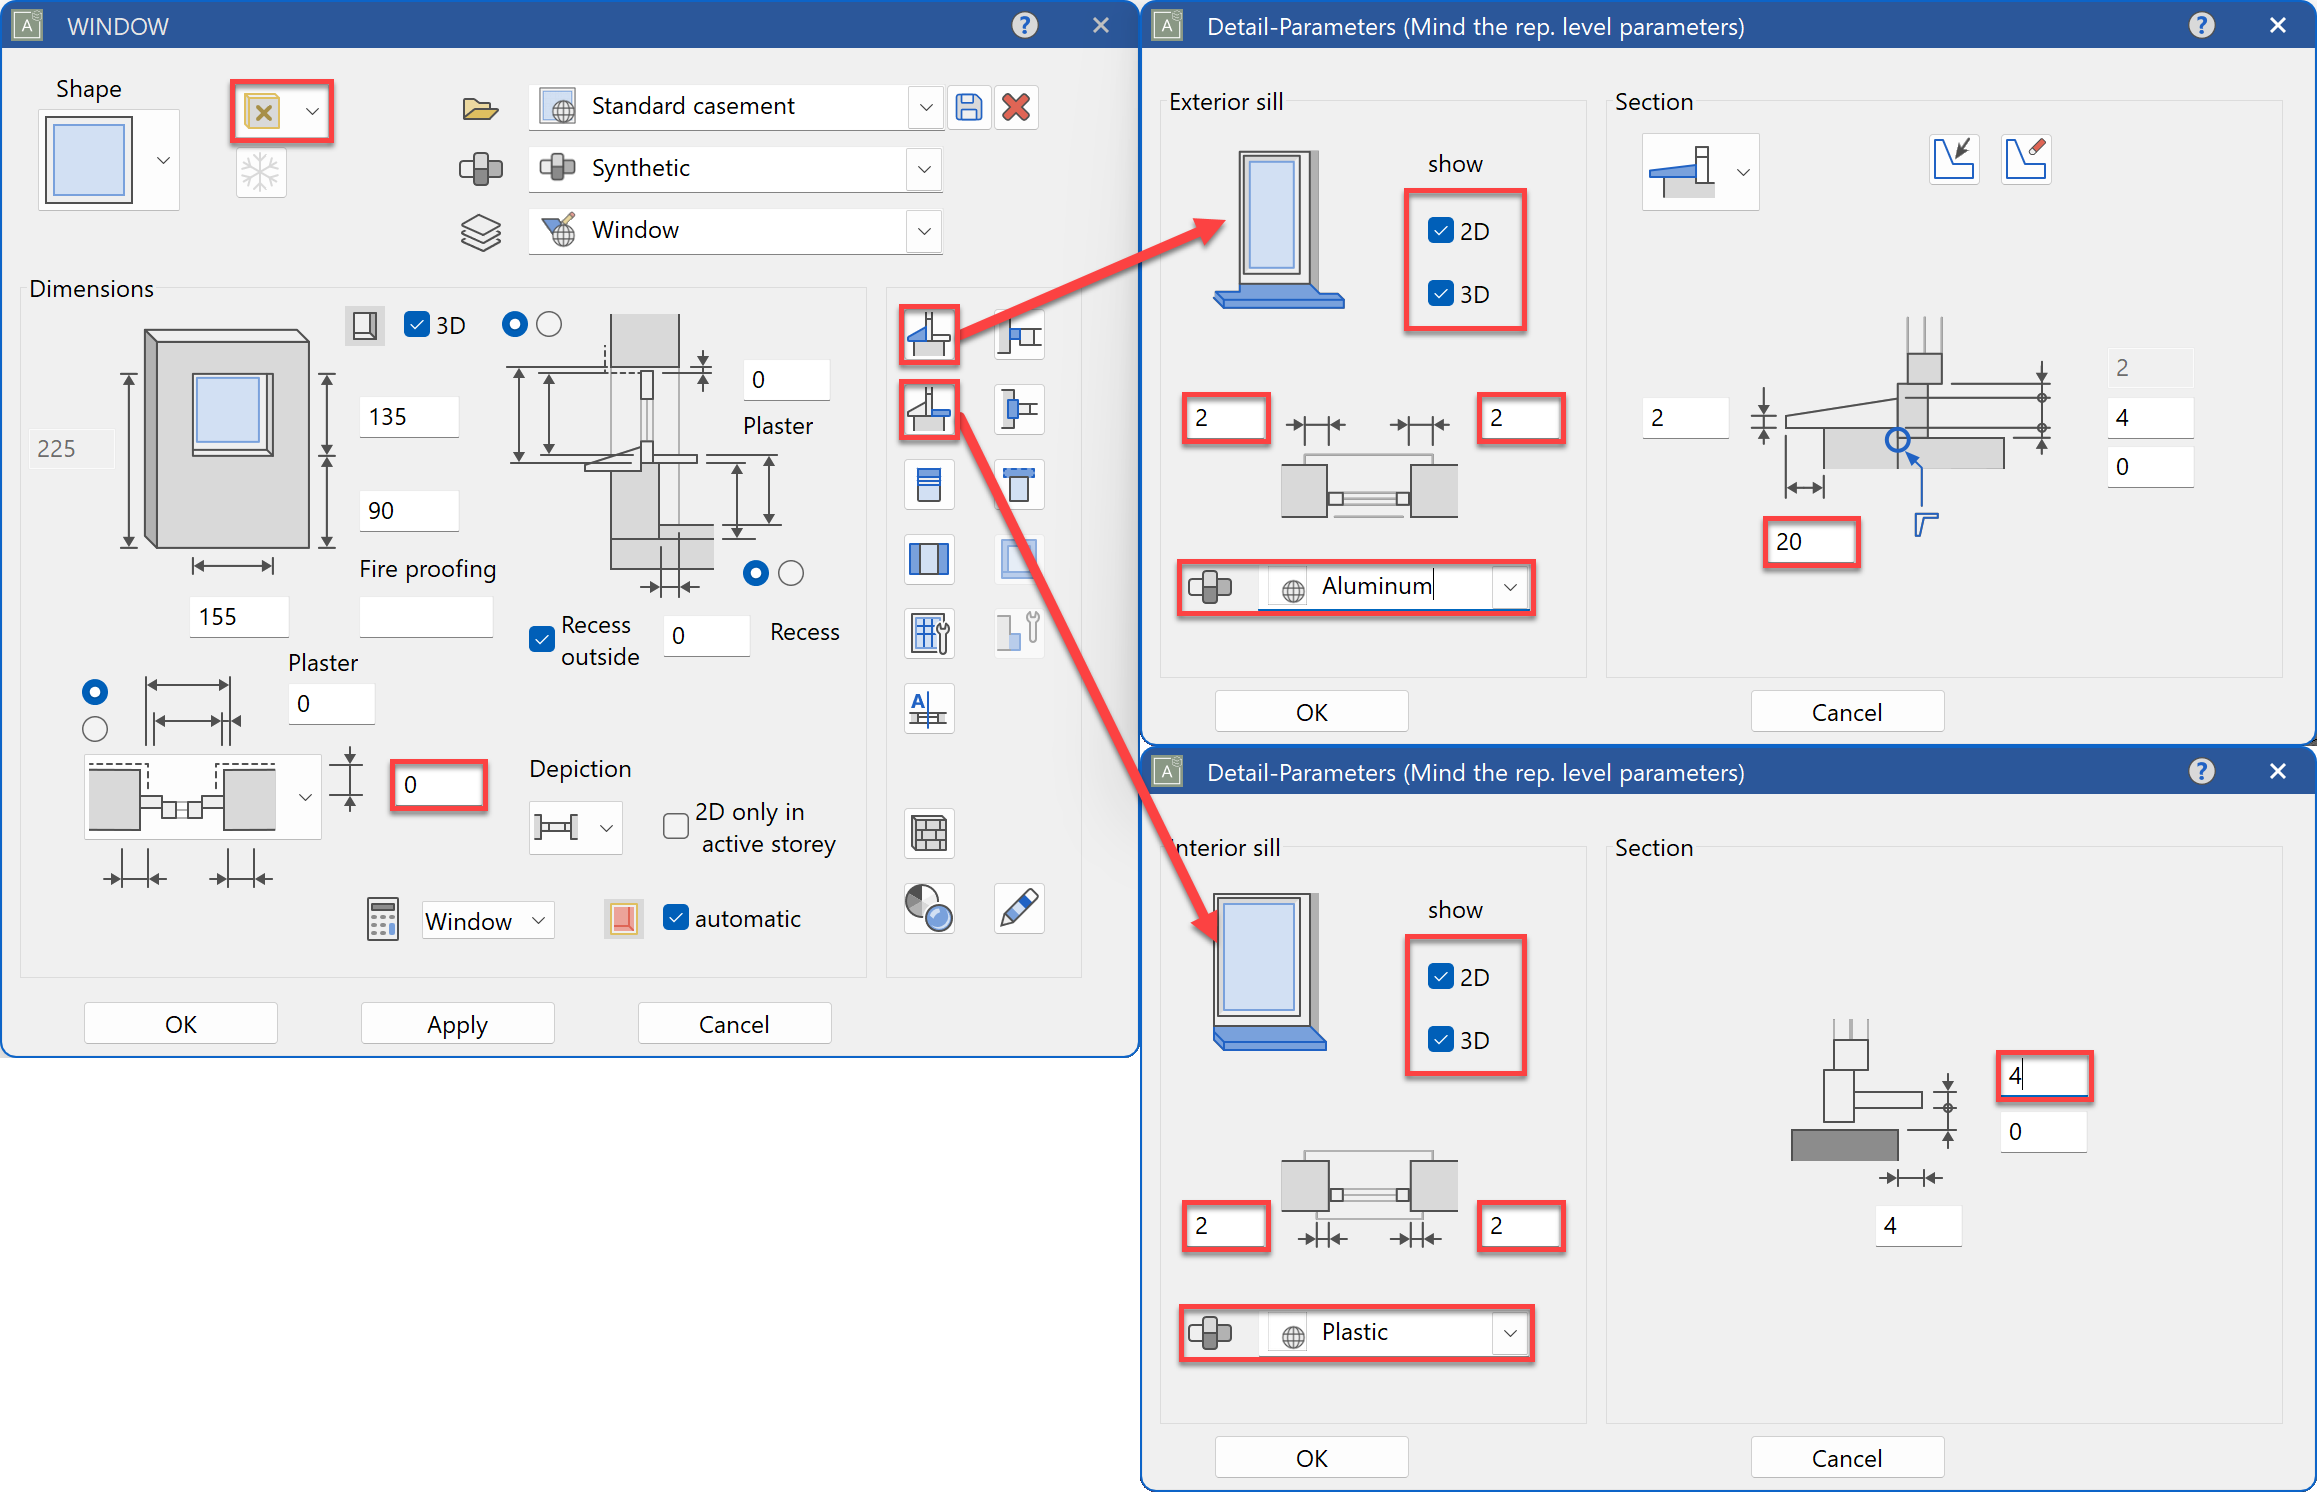
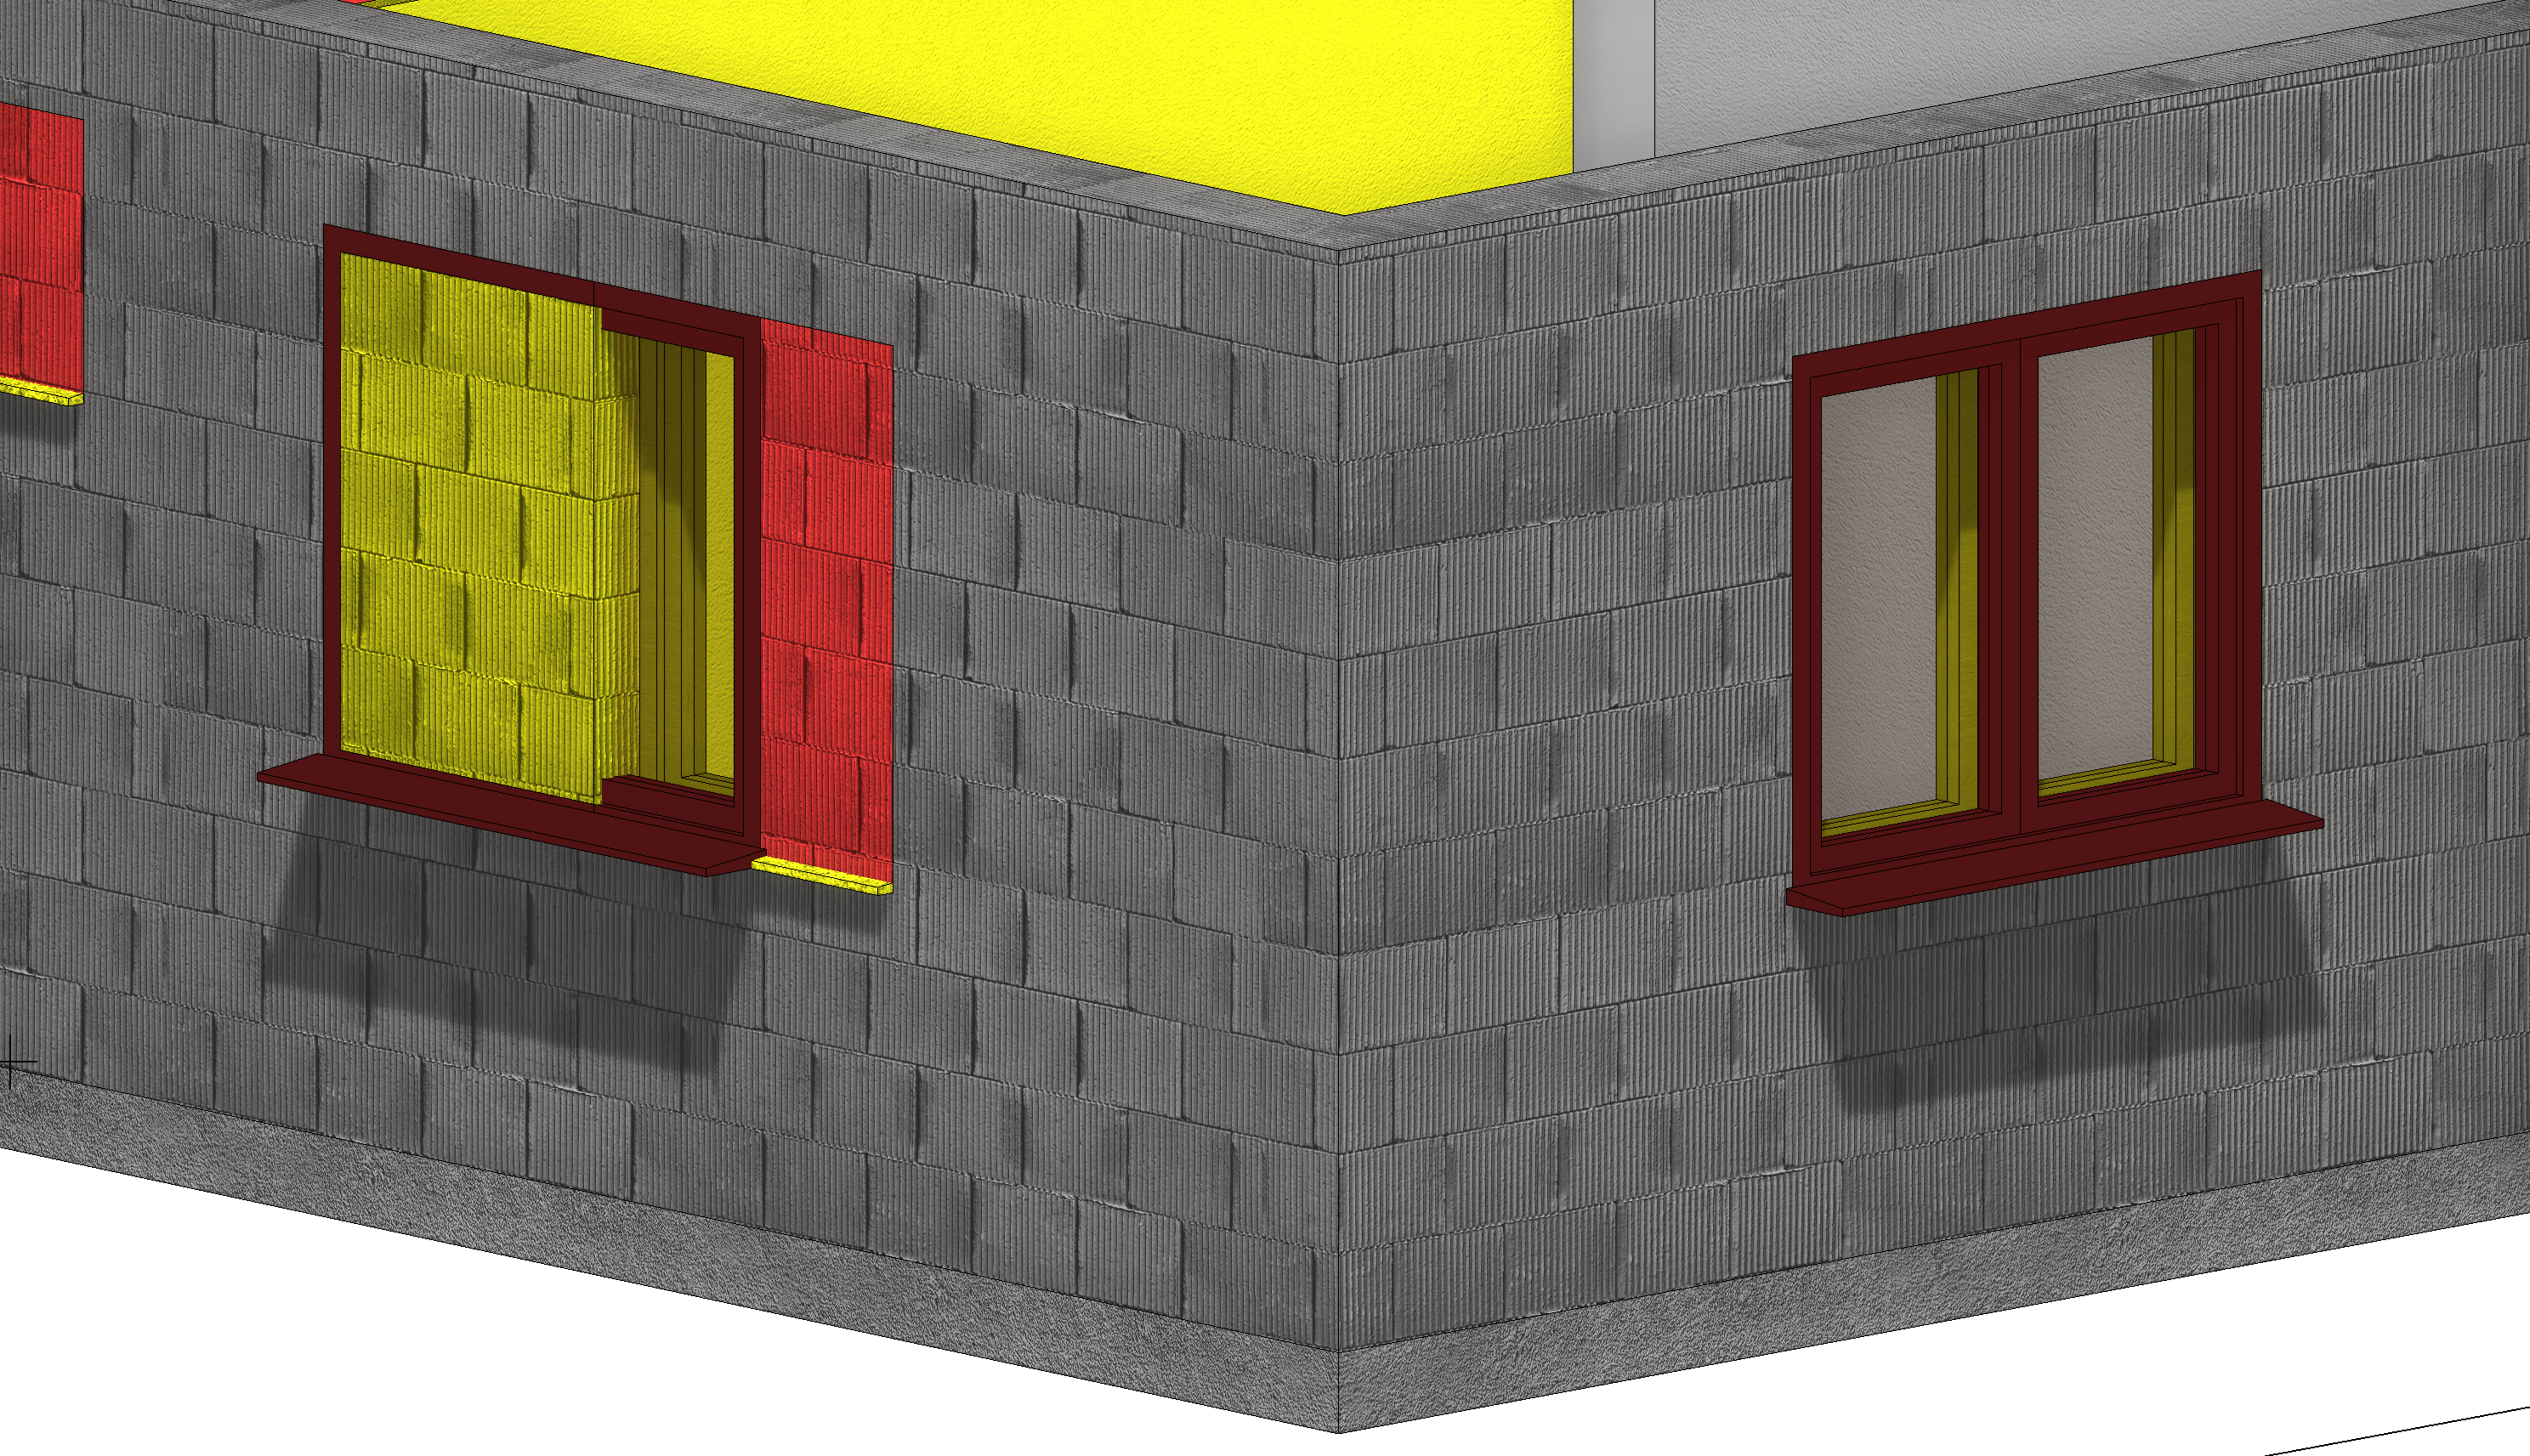
Open up the parameters and set the window to be drawn to New construction. Set the depth distance to 0 and define new window sills. Since the thermal insulation will be 16 cm thick, set the overhang of the exterior window sill to 20 cm. Activate the interior window sill and, if necessary, select other materials as you wish under Materials.
-
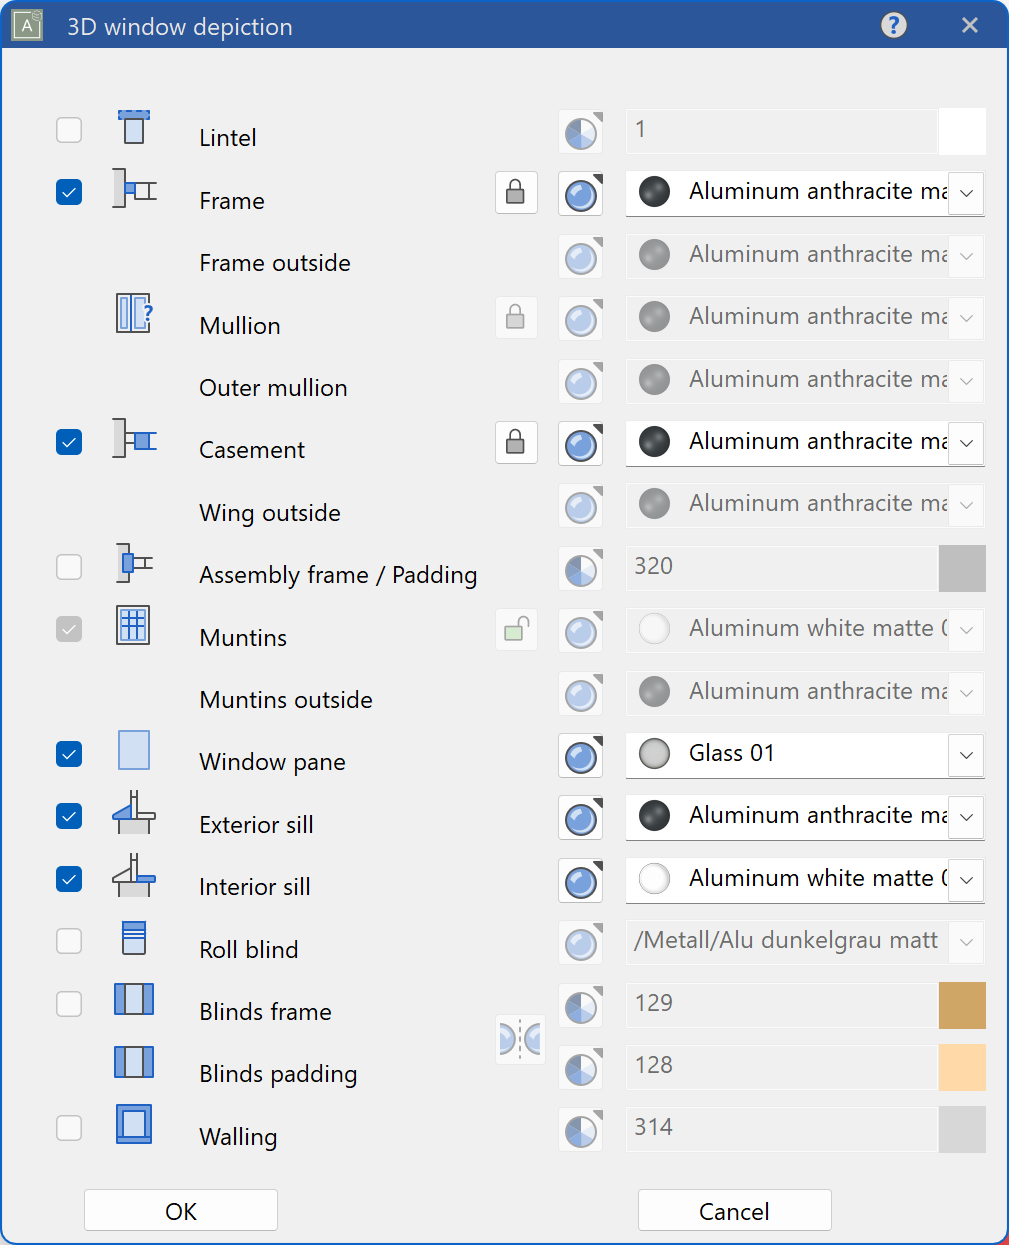
You may also change the visualisation materials to a more modern look. You can freely choose this as you like but below is our settings:

-
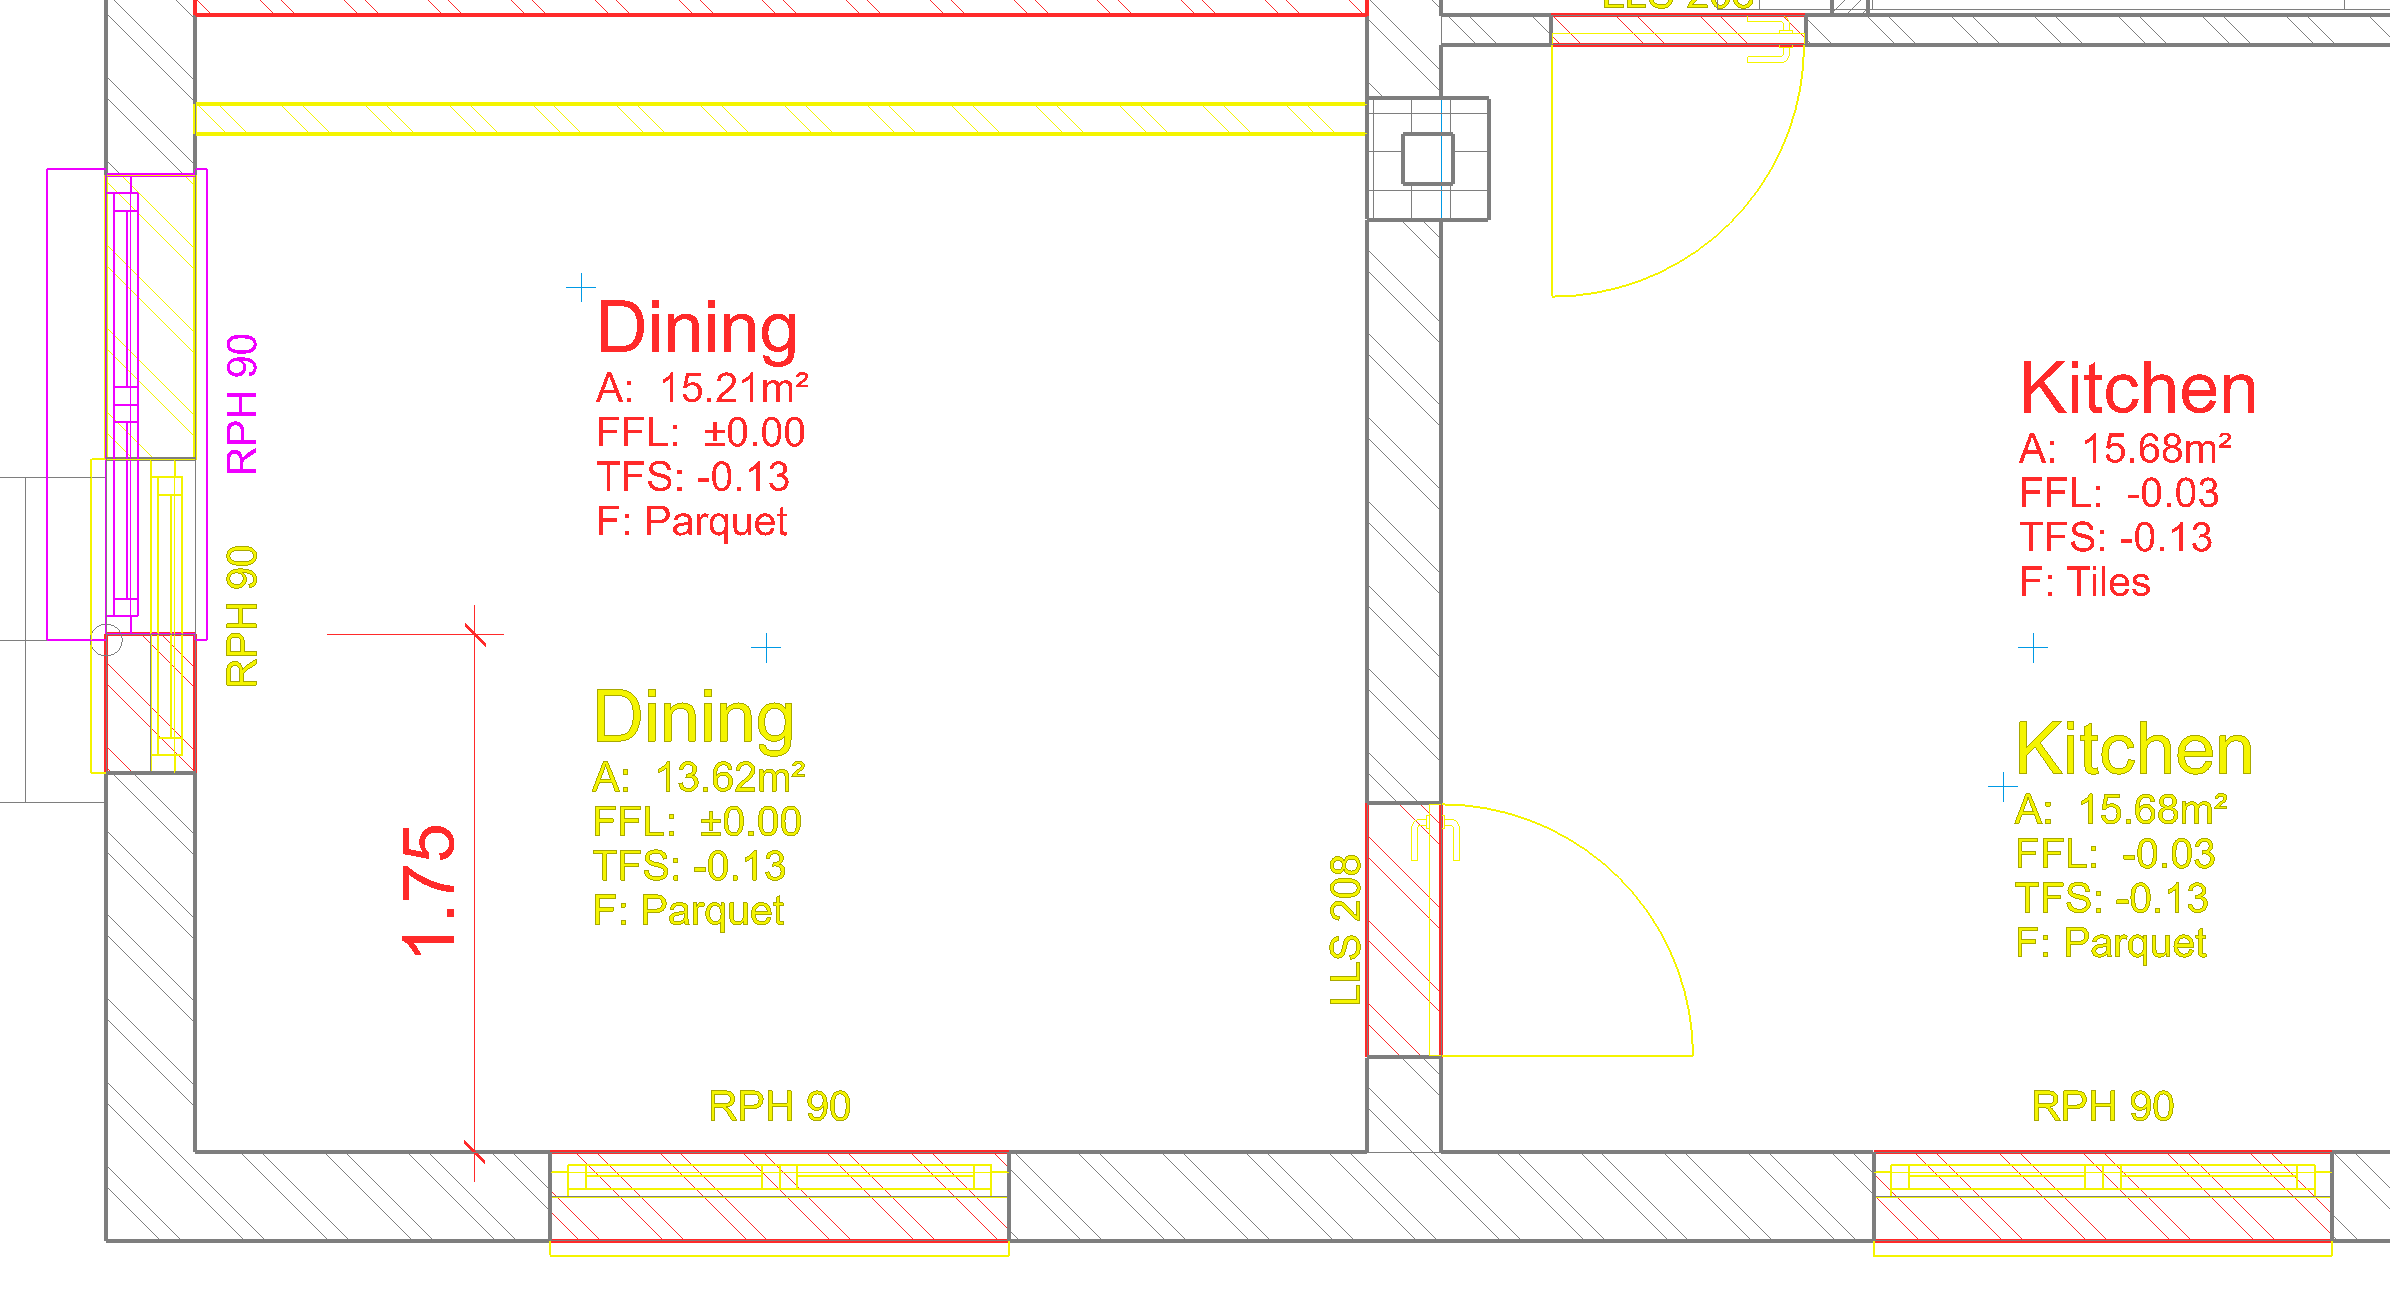
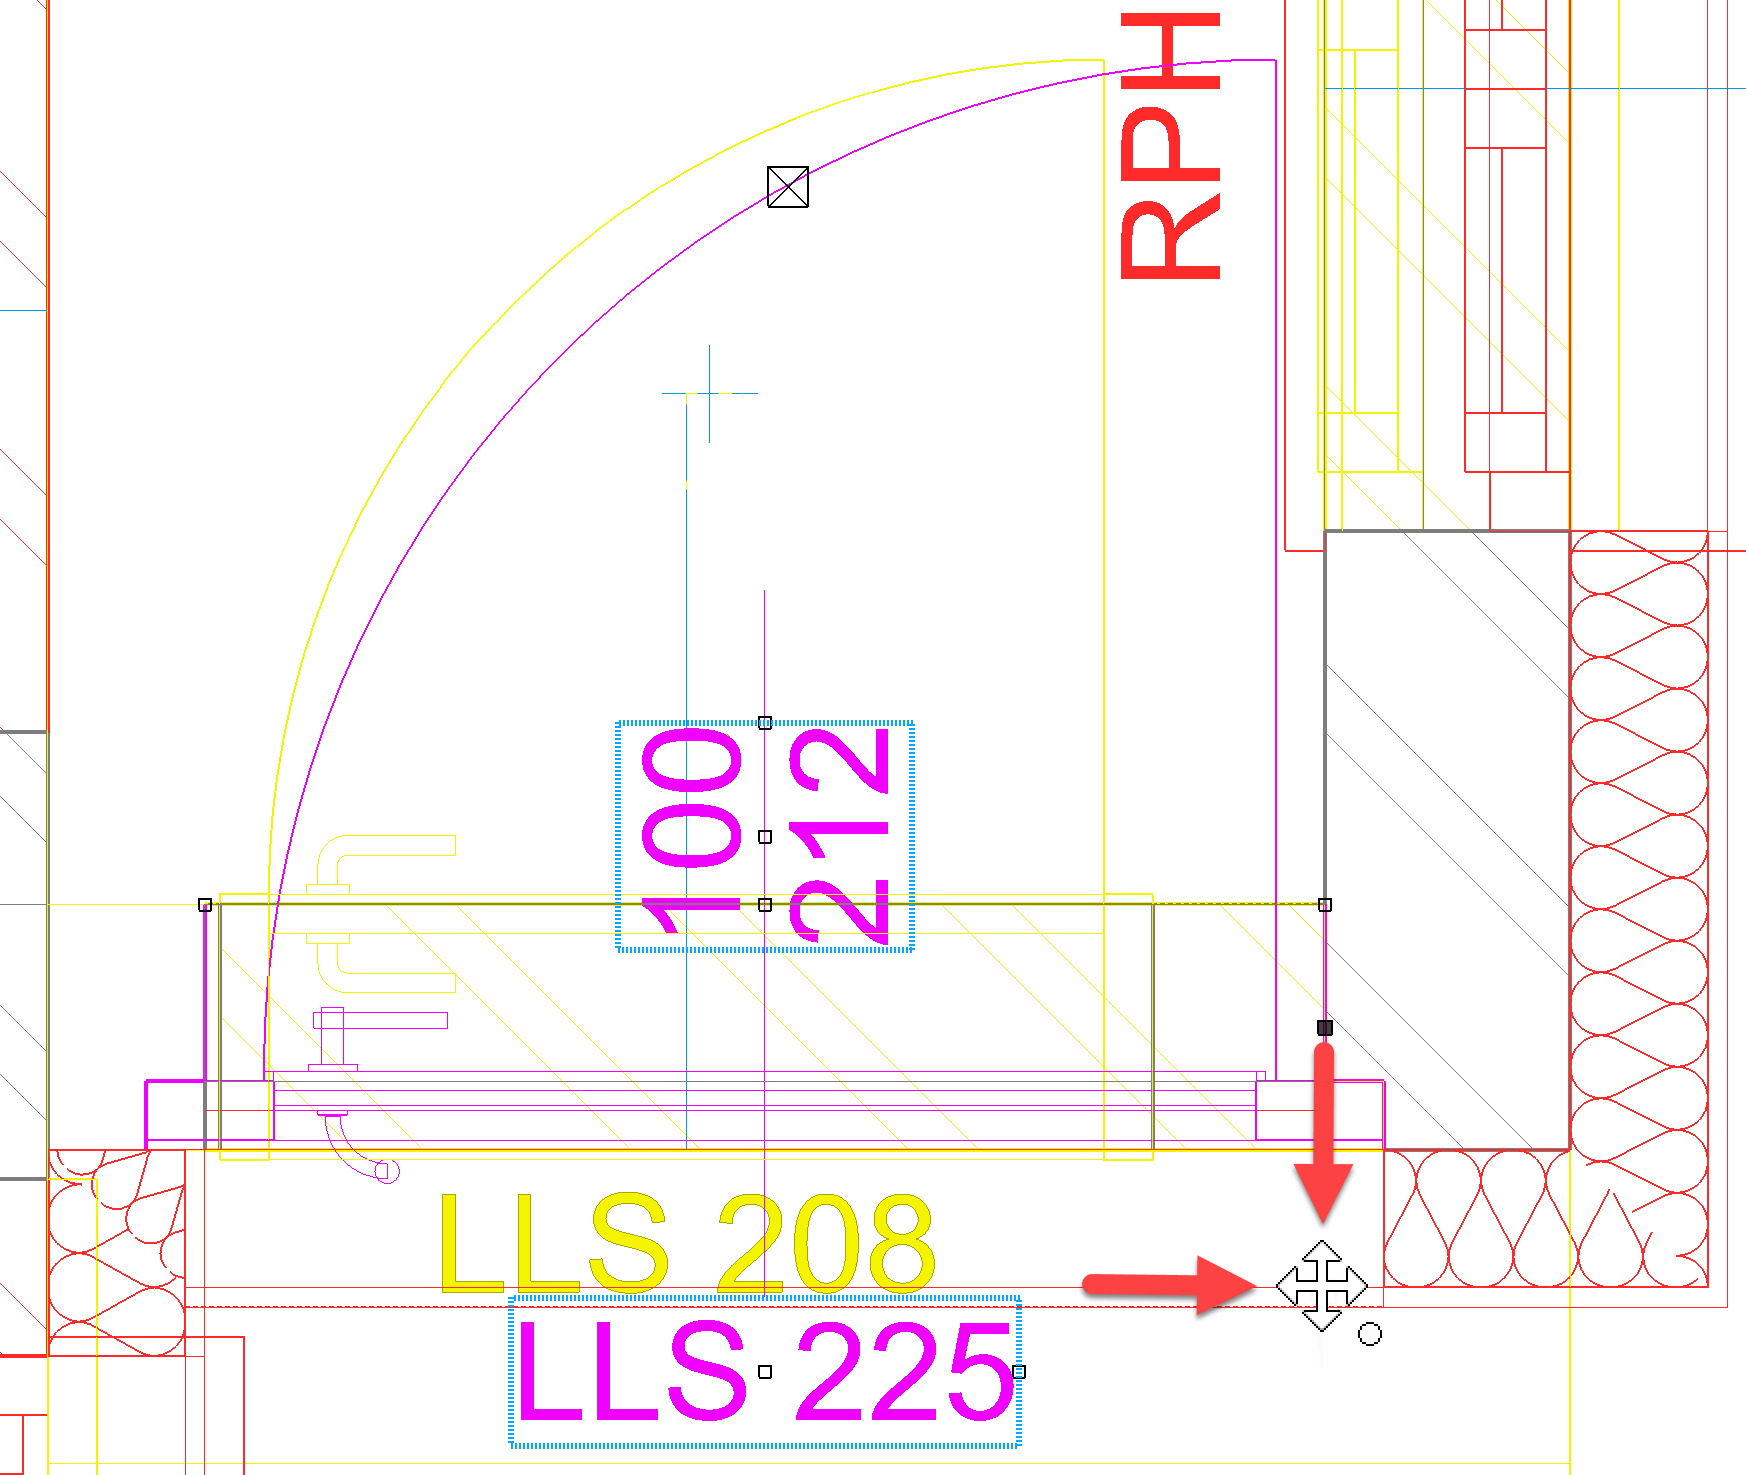
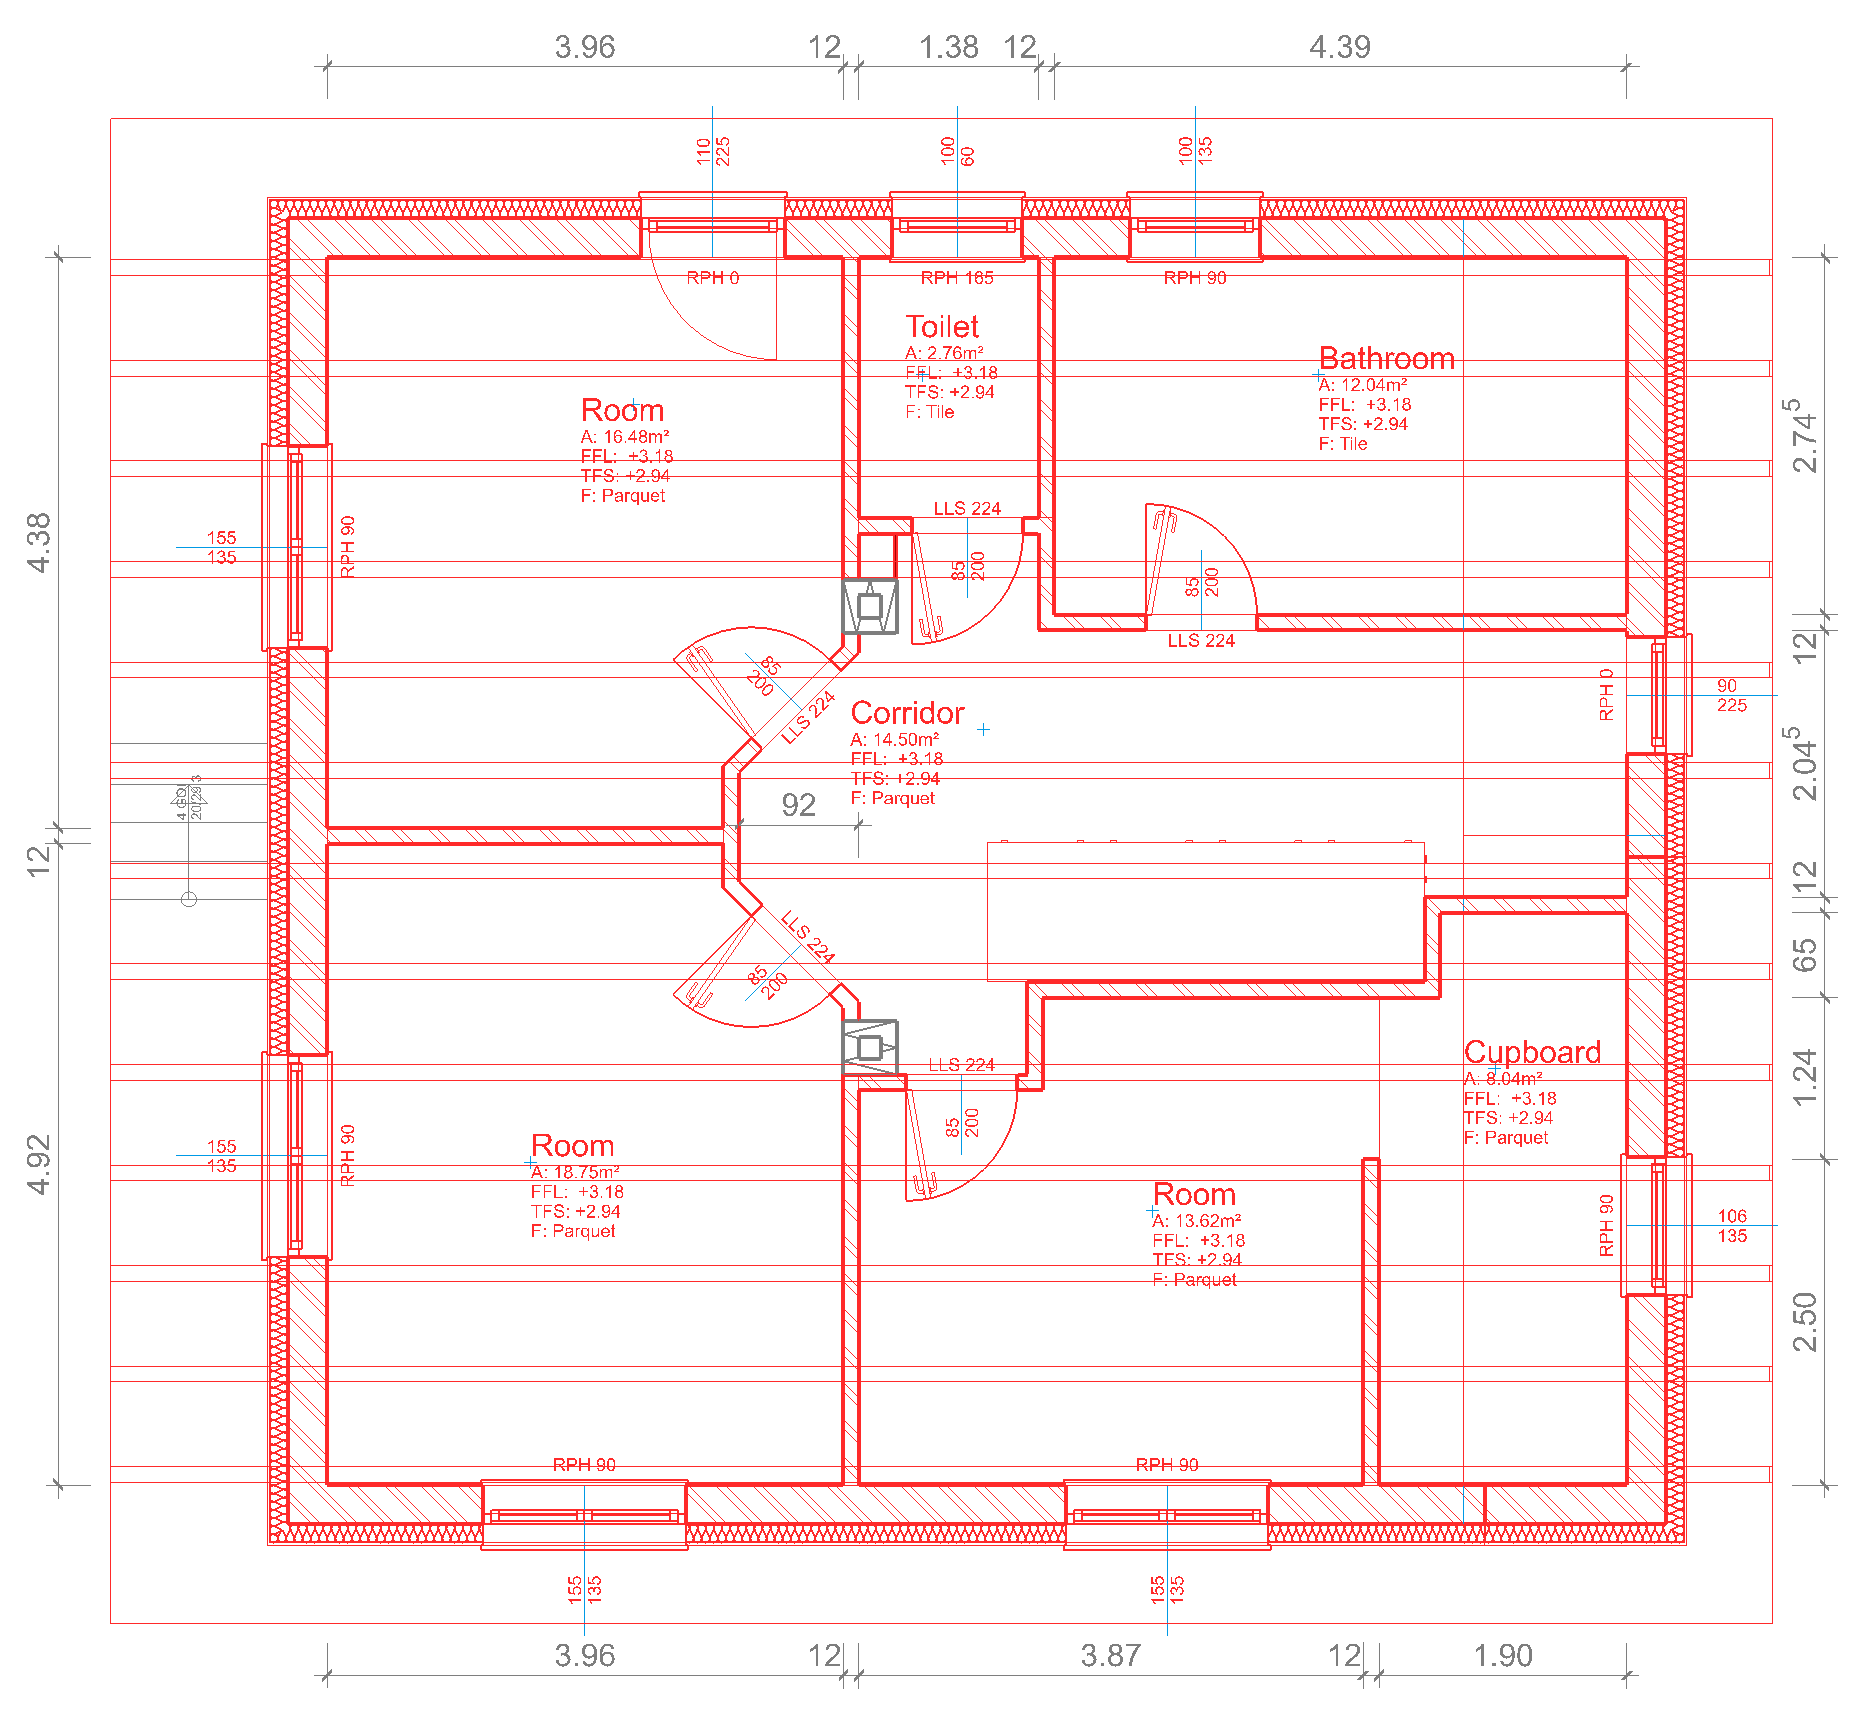
Now, replace the two windows in the lower wall in their original position and set the left dining room window 175 cm from the corner of the room. The automatic filling panels disappear where a new window will sit. In the case of the left dining room window, however, there are three different zones:
-
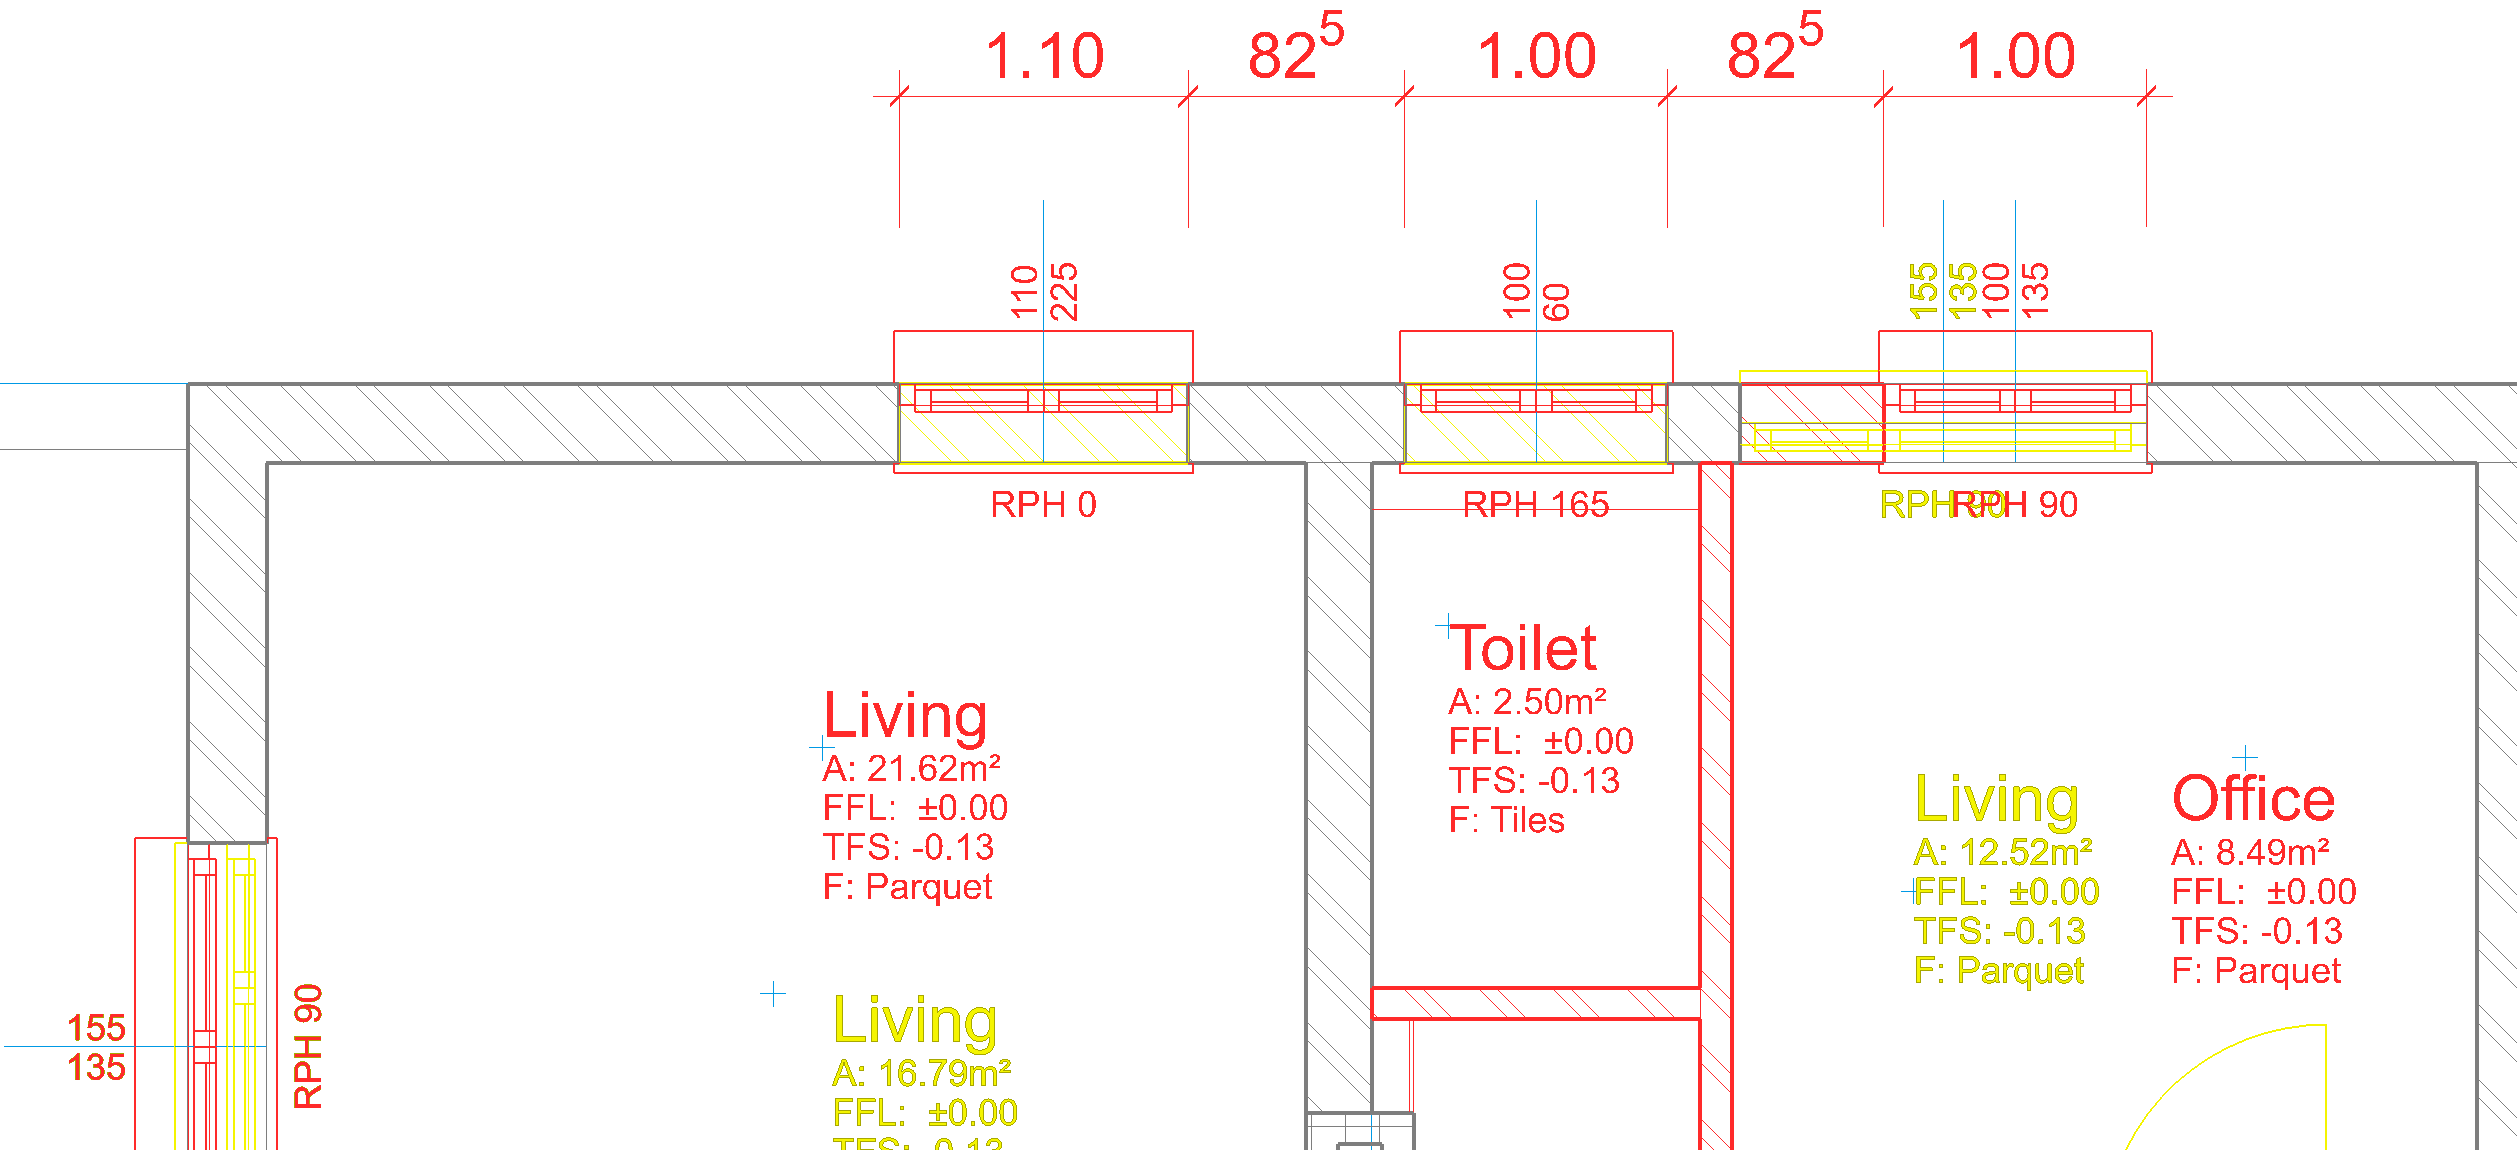
Replace the living room window, in the same manner as lower wall windows, with new windows that are in the same positions. Then place the new windows in the upper wall as indicated so that the right edge of the right window remains congruent (arrow).
-
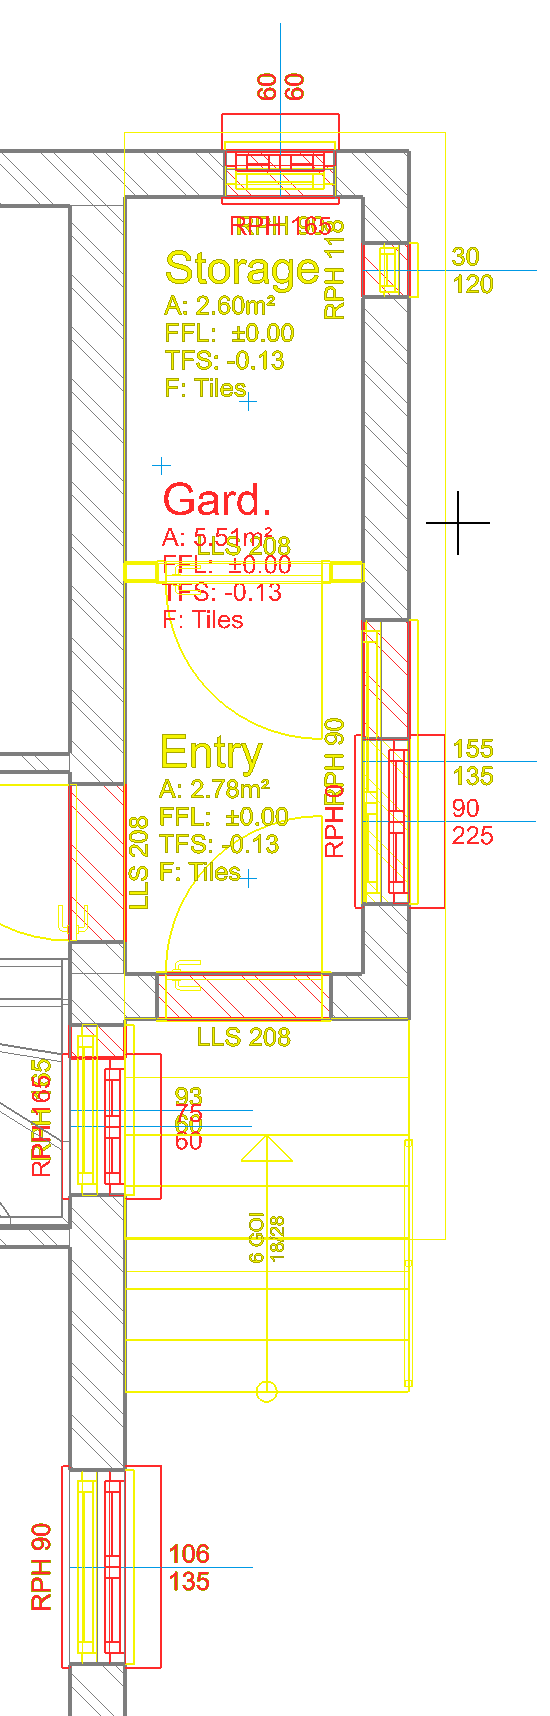
Use the same principles to reset the windows in the entrance area.
Modification of exterior wall in ground floor
Workshop
-
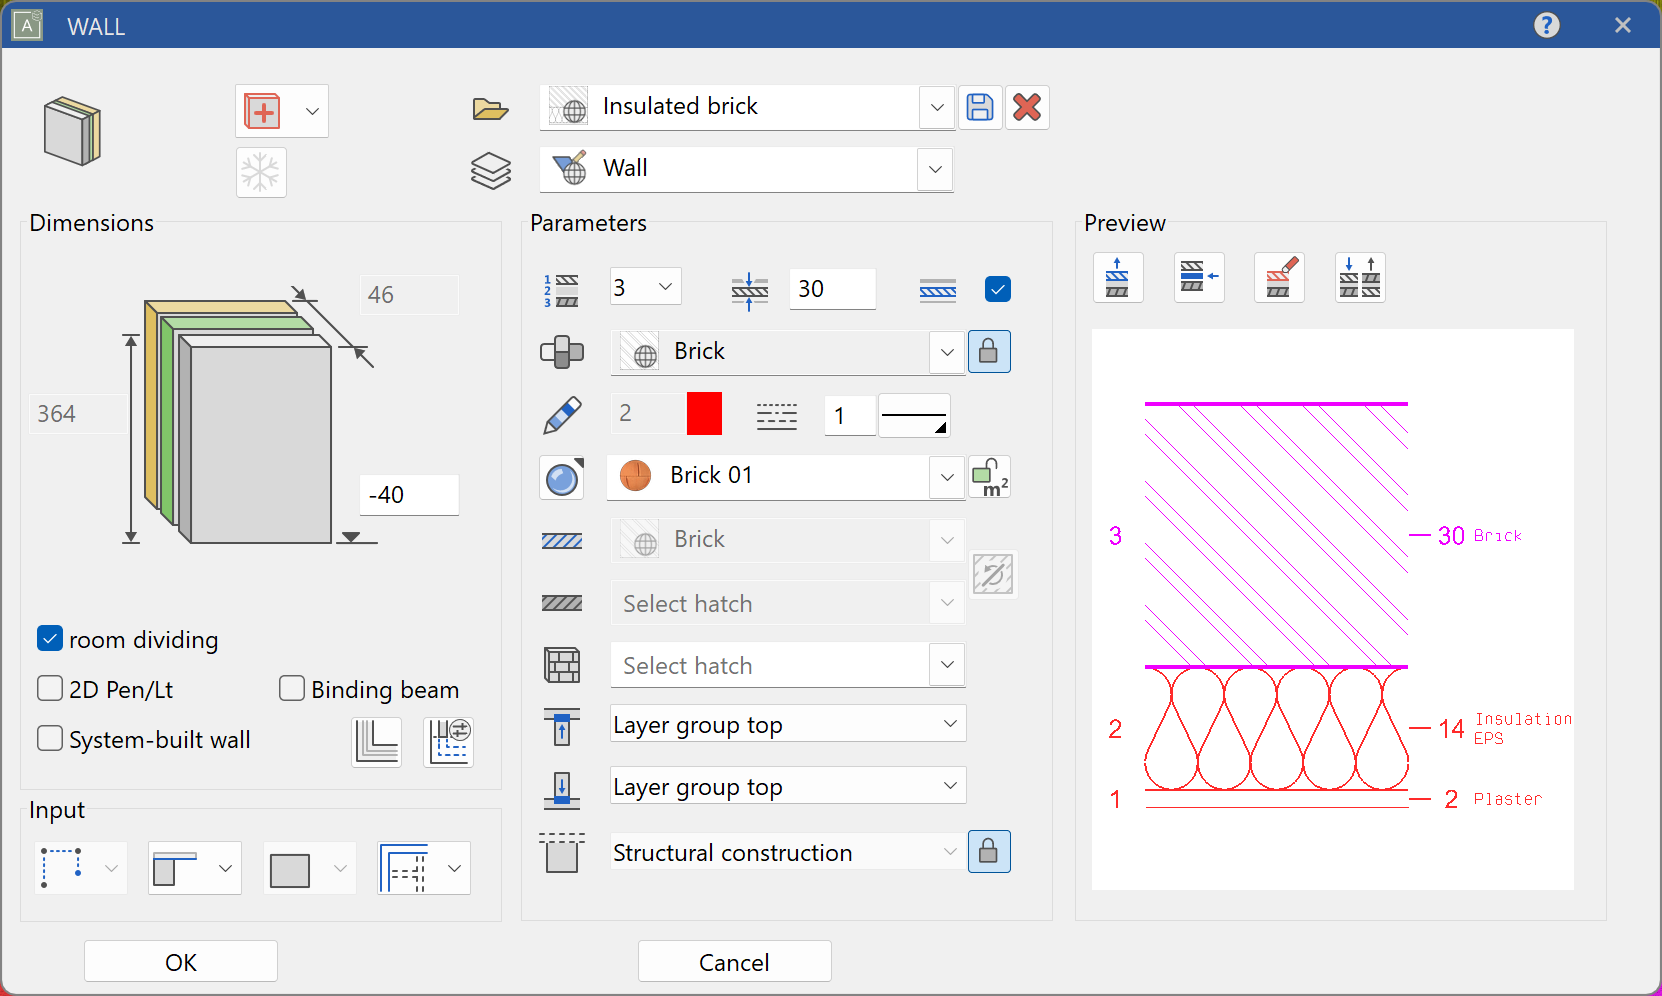
Now create a new wall with the record type (1) Insulated brick, invert the layers (2), delete the brick as we already have that material in the original wall (3) and finally alter the thicknesses to 14 cm Insulation ESP and 2 cm Plaster.


Cover the entire ground floor with this wall.
-
Separate the insulation wall where the existing walls are also separated.
-
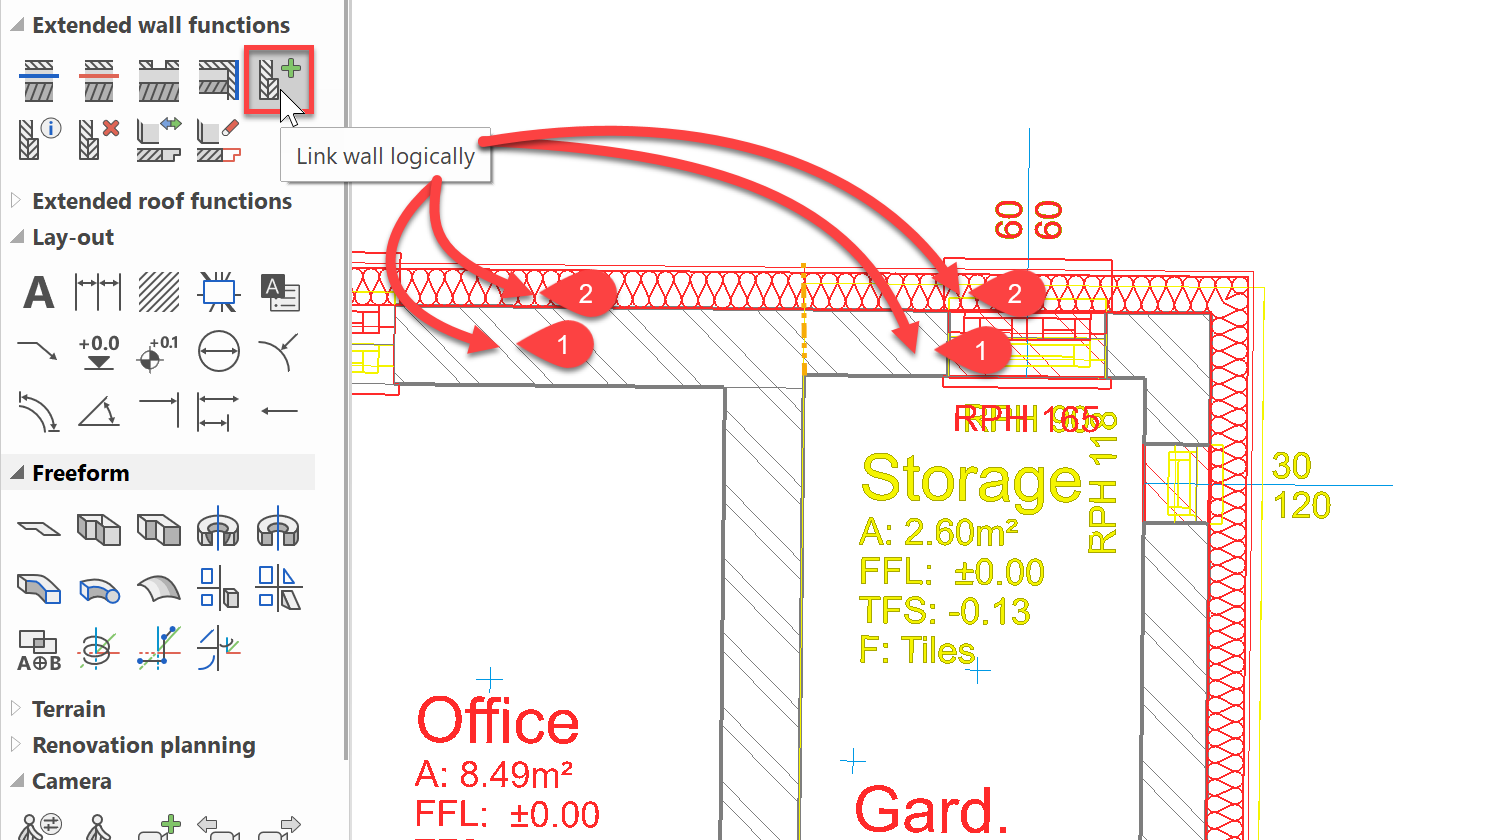
So that this new wall is treated as a single wall together with the existing wall of the openings, link these two walls together.
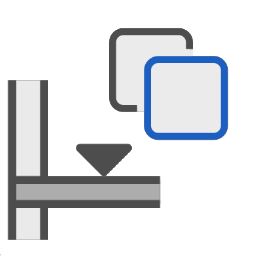
Select Link Wall logically, click on the existing wall, then on the insulation wall attached to the outside. Select the command again and link the other existing wall to the new insulating wall. The two walls are now treated as one. Because the insulating wall has a New construction state, only the new windows have an effect on it.
Modification of doors
Workshop
-
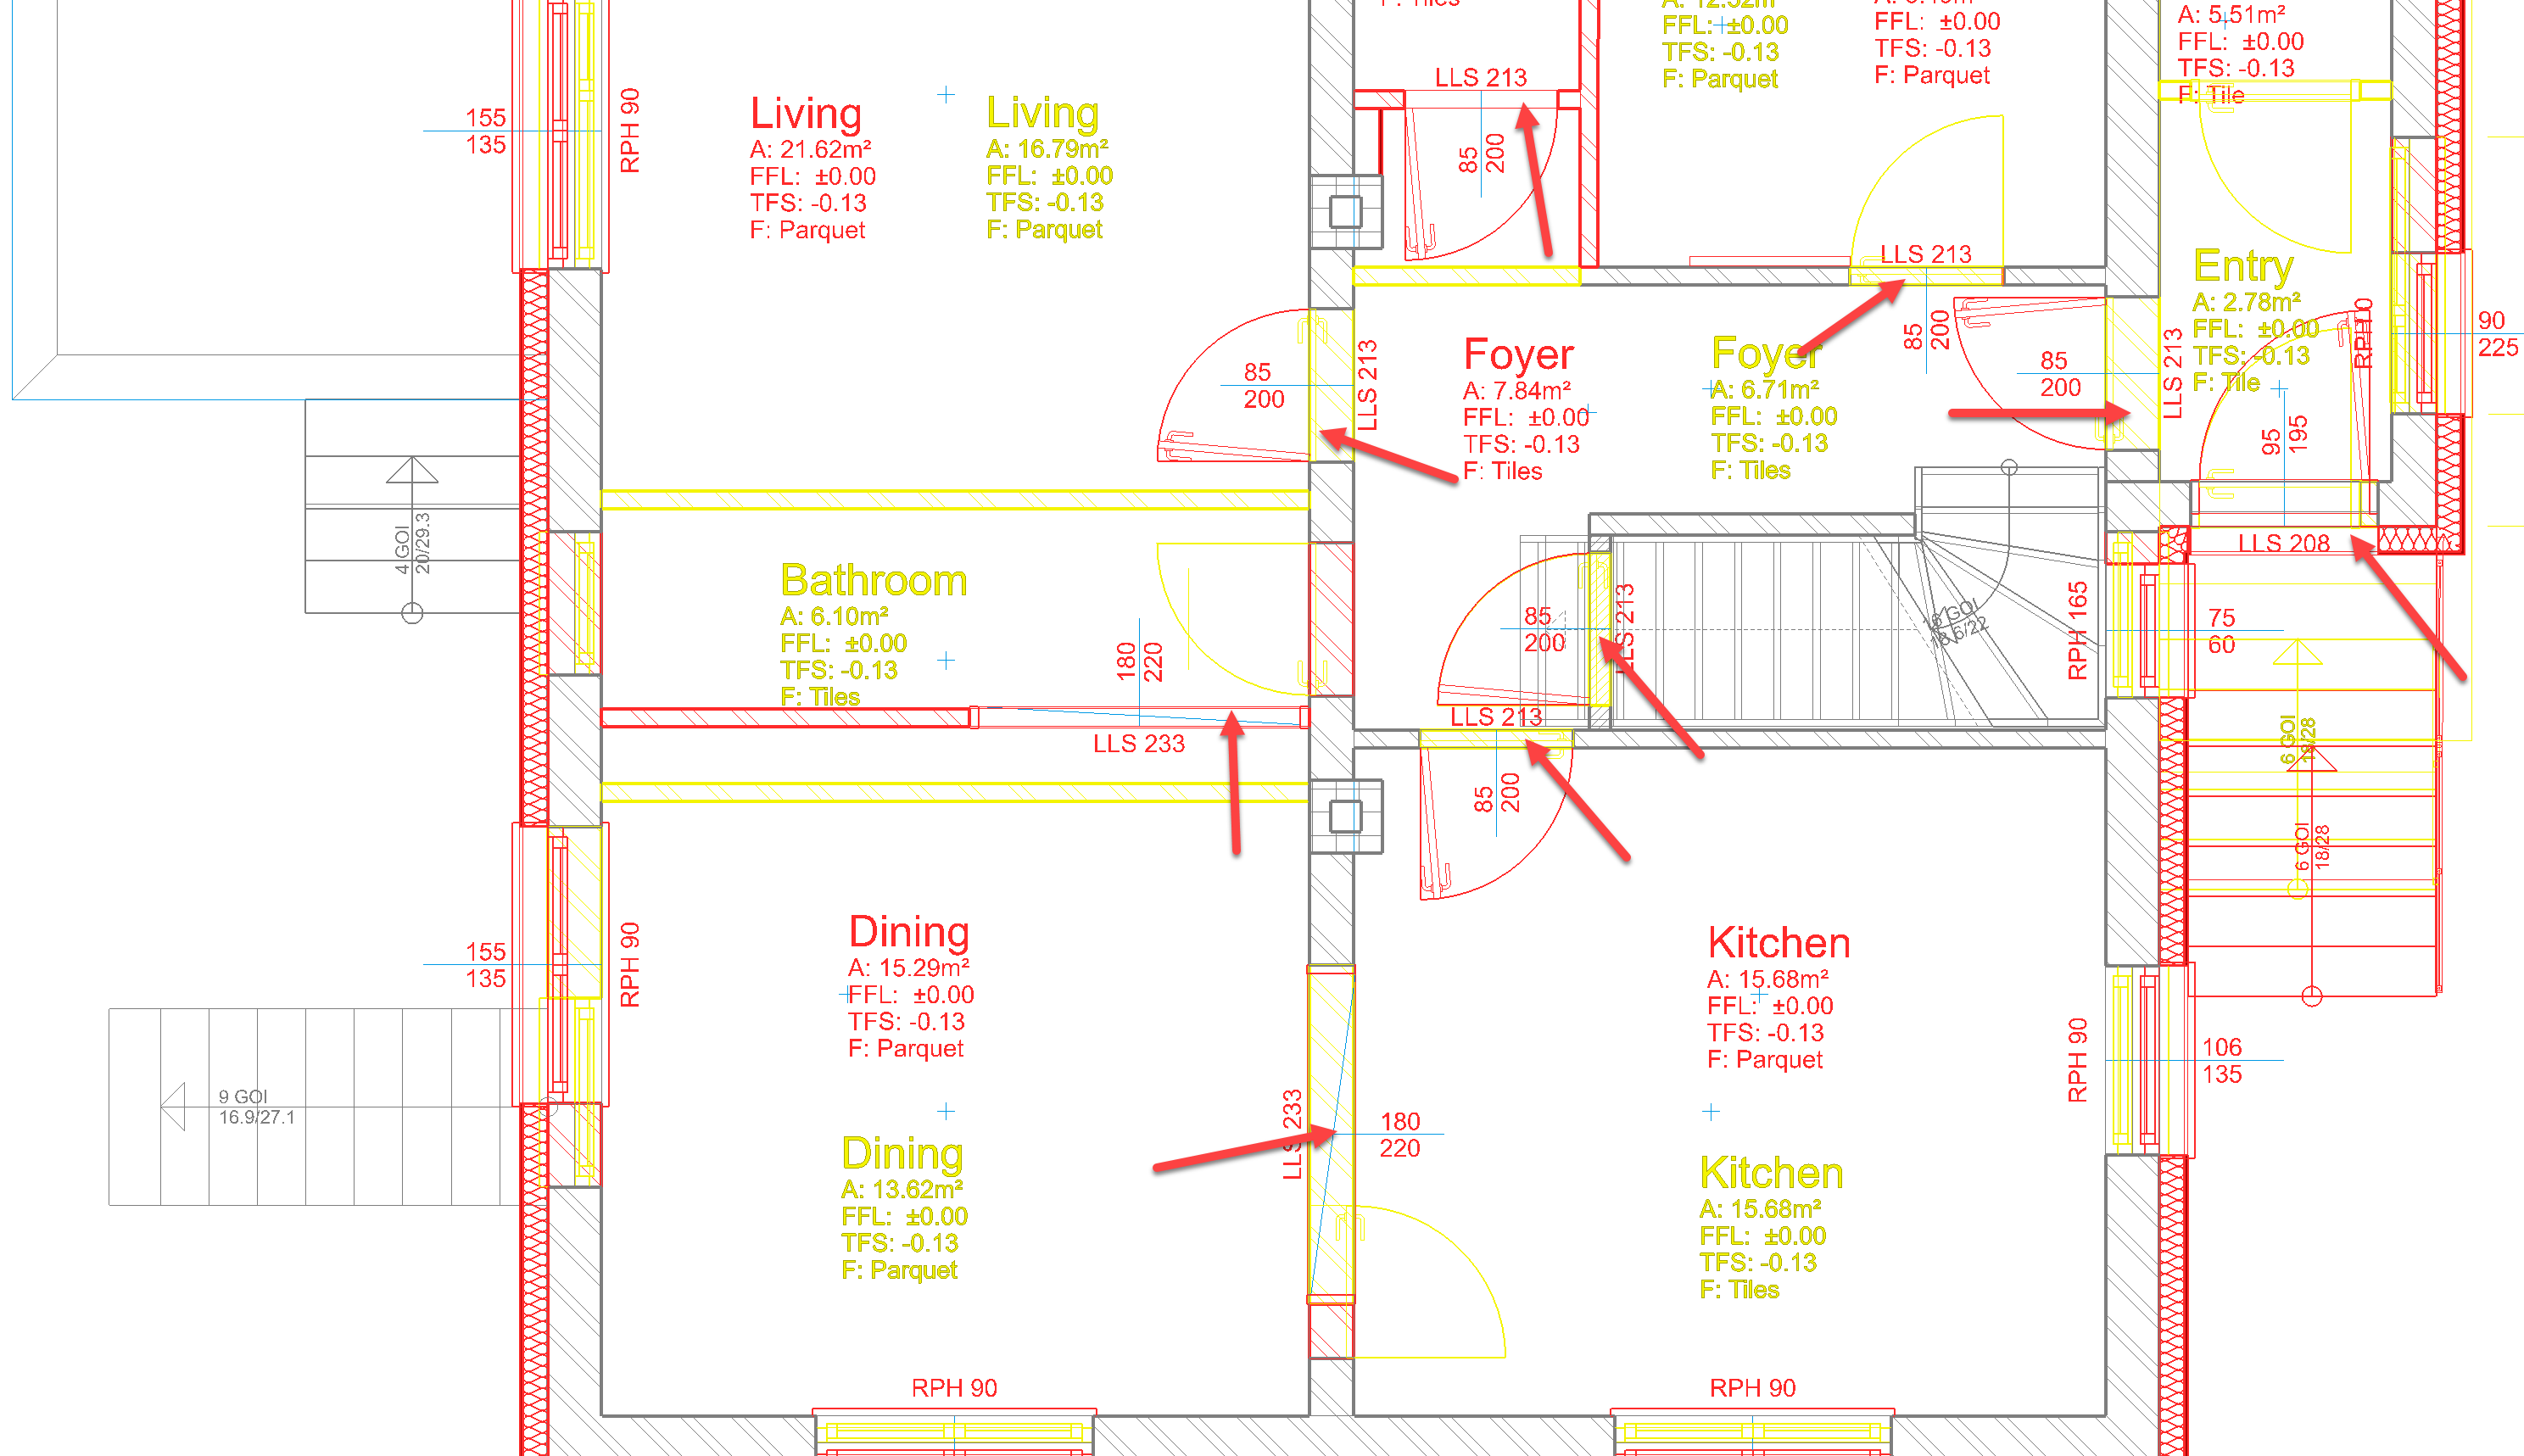
Now place new doors for the entrance and for the interior of the house. The inner doors will essentially be put in place of the old doors, but they are 5 cm higher. The door to the office will be changed to a Sliding door, and the door between the kitchen and lower living room should be replaced by a Passage 180x220 cm, which sits in the middle between the chimney and the outside wall. Set the same opening as shown between the two living rooms.
-
The front door will also be renewed with Entry door 2, whereby it should be noted that the new version should sit on the insulation level.
-
The outside access stairs are also being renewed so as to form a larger platform.

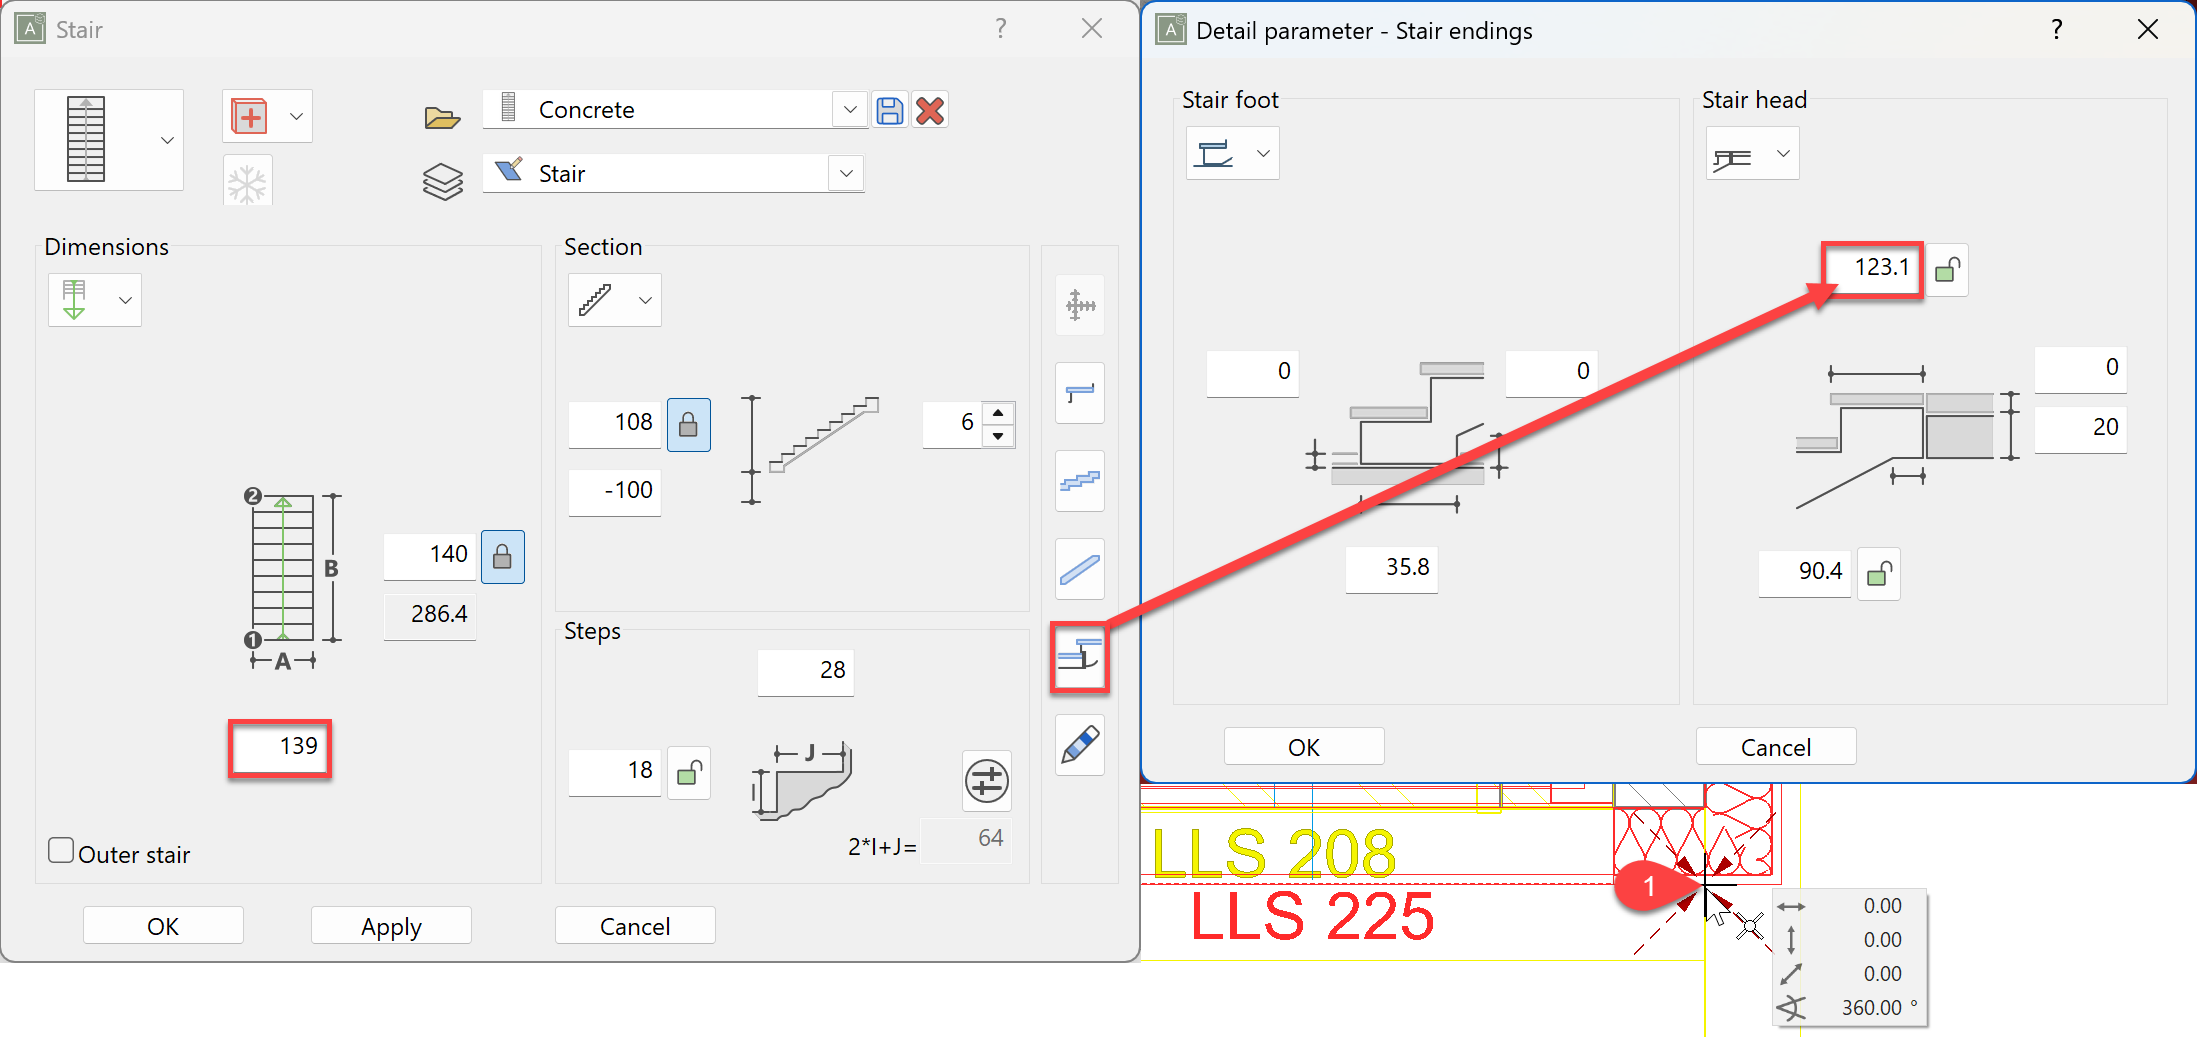
To do this, record the parameters of the demolition stairs, change the state to New construction, enlarge the upper-most step and reduce the width by the thickness of the new insulation.
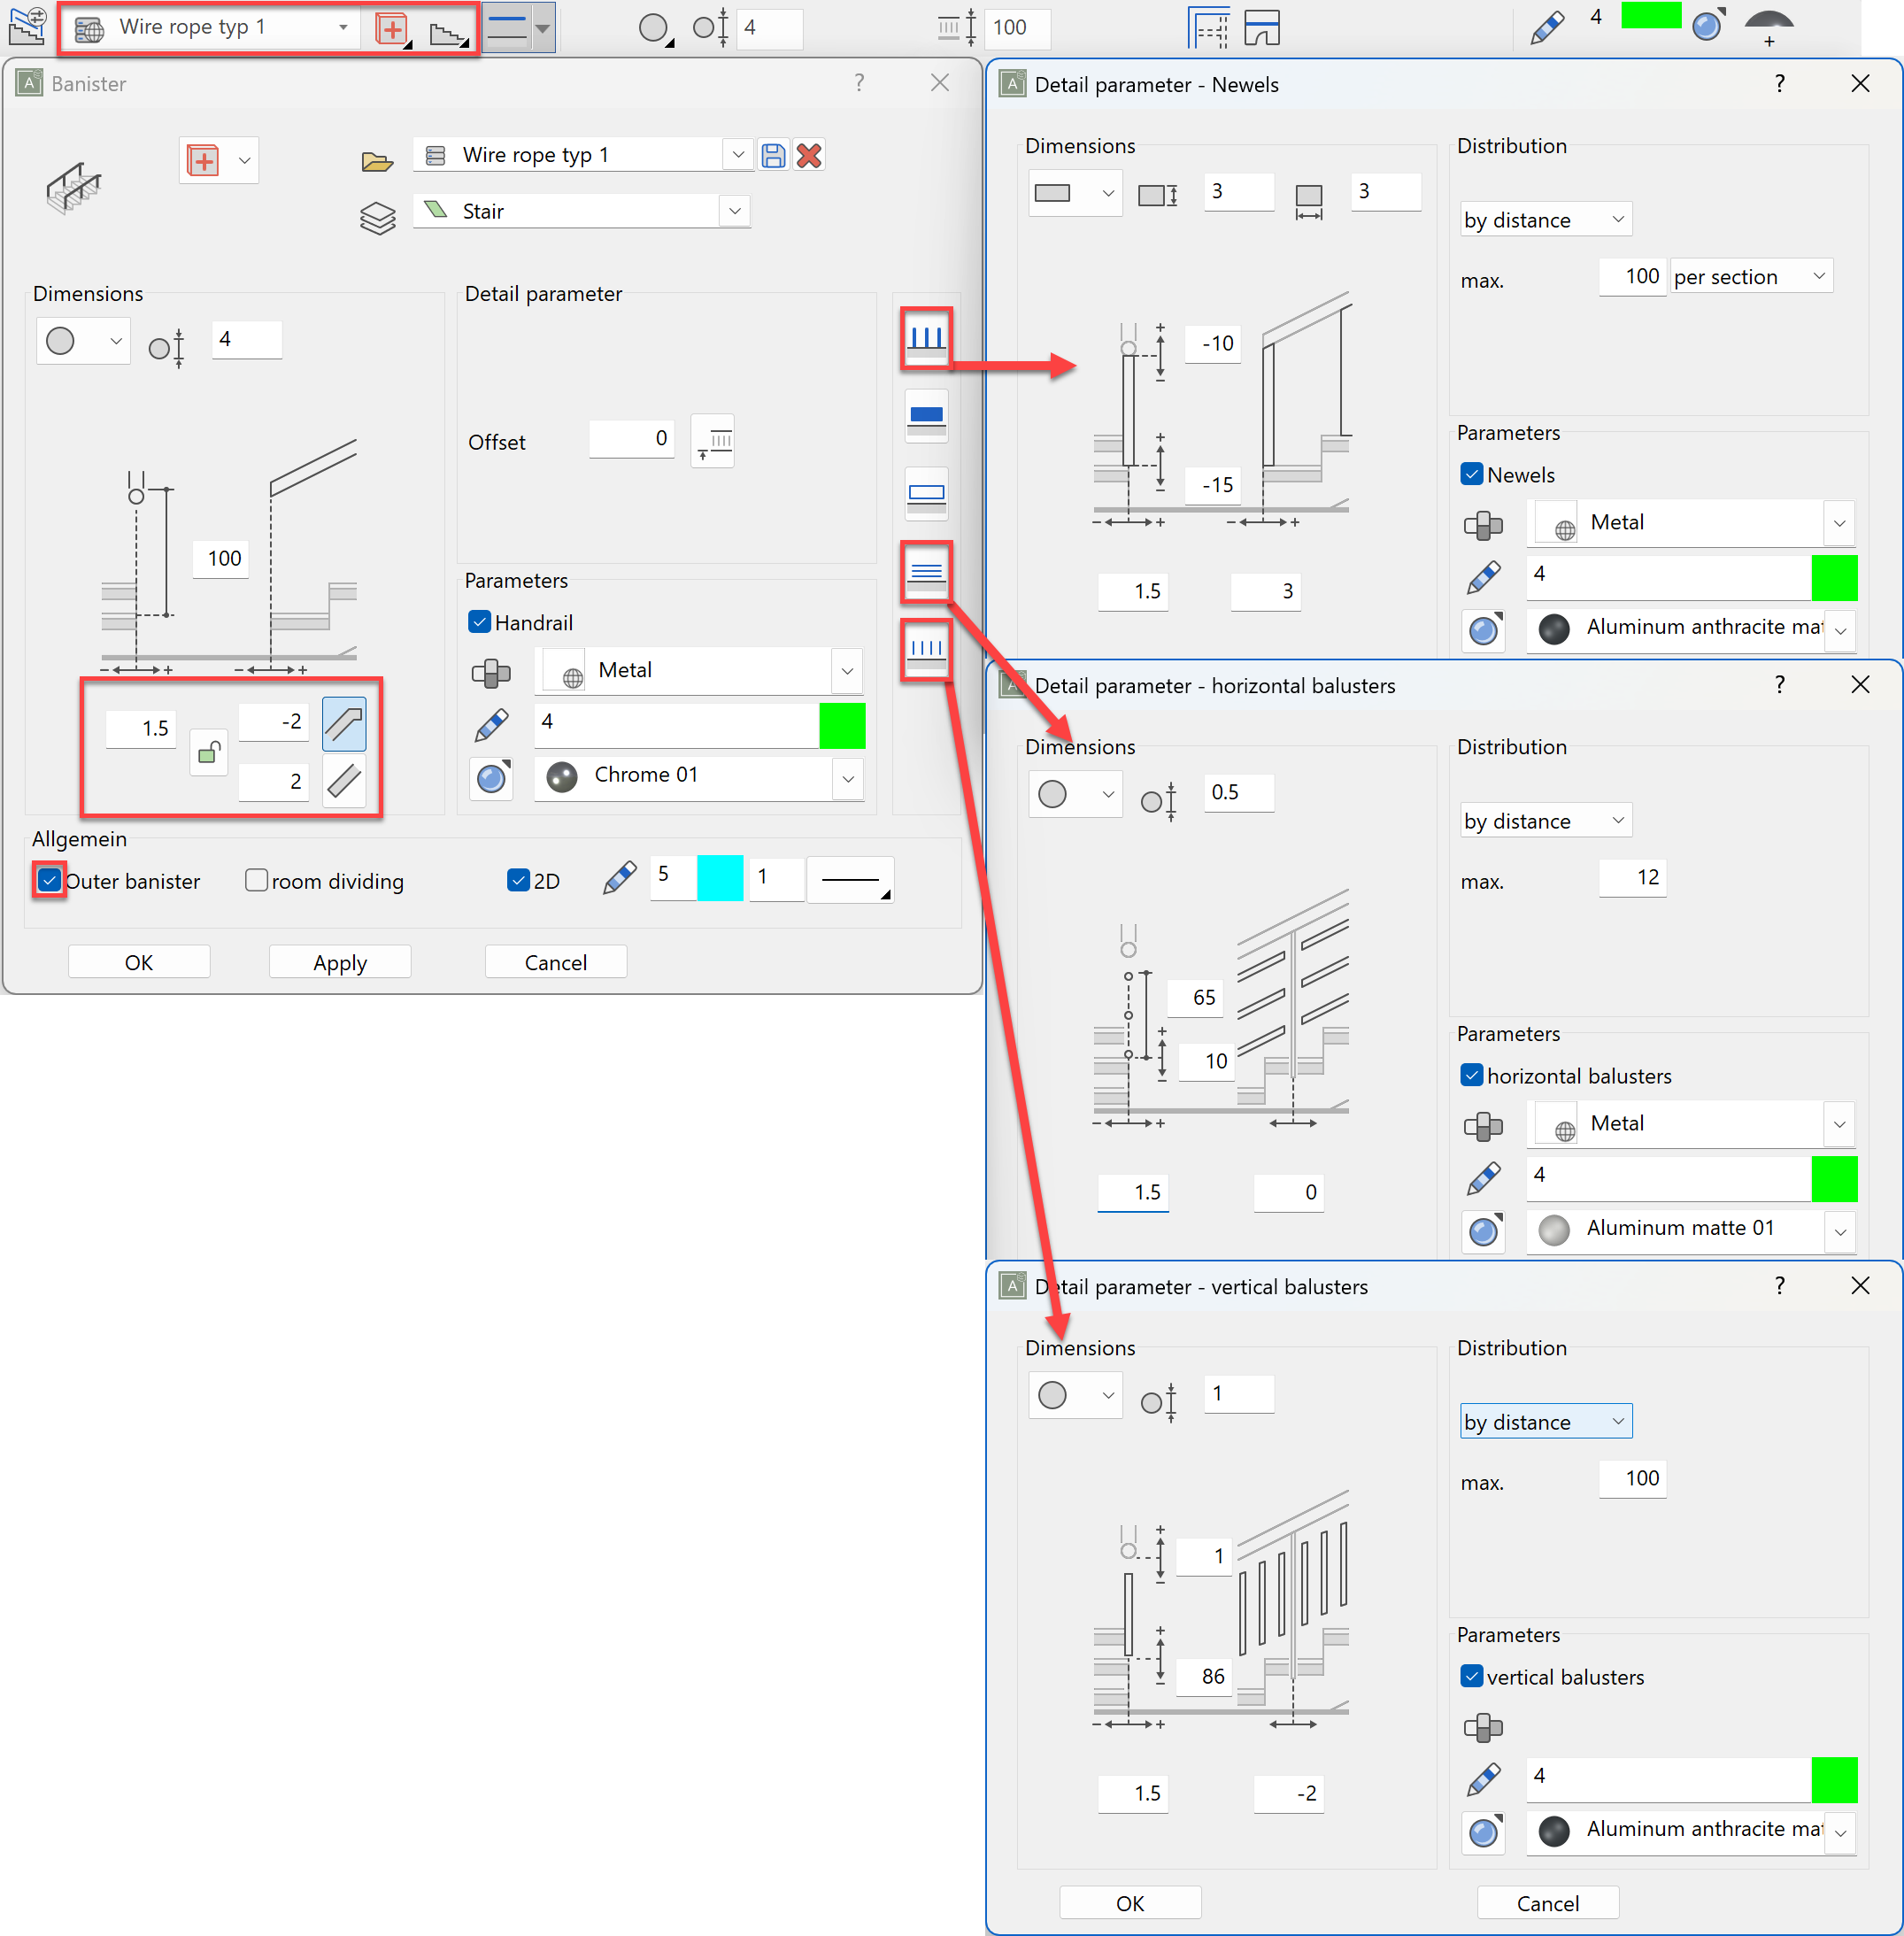
For the railing, use the record Wire rope type 1 and set the following settings. Be carful to set the entry type to stair for the first portion.
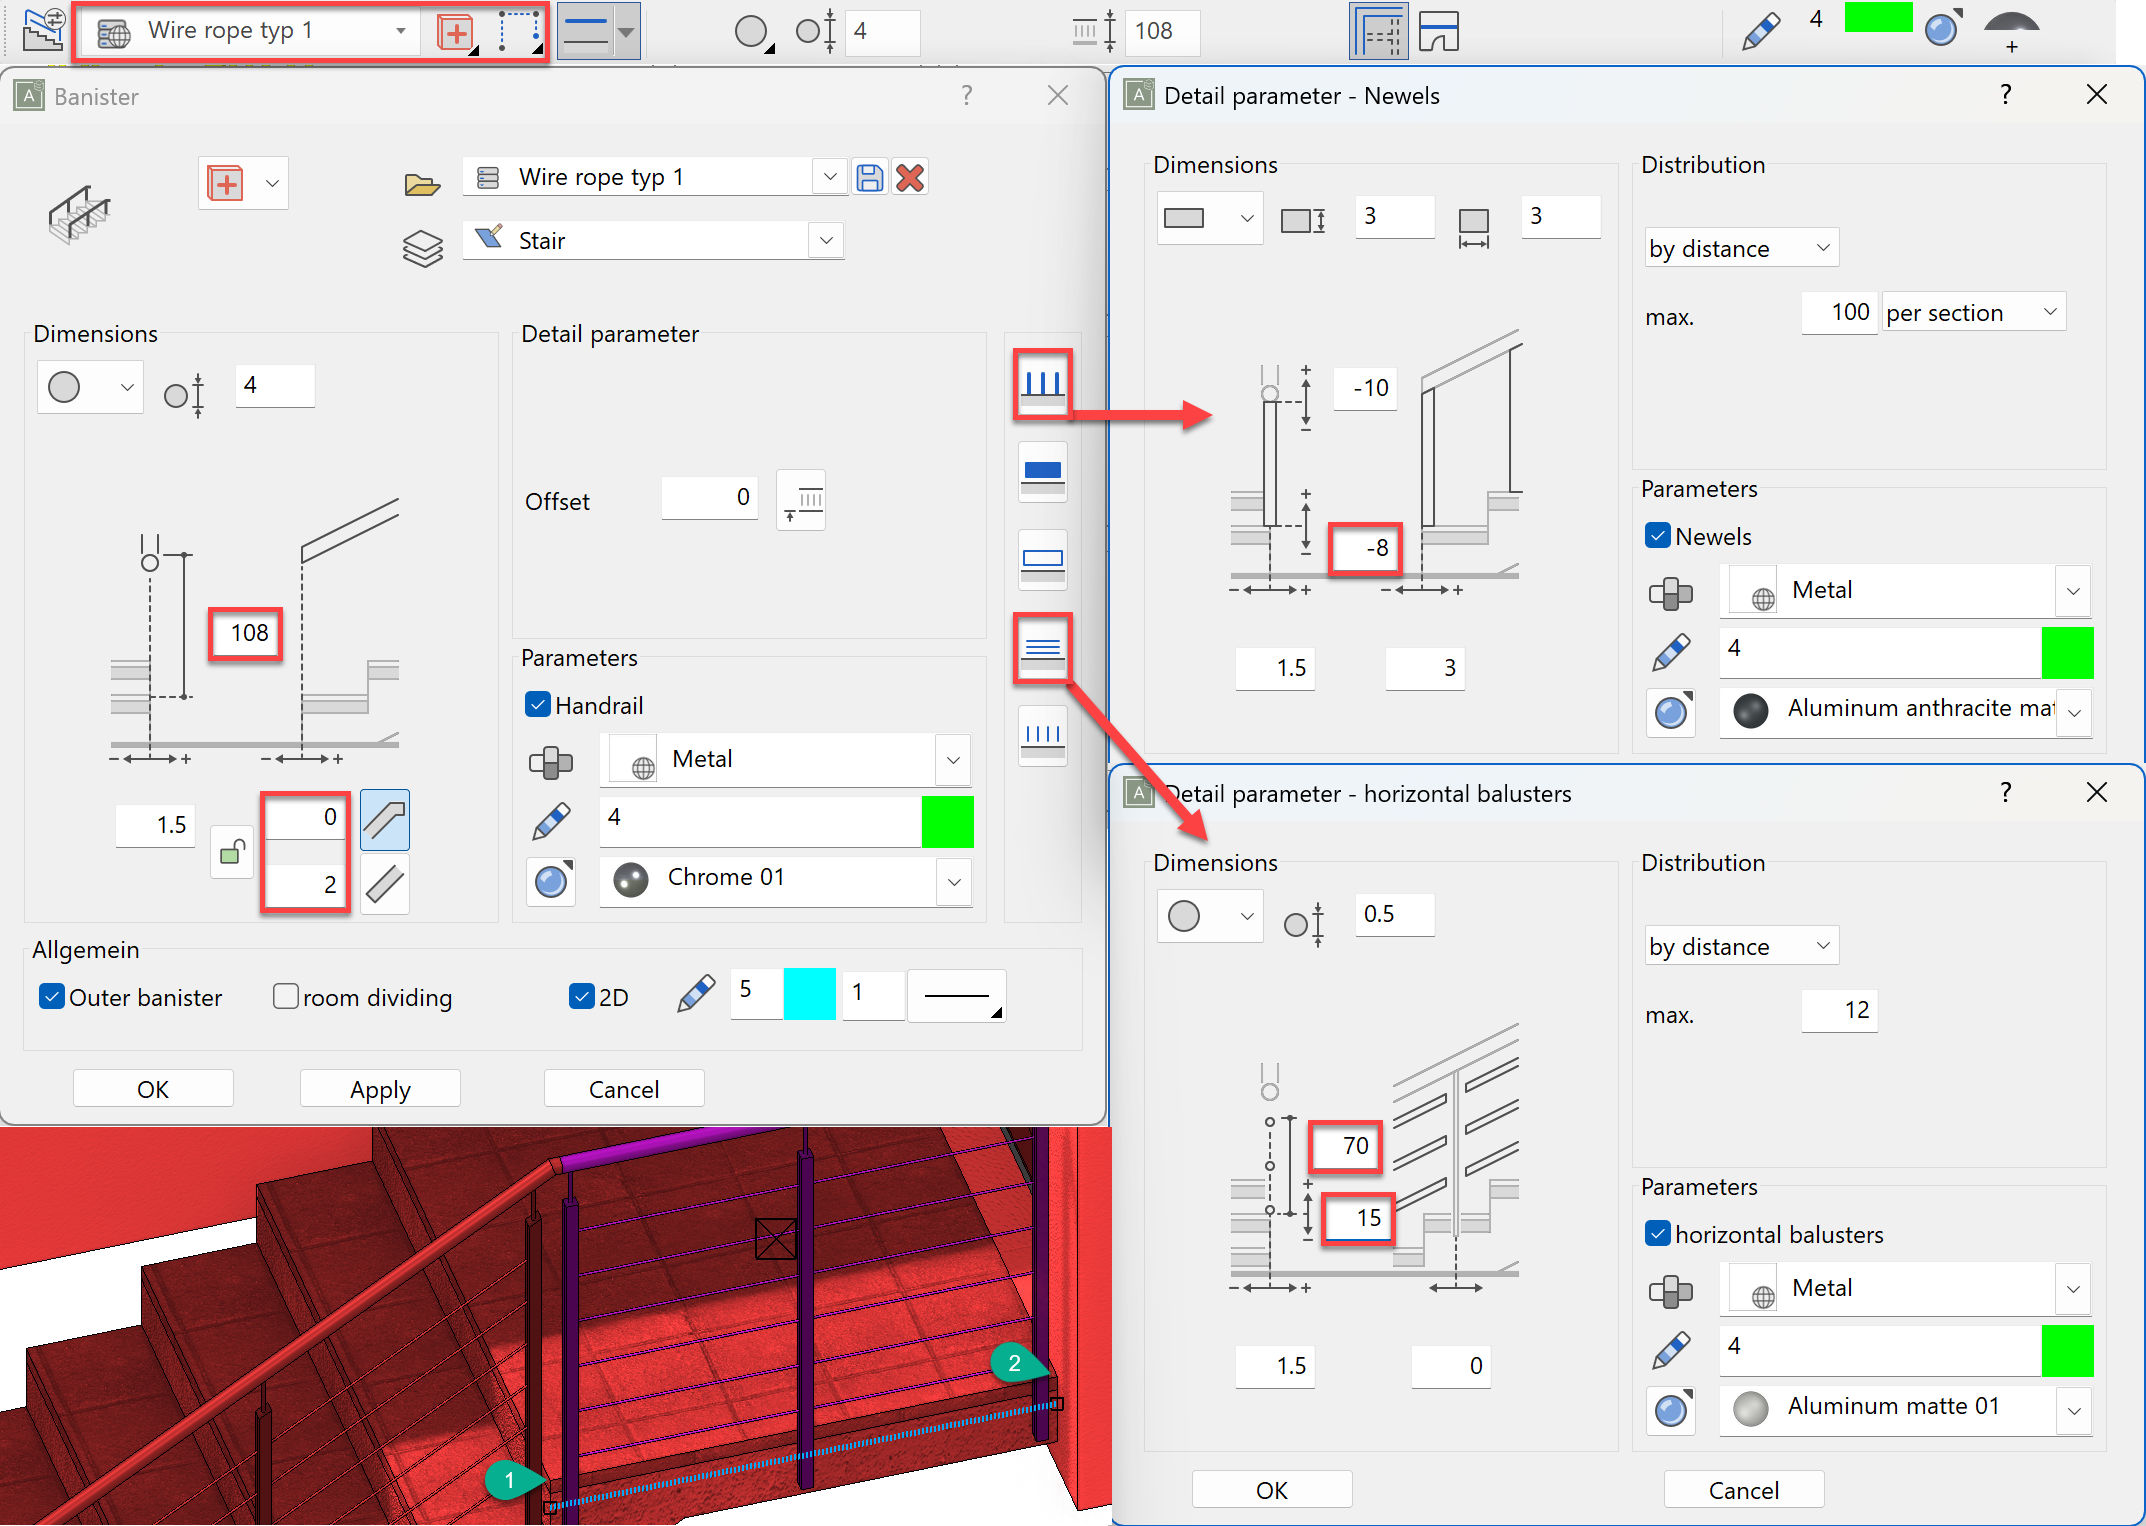
For the railing along the podest, use the same setting but some adjustments need to be made.
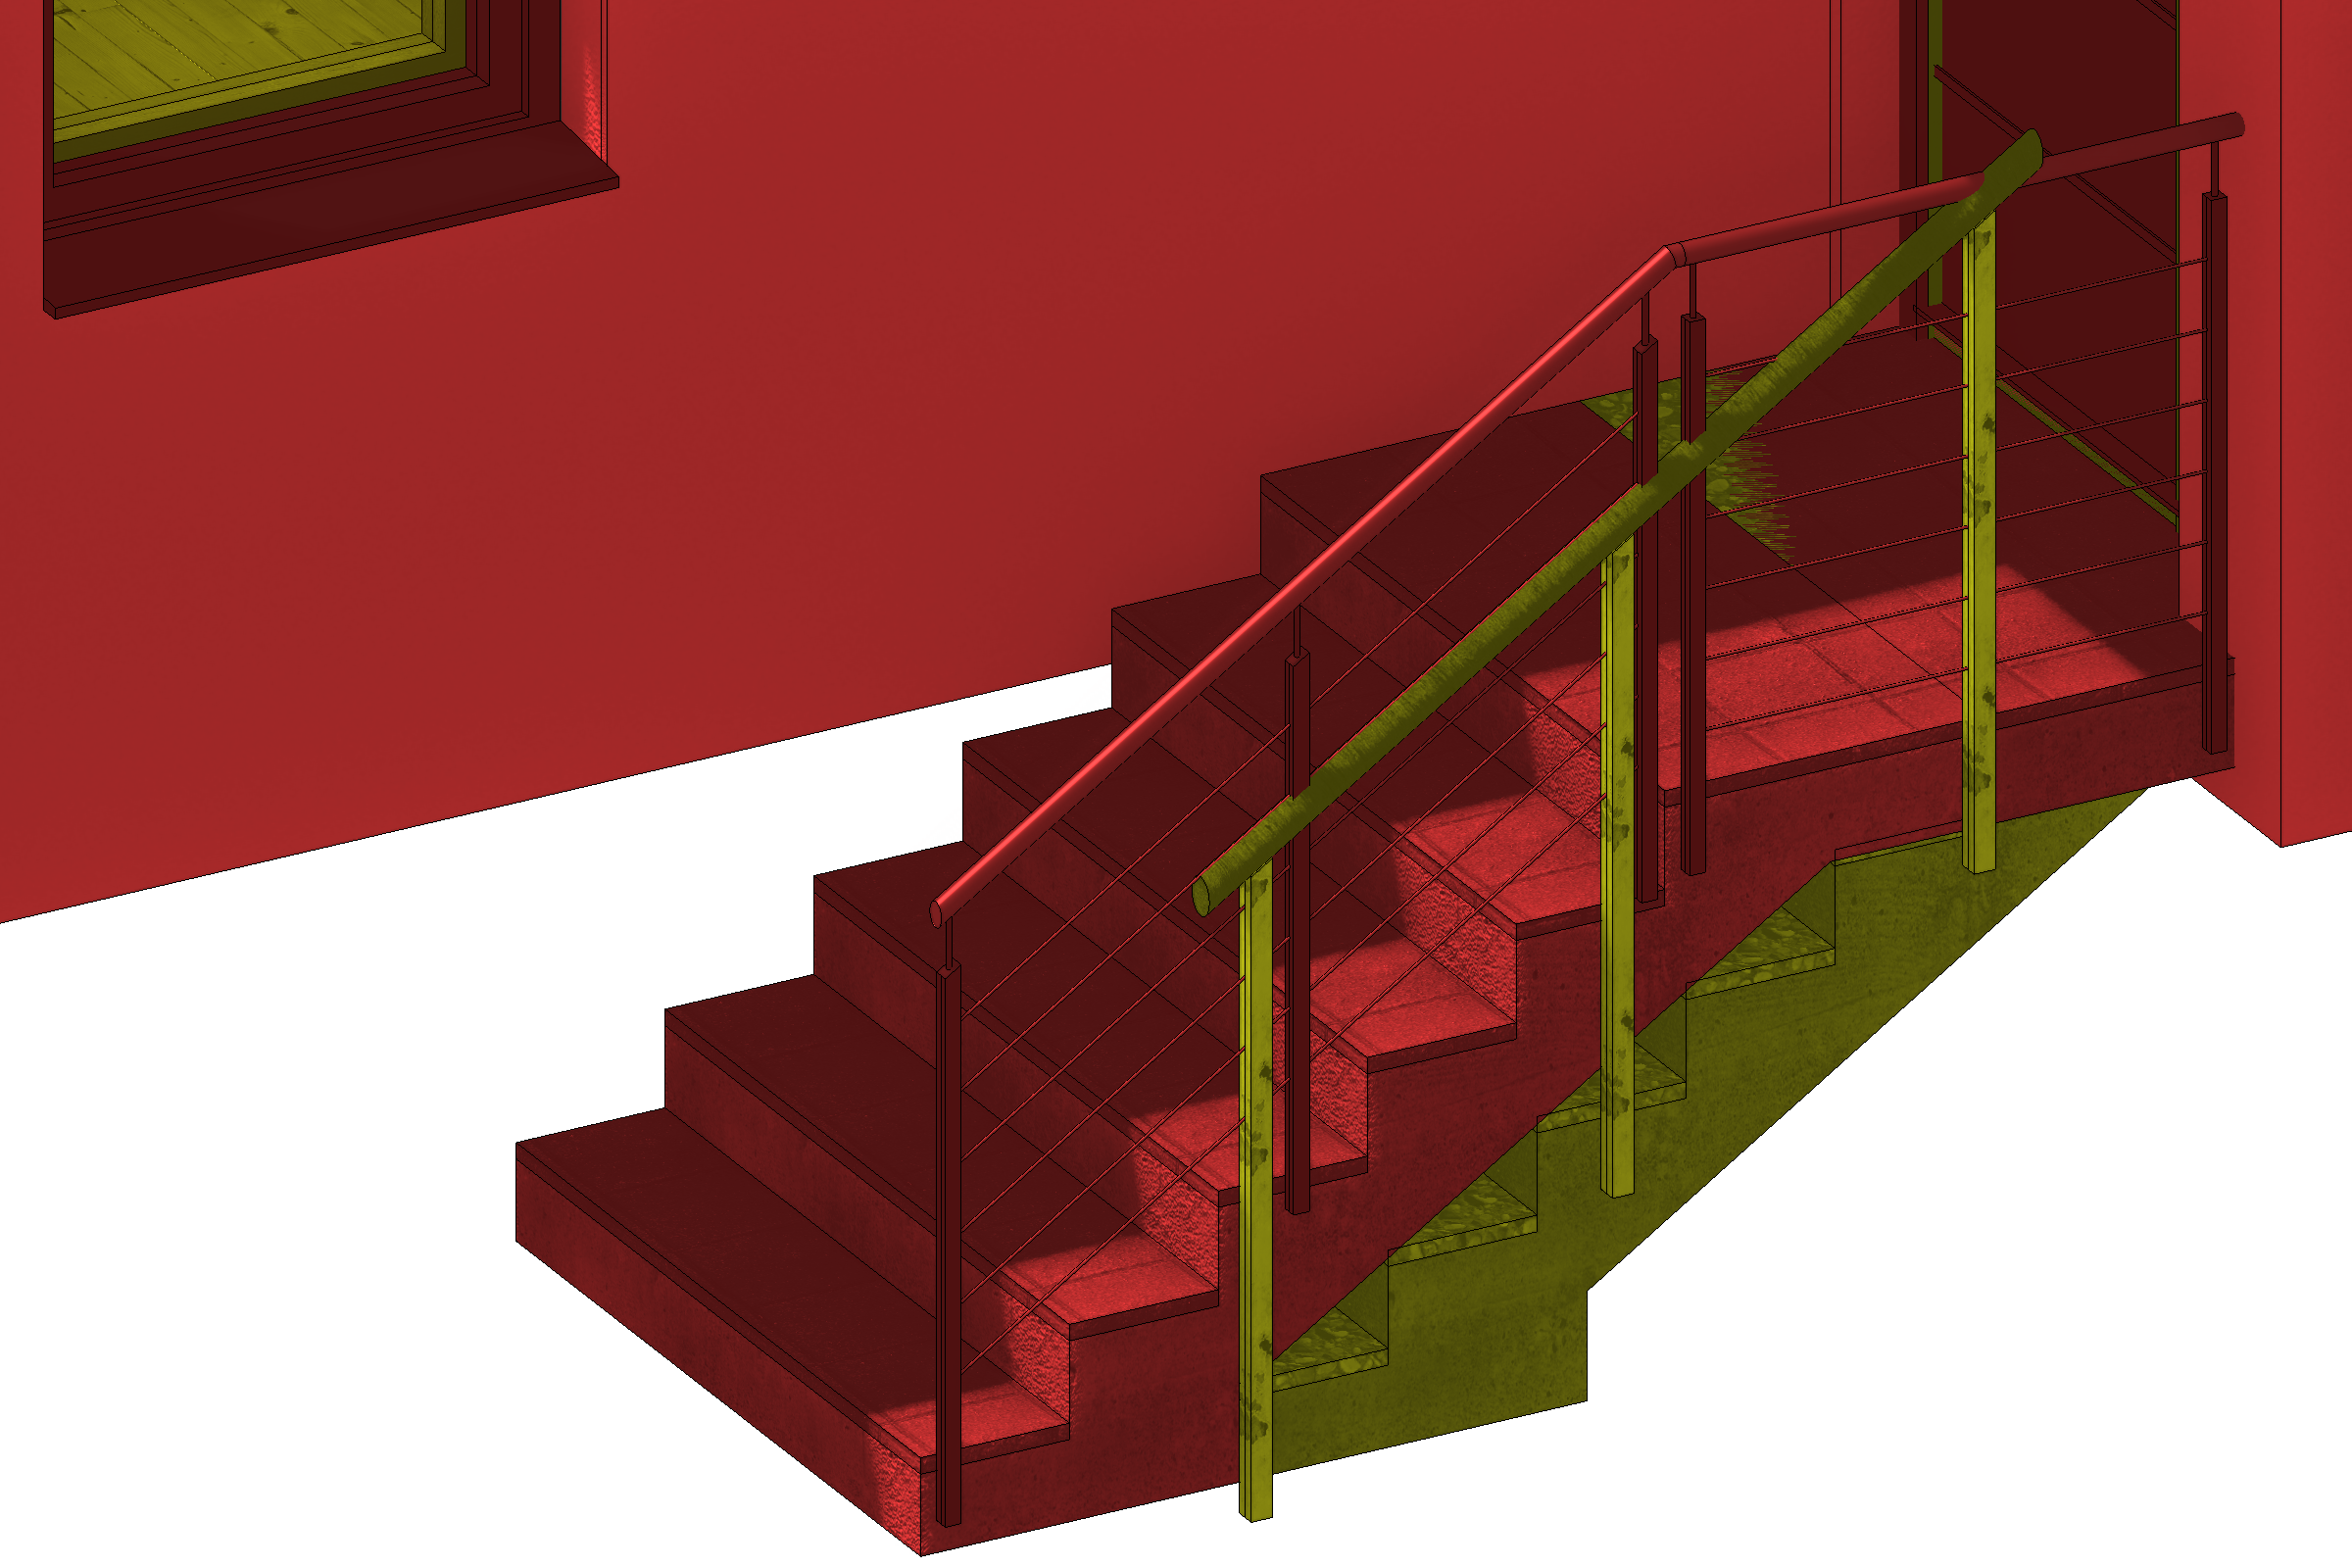
The entry stair should look something like this when finished.
Modification of exterior walls and the roof
Workshop
- Select the upper floor and define a new exterior wall based on the exterior wall template so that it corresponds to the renovated wall on the ground floor: 30 cm brick, 14 cm insulation and 2 cm plaster.
-
Then pull this wall around the upper floor with the ground floor displayed so that it sits flush with the ground floor wall on the outside. For the part above the entry way, use a wall with Height reference - to ceiling and set the lower edge to -40 cm.
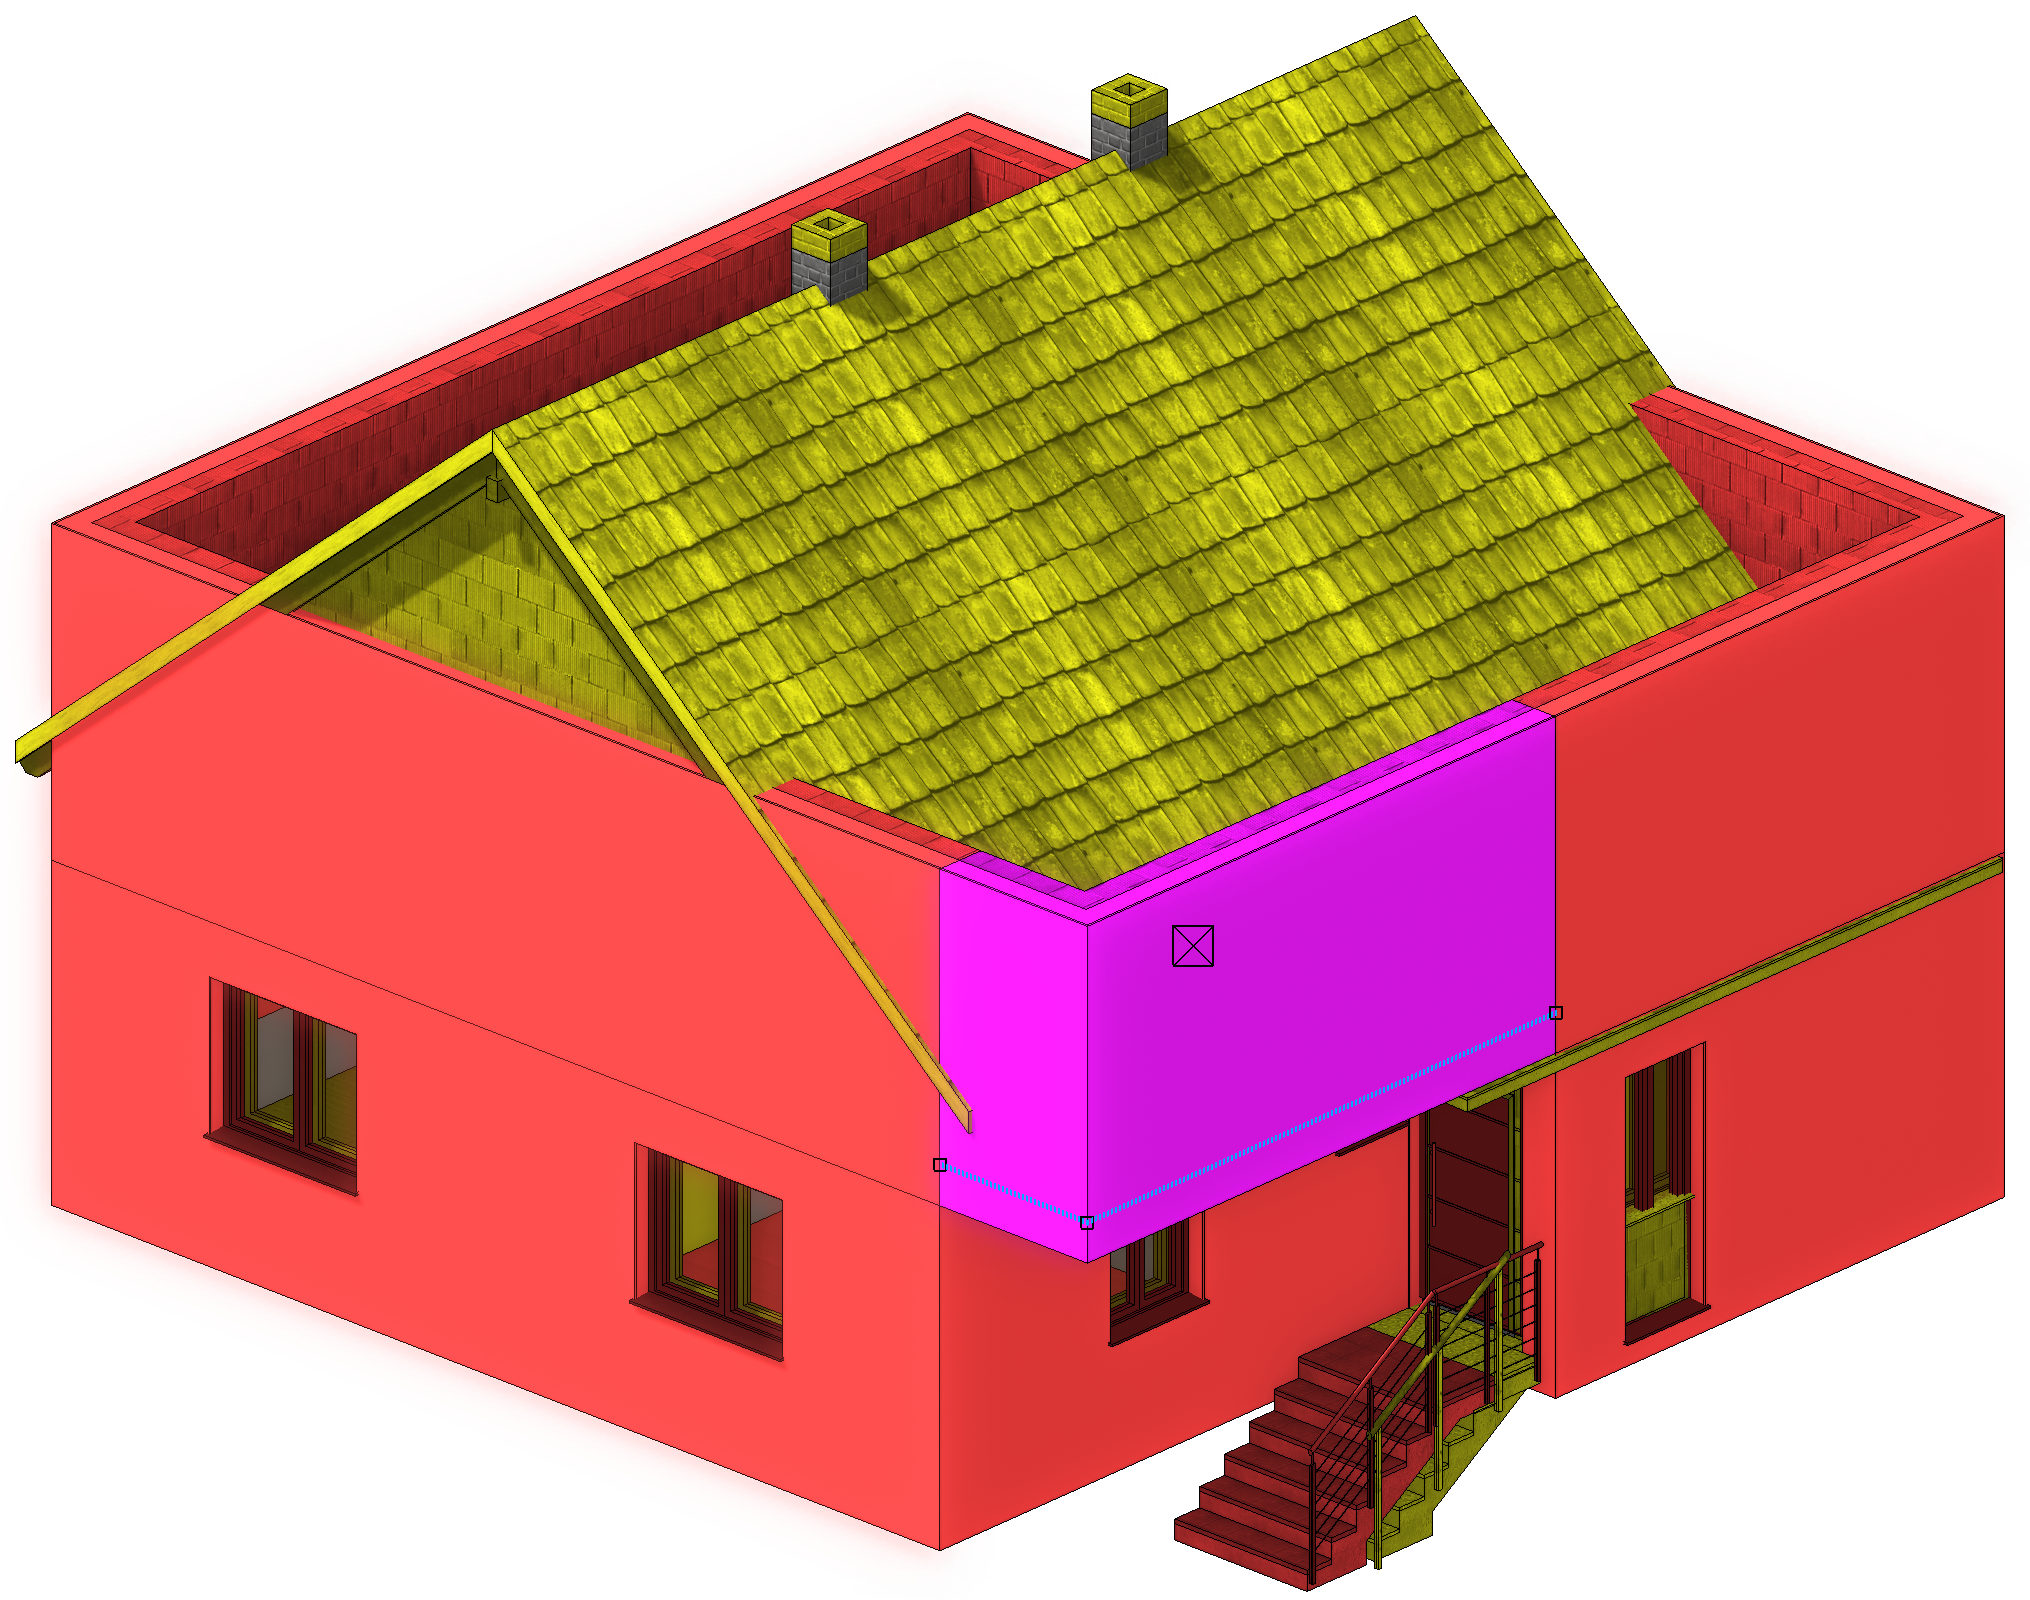
For the time being, the wall is only defined by the height that is provided in the storey settings. -
Show only Existing construction and New construction, mark all windows on the ground floor, except for the stairwell window and the small window at the front of the storage, and copy them to the upper floor:
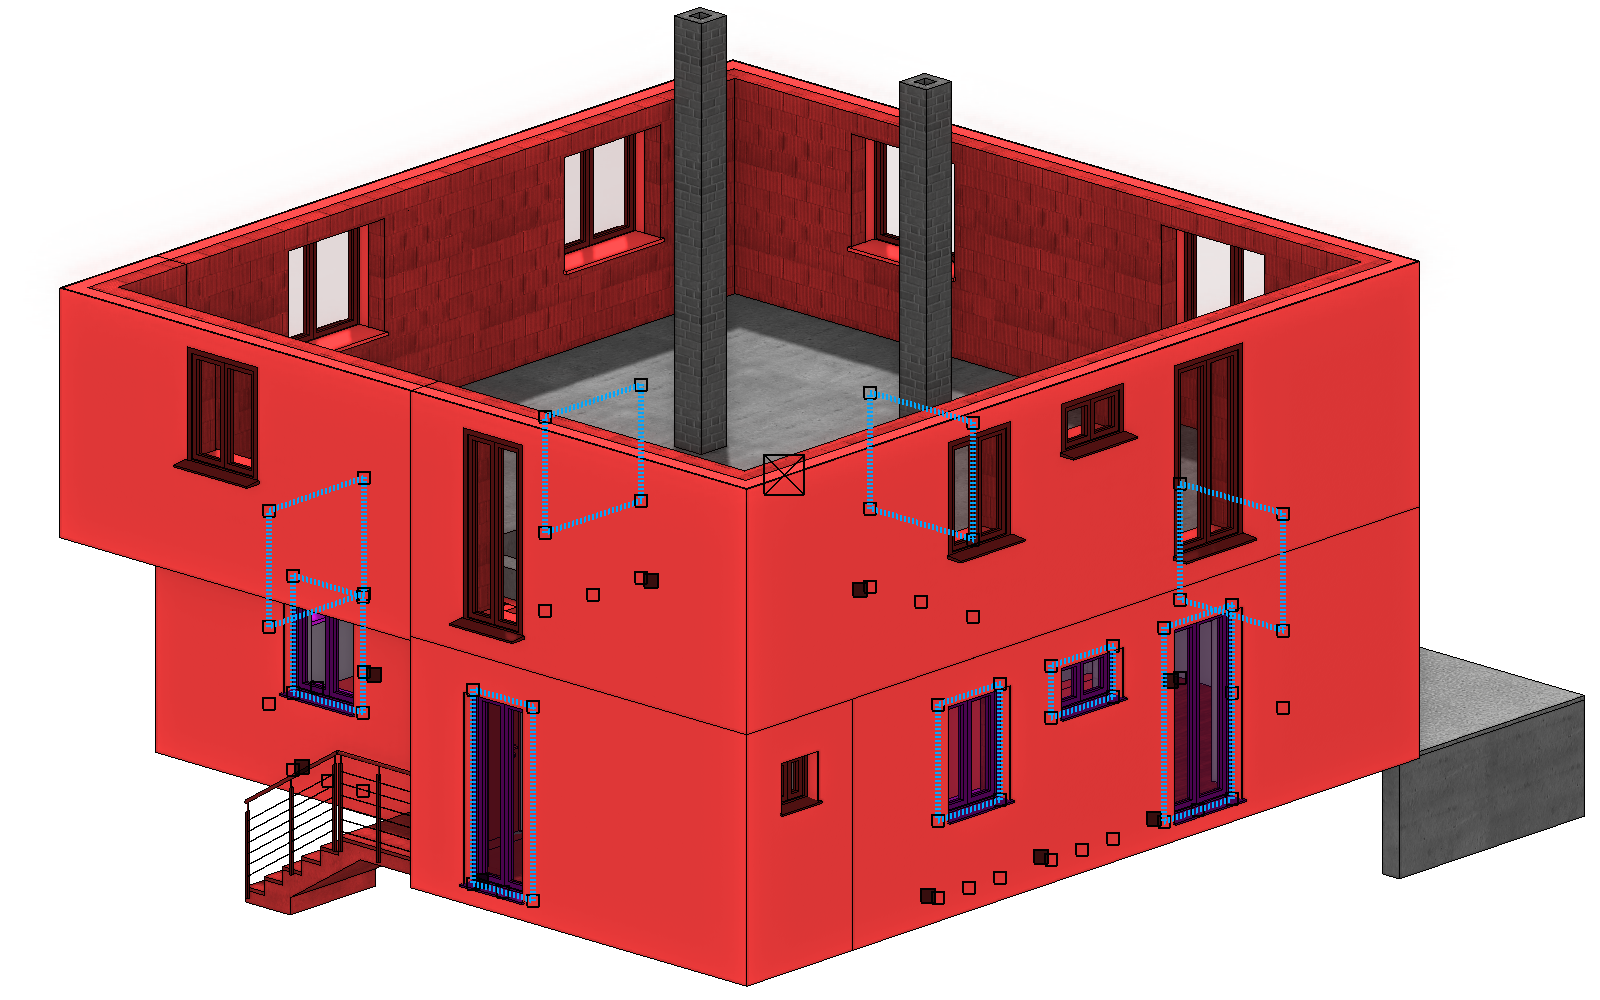
Change the windows as you like, e.g. with a higher height and additional transoms. Since you only have one wall here, you have to correct the depth of the window (+16) and the protrusion of the exterior window sills (20-16 = 4). Correct these parameters for a window, build the upper floor by yourself, and transfer these two parameters to the other windows with on image.
-
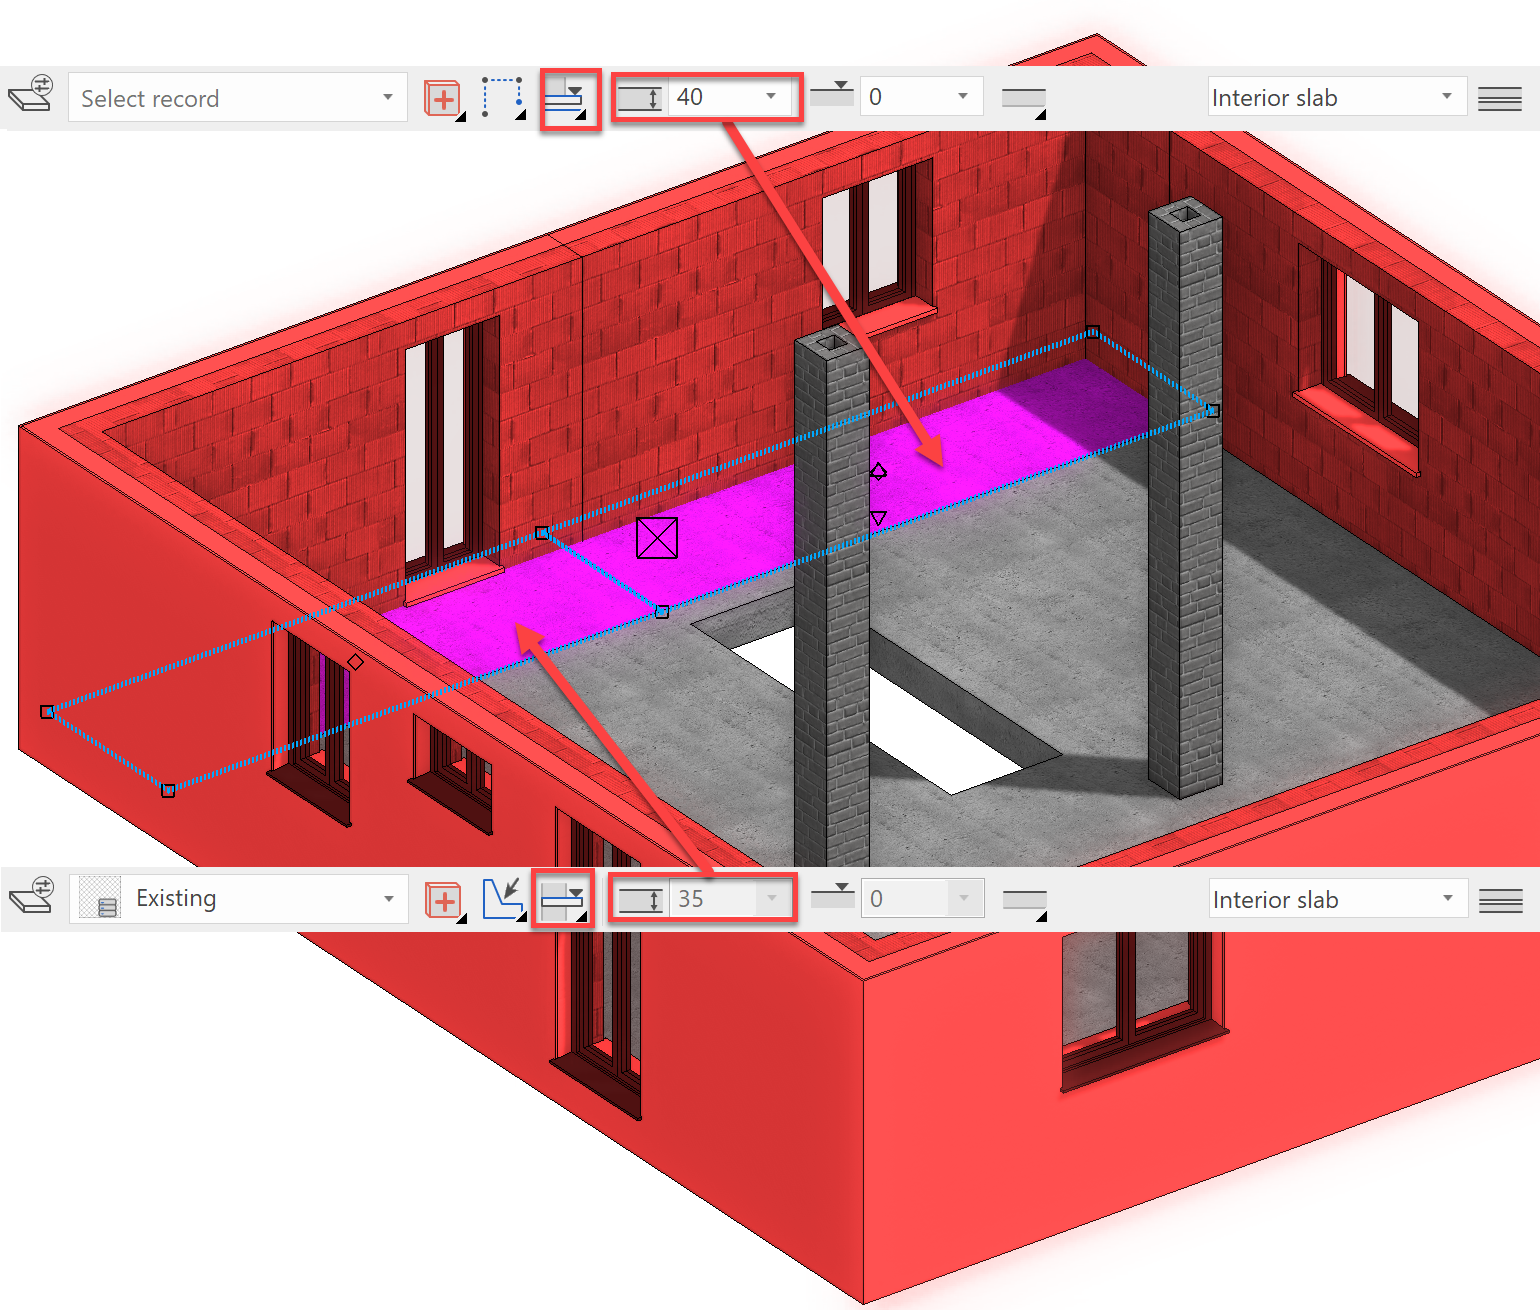
Complete the floor above the wardrobe with a floor that corresponds to the existing building’s floor, but is set as a New construction. The floor above the entry way becomes the storey floor, which is 40 cm thick.
 Roof:
Roof: -
Create auxiliary lines for the shed roof: 120 cm overhang on the ridge side, 66 cm on the eave and 60 cm on the verges. Put a Standard 3-layers roof Sloped (Shed) roof with a pitch of 7° and a height of 245 cm in the inside corner of the wall (see picture) after you have laid out the contour.

-
Then place the rafters with the following parameters:

-
Provide the upper floor with new interior walls and rooms however you like. Example:
-
Provide the basement wall with insulation as you did the first floor wall by drawing it around the outside and then linking it to the existing basement walls.

-
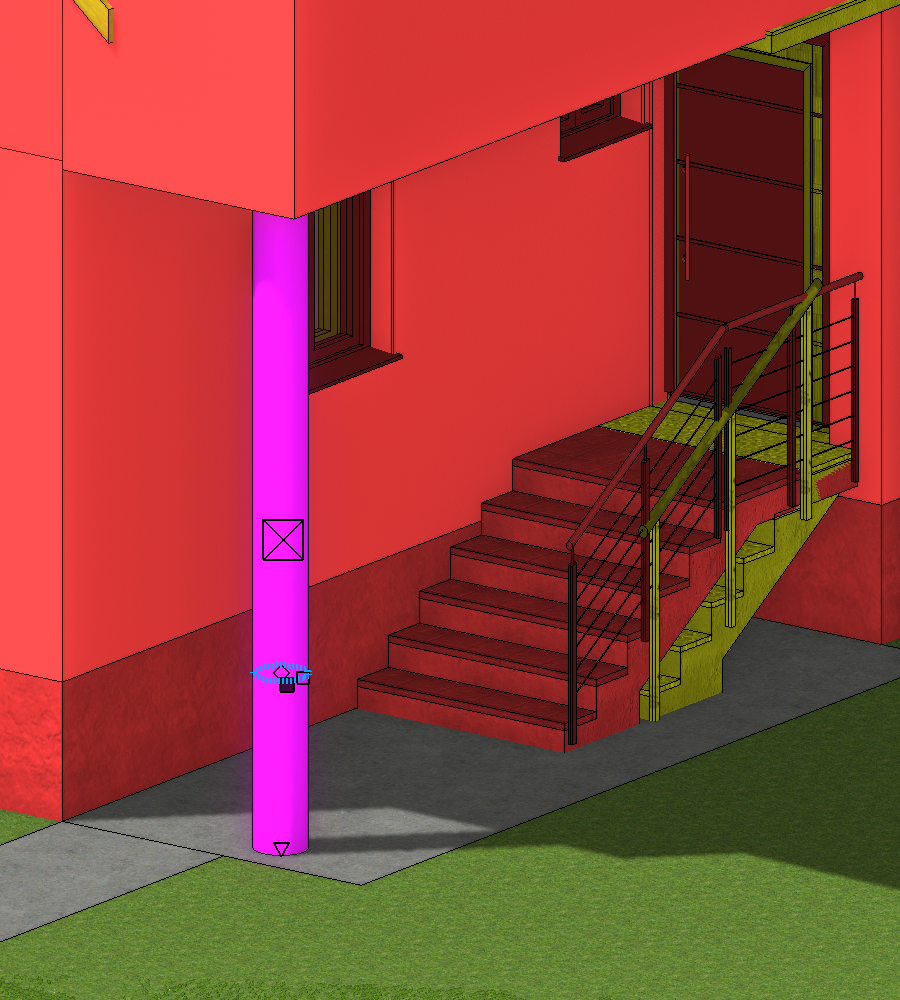
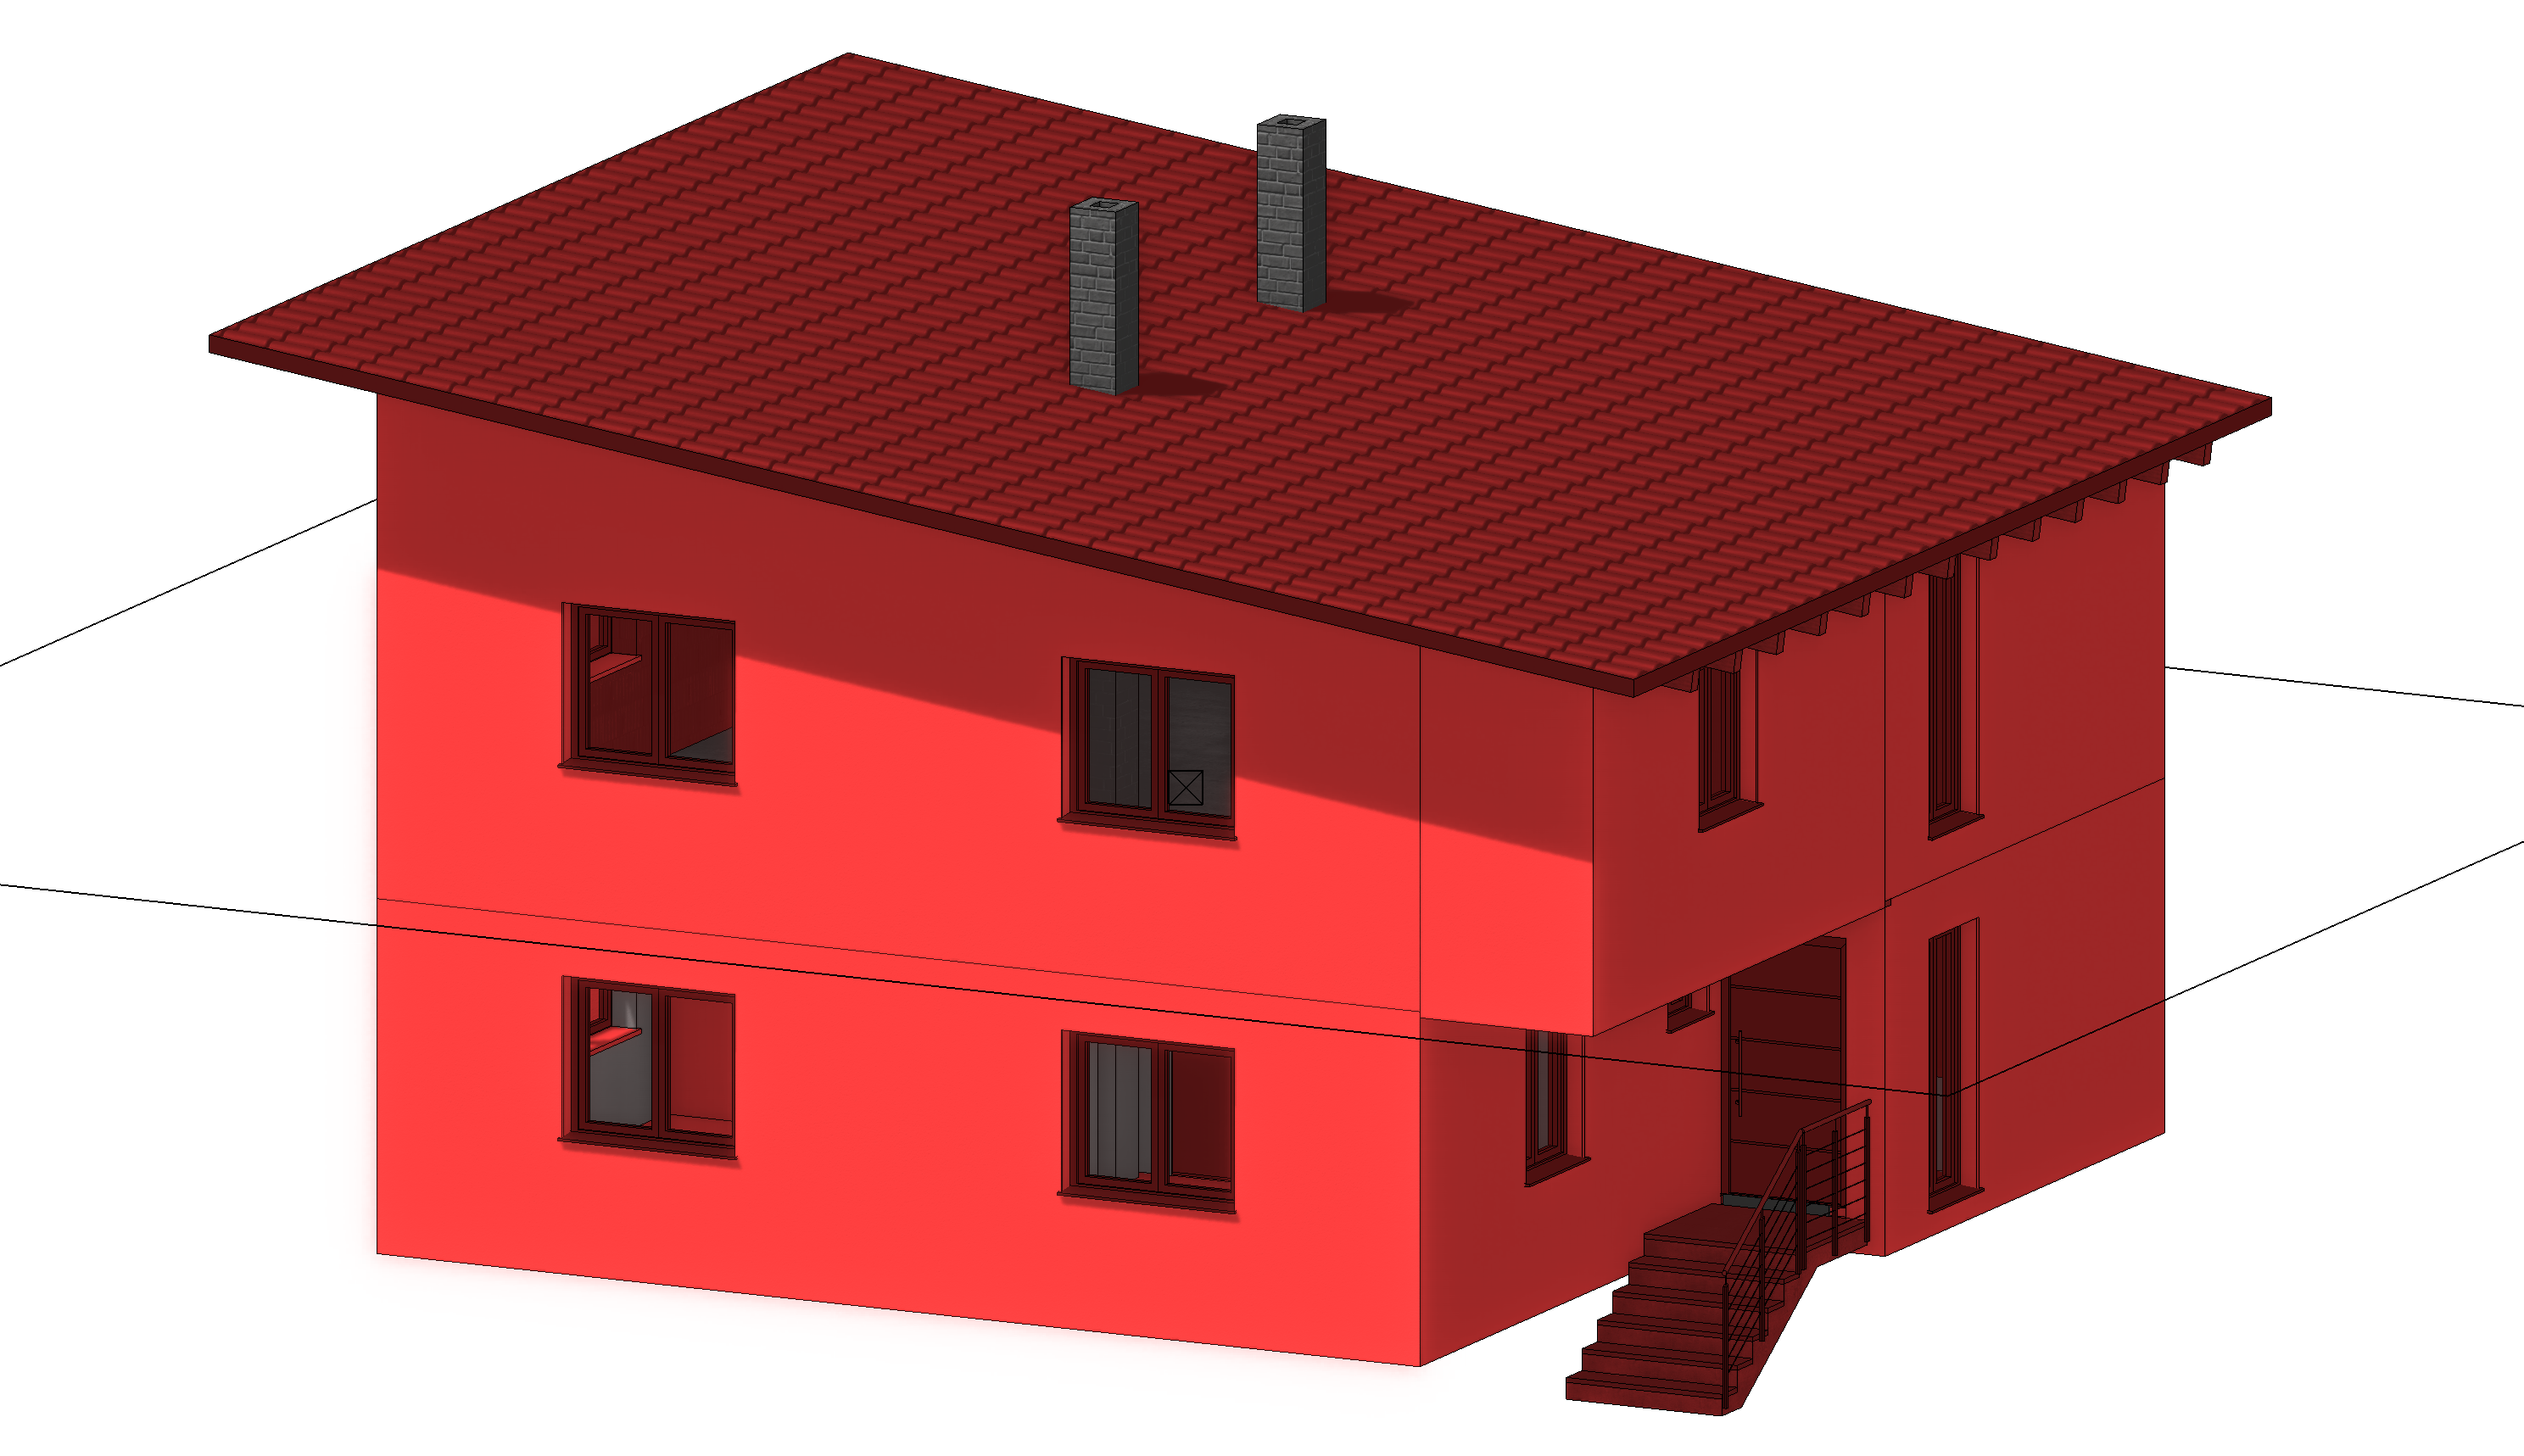
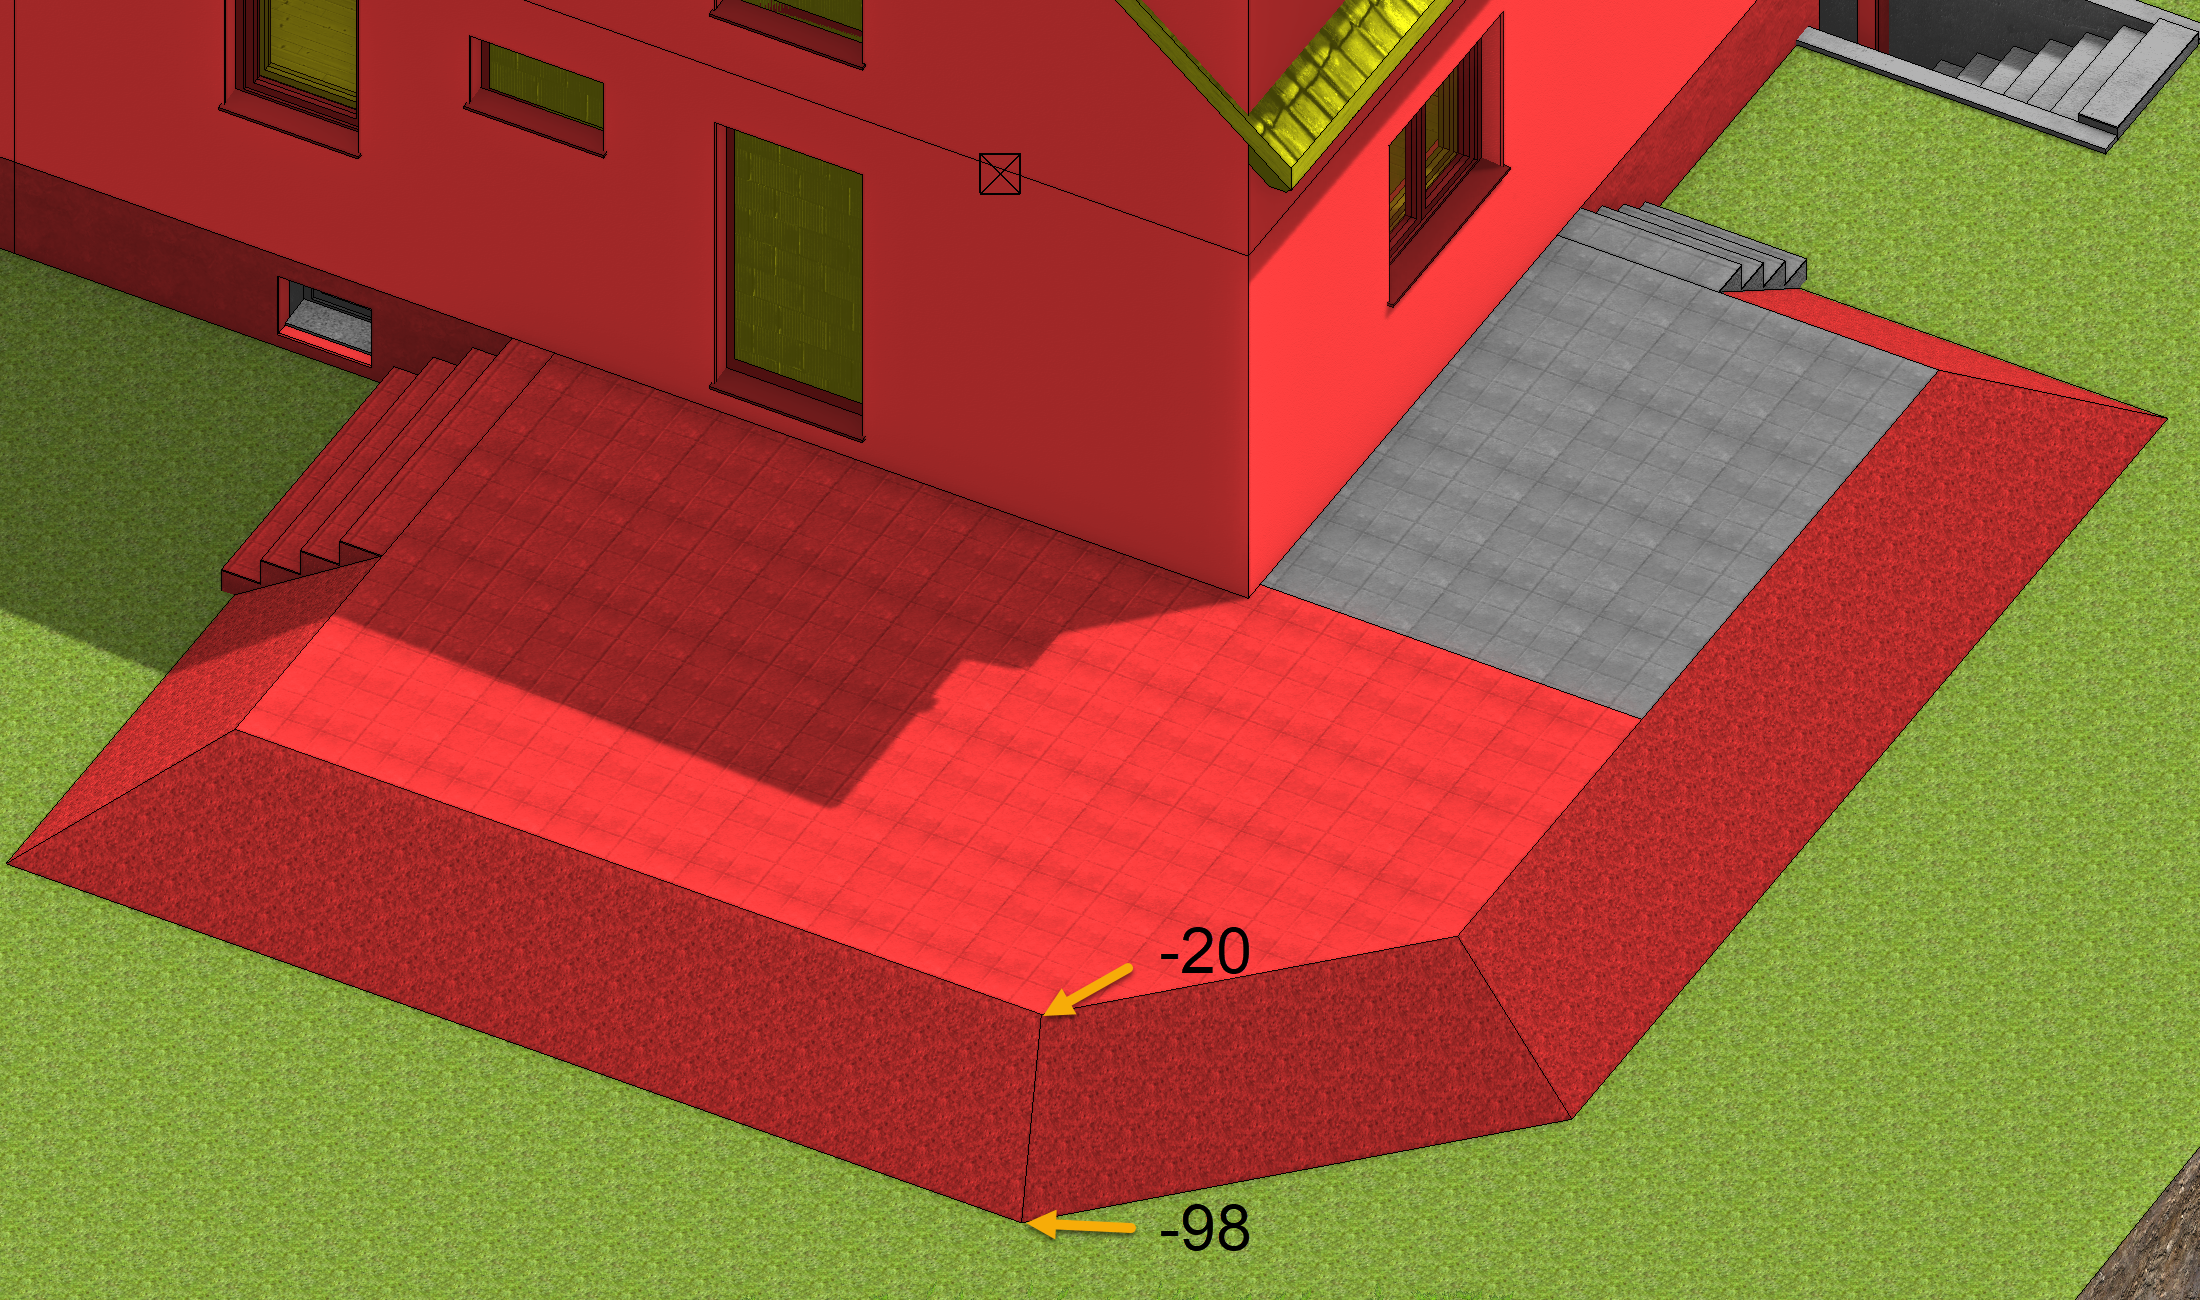
On the ground floor, place a column with a Height reference - to ceiling under the corner of the converted upper floor that protrudes over the entry way. Switch the renovation planning to No restriction, activate the column and either drag it in 3D mode with its lower handle to the level of the entry way surface, or set its lower edge to -98 cm.

Tip
Walls that are limited by ceilings or roofs also only allow this if it agrees with the renovation status. If a roof is marked for demolition, as in this example, a new construction wall will not be limited by it.
Modification of the terrace
Workshop
-
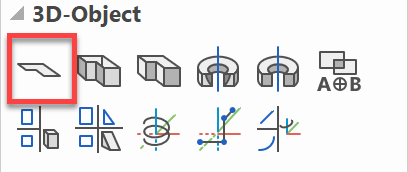
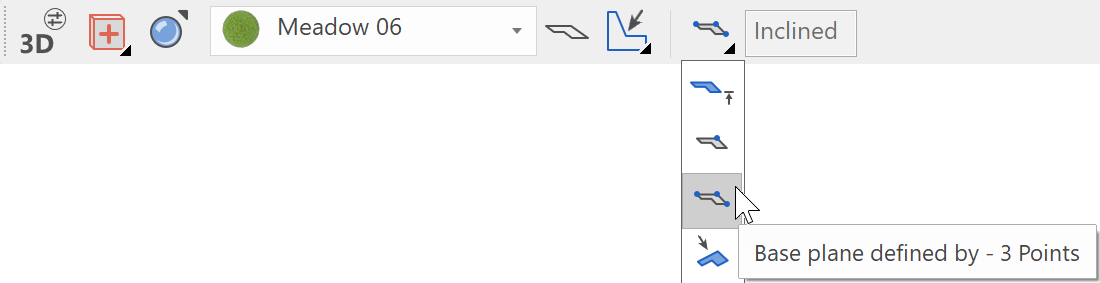
Extend the terrace according to the parameters of the existing terrace by placing a slab inside the polygon using the specified dimensions, copy the outside staircase to the other side, change its width and create an angled embankment so the top terrain edge is flush with the new terrace slab using Base plane defined by – 3 Points.
For the creation of surrounding areas, see course unit Enhanced functions > Surrounding area (inclined over 3 points)

Exchange of library parts from existing construction to Demolition / New construction
Workshop

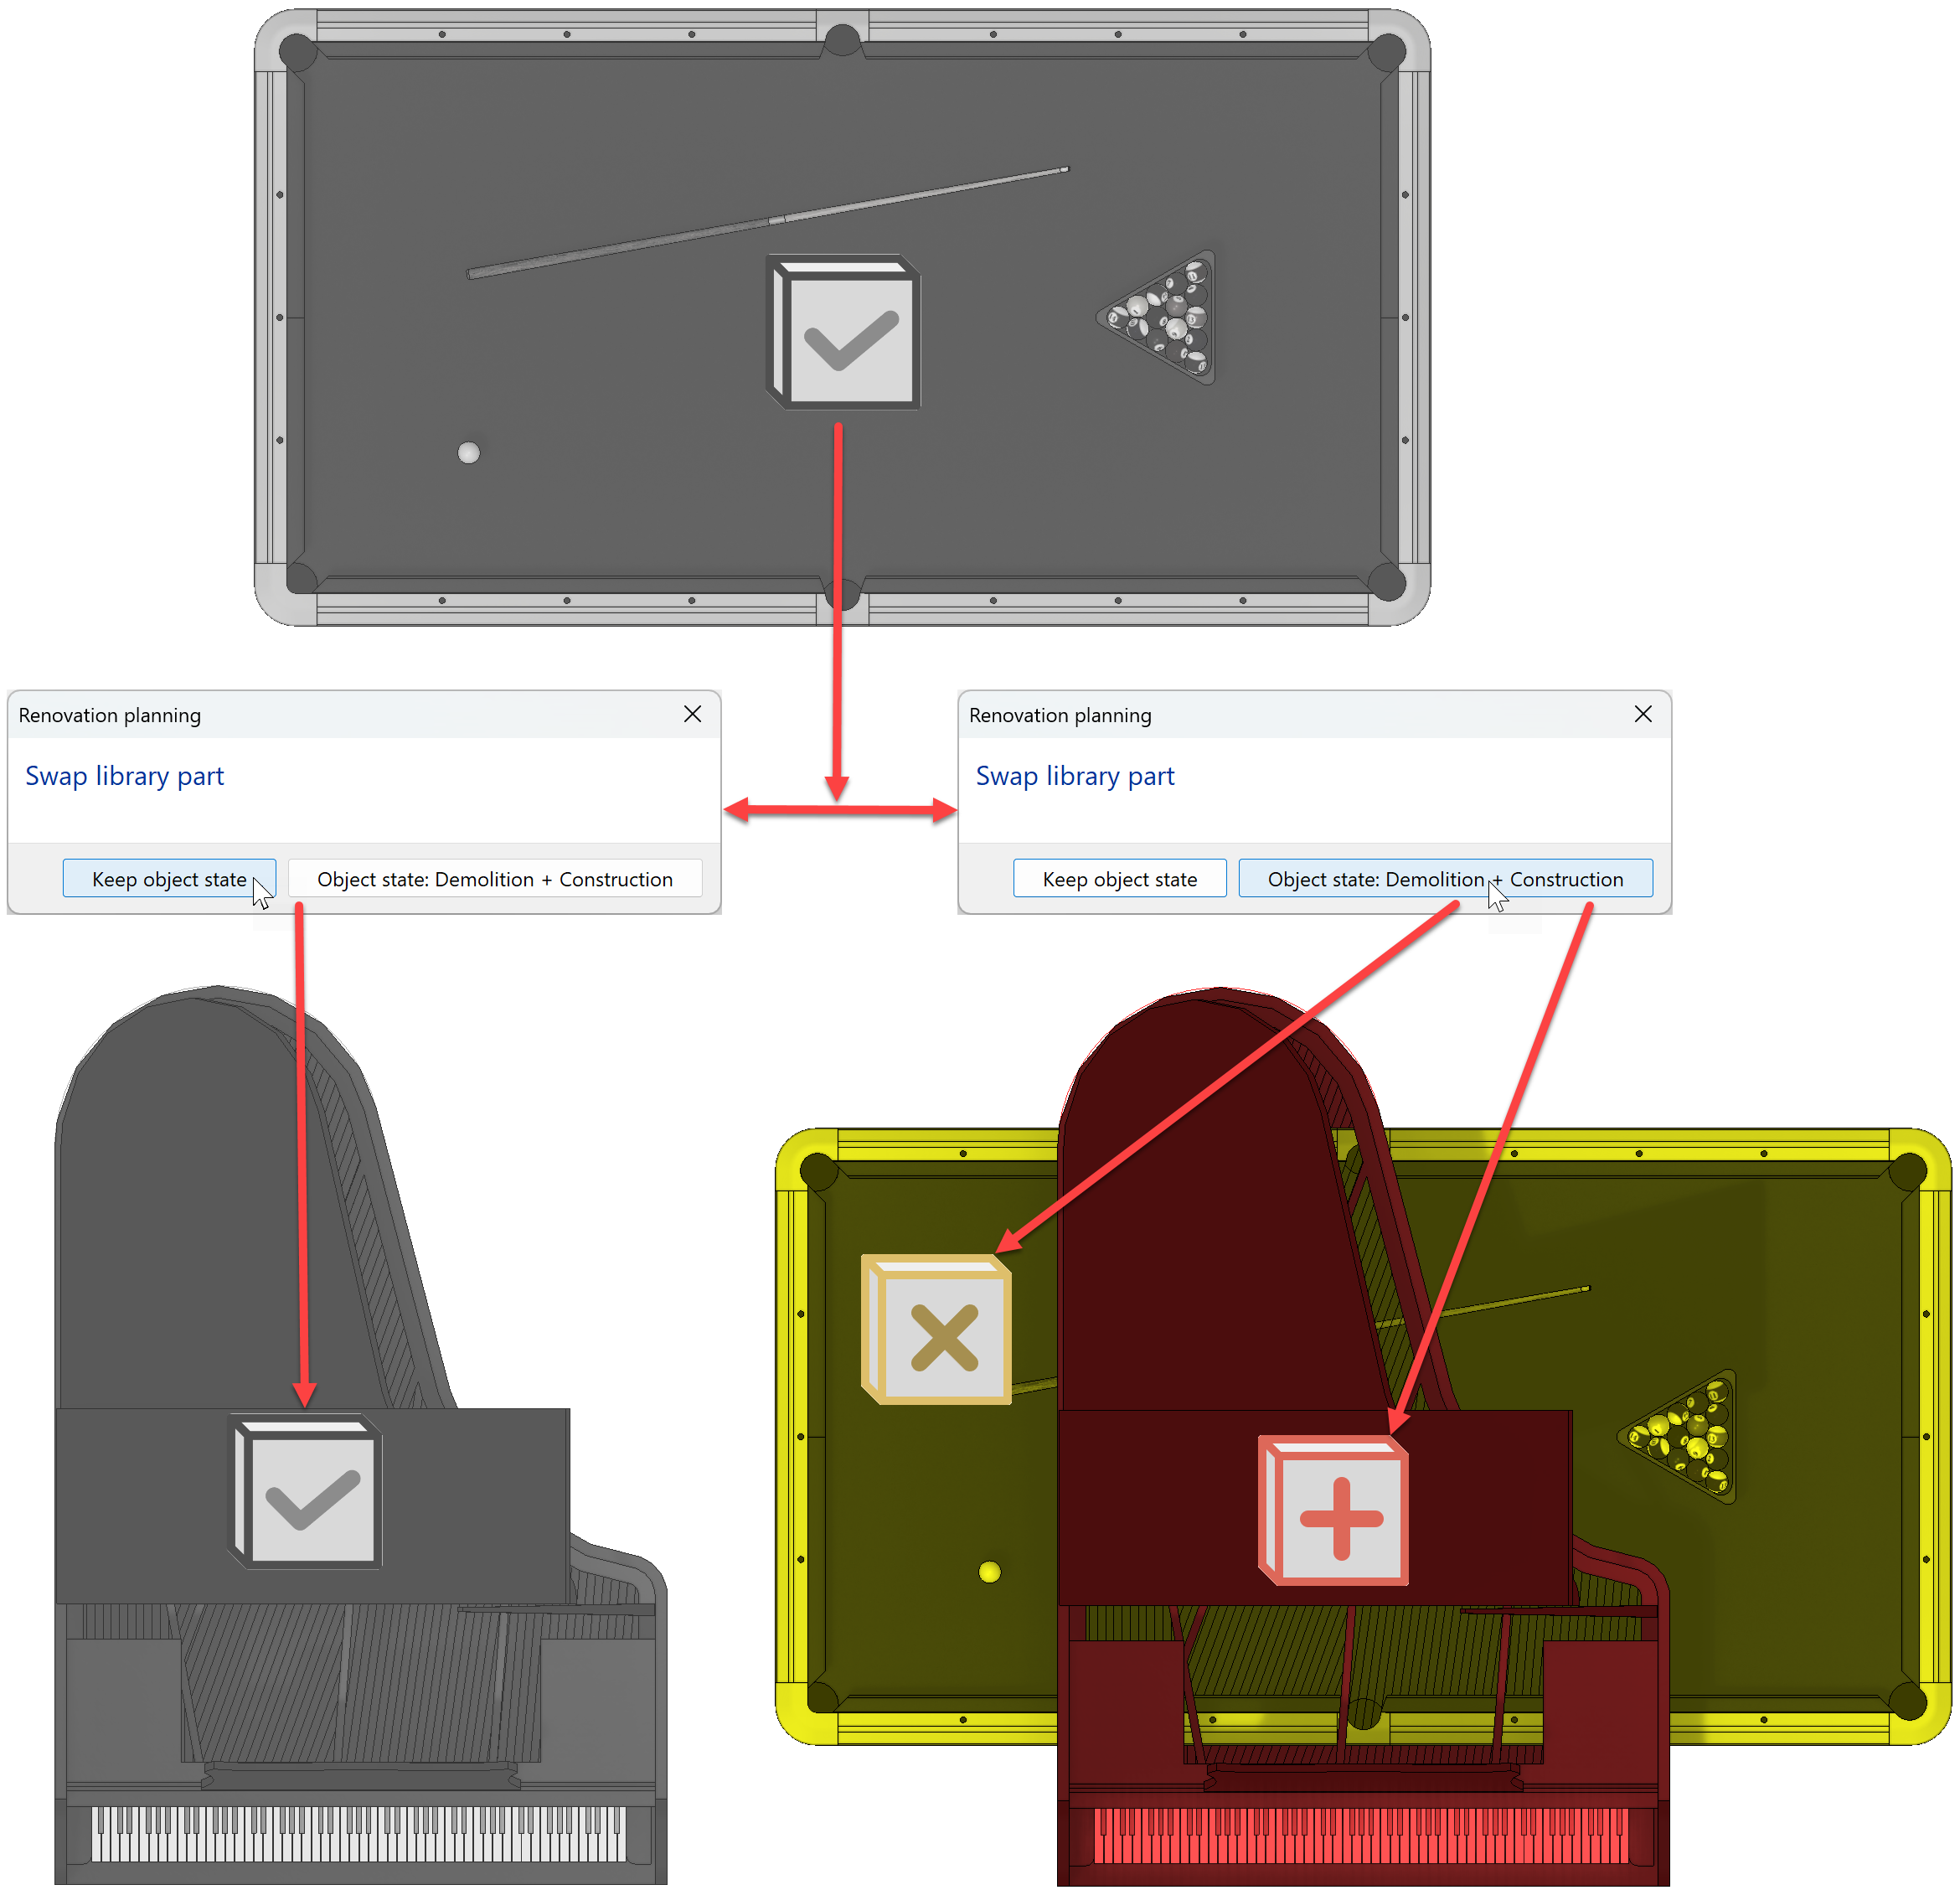
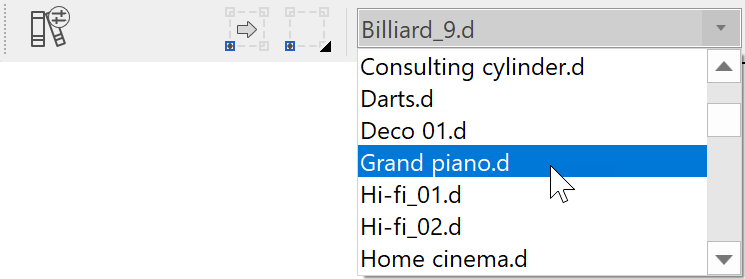
Library parts also have renovation planning information and, like other objects, are displayed in the defined colours. The exchange of a library part can also automatically change its state, e.g. from Existing construction to Demolition, and set the new part to New construction during active renovation planning.
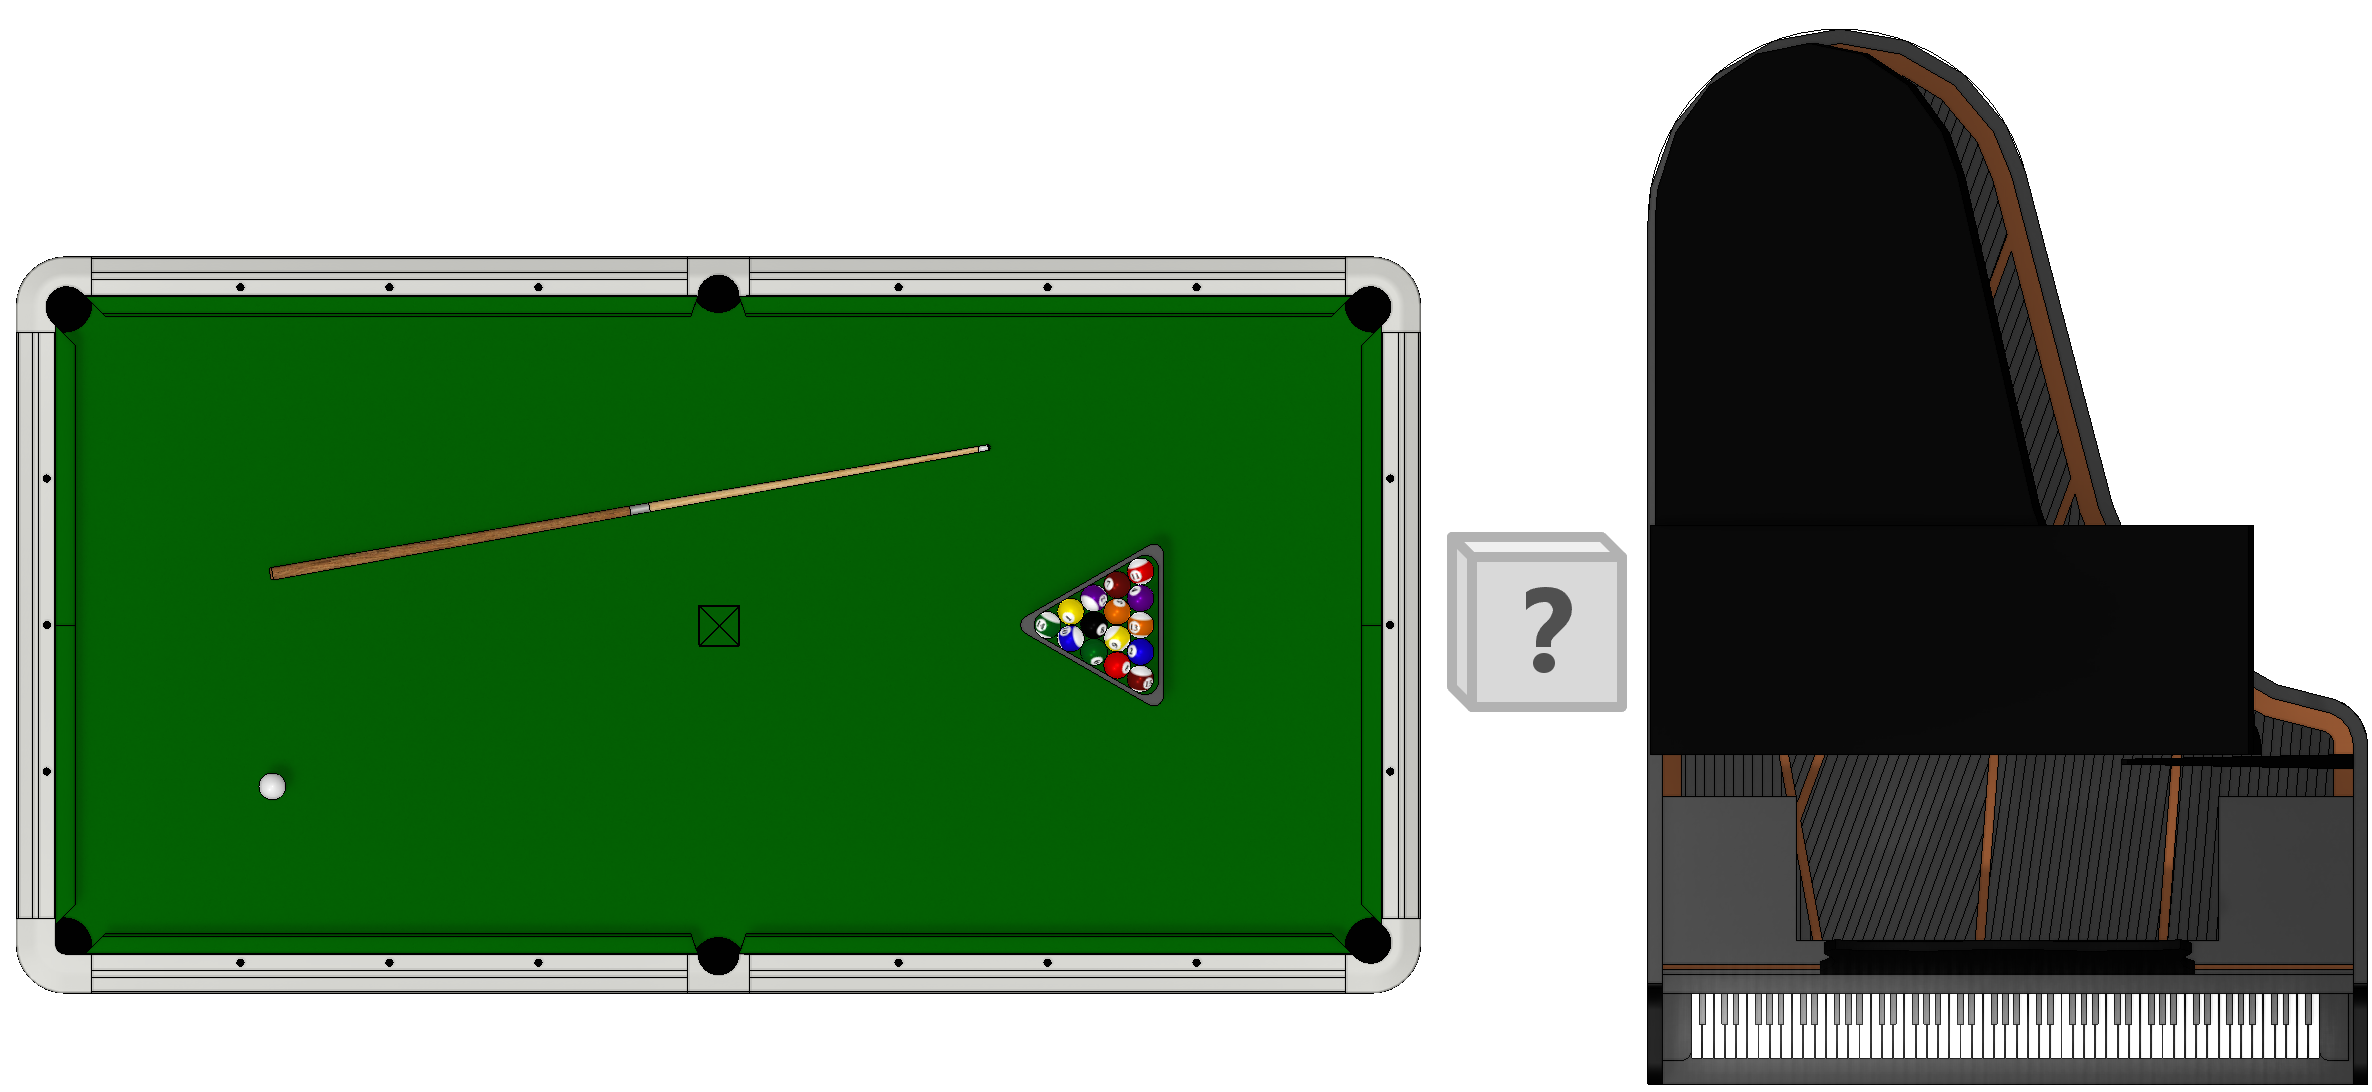
For example, a grand piano should replace a pool table:
The decisive factor here is the state of the existing library part.
If the library part has the state Unknown, it is replaced by the new library part, which is also given the state Unknown.
If the library part has the state Existing construction, you can choose whether the new object will also be Existing construction, or whether it will be set to Demolition by the exchange and the new library part will be placed above it in the state New construction.