Railing
In this portion, we would like equip the parapet walls around the balconies and terraces with railings. We will, again, proceed one storey at a time and utilise the practical copy function of ELITECAD.
First floor
We will begin with the balconies on the first floor. Activate this storey in the storey manager. Select Create banister from the tools manager Construction parts. The settings for the railing have already been prepared in a data record. Select the data record CK_Balcony_Railing. After that, you decide how the railings are to be placed. For our model, we will use the option Draw contour manually.
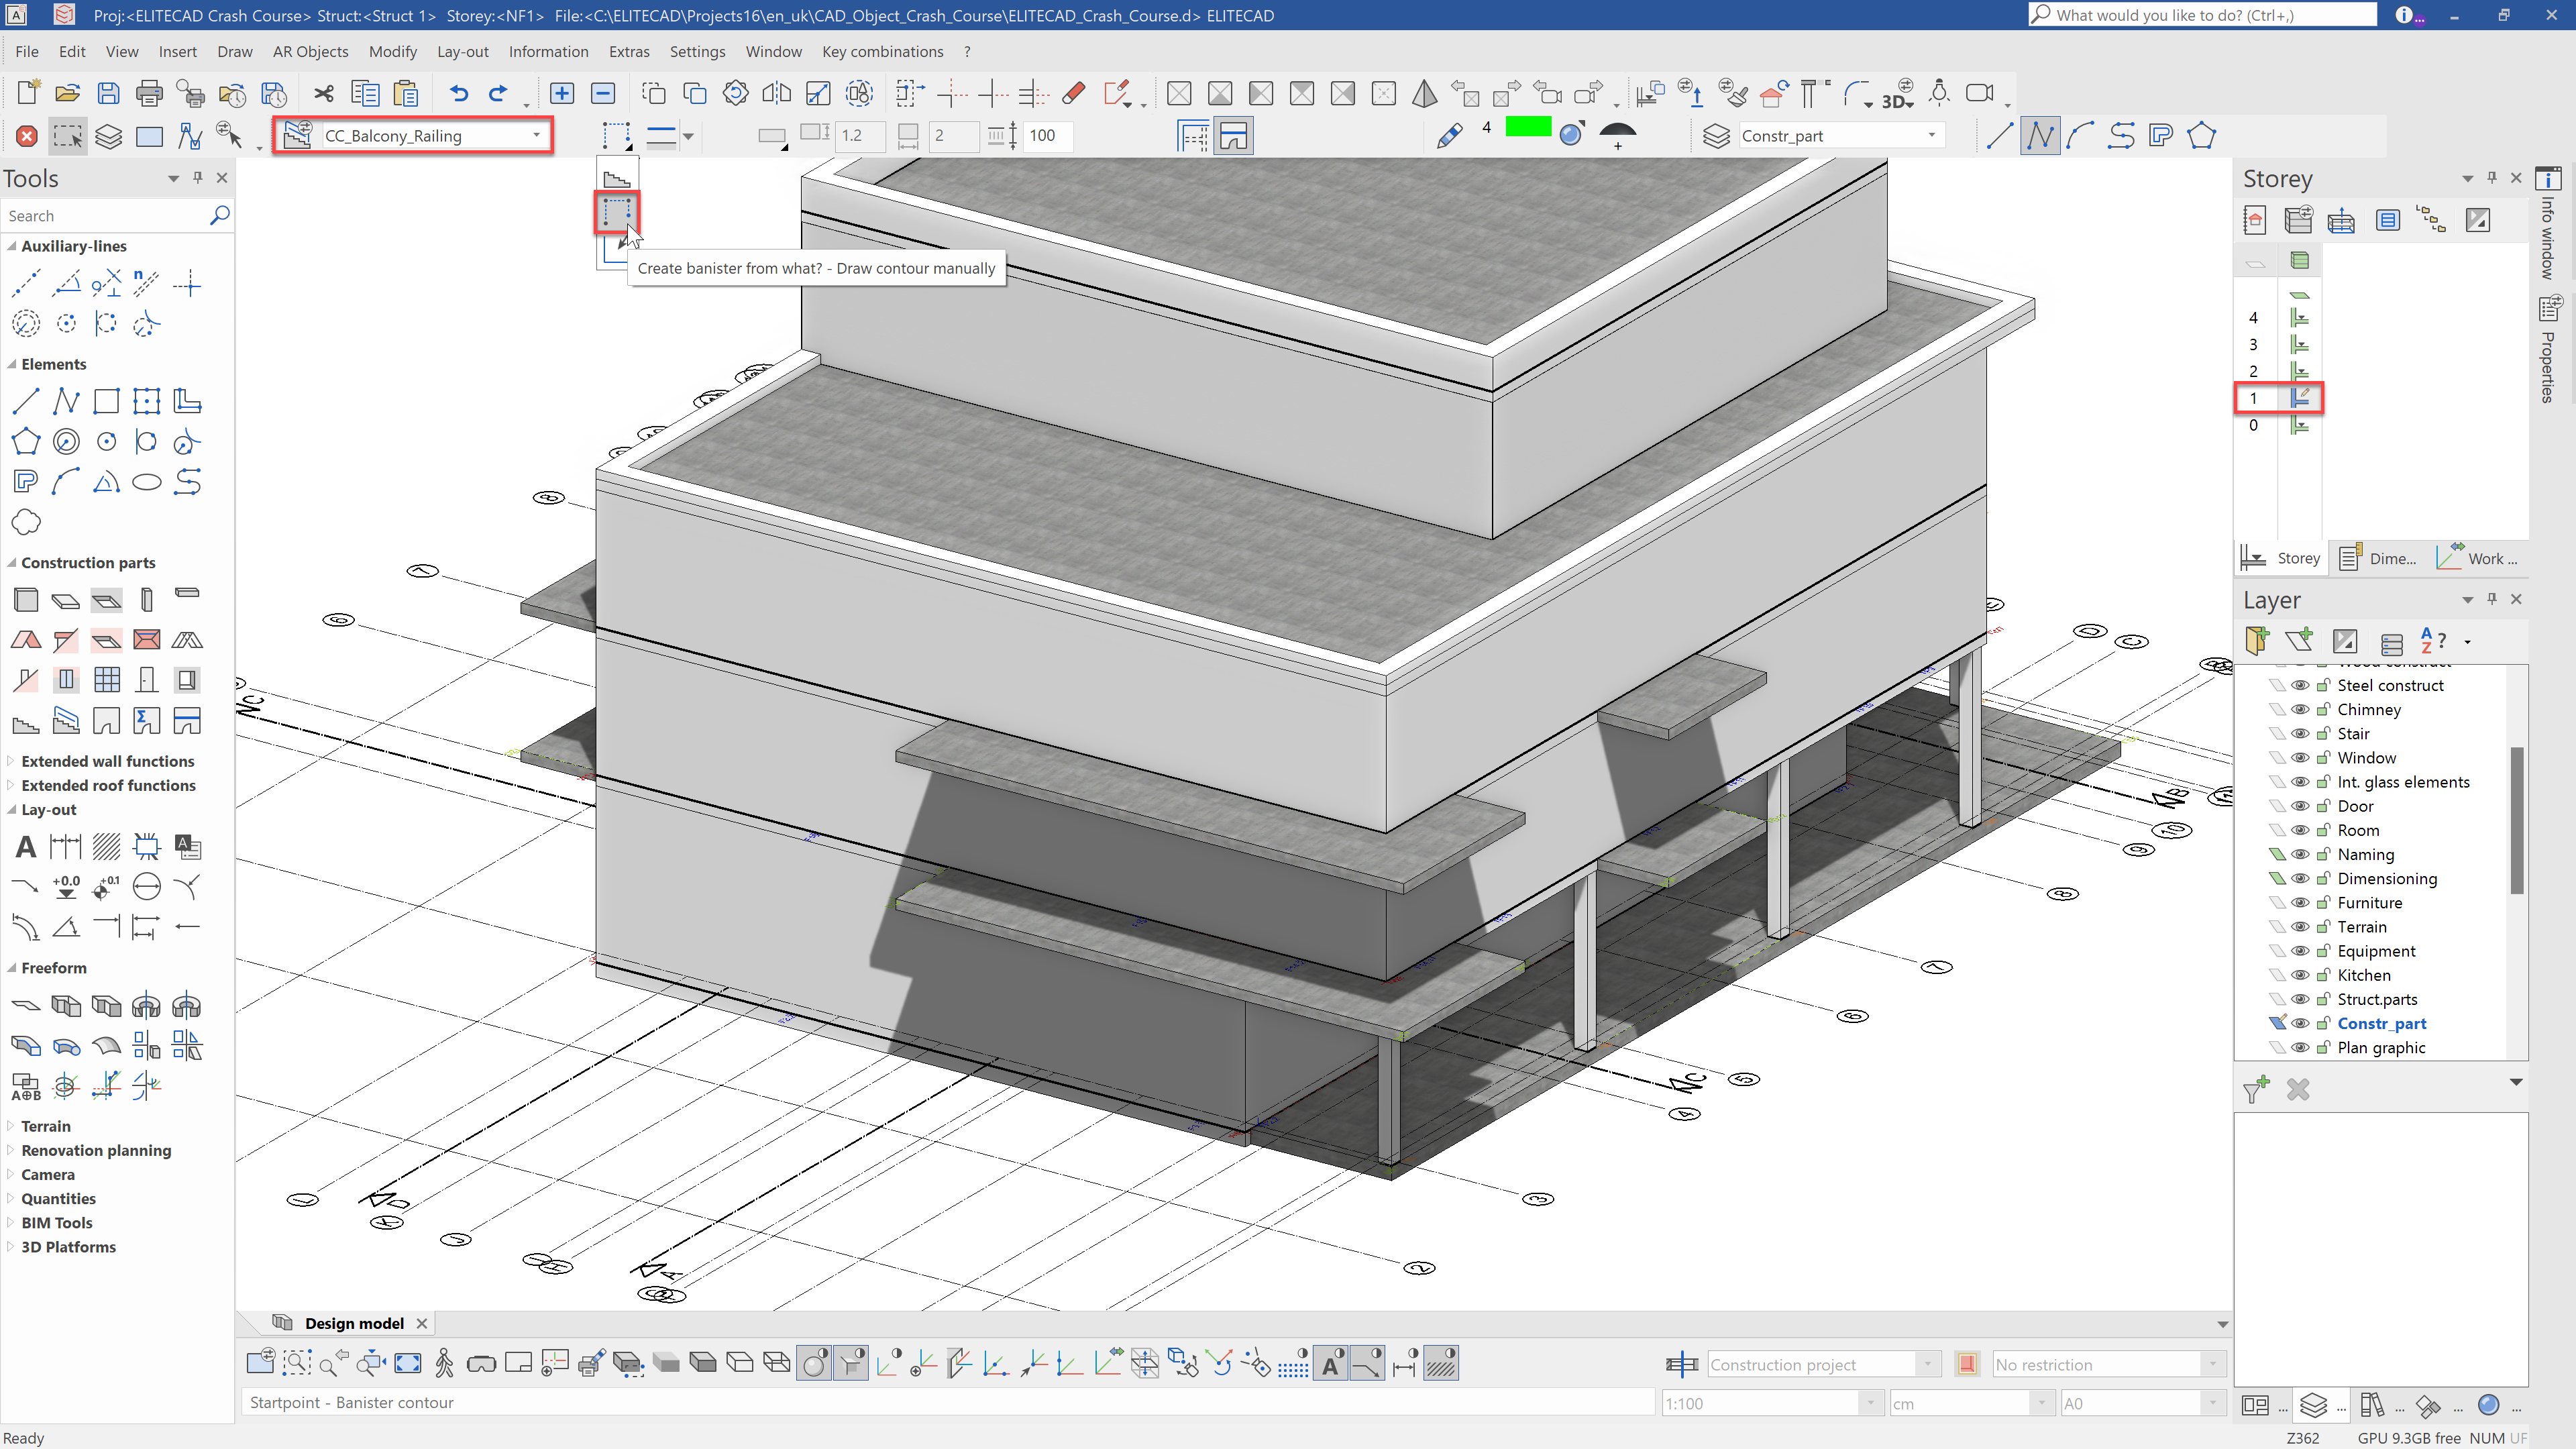
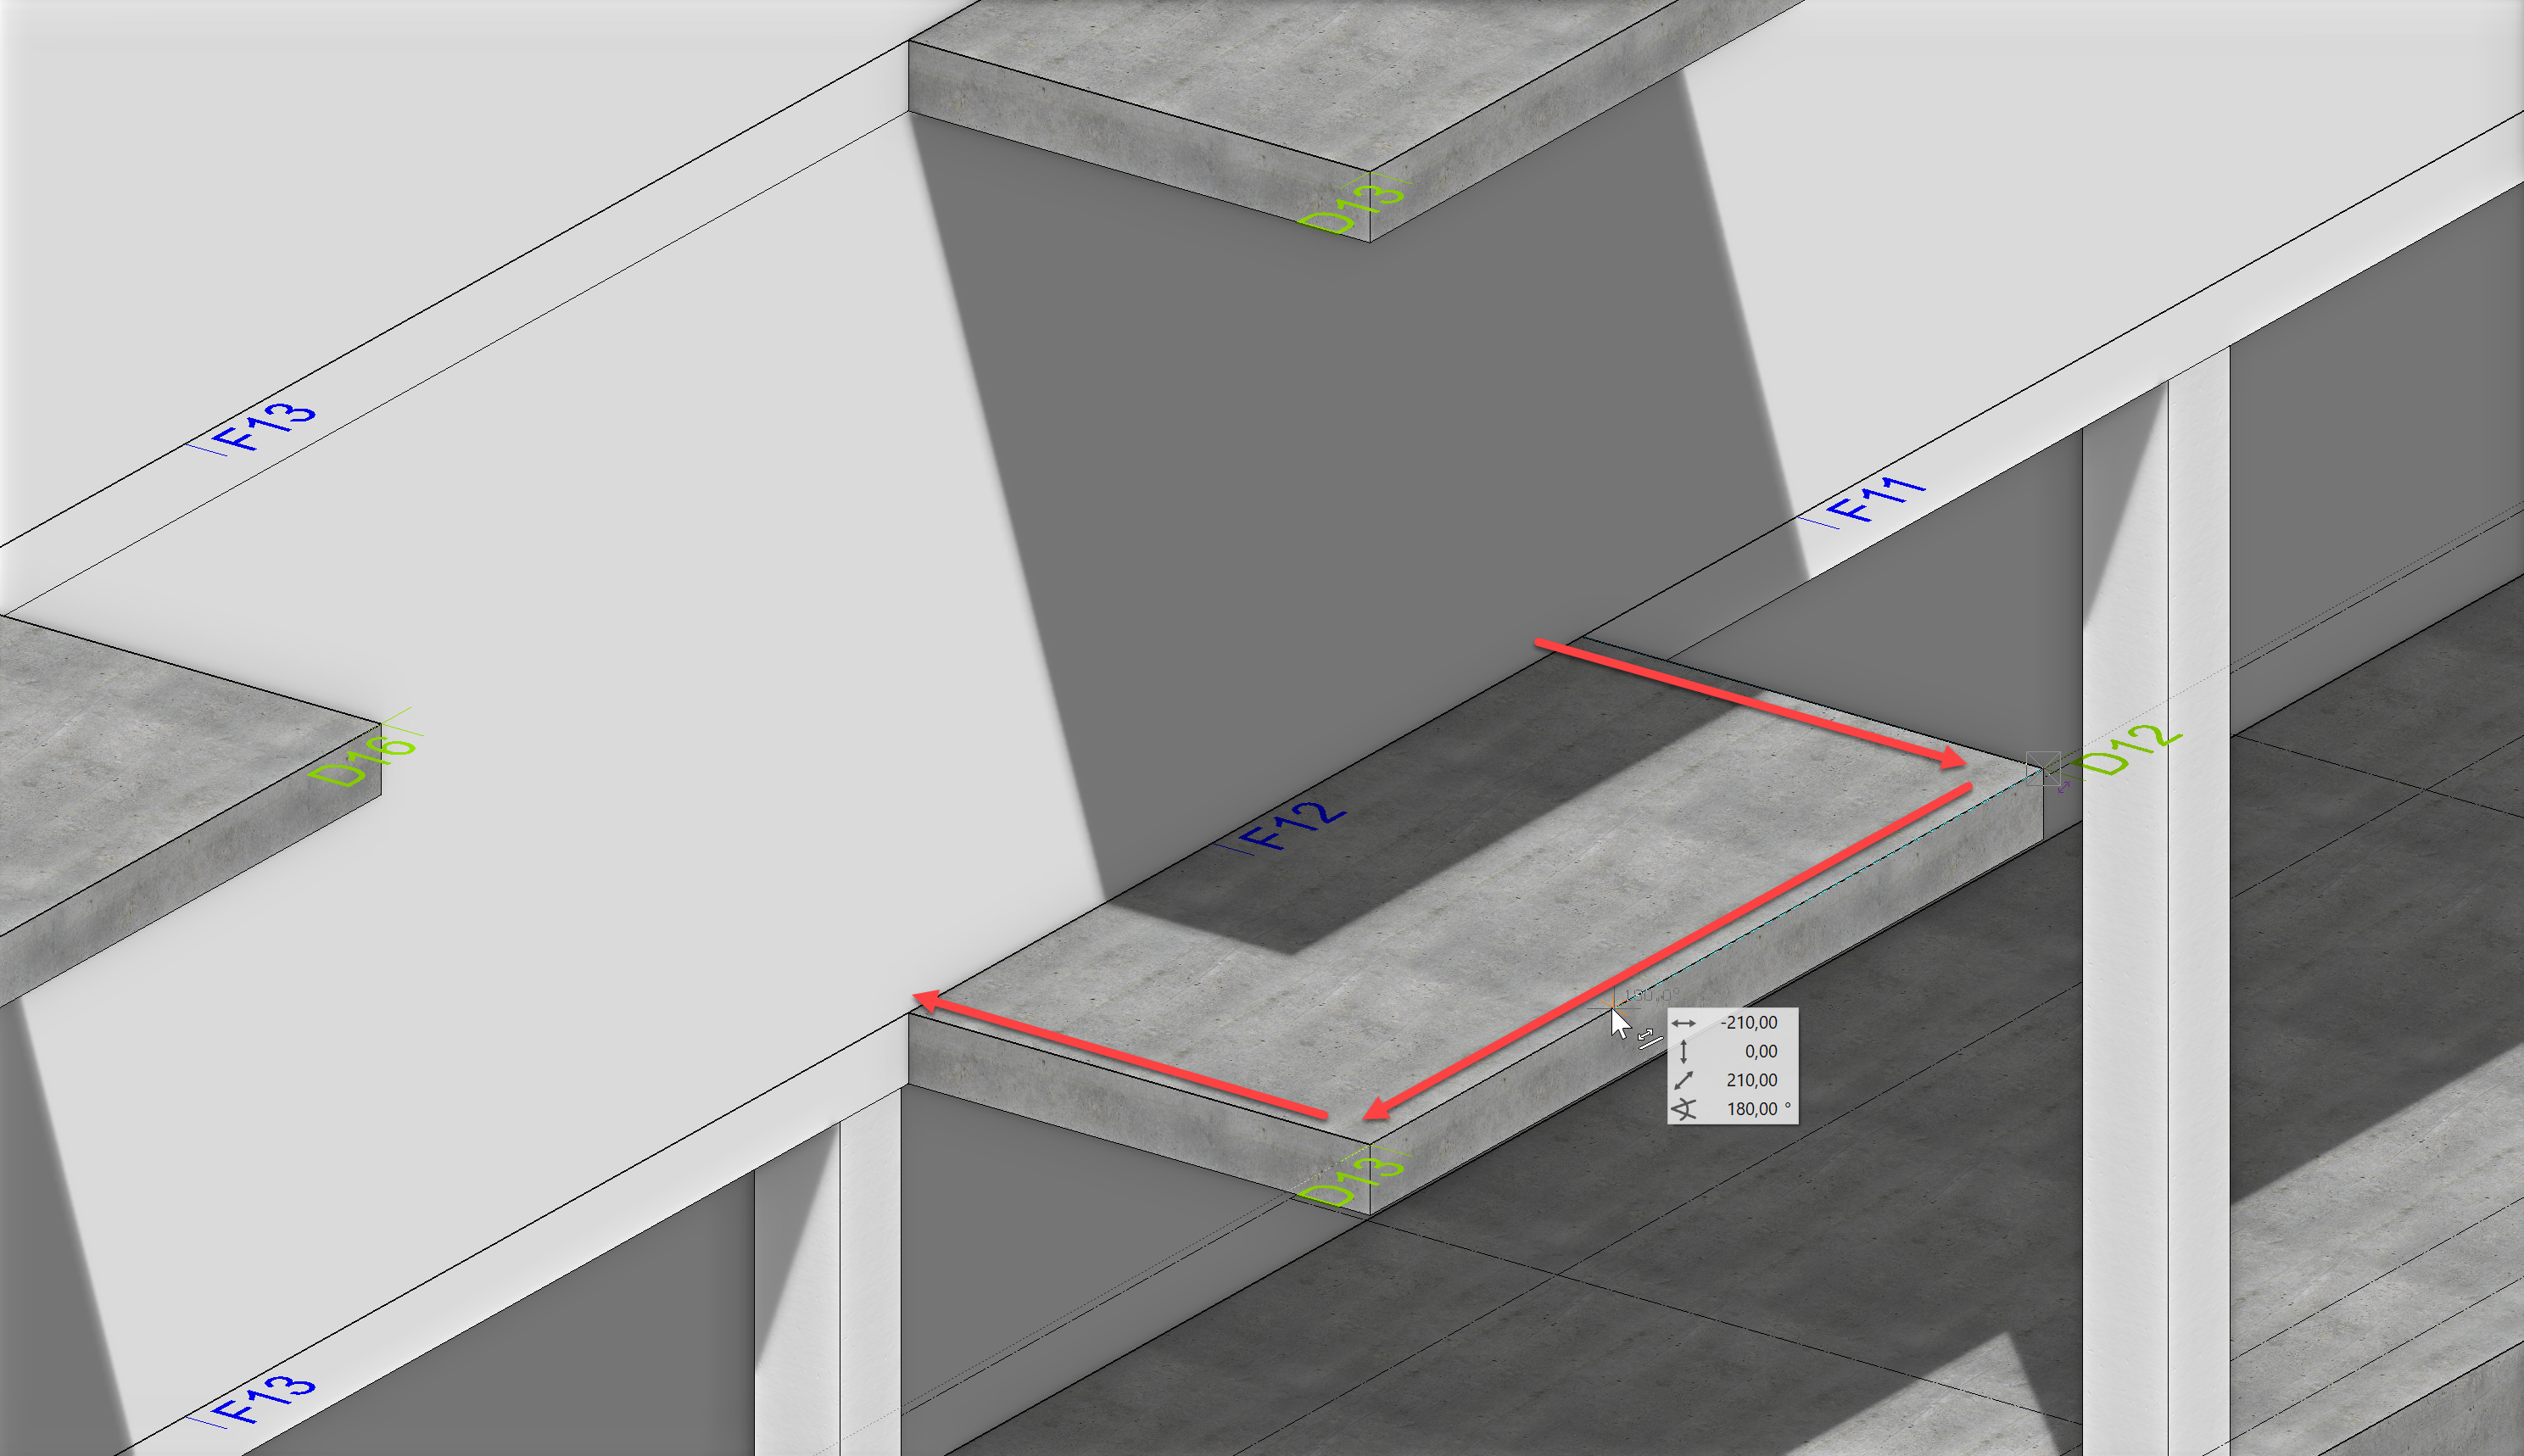
Now only the desired contour need be drawn. This, as well, can be done in either 2D or 3D as you prefer. For our example, we will draw the contour directly into the 3D model as we are following the outside edge of the balcony. Start where the balcony meets the wall and follow points D12 and D13 until you meet the wall again. Once you double click on the last point, a railing will be created.
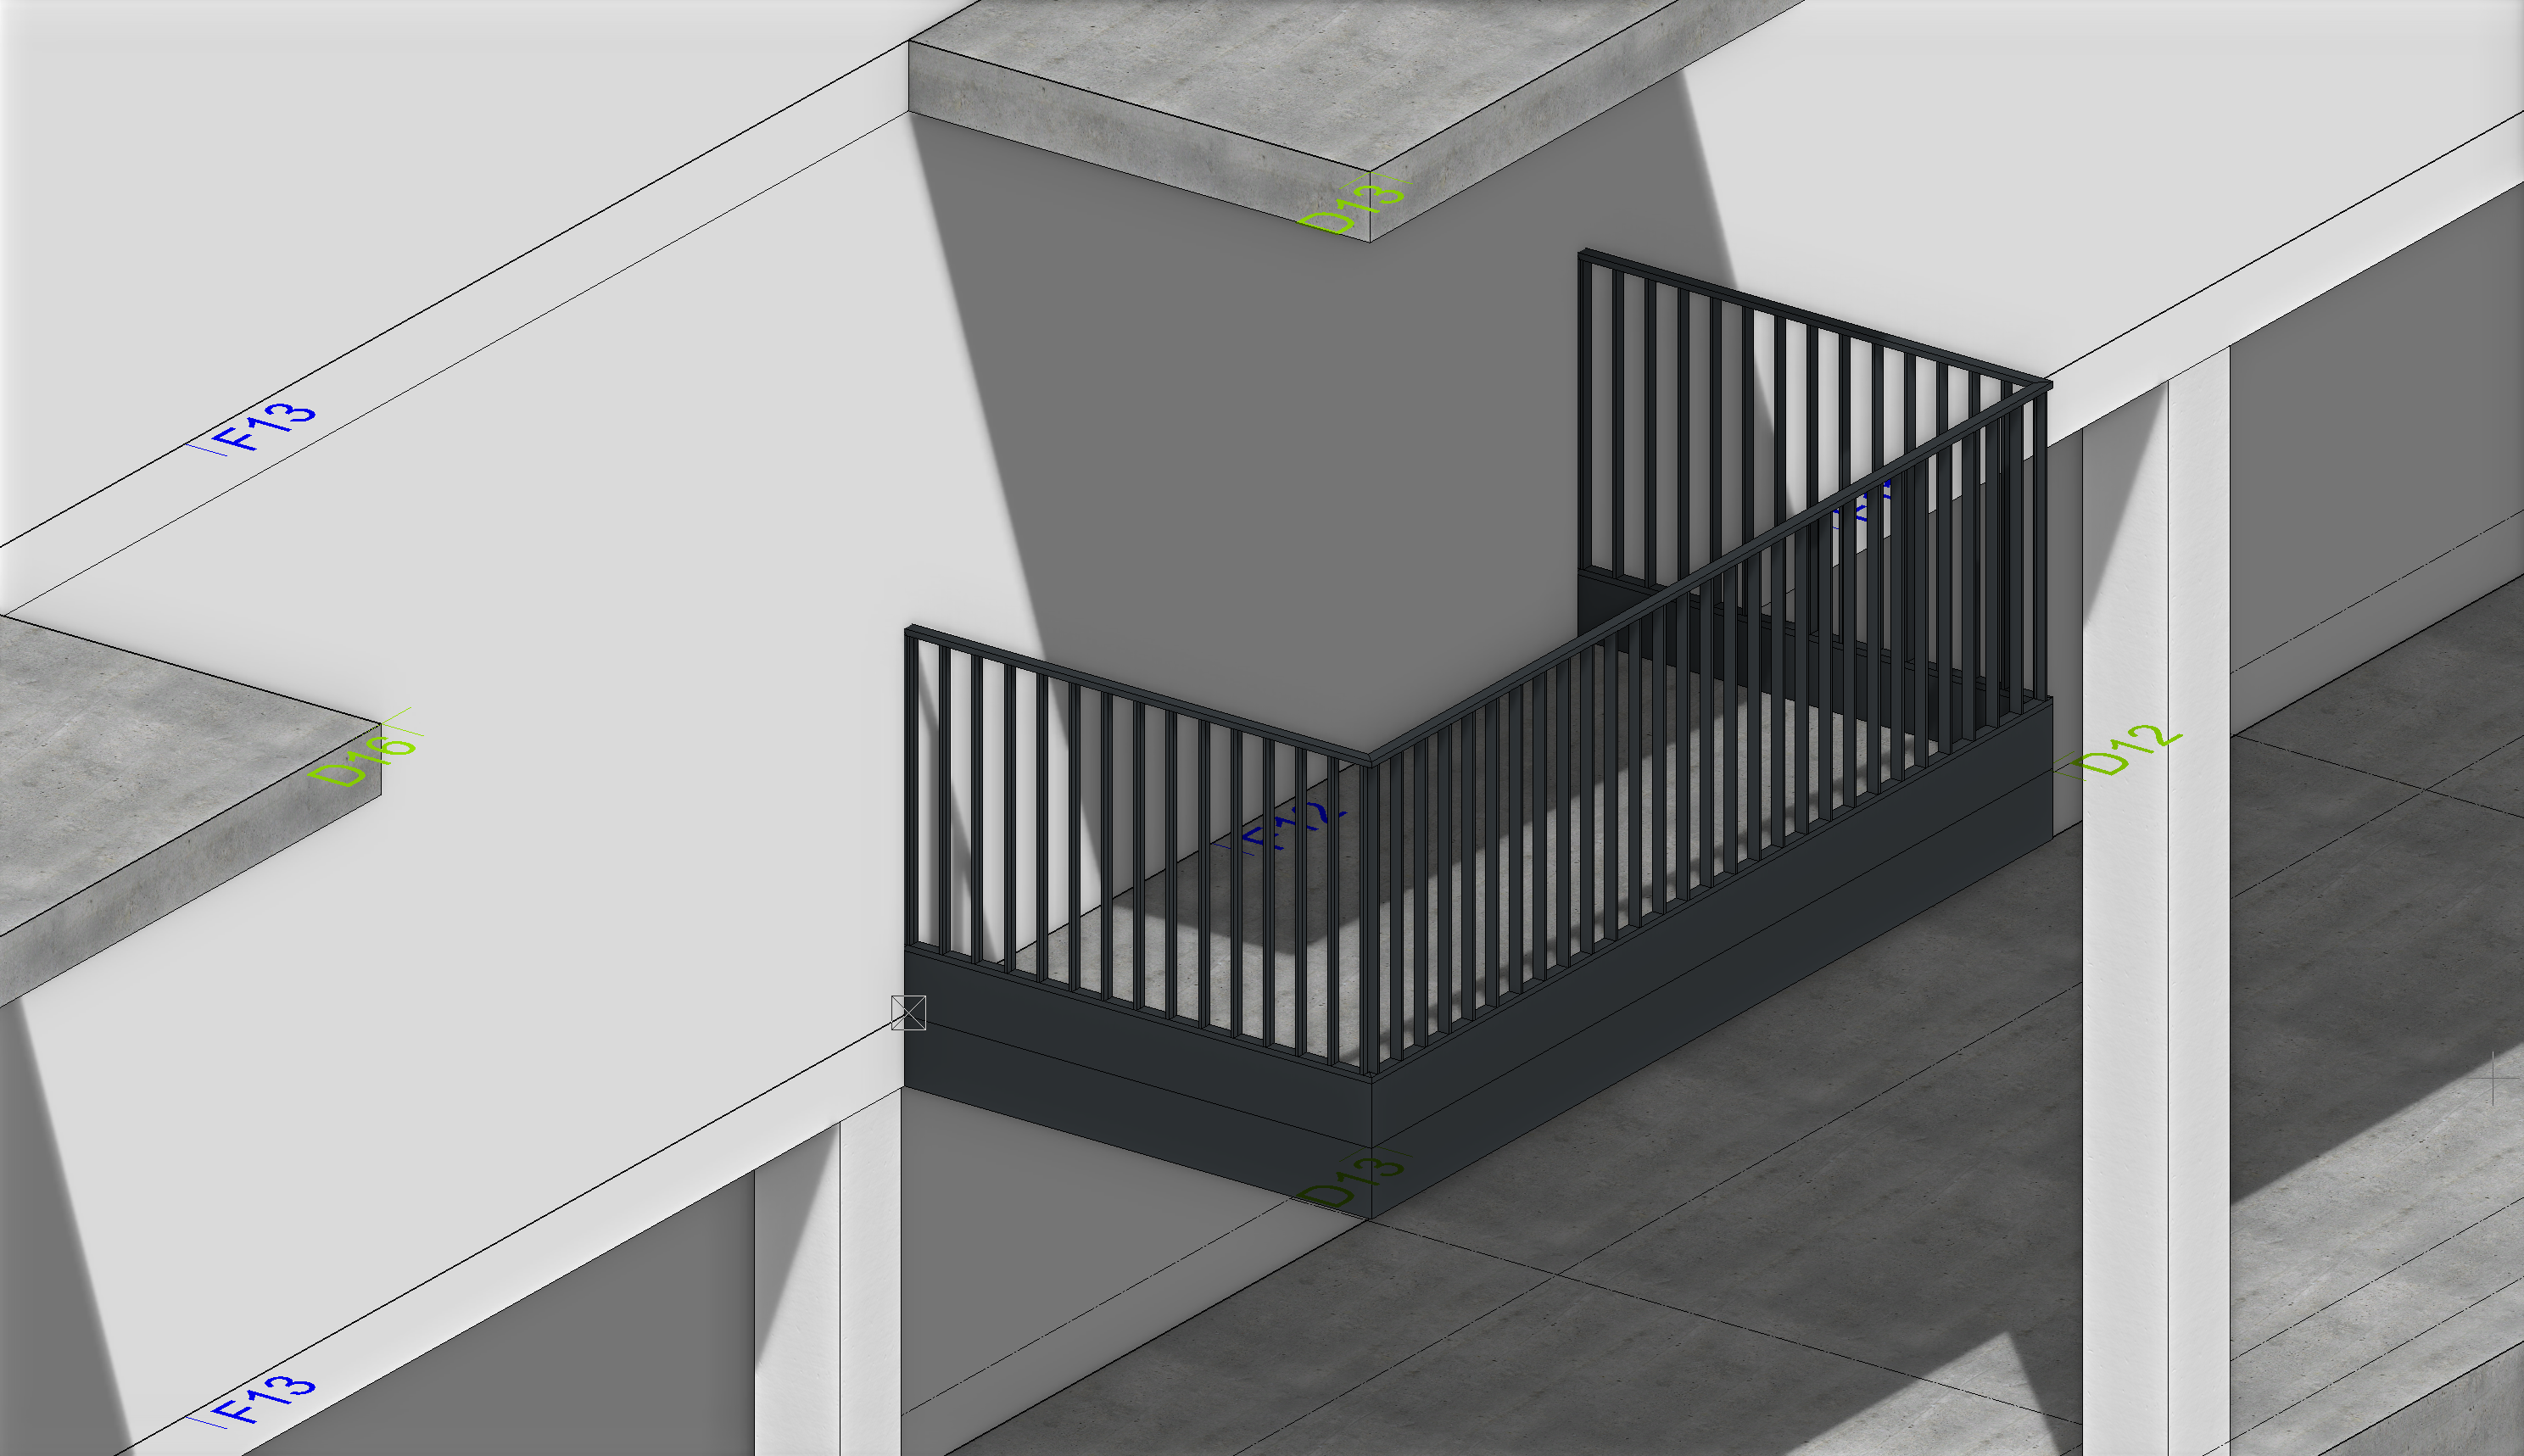
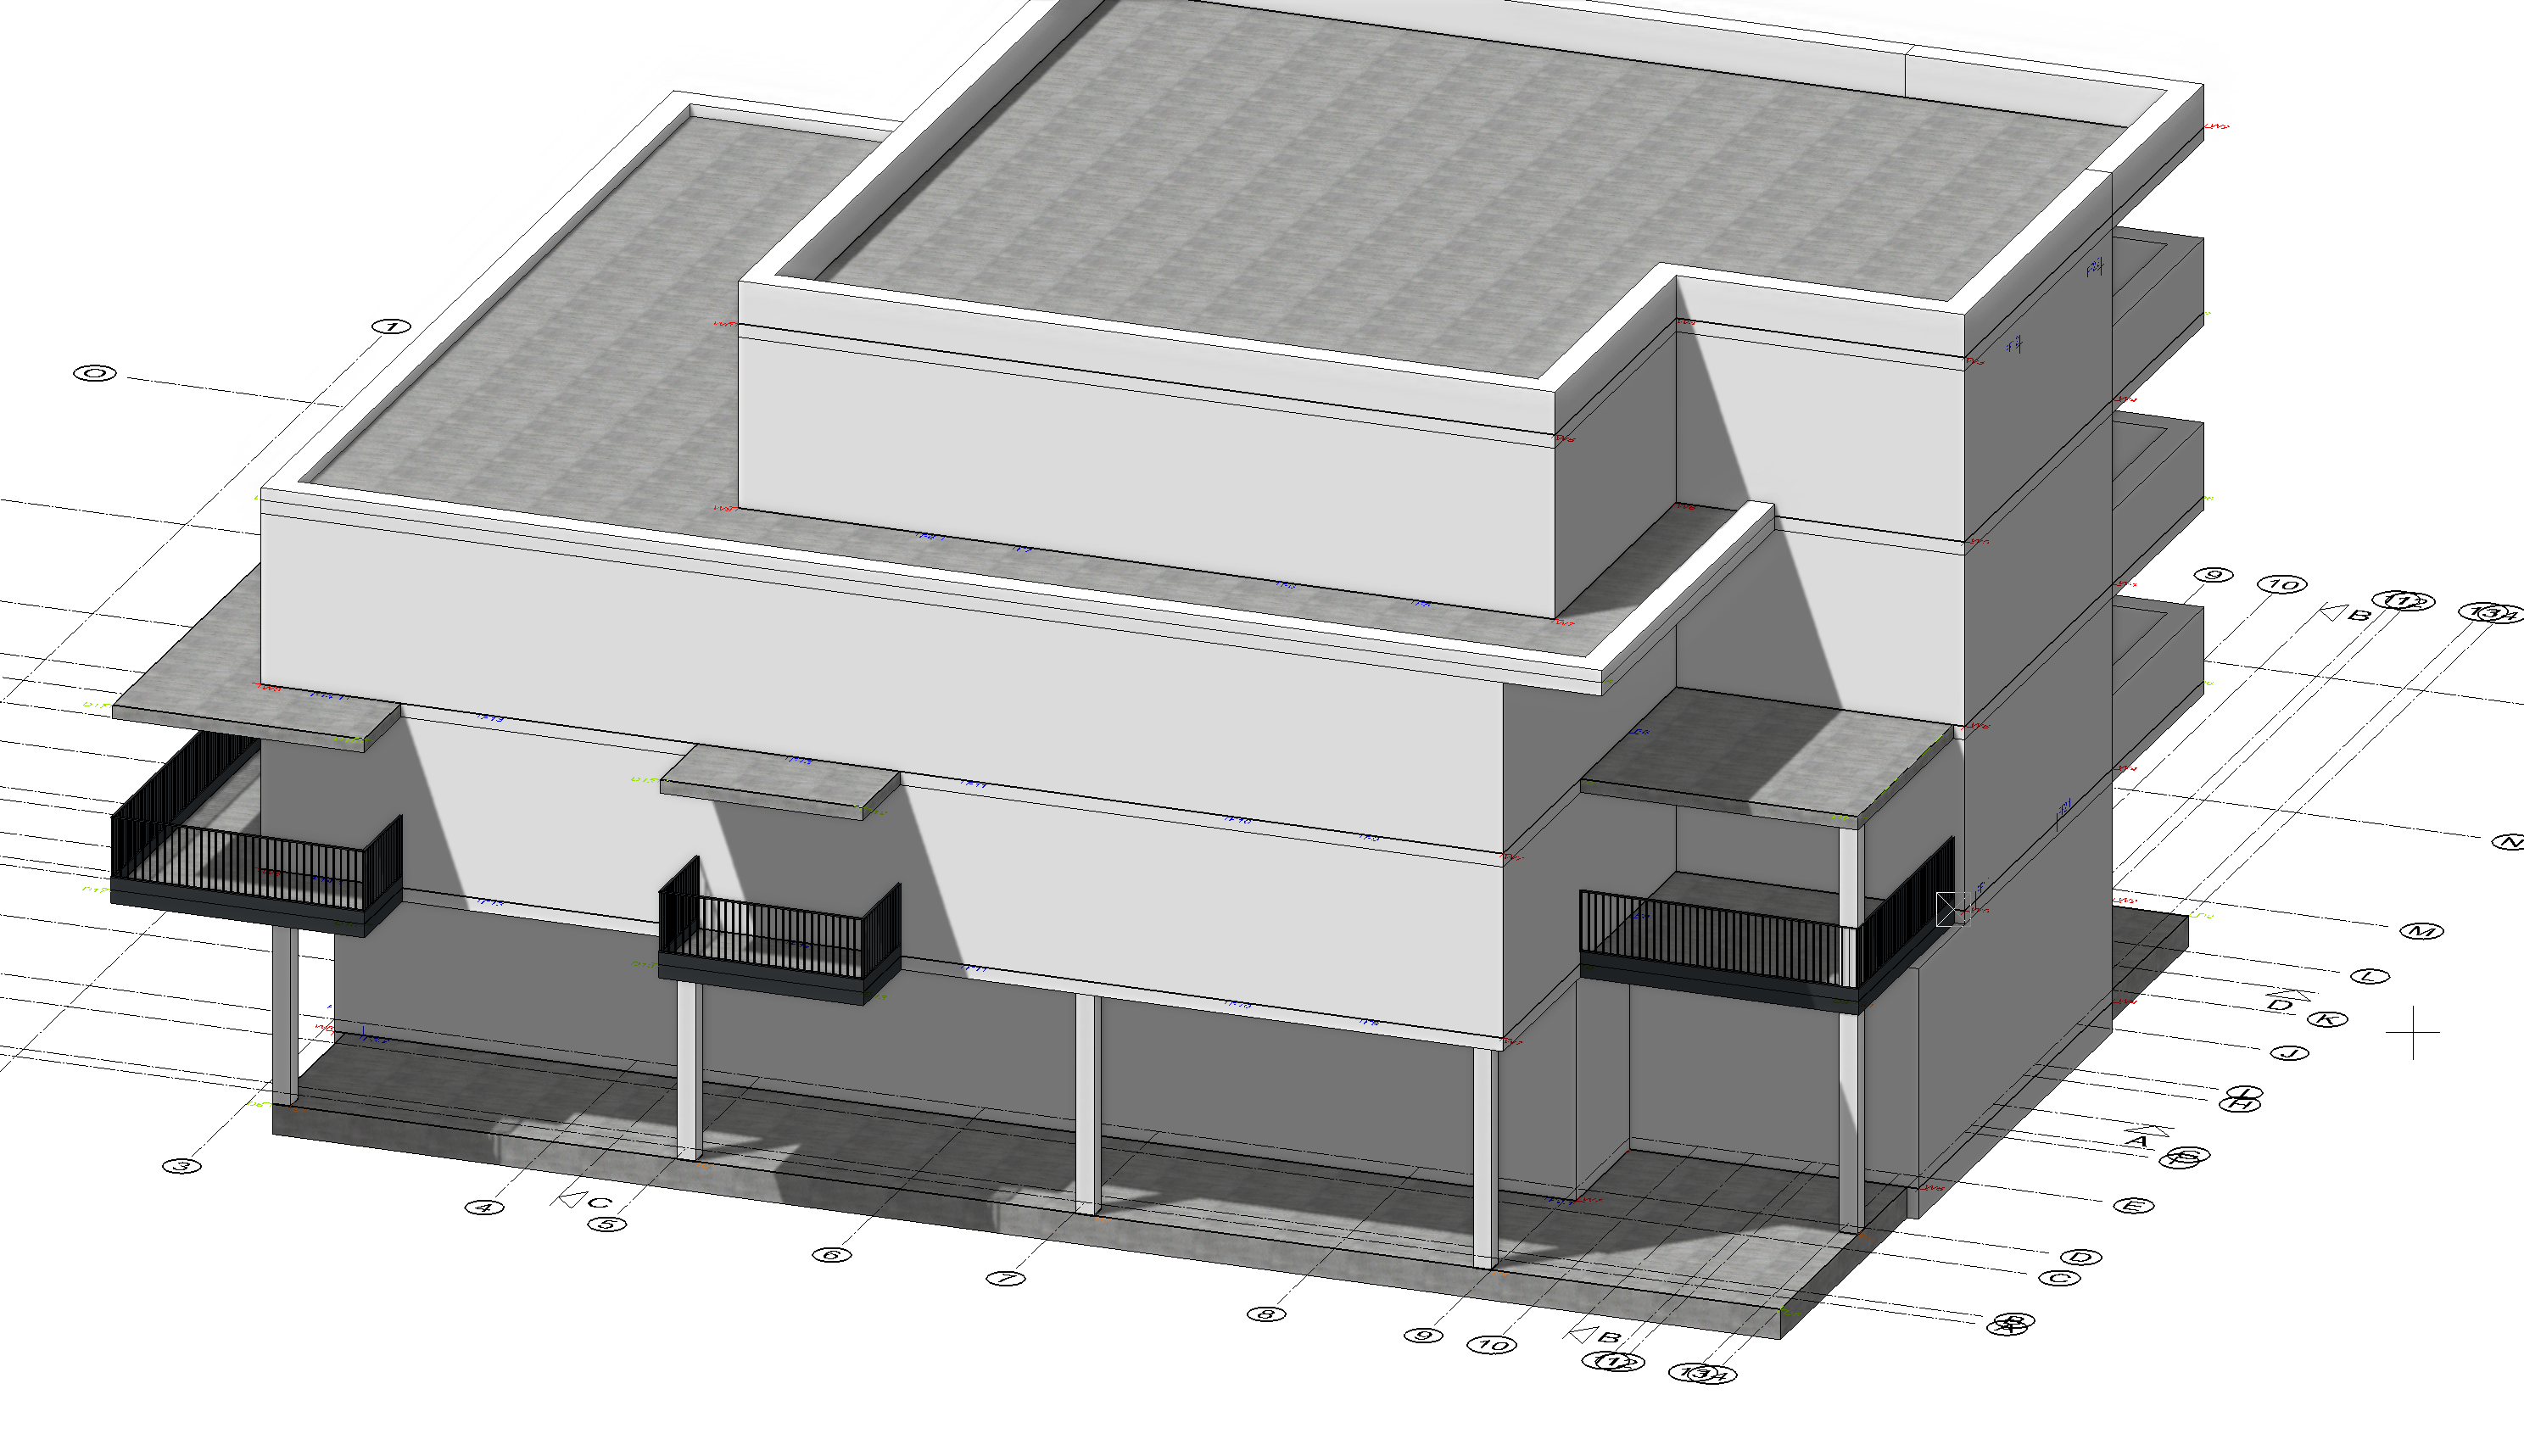
The resulting railing should look like this:
Create the rest of the railings for the first floor:
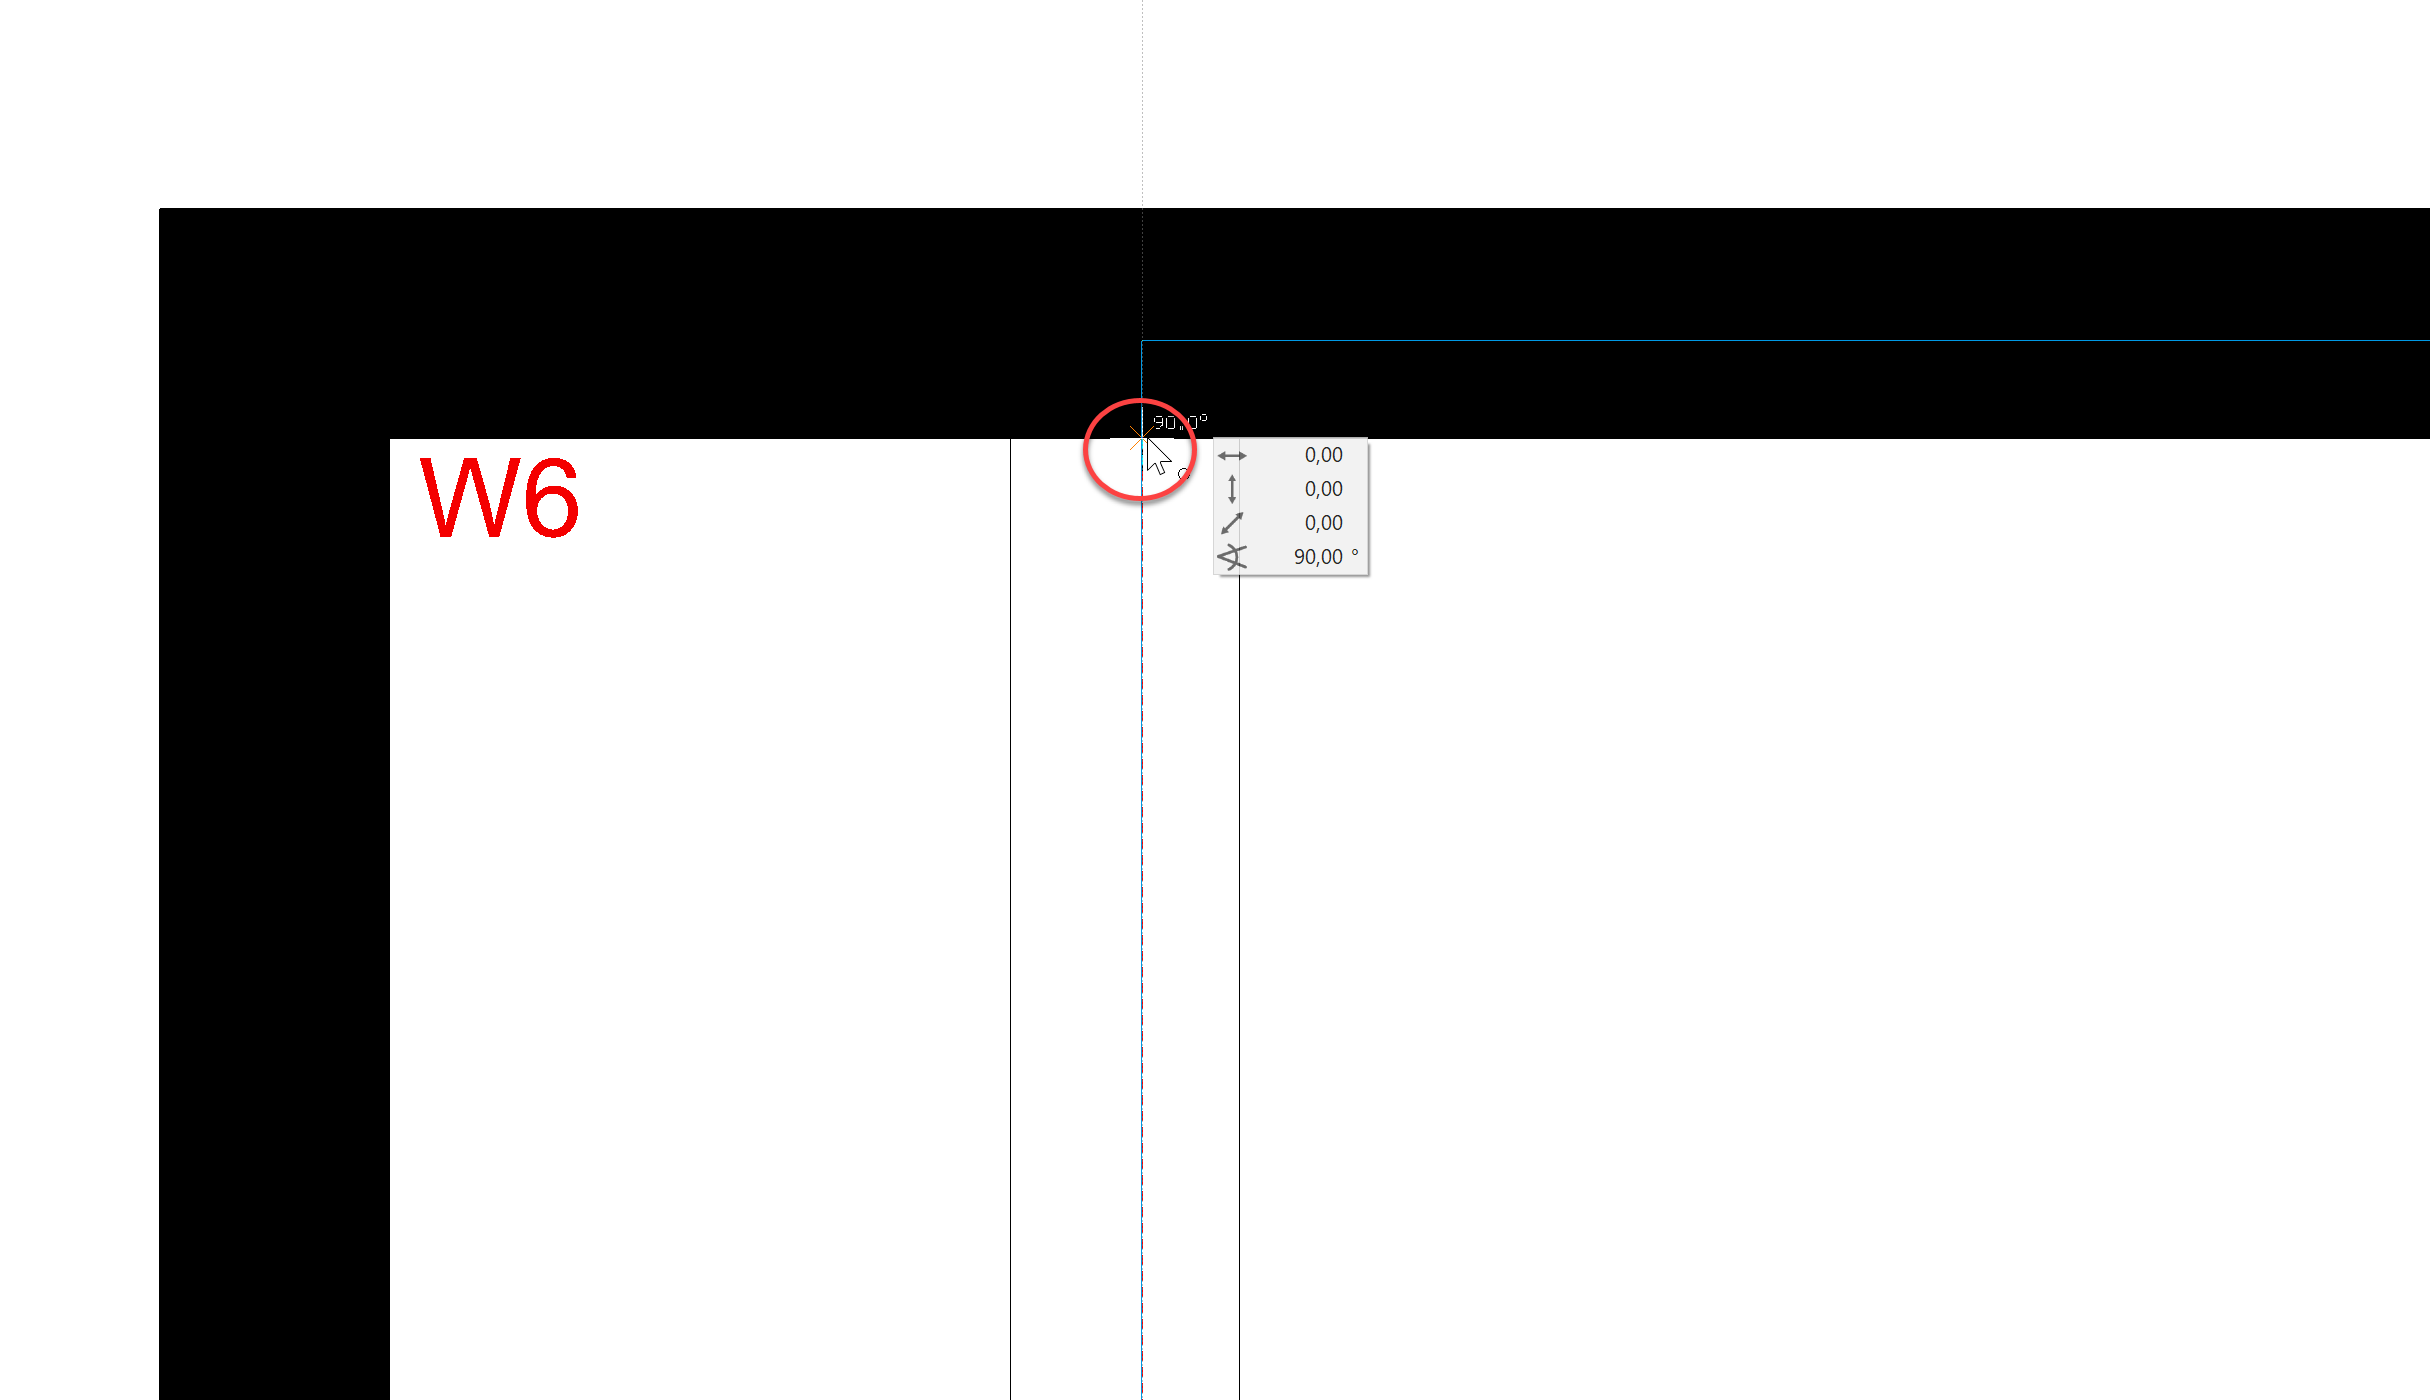
Railing 2: *Wall -> D16 -> D17 -> D18 -> Wall
Railing 3: Wall -> D2 -> D3 -> Wall
Railing 4: Wall -> D9 -> Wall
The completed railings should look like this:
Second floor
Let's move on to the second floor. For this floor, we want to copy the railings from the first floor. All of the following process steps can be executed in a variety of ways. One option would be to mark each railing individually and copy them, or selecting all railings using a multiple selection and coping them all at once. An additional trick to accomplish this, is through parametric selection.
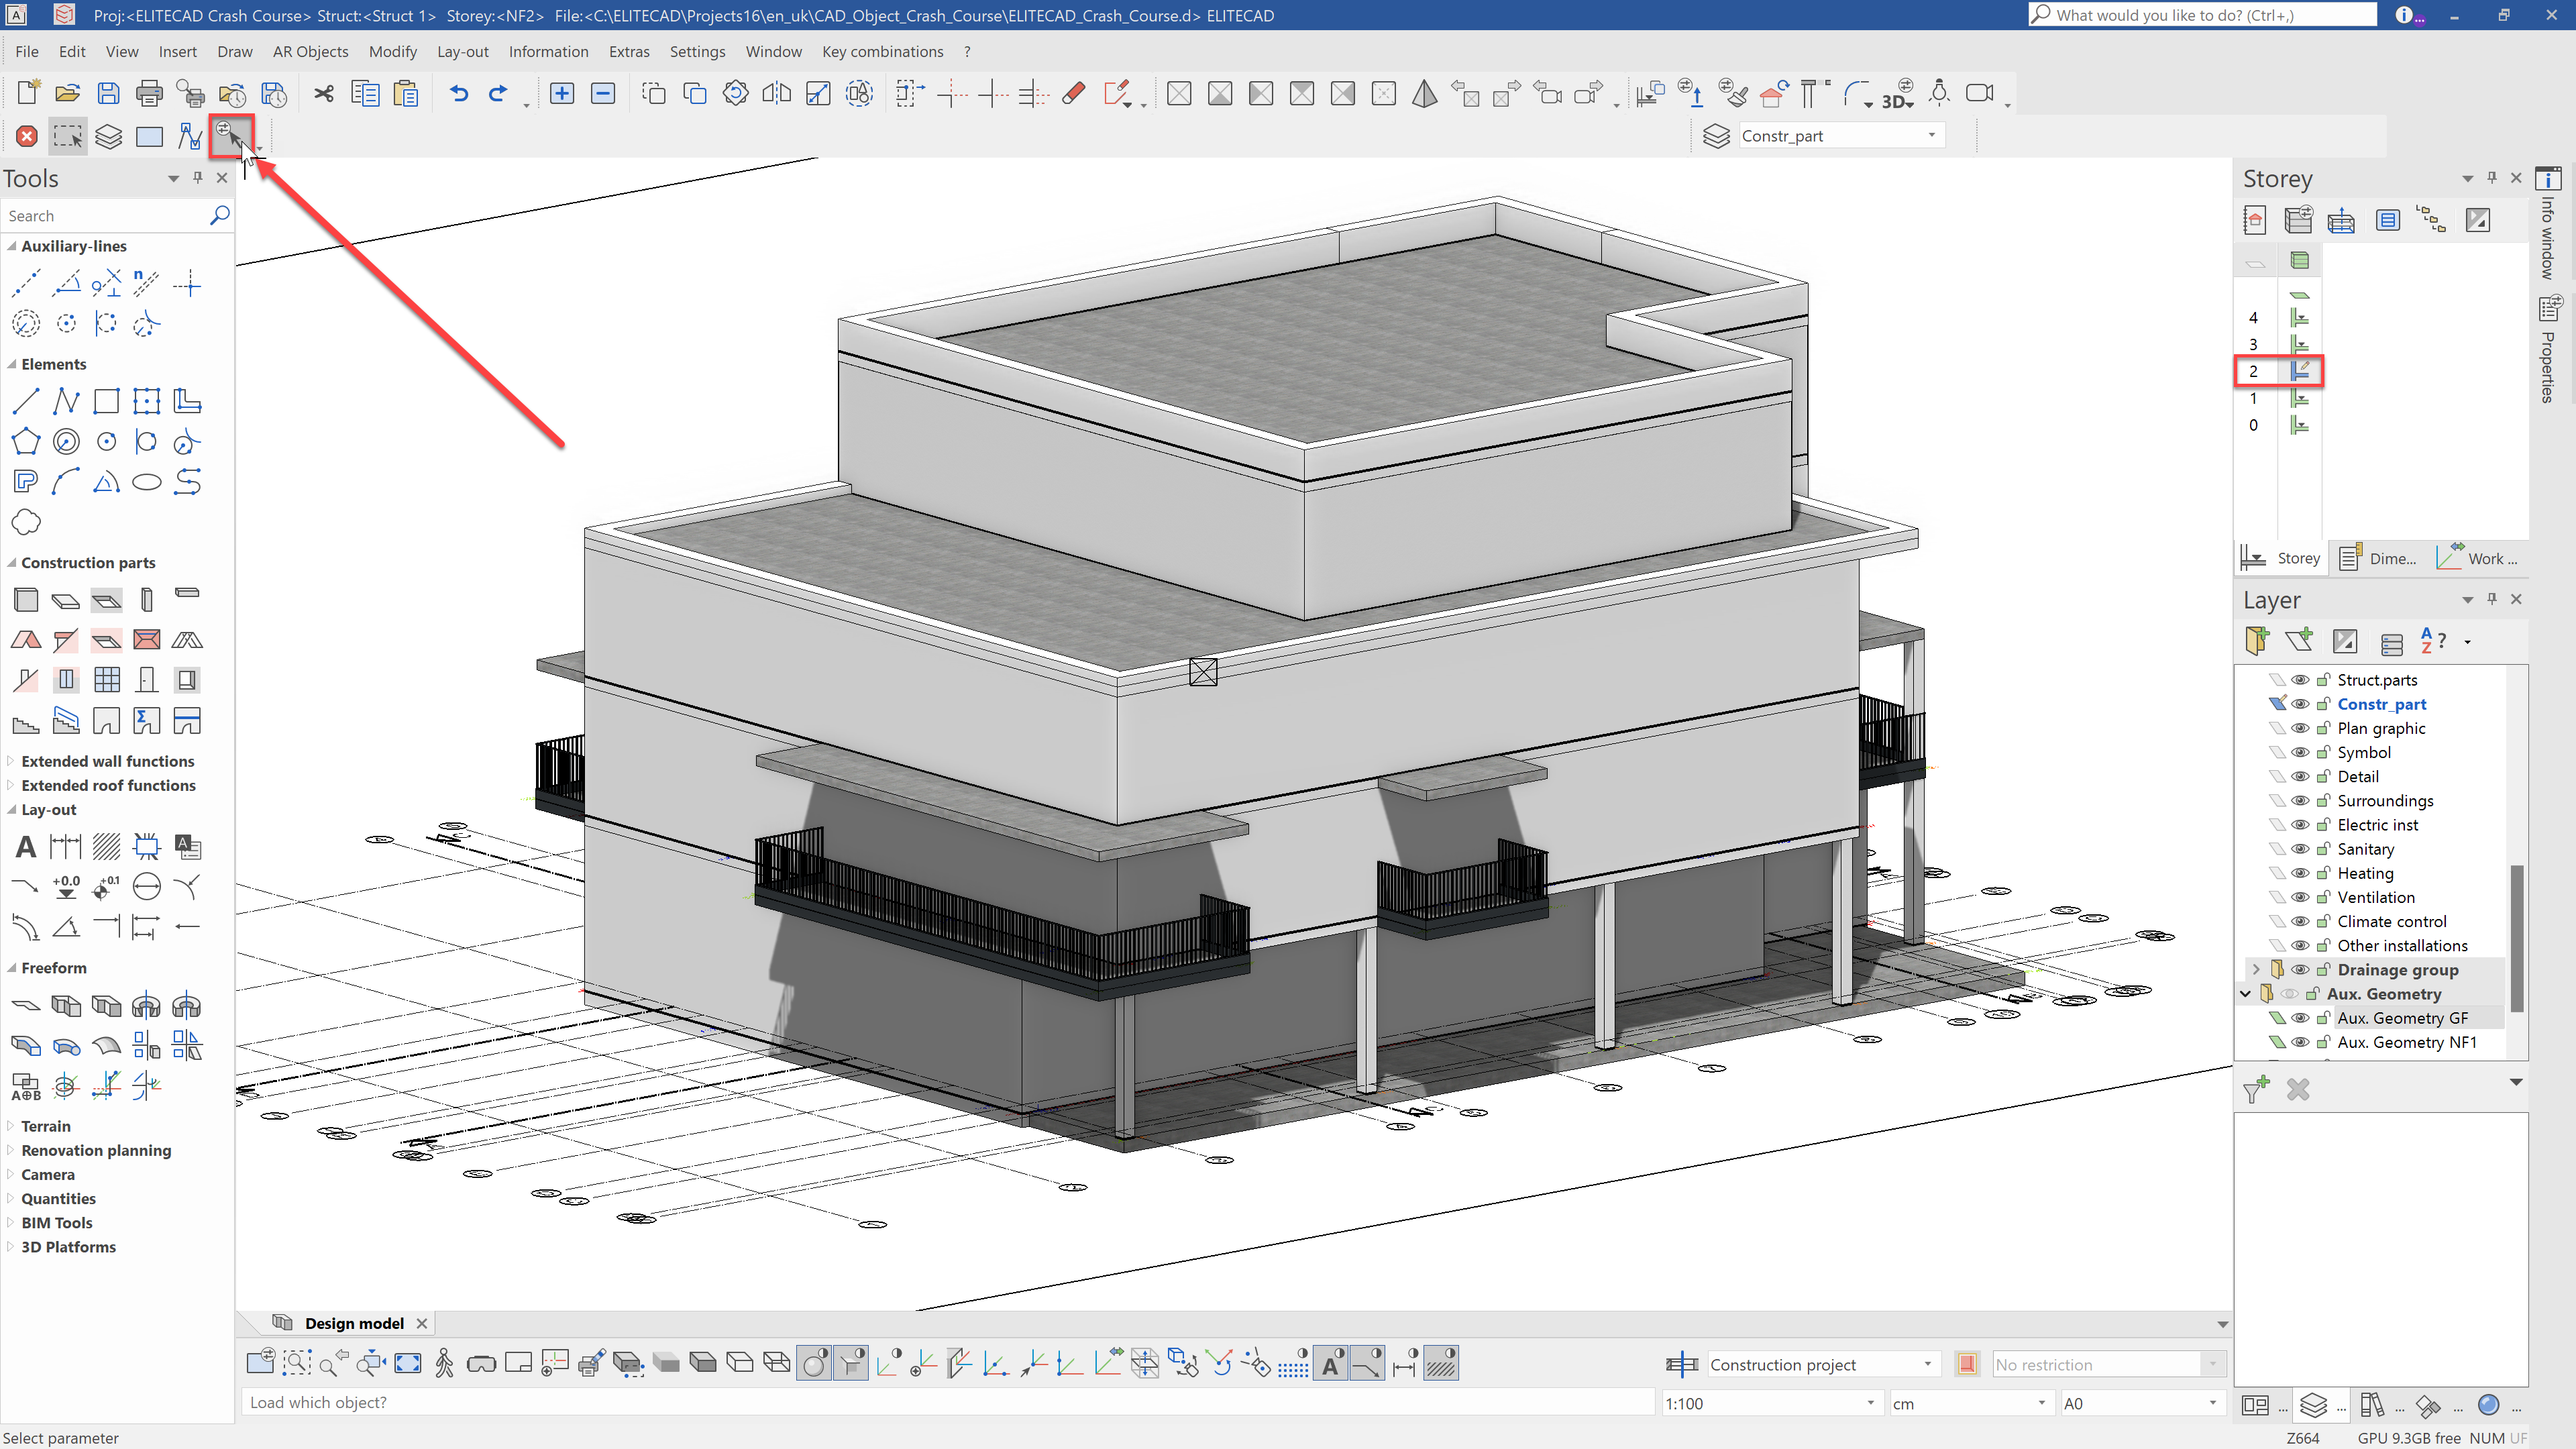
Select the function Select parameter. This function requires a reference object. For this, select any of the railings from the first floor.
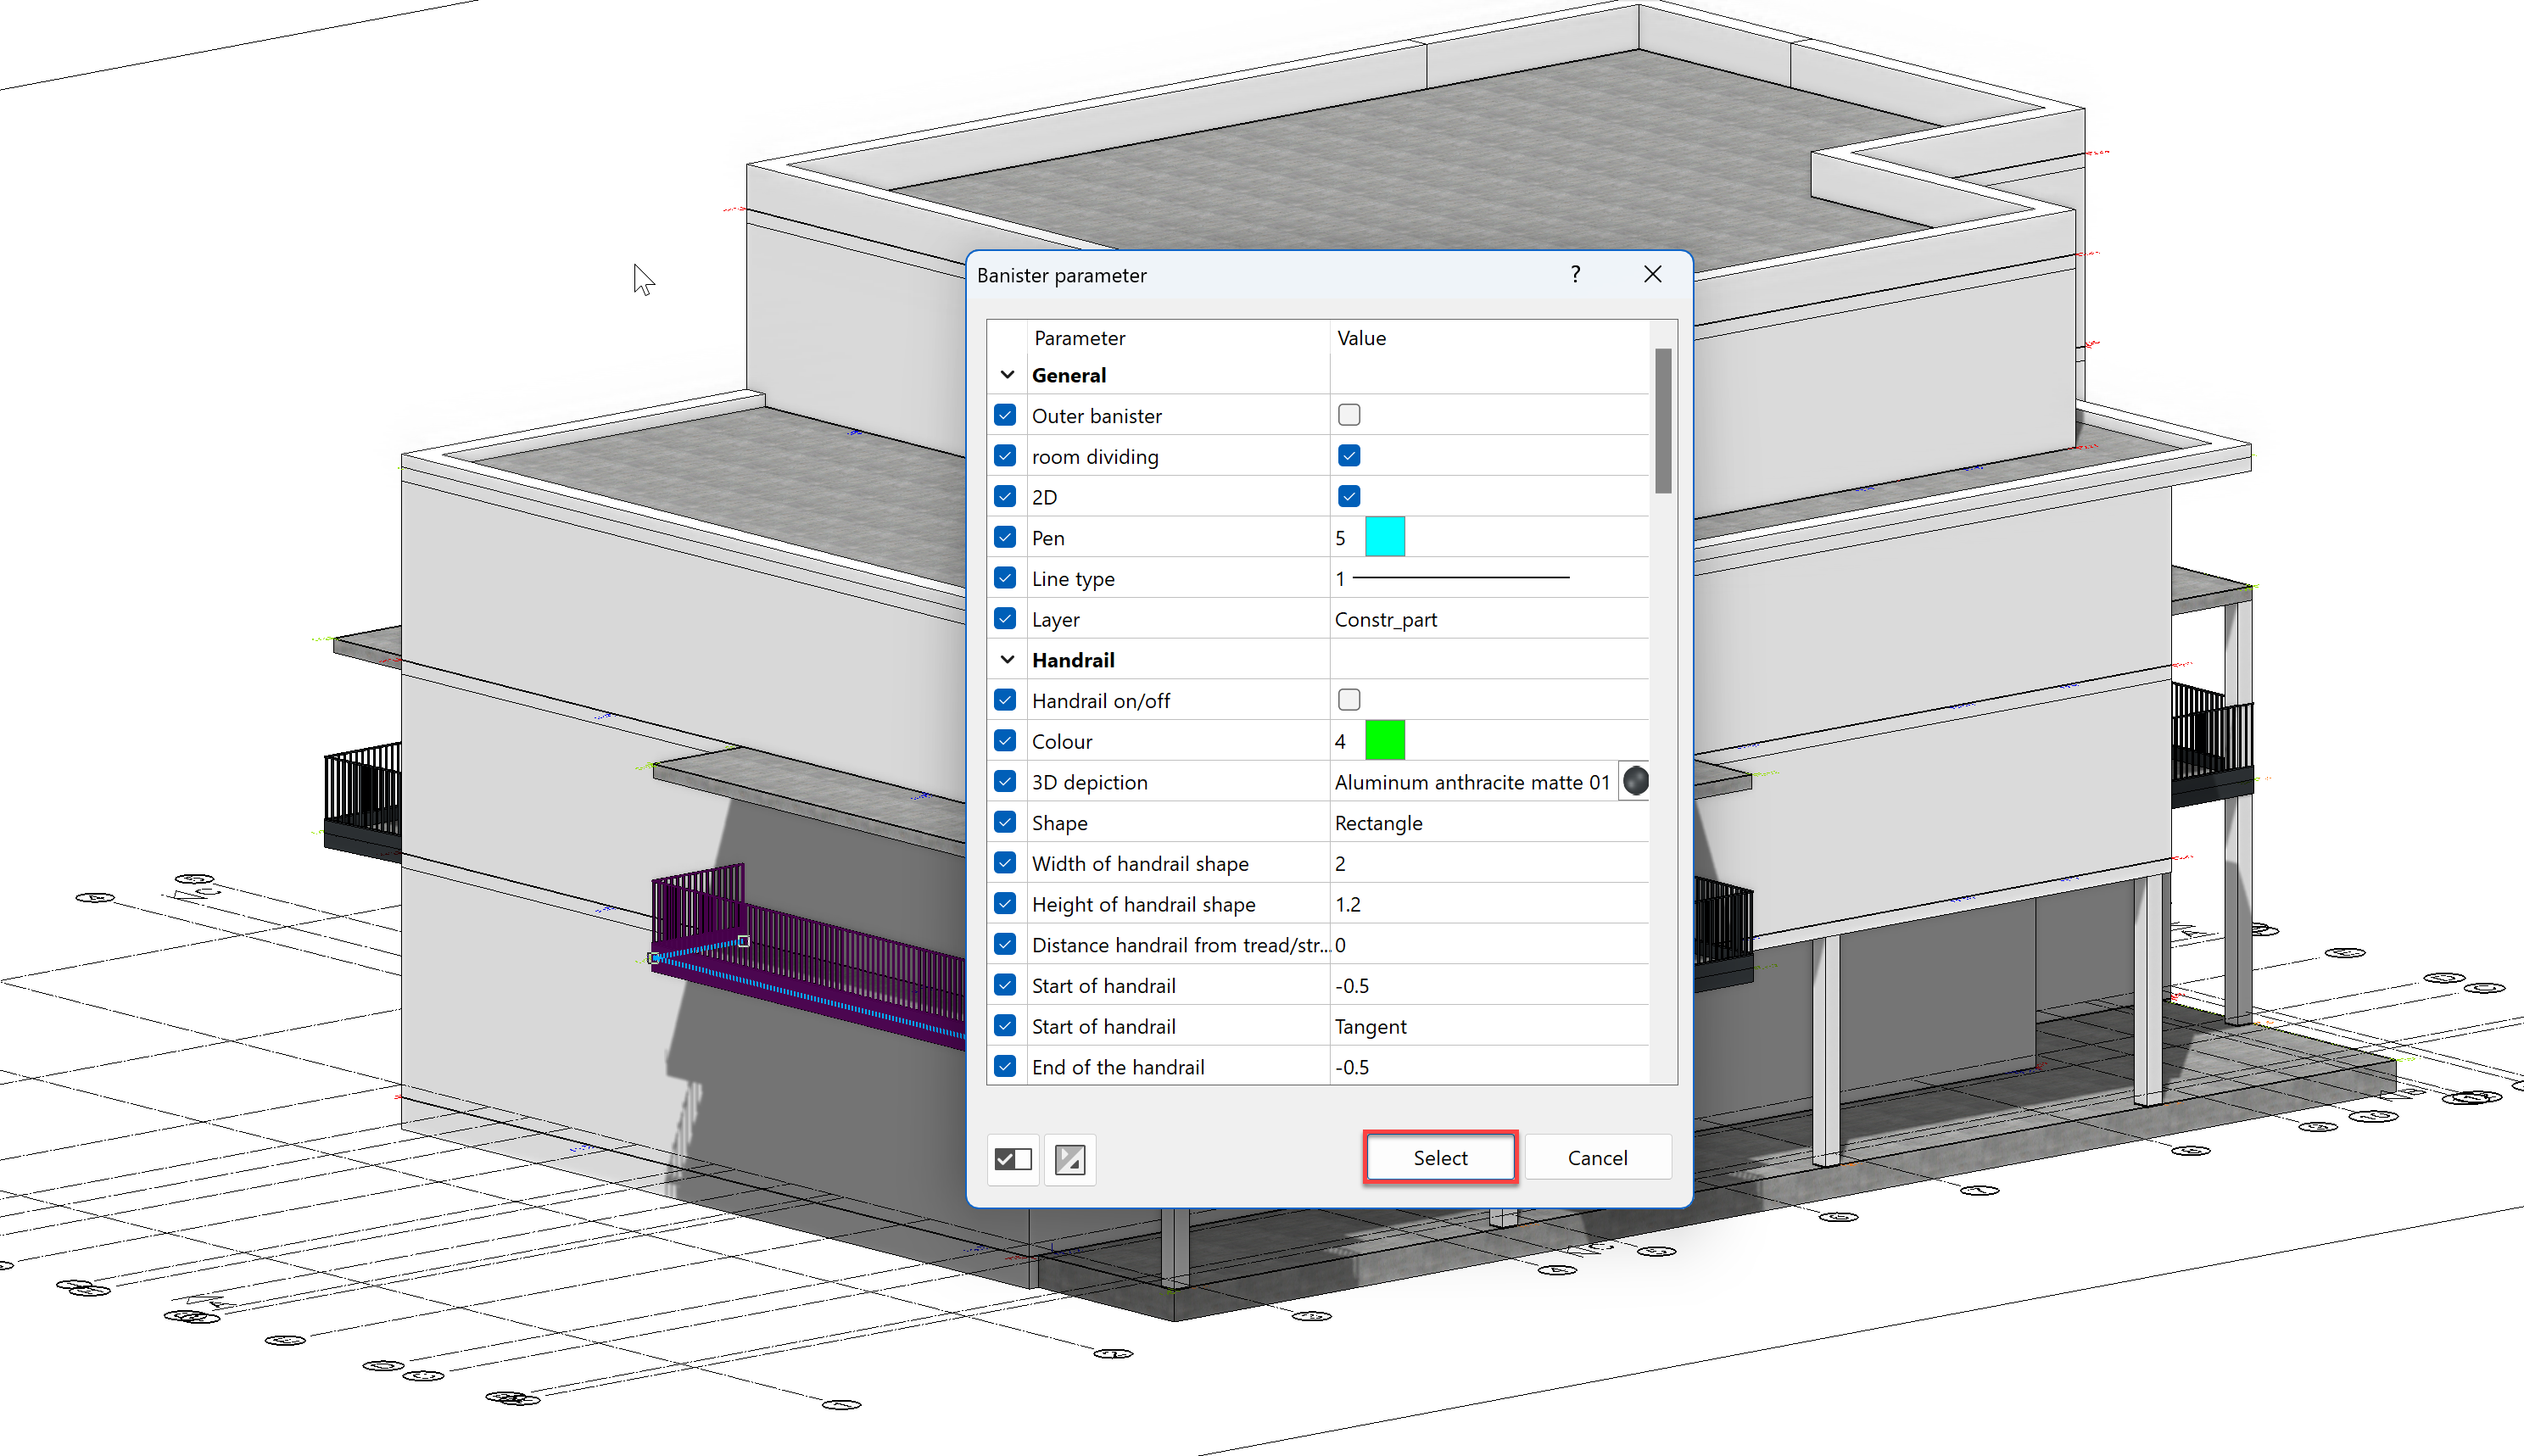
Now the properties of the selected object are loaded and we can search and mark the matching objects according to any criteria set. For example, we could select all railings that have the same height. For us, however, the railings are all the same anyway so we will just confirm the dialog with Select.
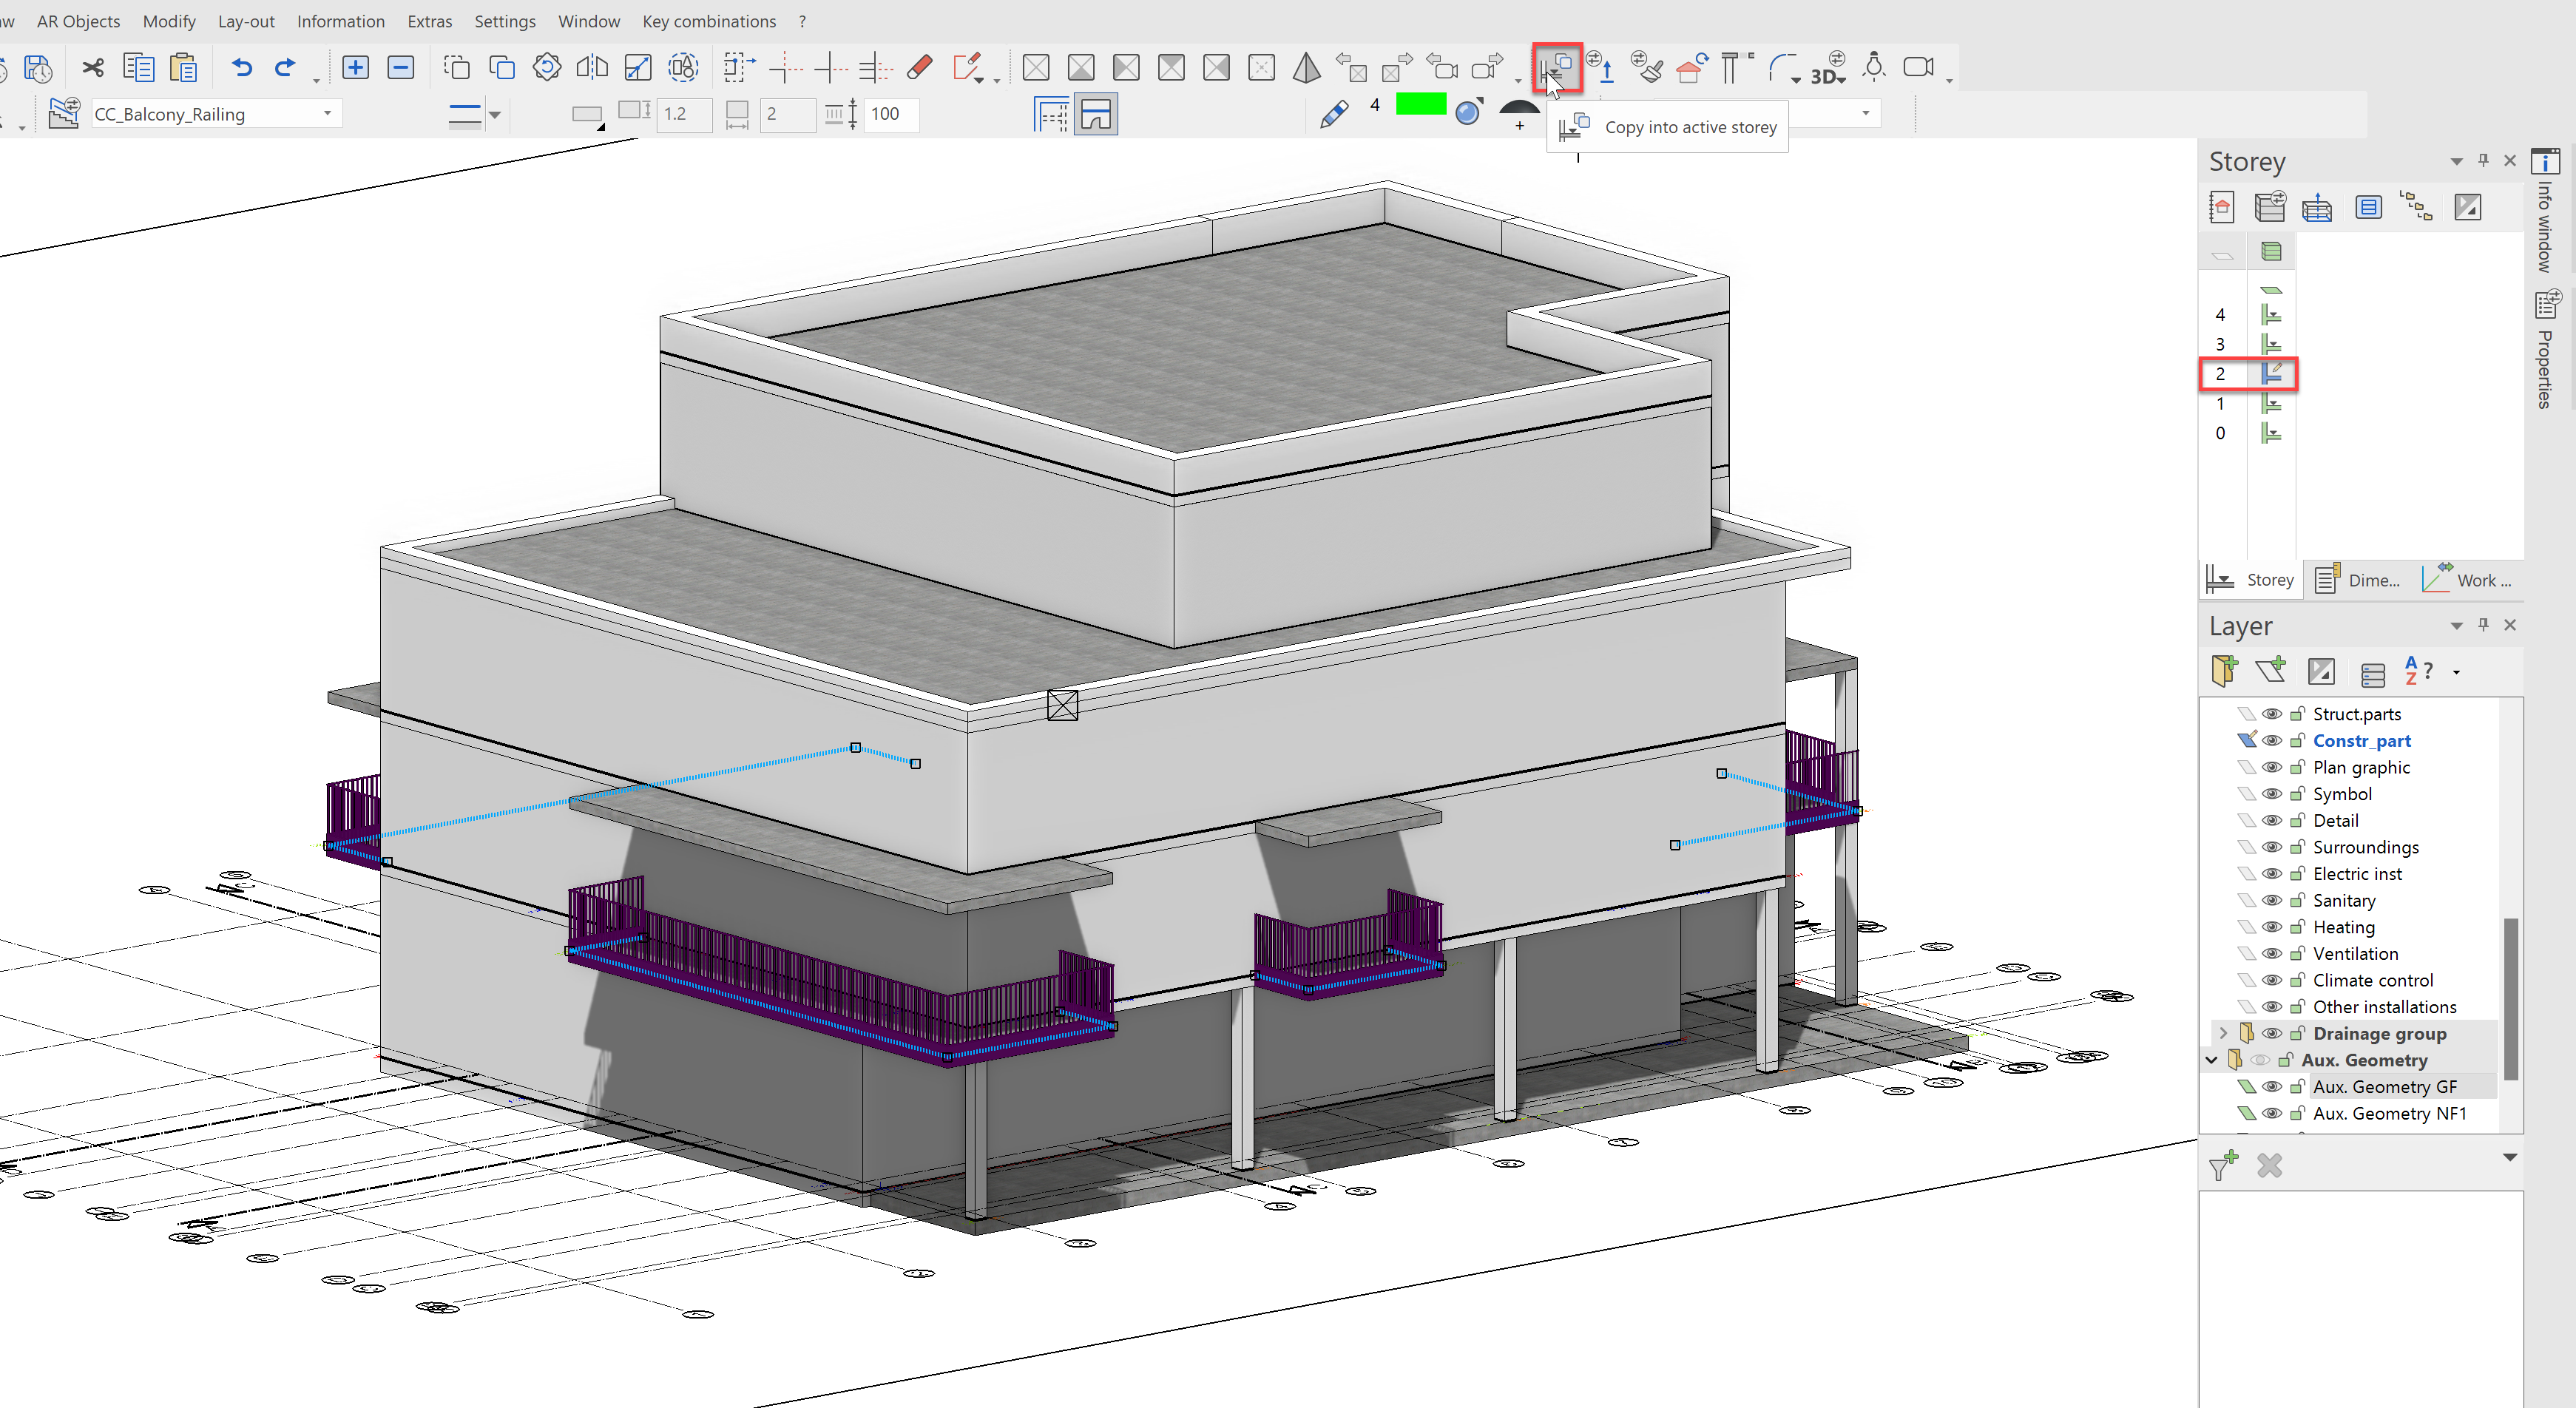
All railing objects are now selected and we can again use the already known function Copy into active storey to copy the components to the second floor.
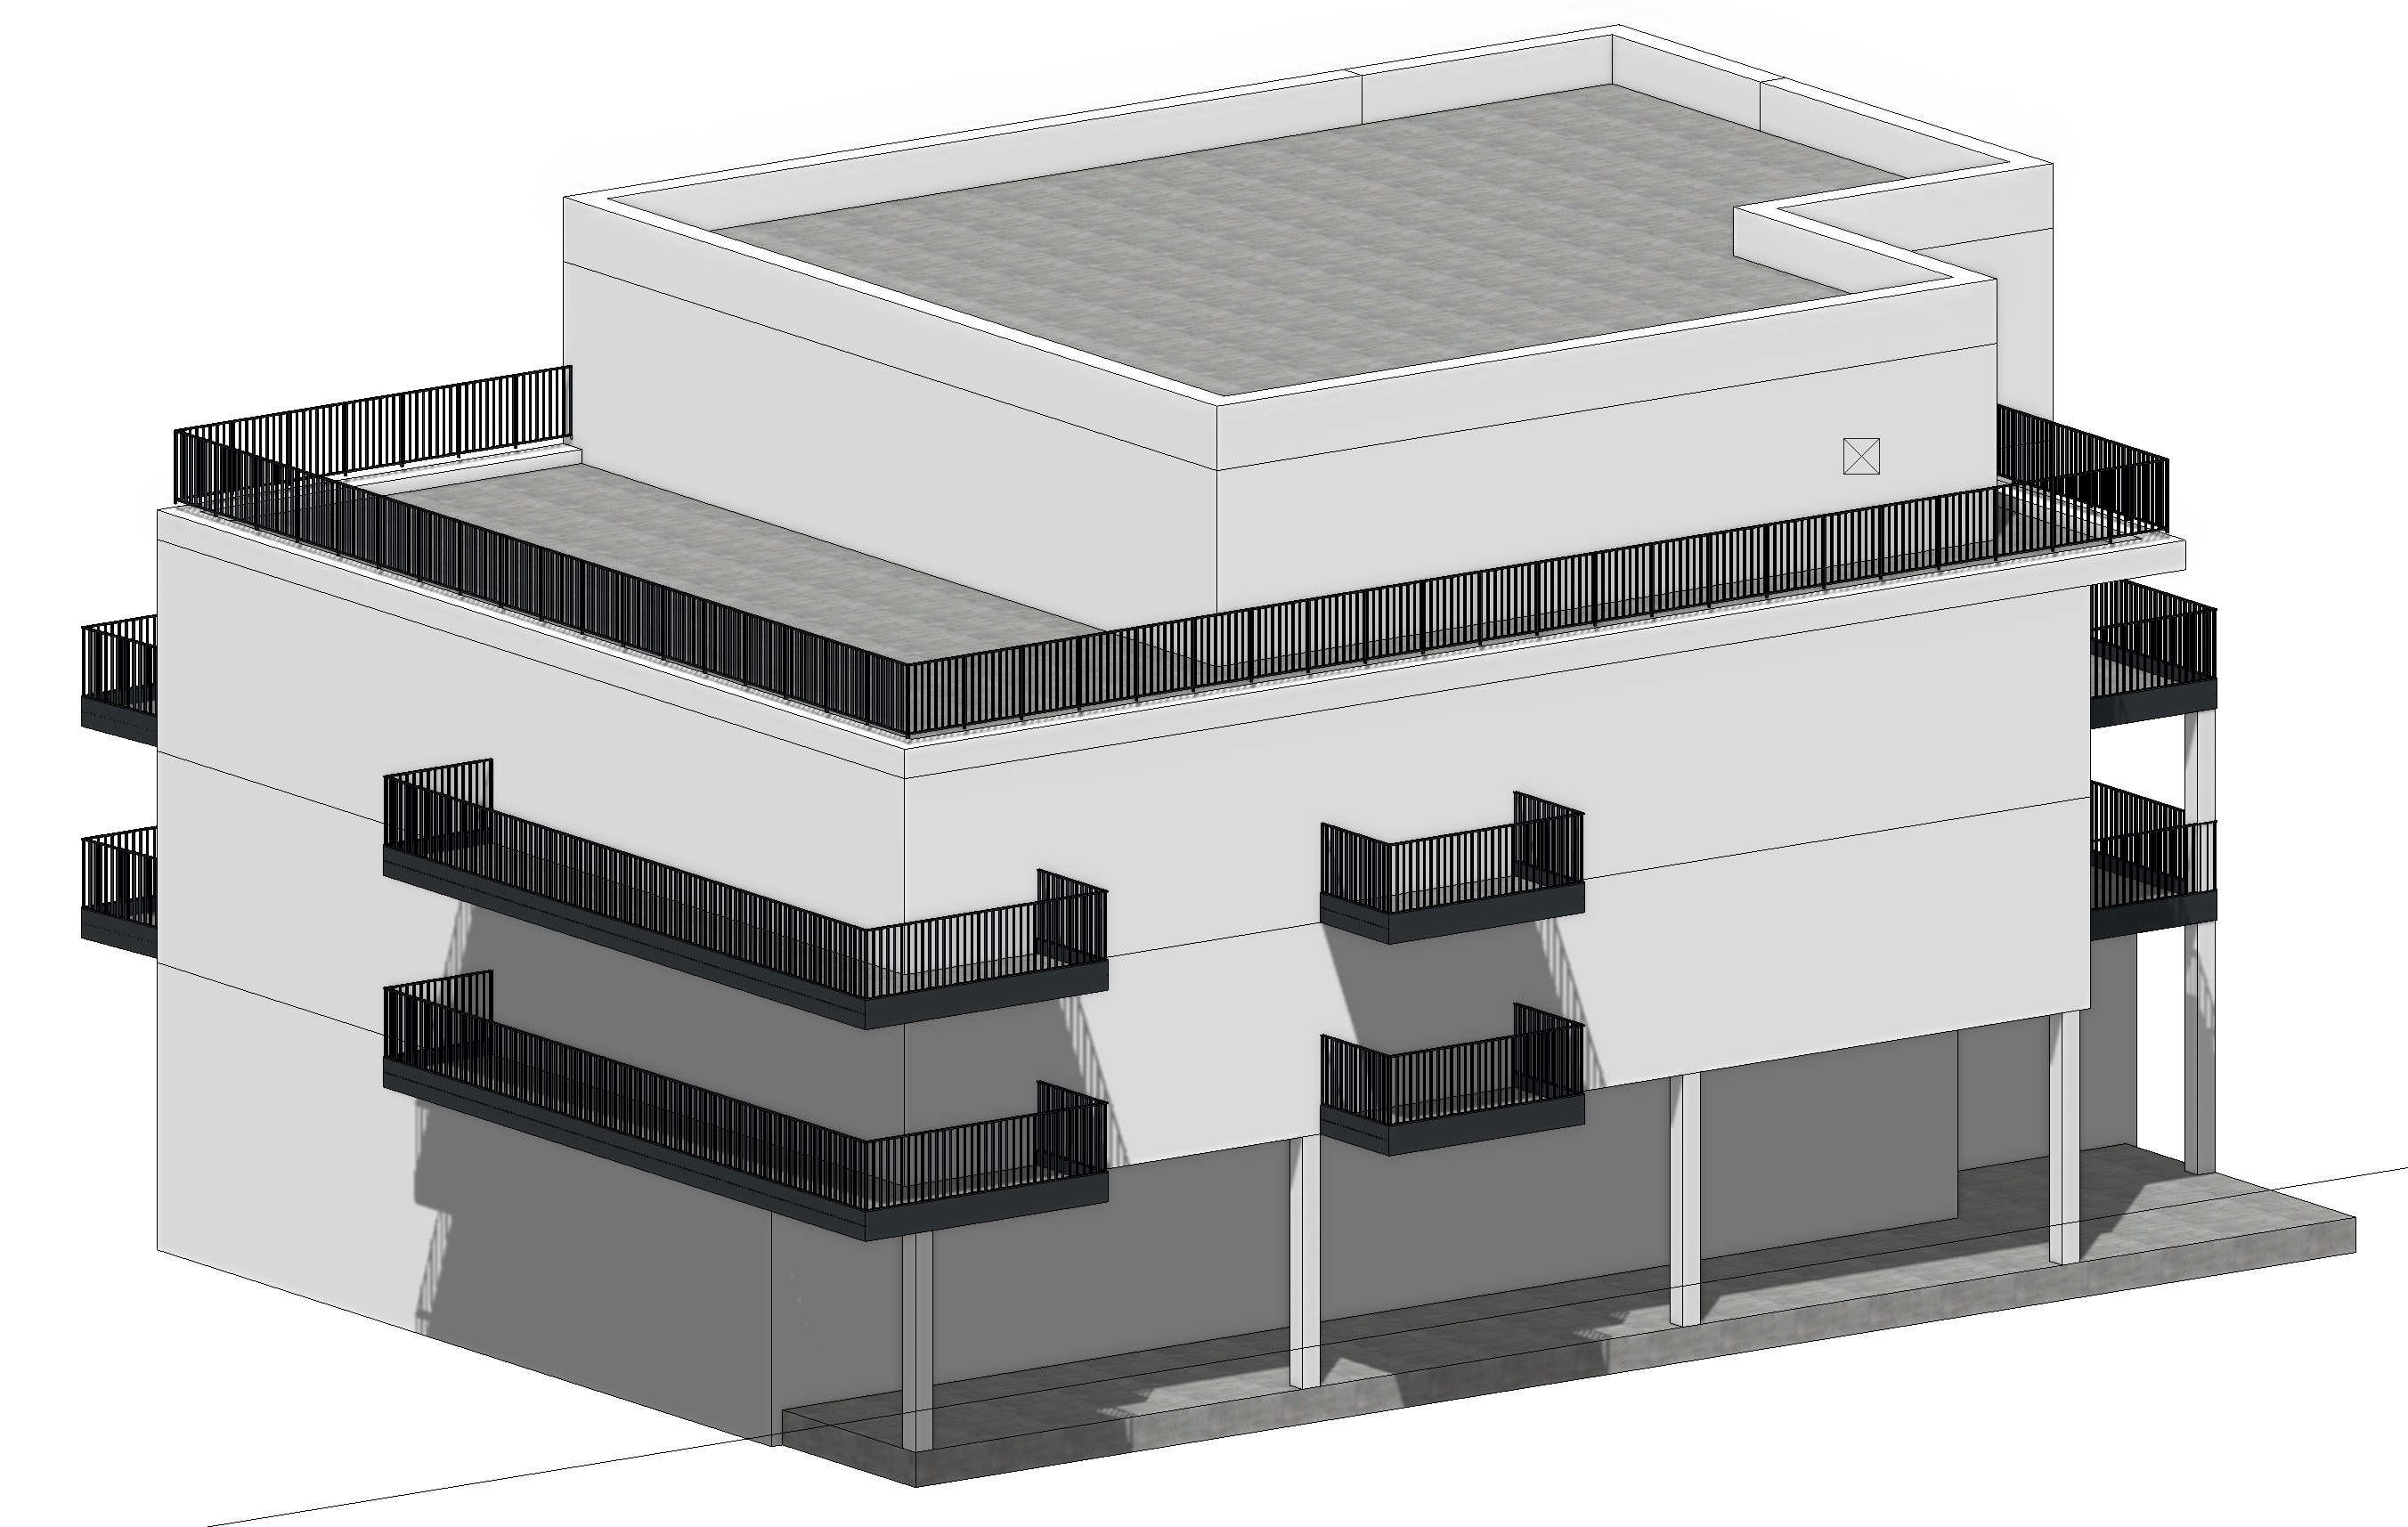
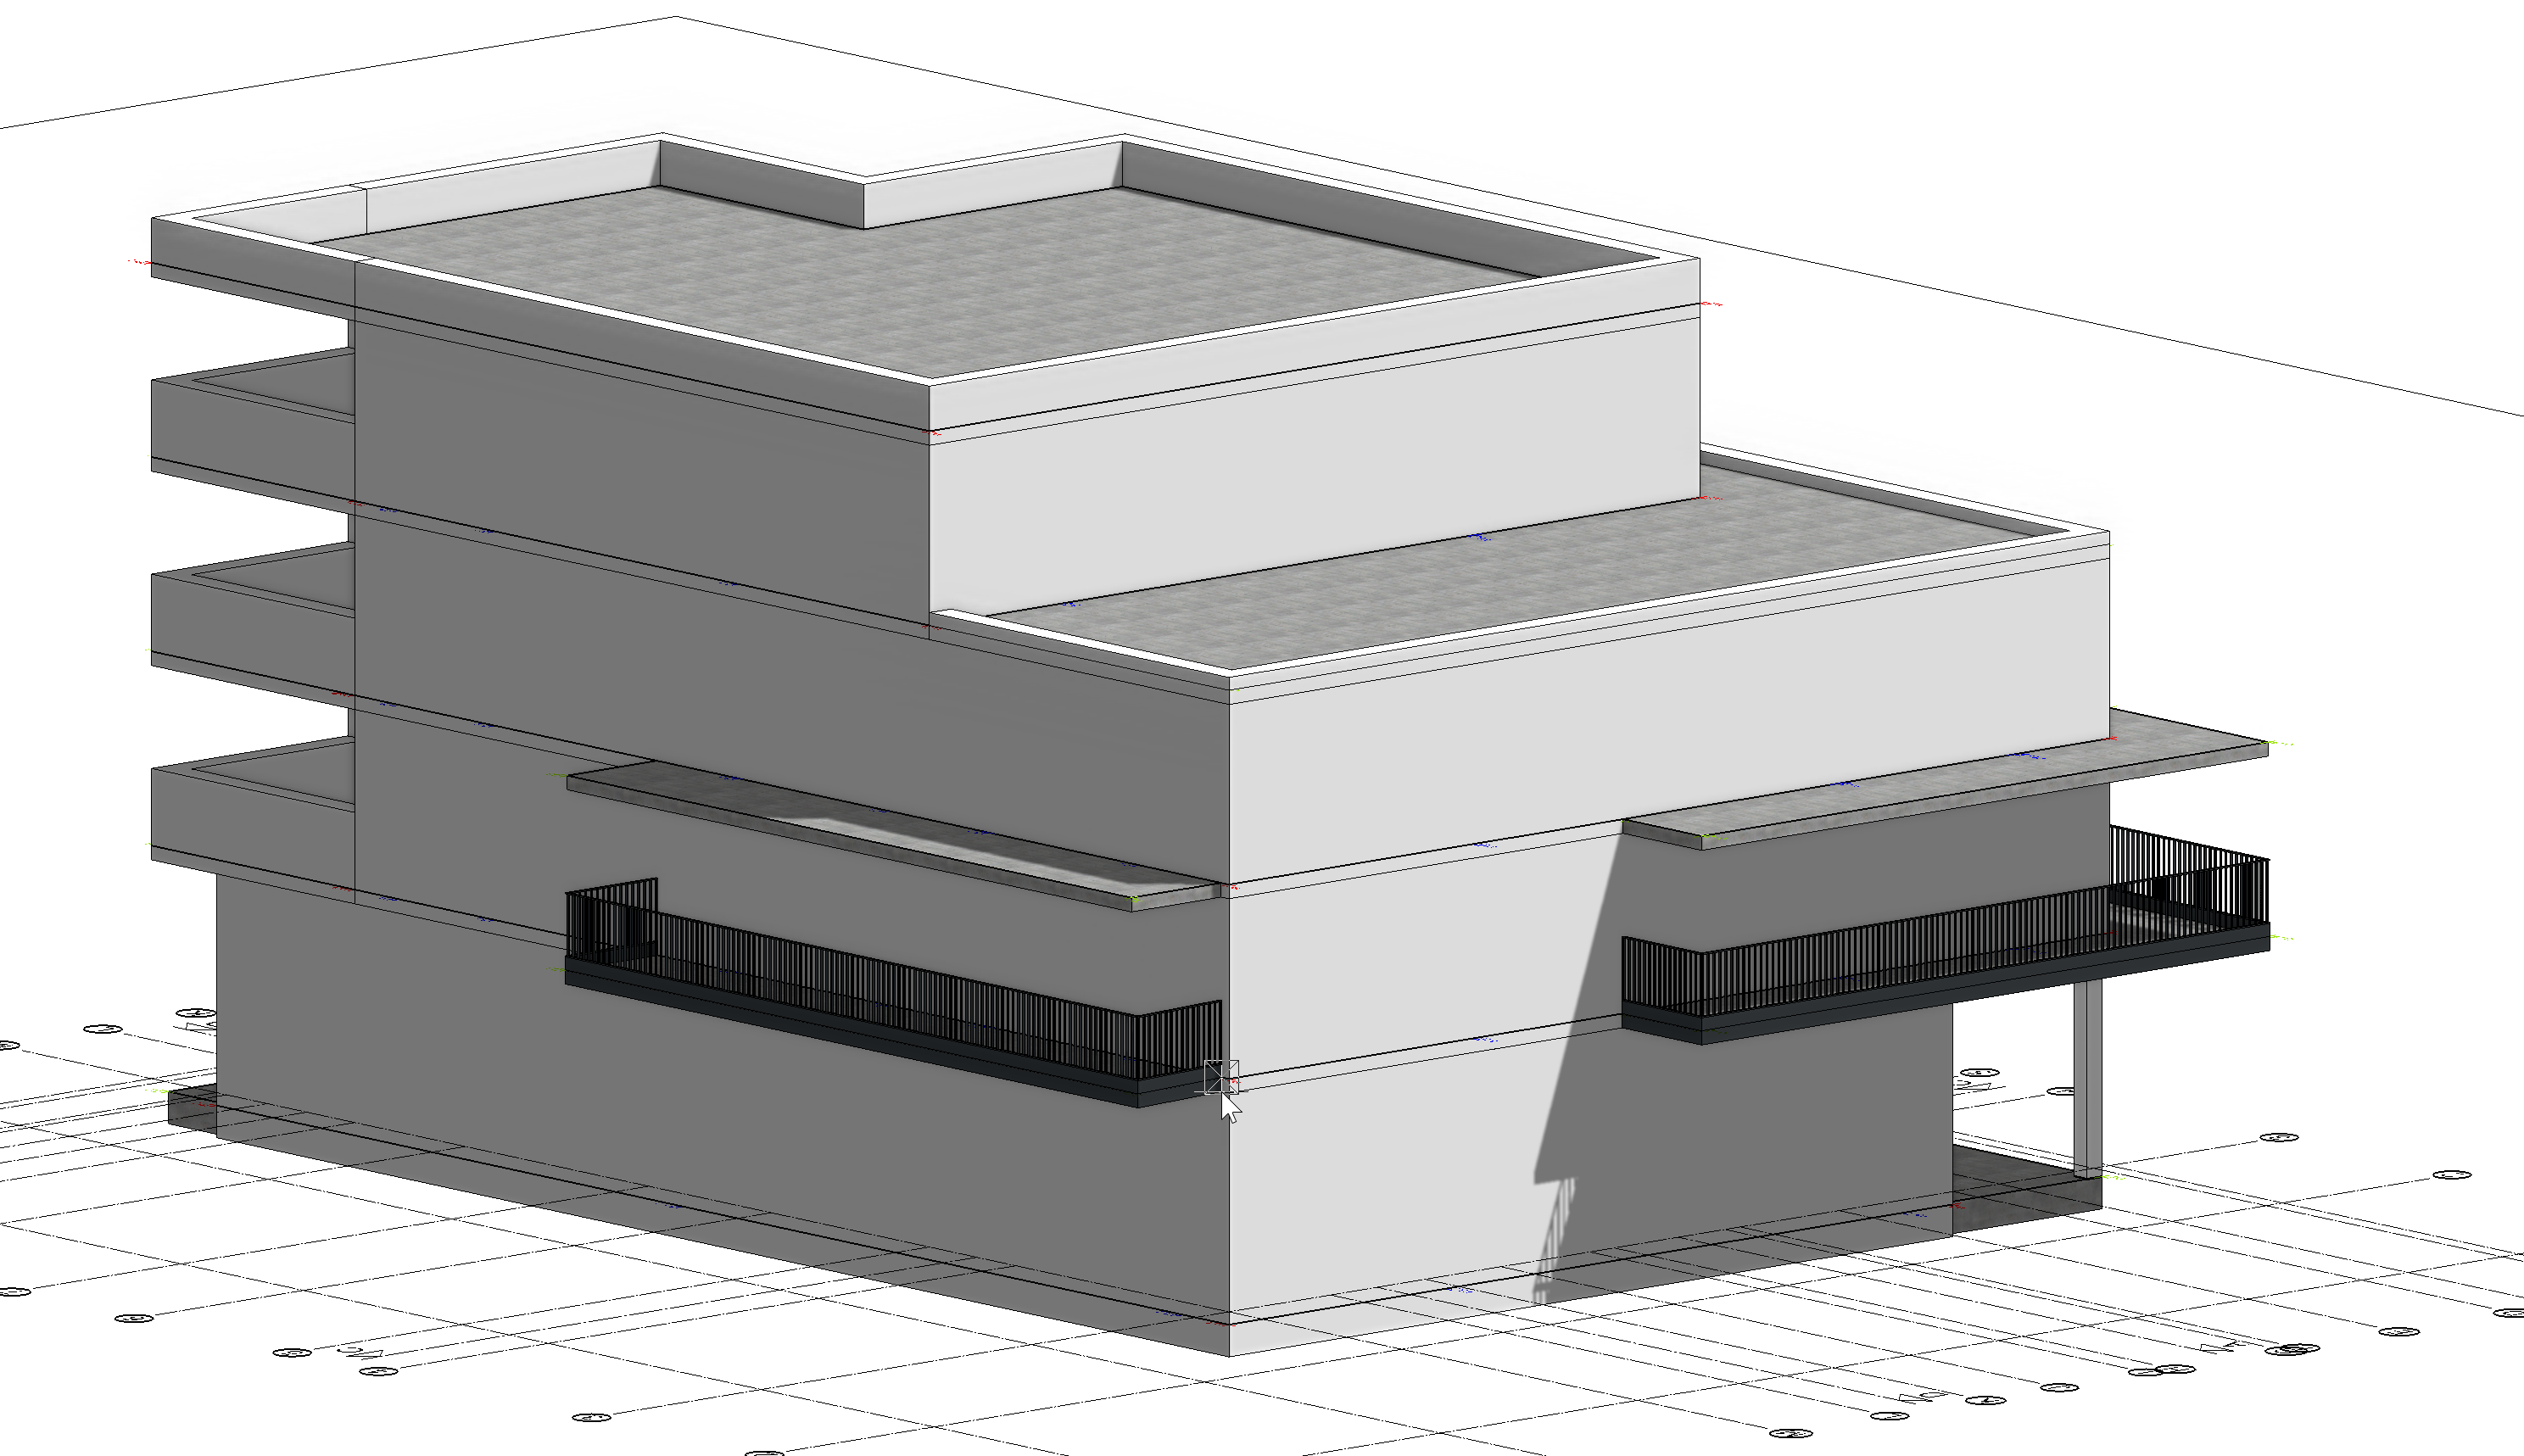
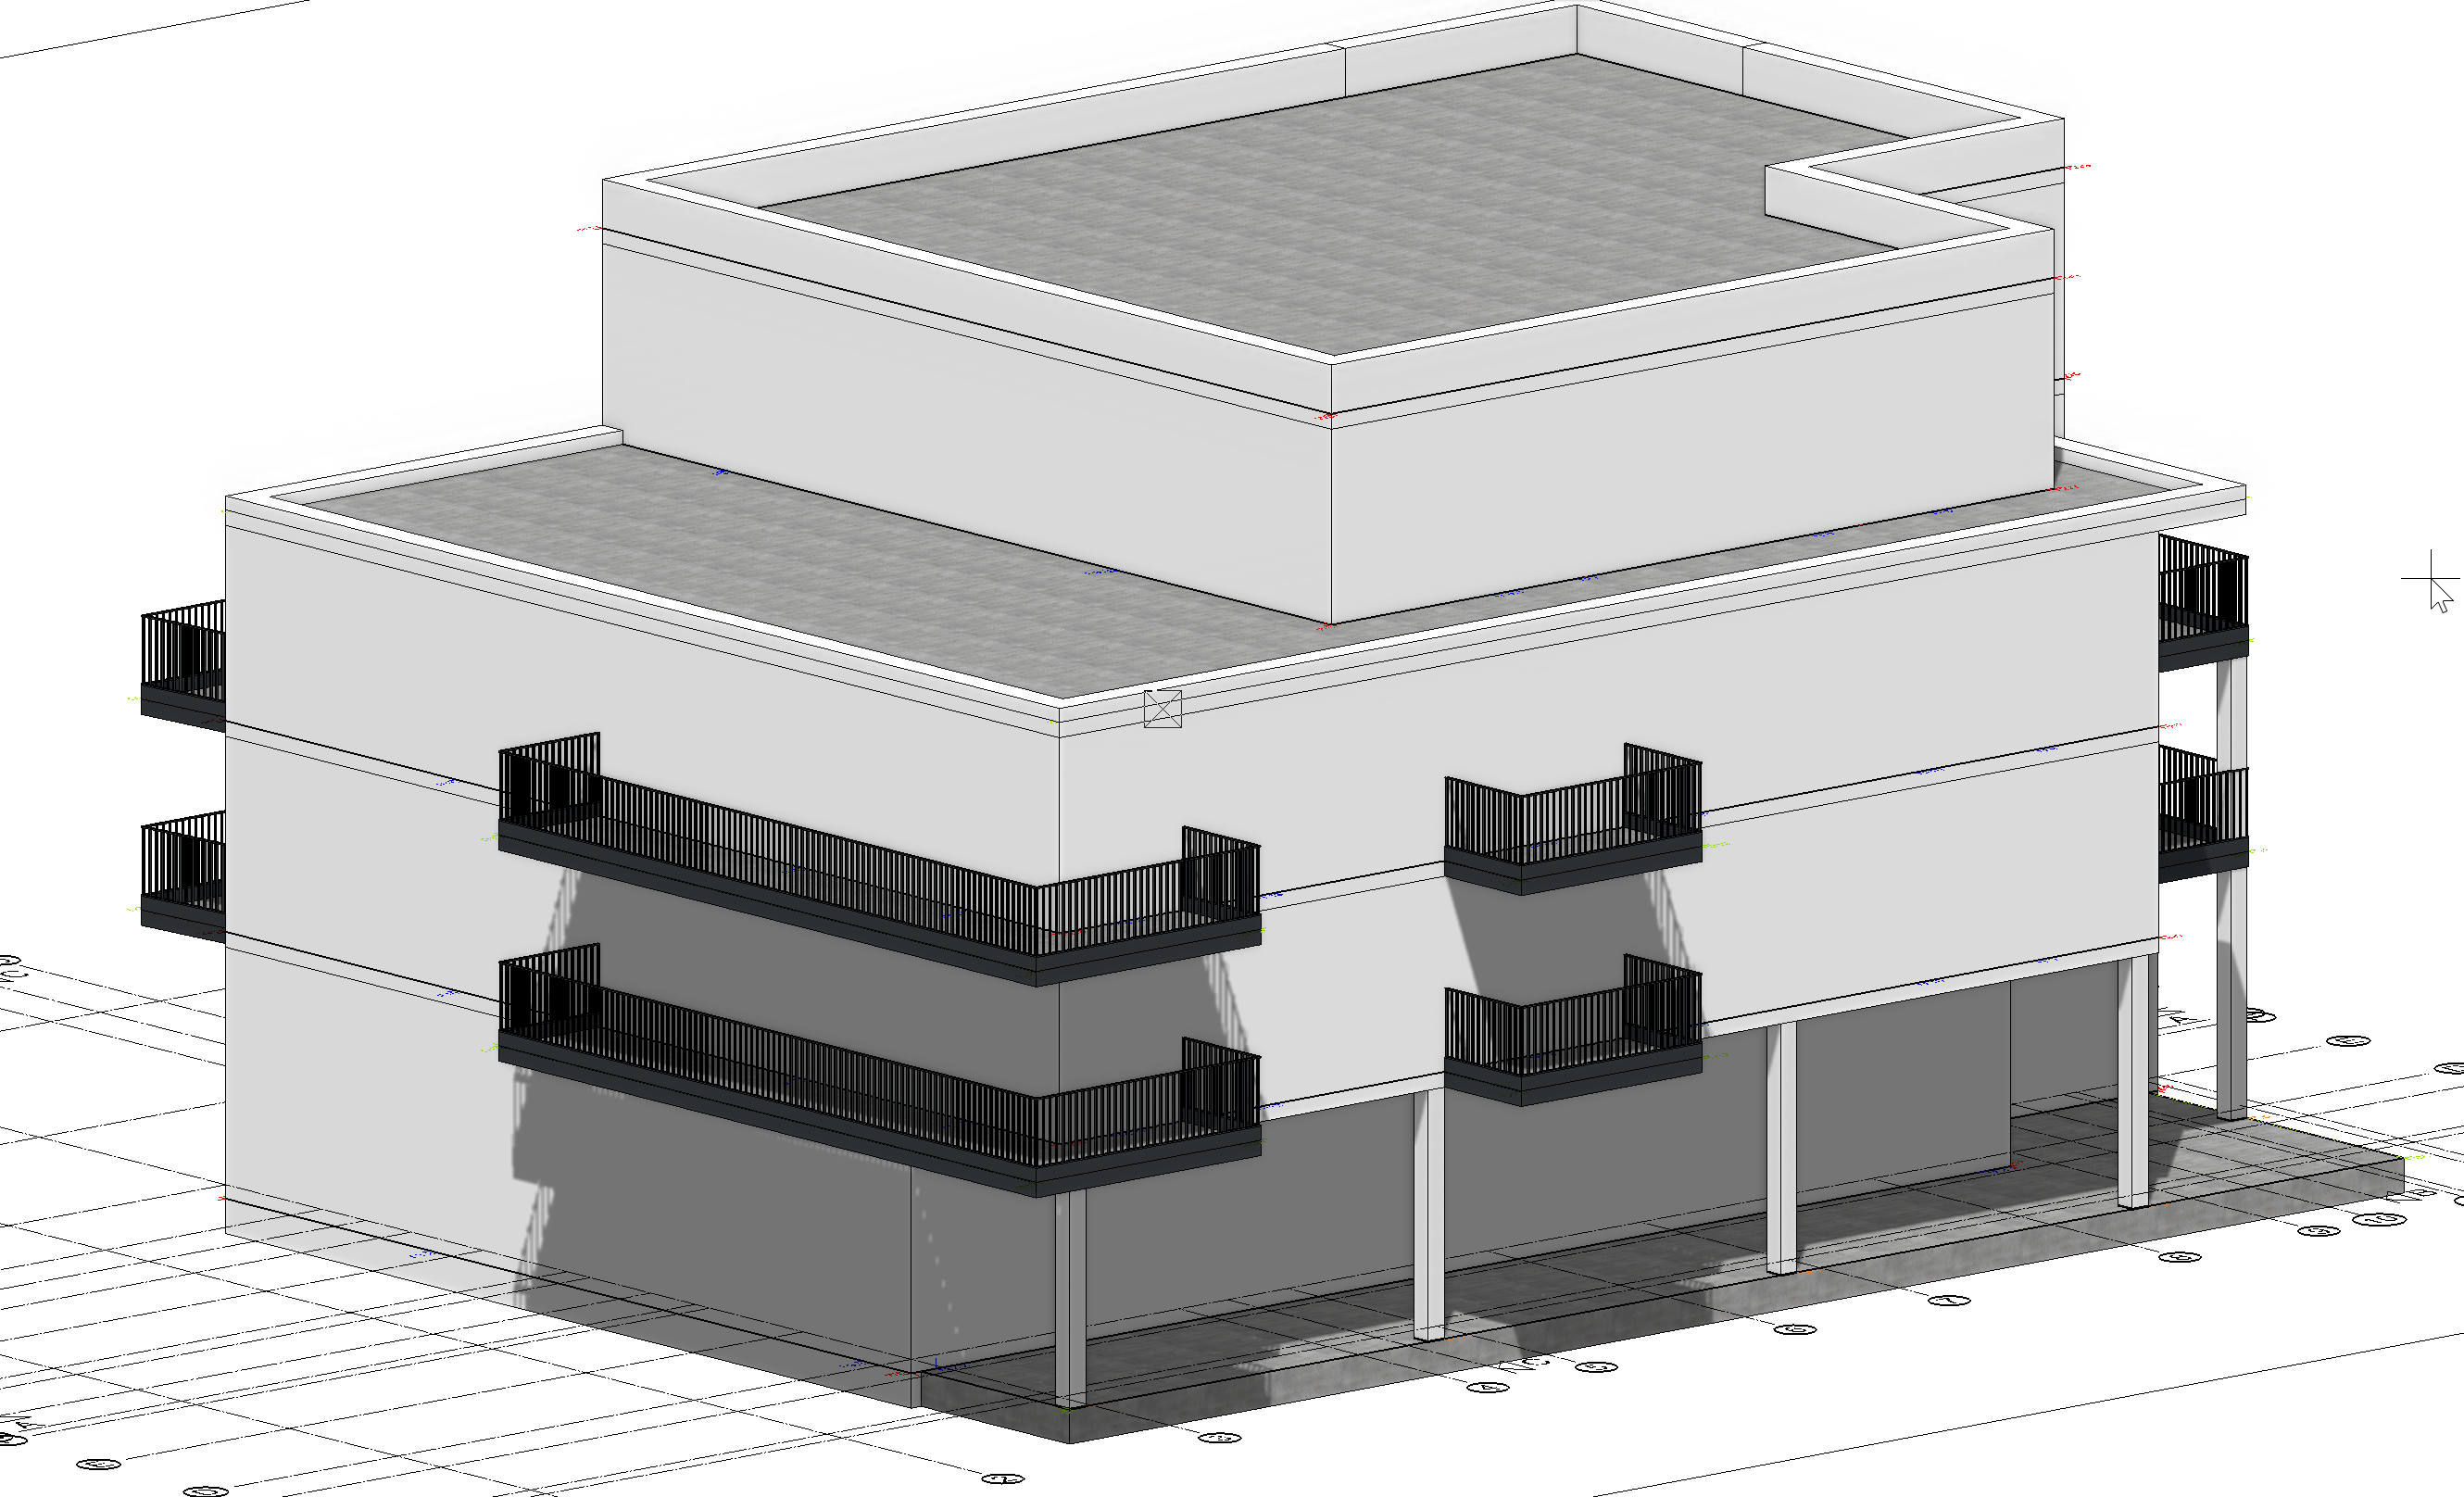
In doing this, the railings from the second floor are now also finished and our building model should look like this:
Top floor
Finally, we will create the terrace railing for the top floor.
Activate TF1, open the railing function and select the data record CK_Terrace_Railing. Trace the contour of the terrace as shown:

When you reach the wall again, double-click to end the polygon function.
Your building model incl. railings should now look like this: