User interface
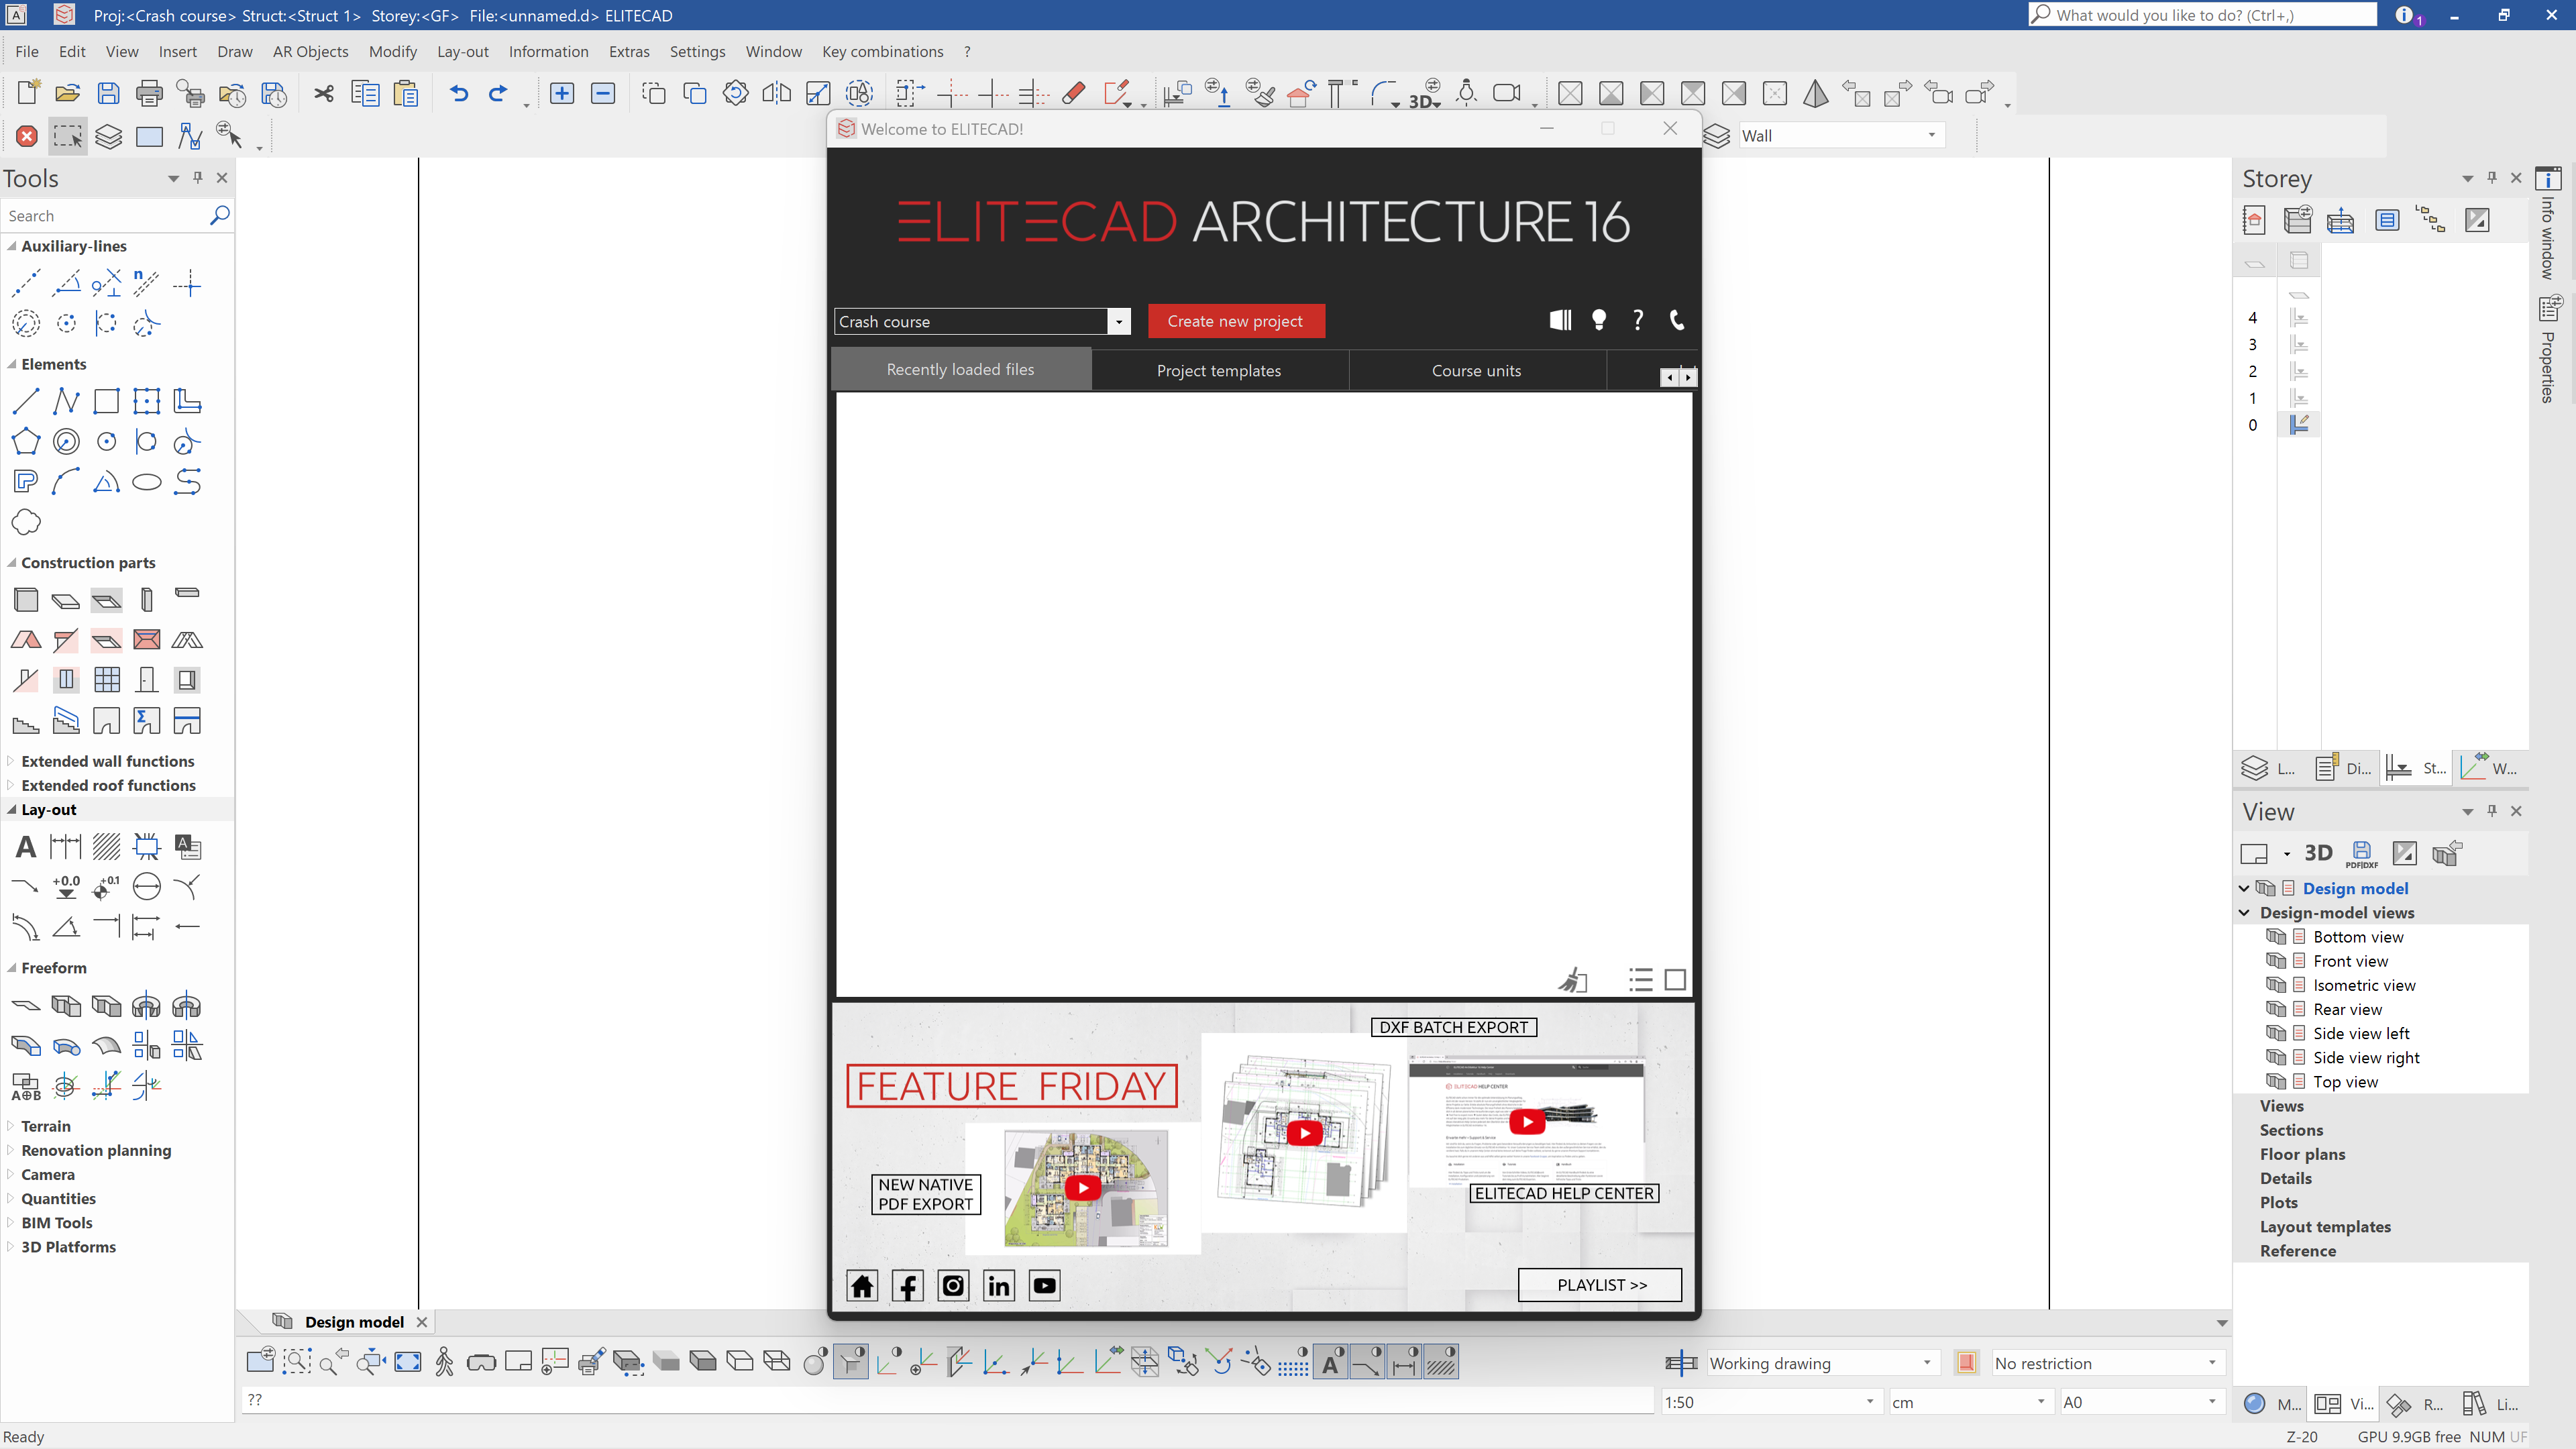
In the first part of the ELITECAD Crash Course, we would like to get to know the User Interface as well as the model controls. The first time you start ELITECAD, your user interface should look something like this:
Loading the sample project
To get to know the controls of the model, we will load a finished sample project. You can get to this by selecting the Sample project button in the ELITECAD Welcome Screen.
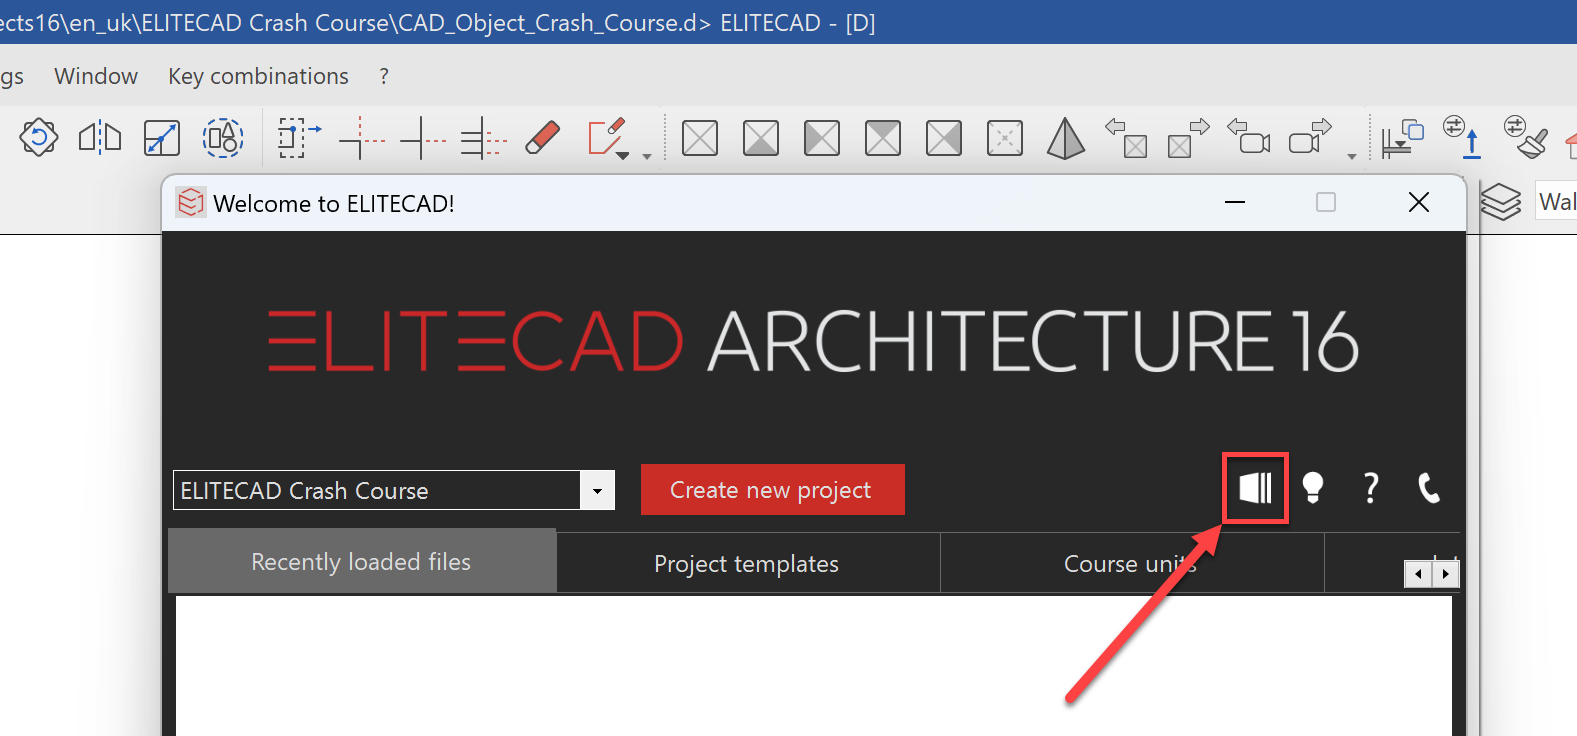
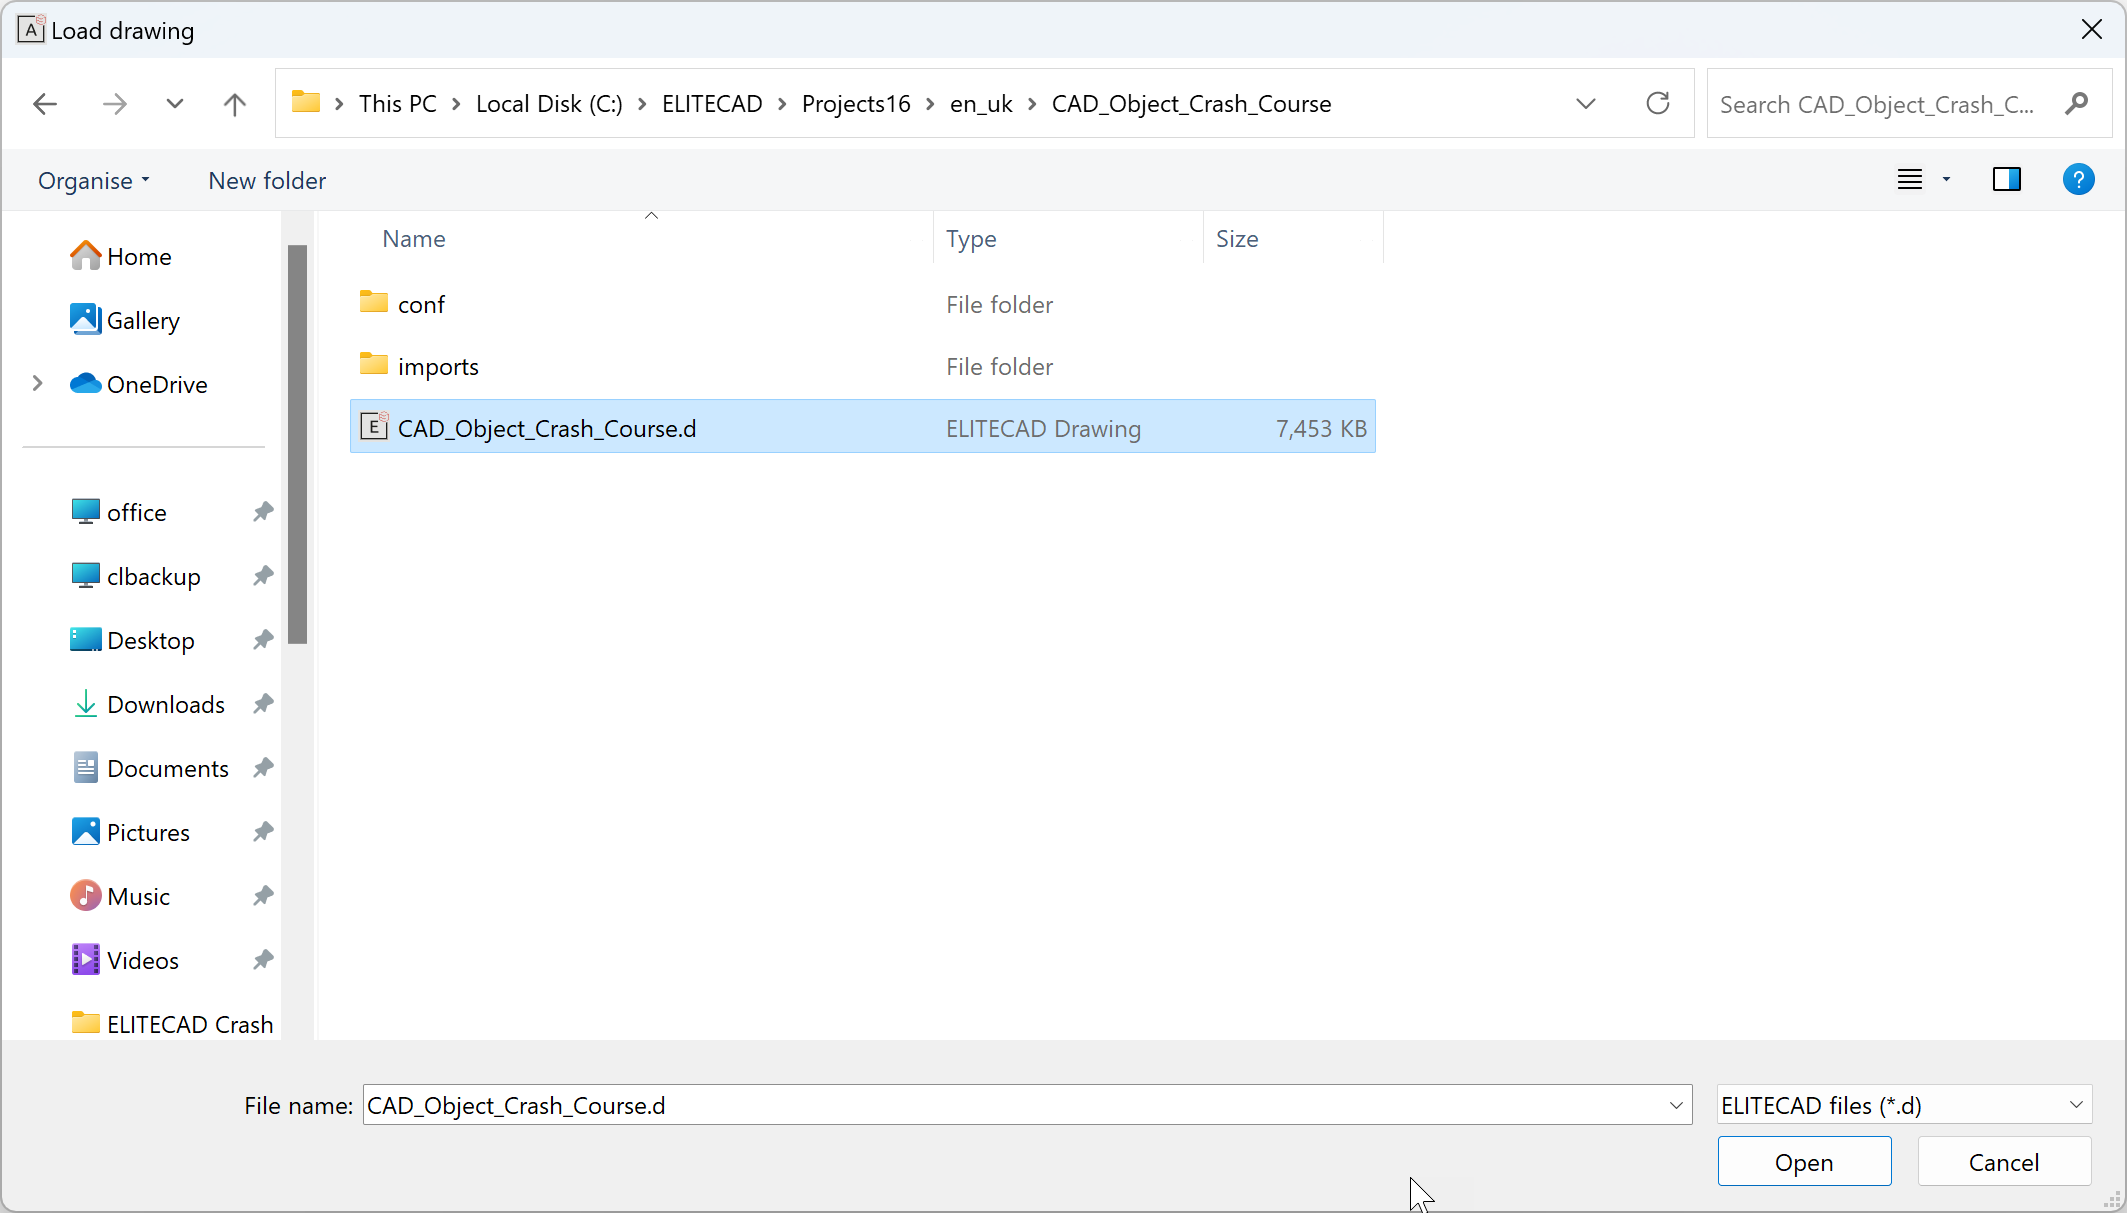
Select the sample project CAD_Object_Crash_Course and open the file *ELITECAD_Crash_Course.d
Note
If you do not see these sample projects here, then it is possible that either they are not installed or you have an incorrect region set. TODO: Links.
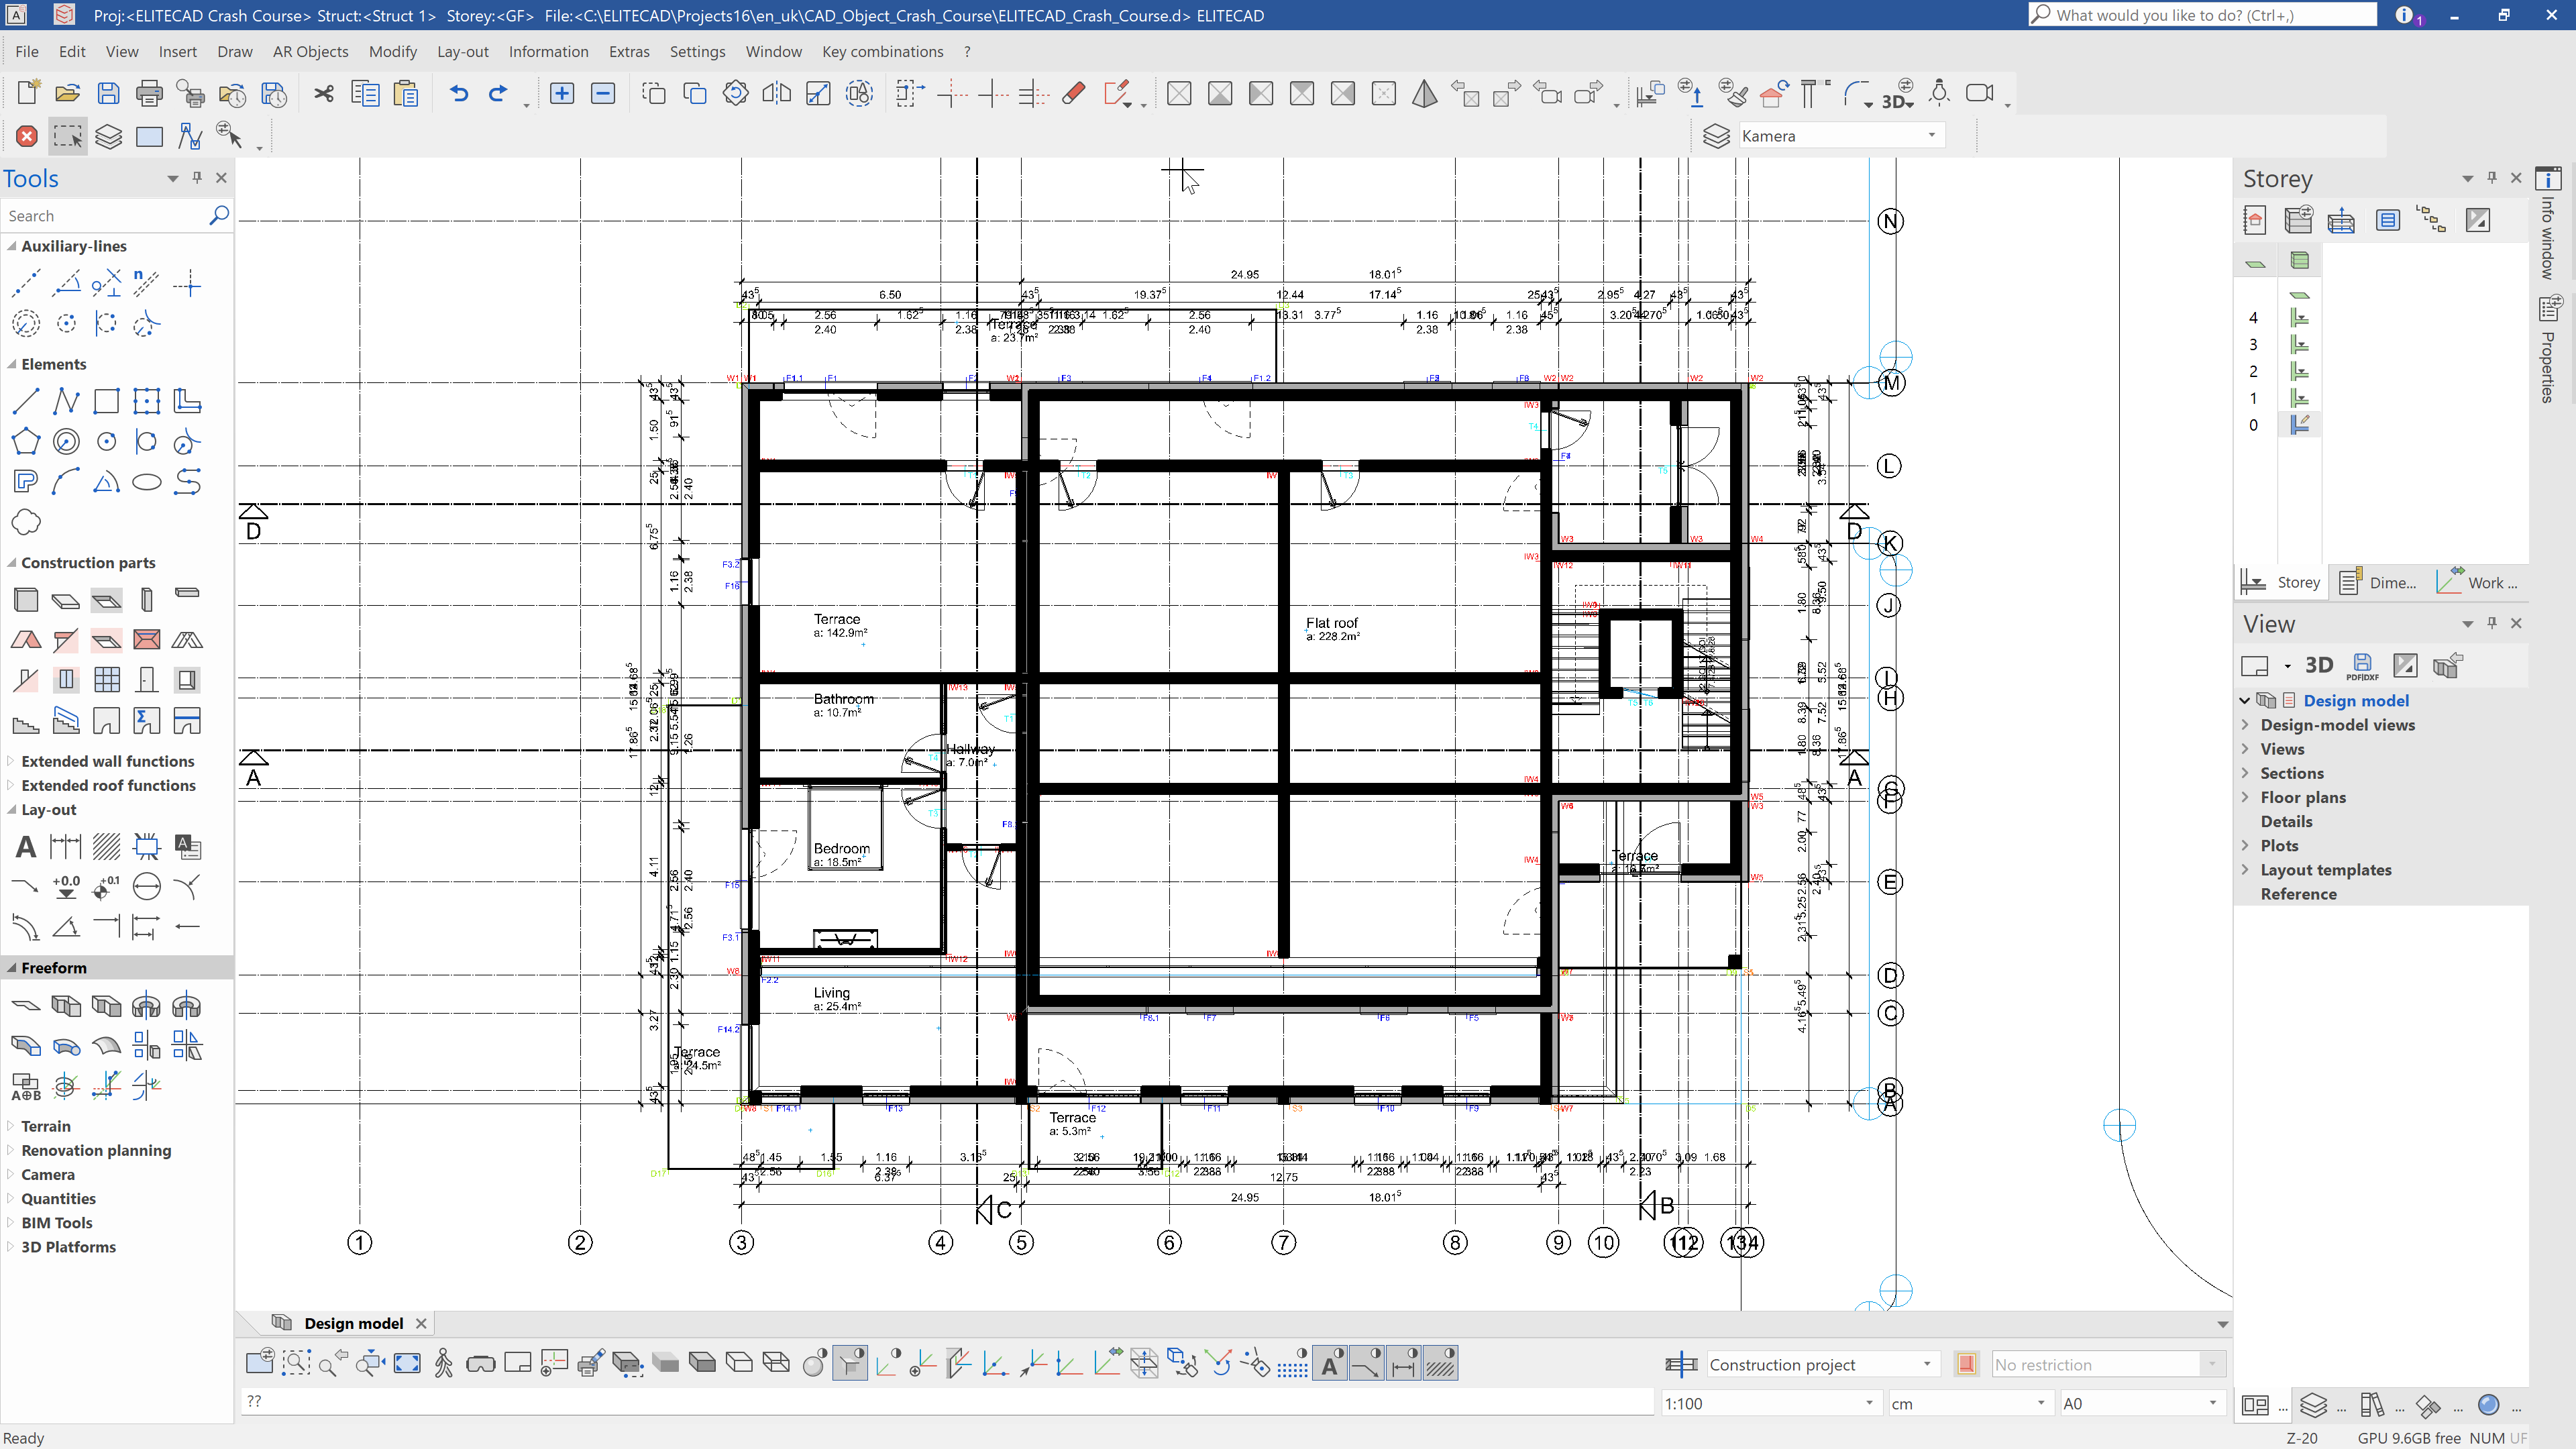
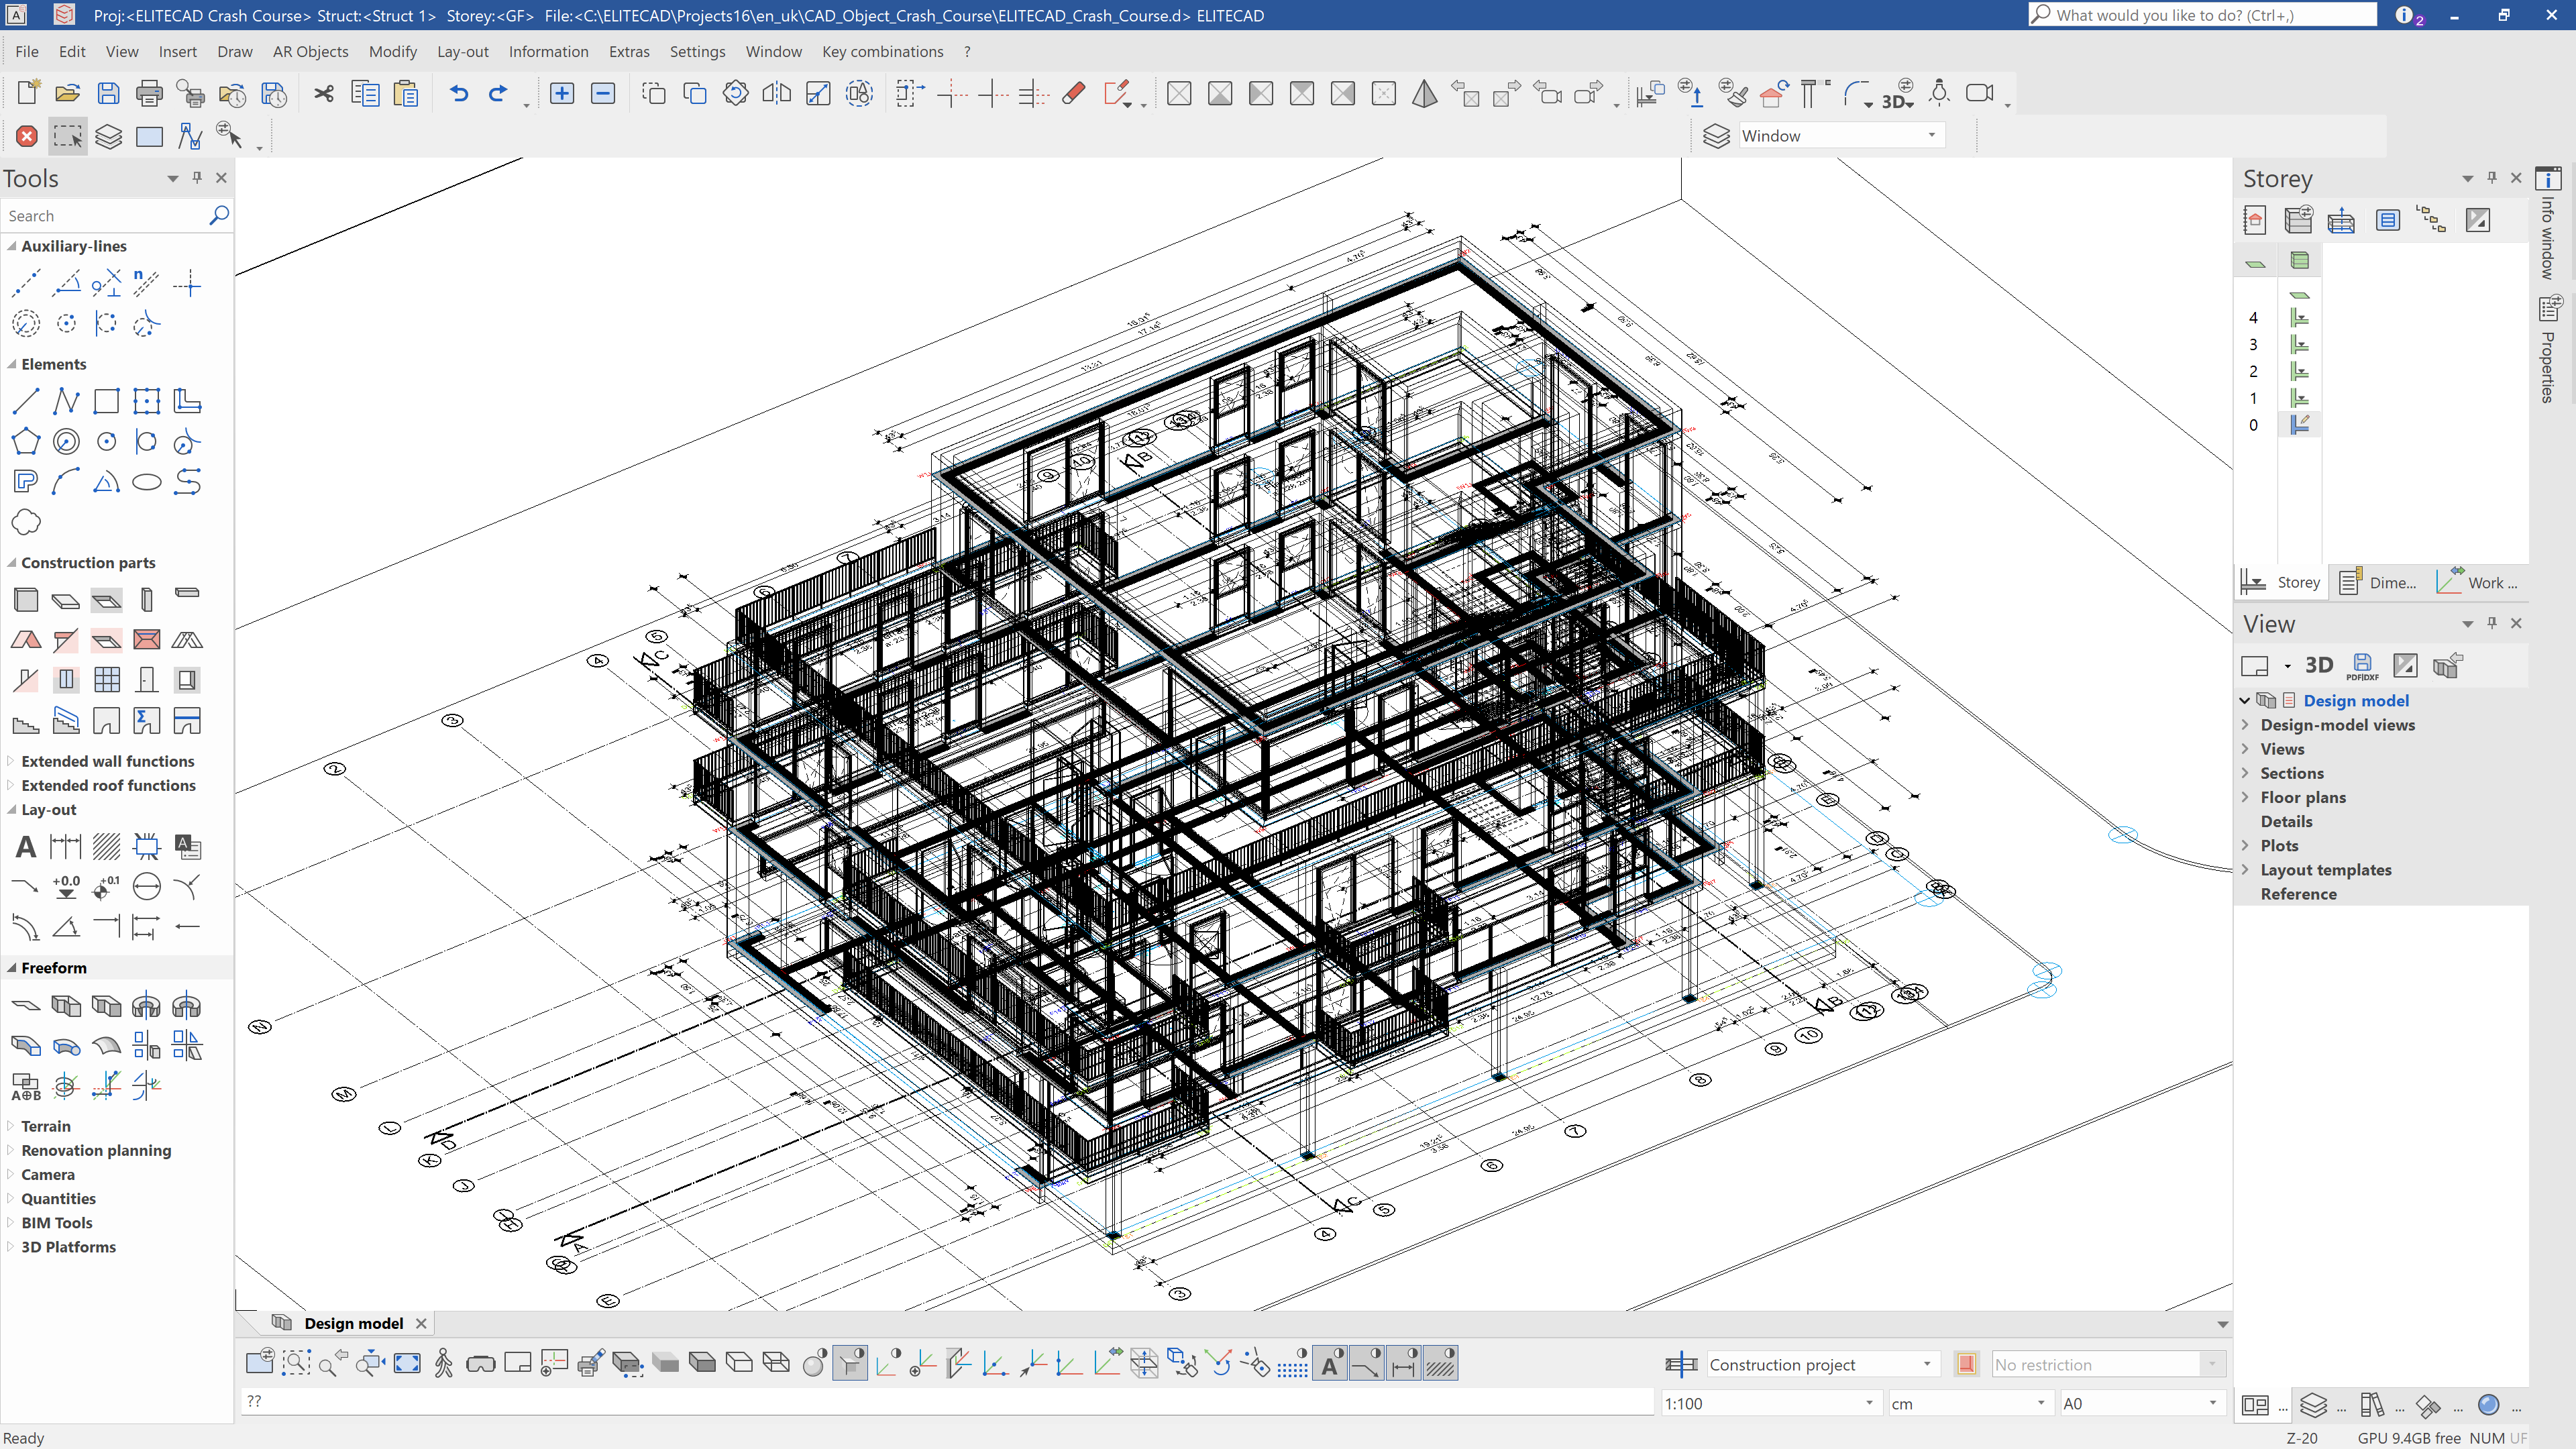
If the sample project is successfully loaded, the result should look like this:
Model controls
In order to be able to rotate and move the loaded model, we will look at how models in ELITECAD are controlled.
Zooming
To zoom, you only must turn the mouse wheel within the graphics window.
Rotate
So that you can turn the model, you press and hold the mouse scroll wheel and at the same time move the mouse cursor on the screen.
Move
So that you can move the model, you press and hold the Ctrl -key and the mouse scroll wheel and at the same time move the mouse cursor on the screen.
Shortcuts
There are many shortcuts in ELITECAD designed to make contolling your model more efficient. Here are two of the most important:
Reposition model to starting position
With the key combination Ctrl+Space, you can reset your model back to its original position so that you have a top view of your model.
Fit to screen
With the key combination Ctrl+Shift+Space, you can zoom in a way that all visible construction parts fill the graphics window.
Model depiction
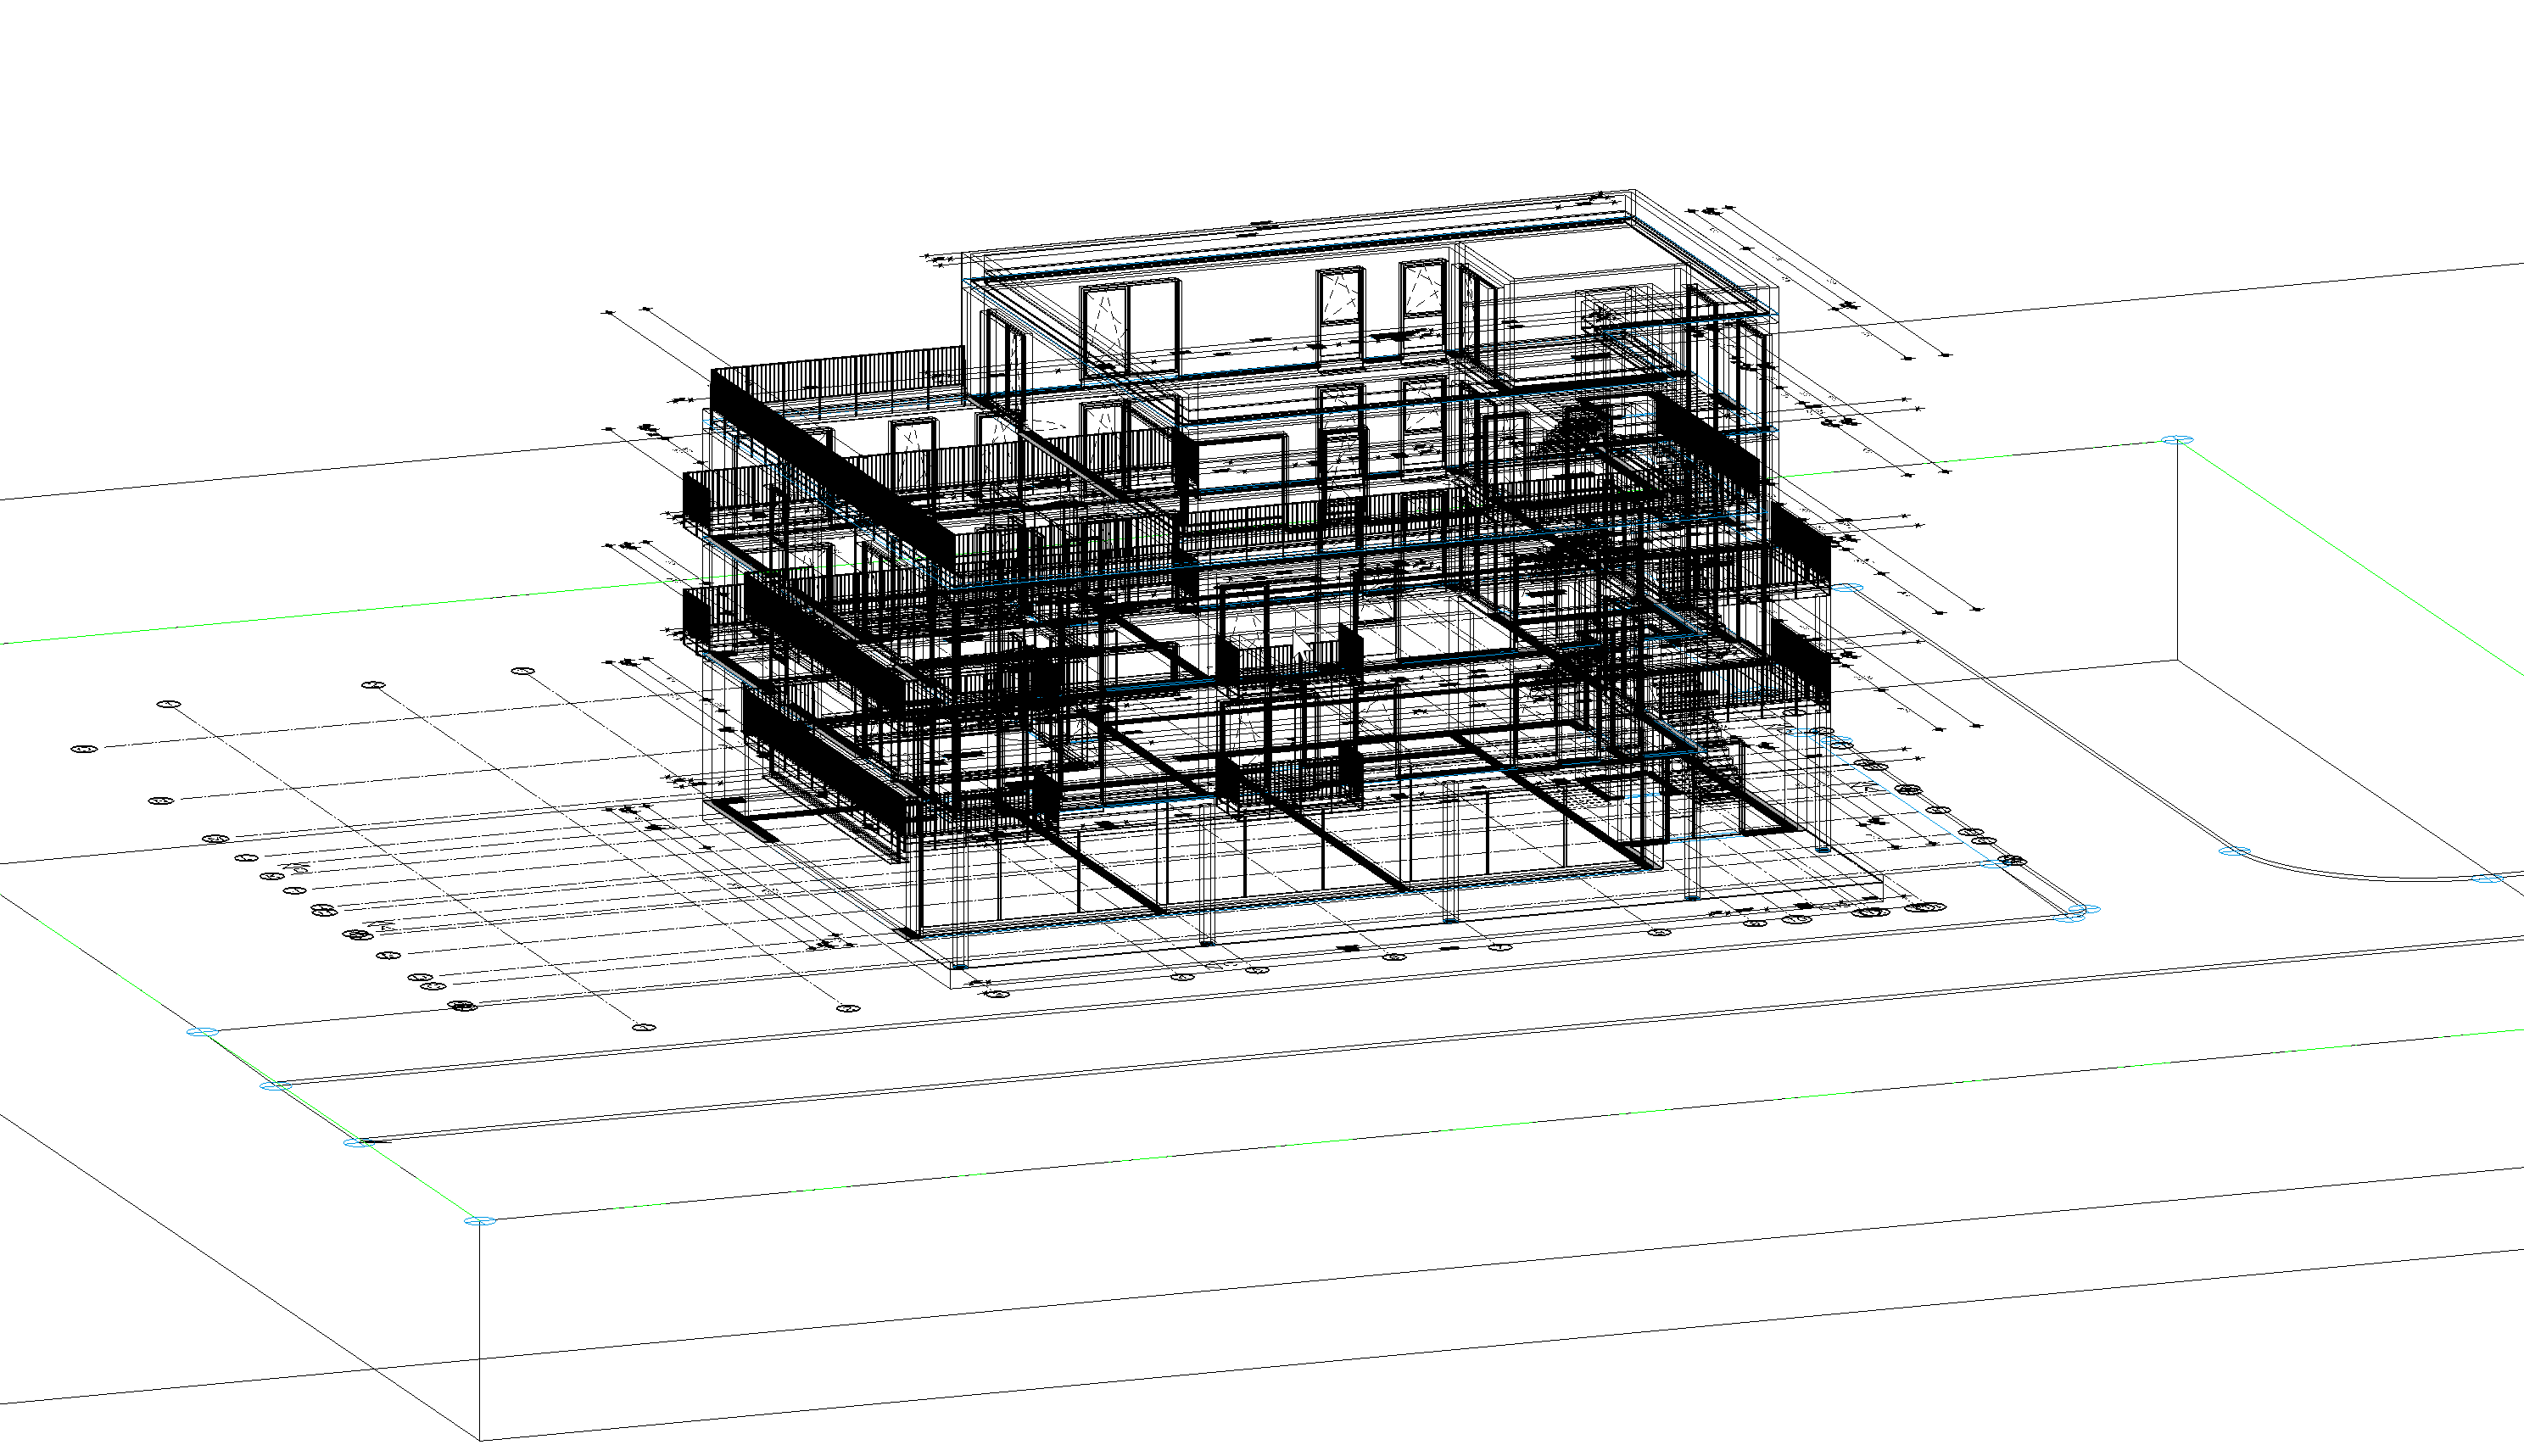
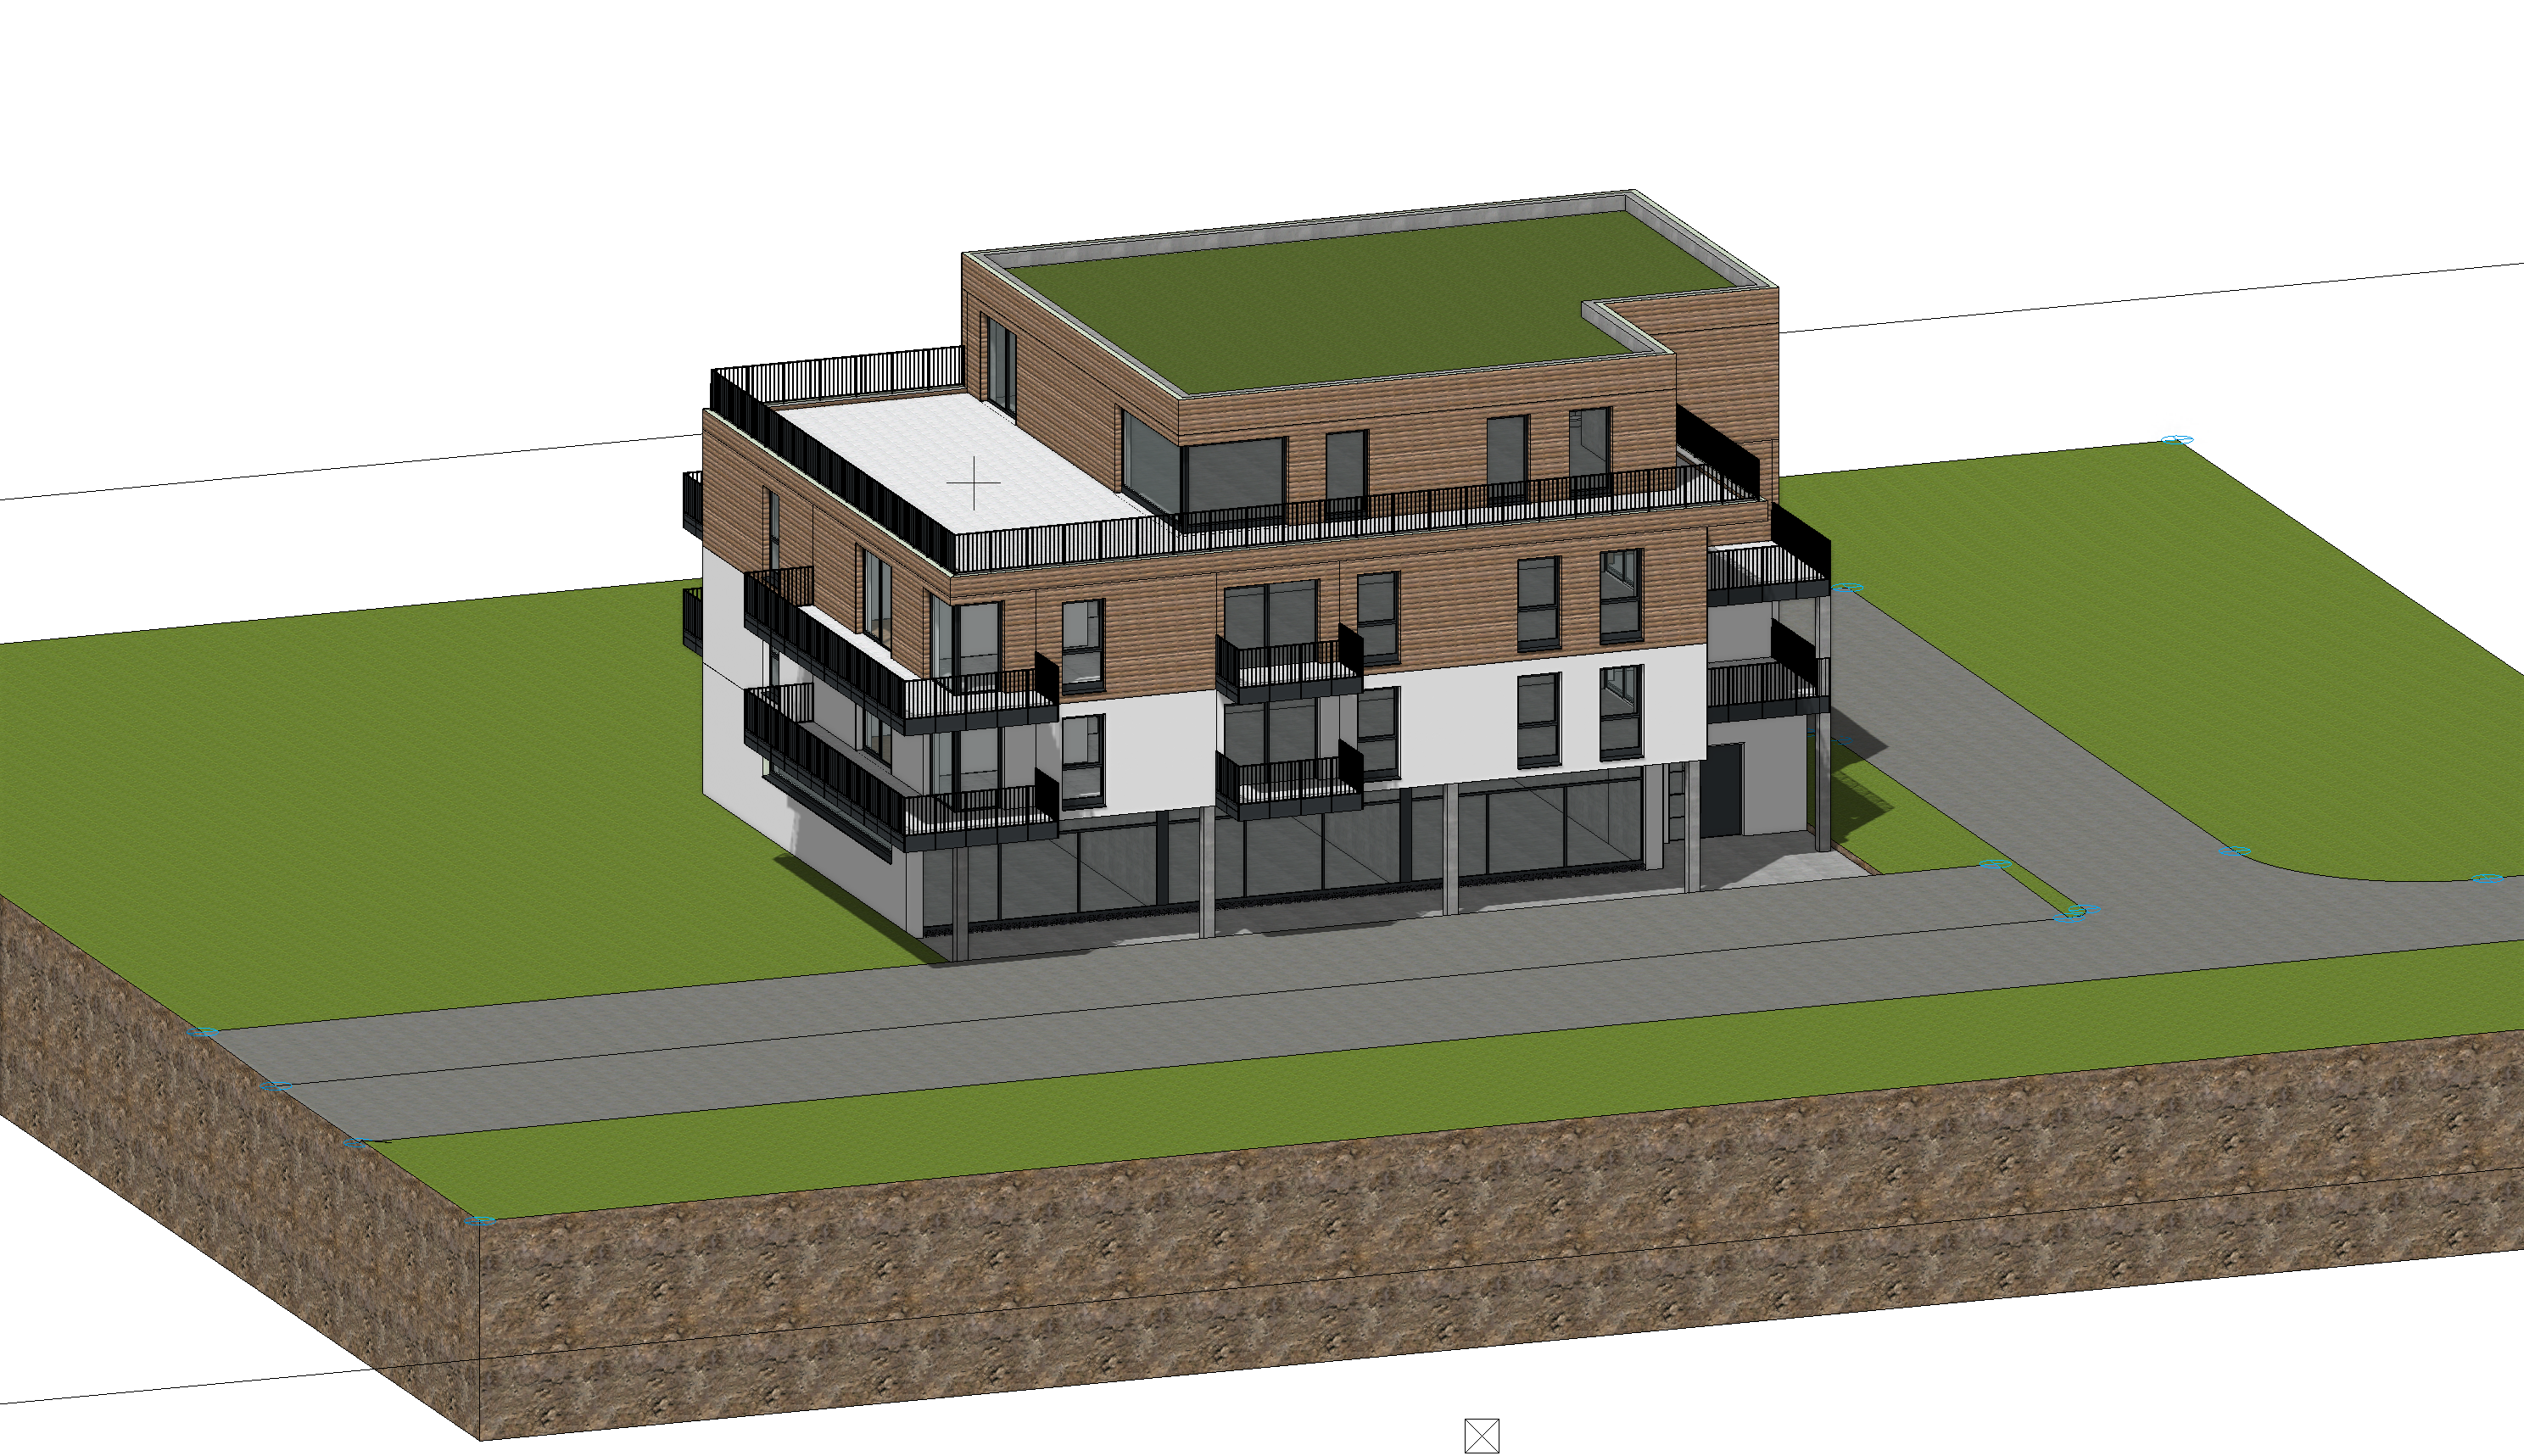
Wire model / solid model depiction
Currently, we see the model in the wire model depiction. The shortcut Ctrl+D can be used to switch between the wire model and solid model depictions modes.
Edges on/off
The edges can be turned on or off for the solid model depiction. This can also be easily toggled using the shortcut Ctrl+K.

Elements on/off
In the solid model depiction, 2D elements are by default not shown. The shortcut Ctrl+E can be used to turn these elements on and back off again.
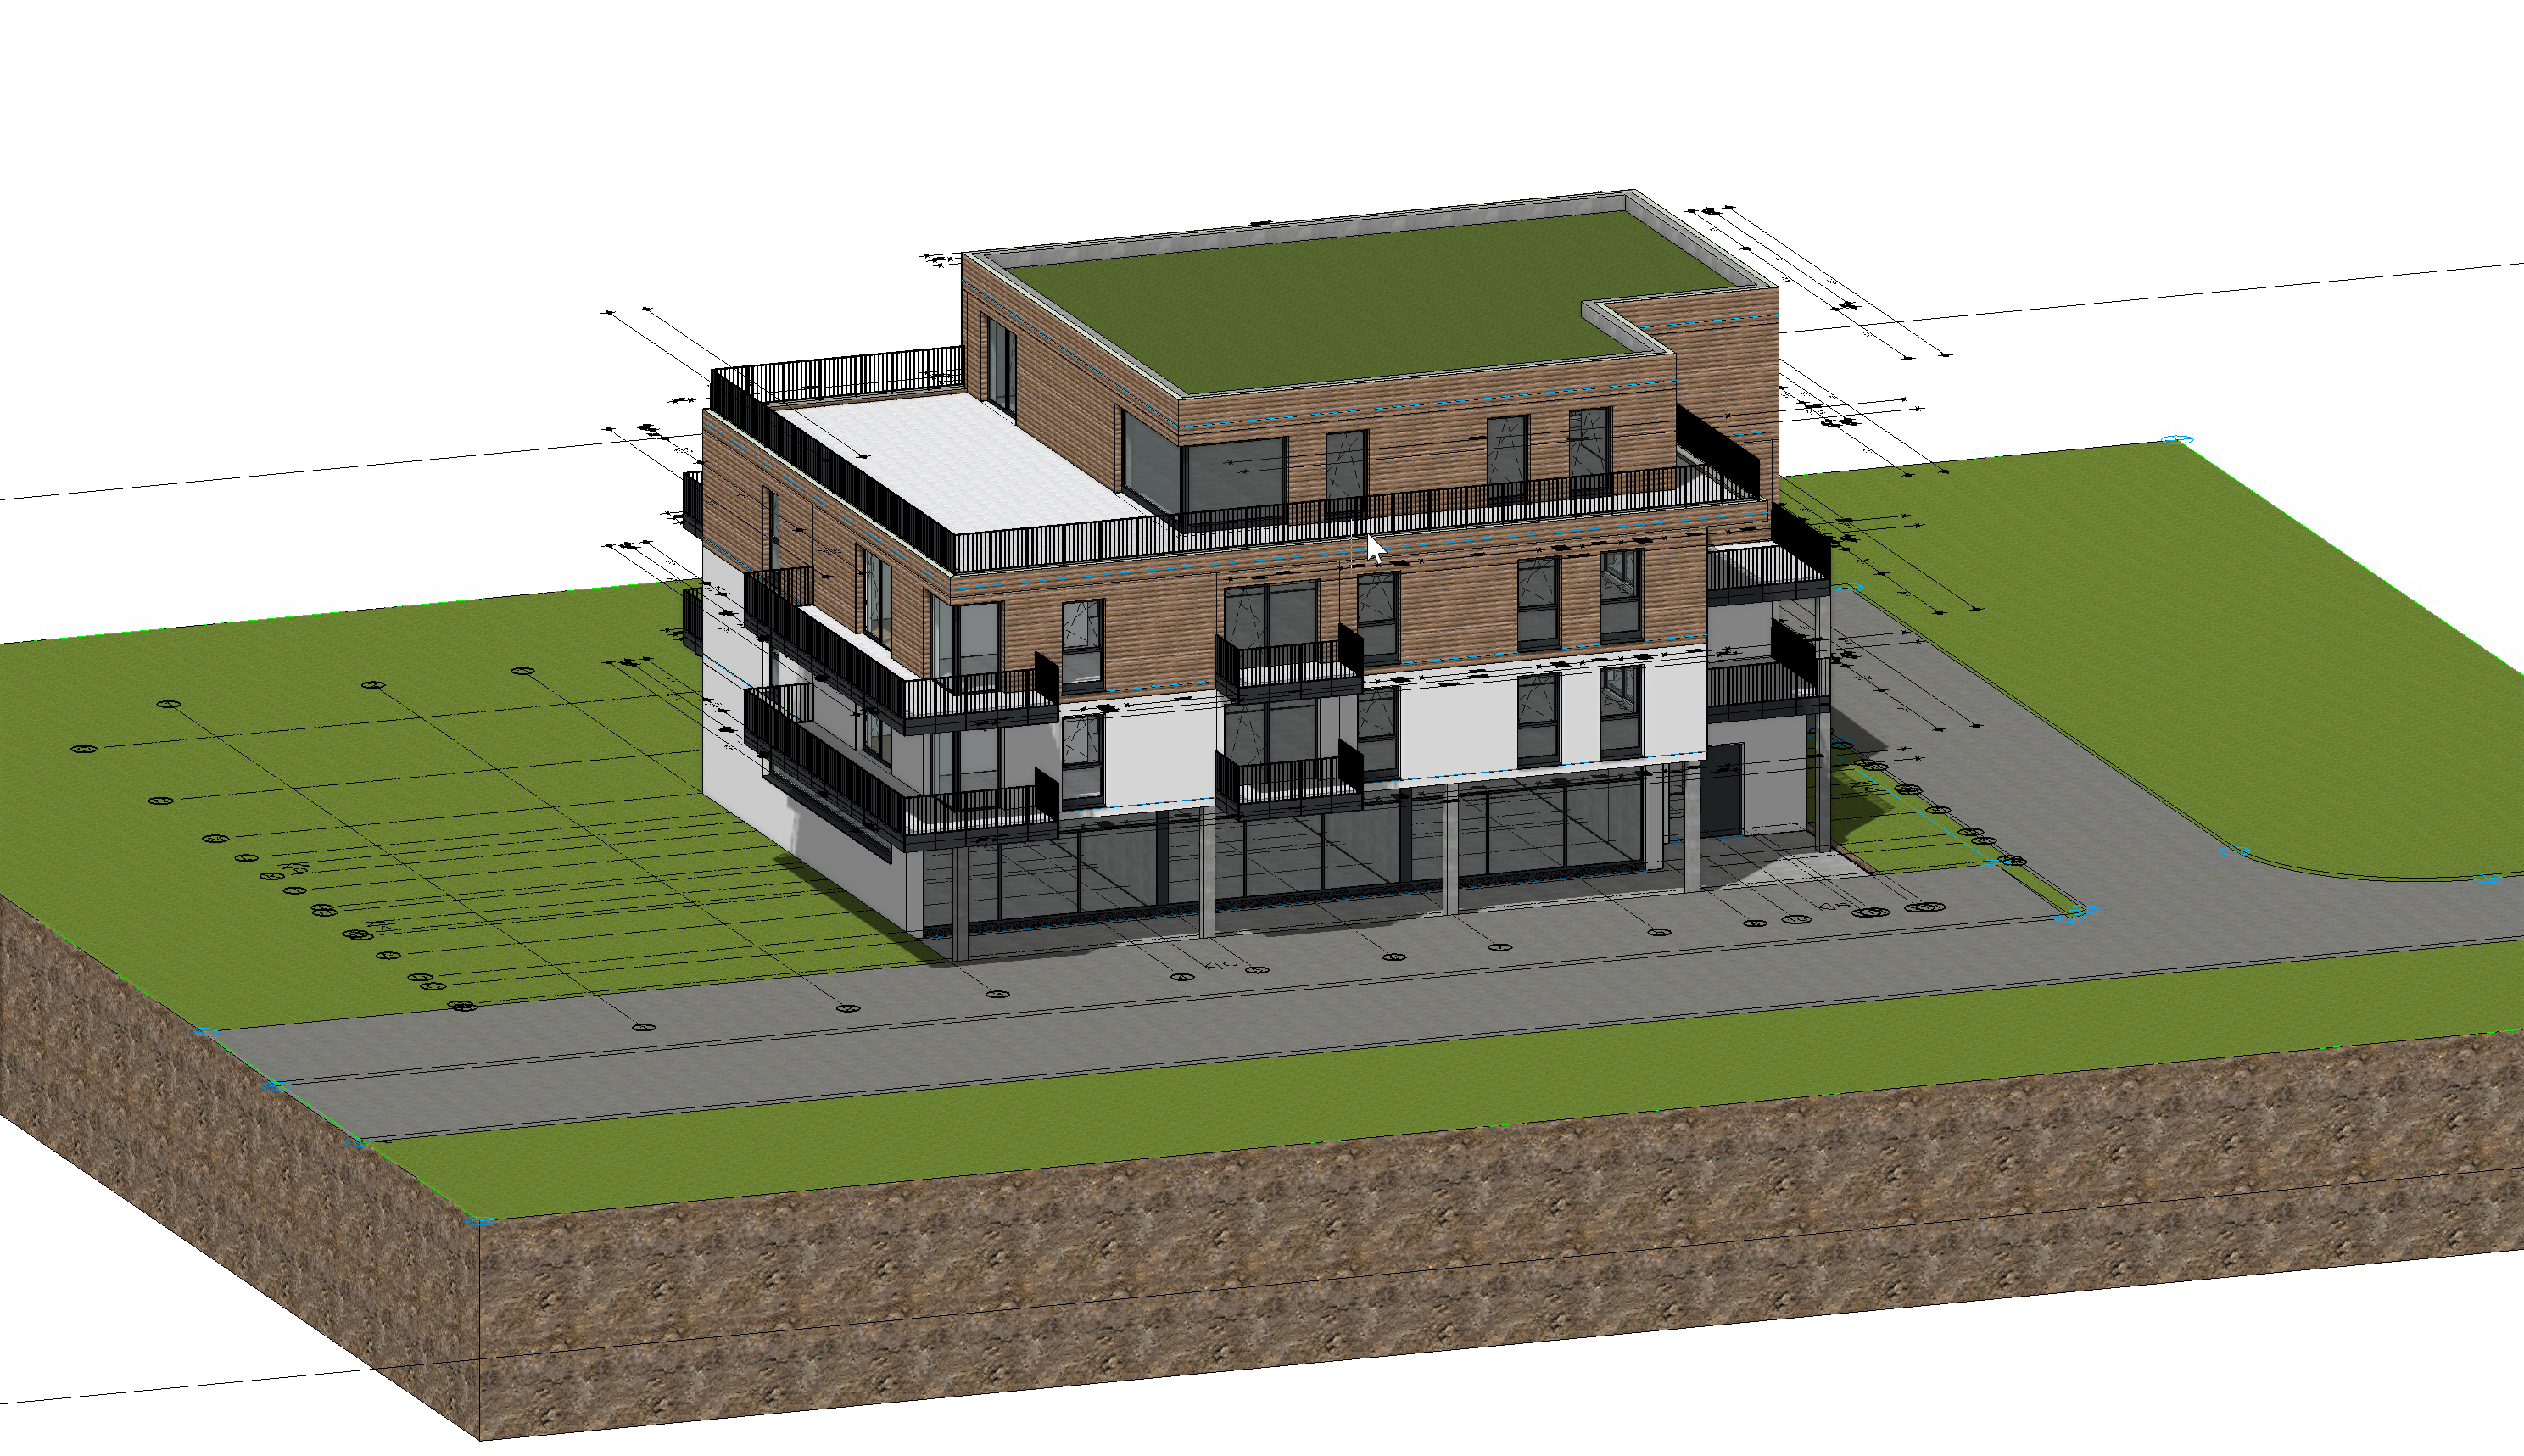
Image properties
The above mentioned shortcuts as well as many further image and depiction options can be toggled using switches at the bottom of the graphics screen. This bar also visually indicates which options are currently active.

Model structure/ Visibility
Every construction part is assigned to a Structure and Storey. Additionally, objects can be further categorised with the Layer Structure. Incorporated into these assignments is a Visibility filter with which the visibility of objects can be controlled. This allows for an efficient work flow with complex models.
Structures / Storeys
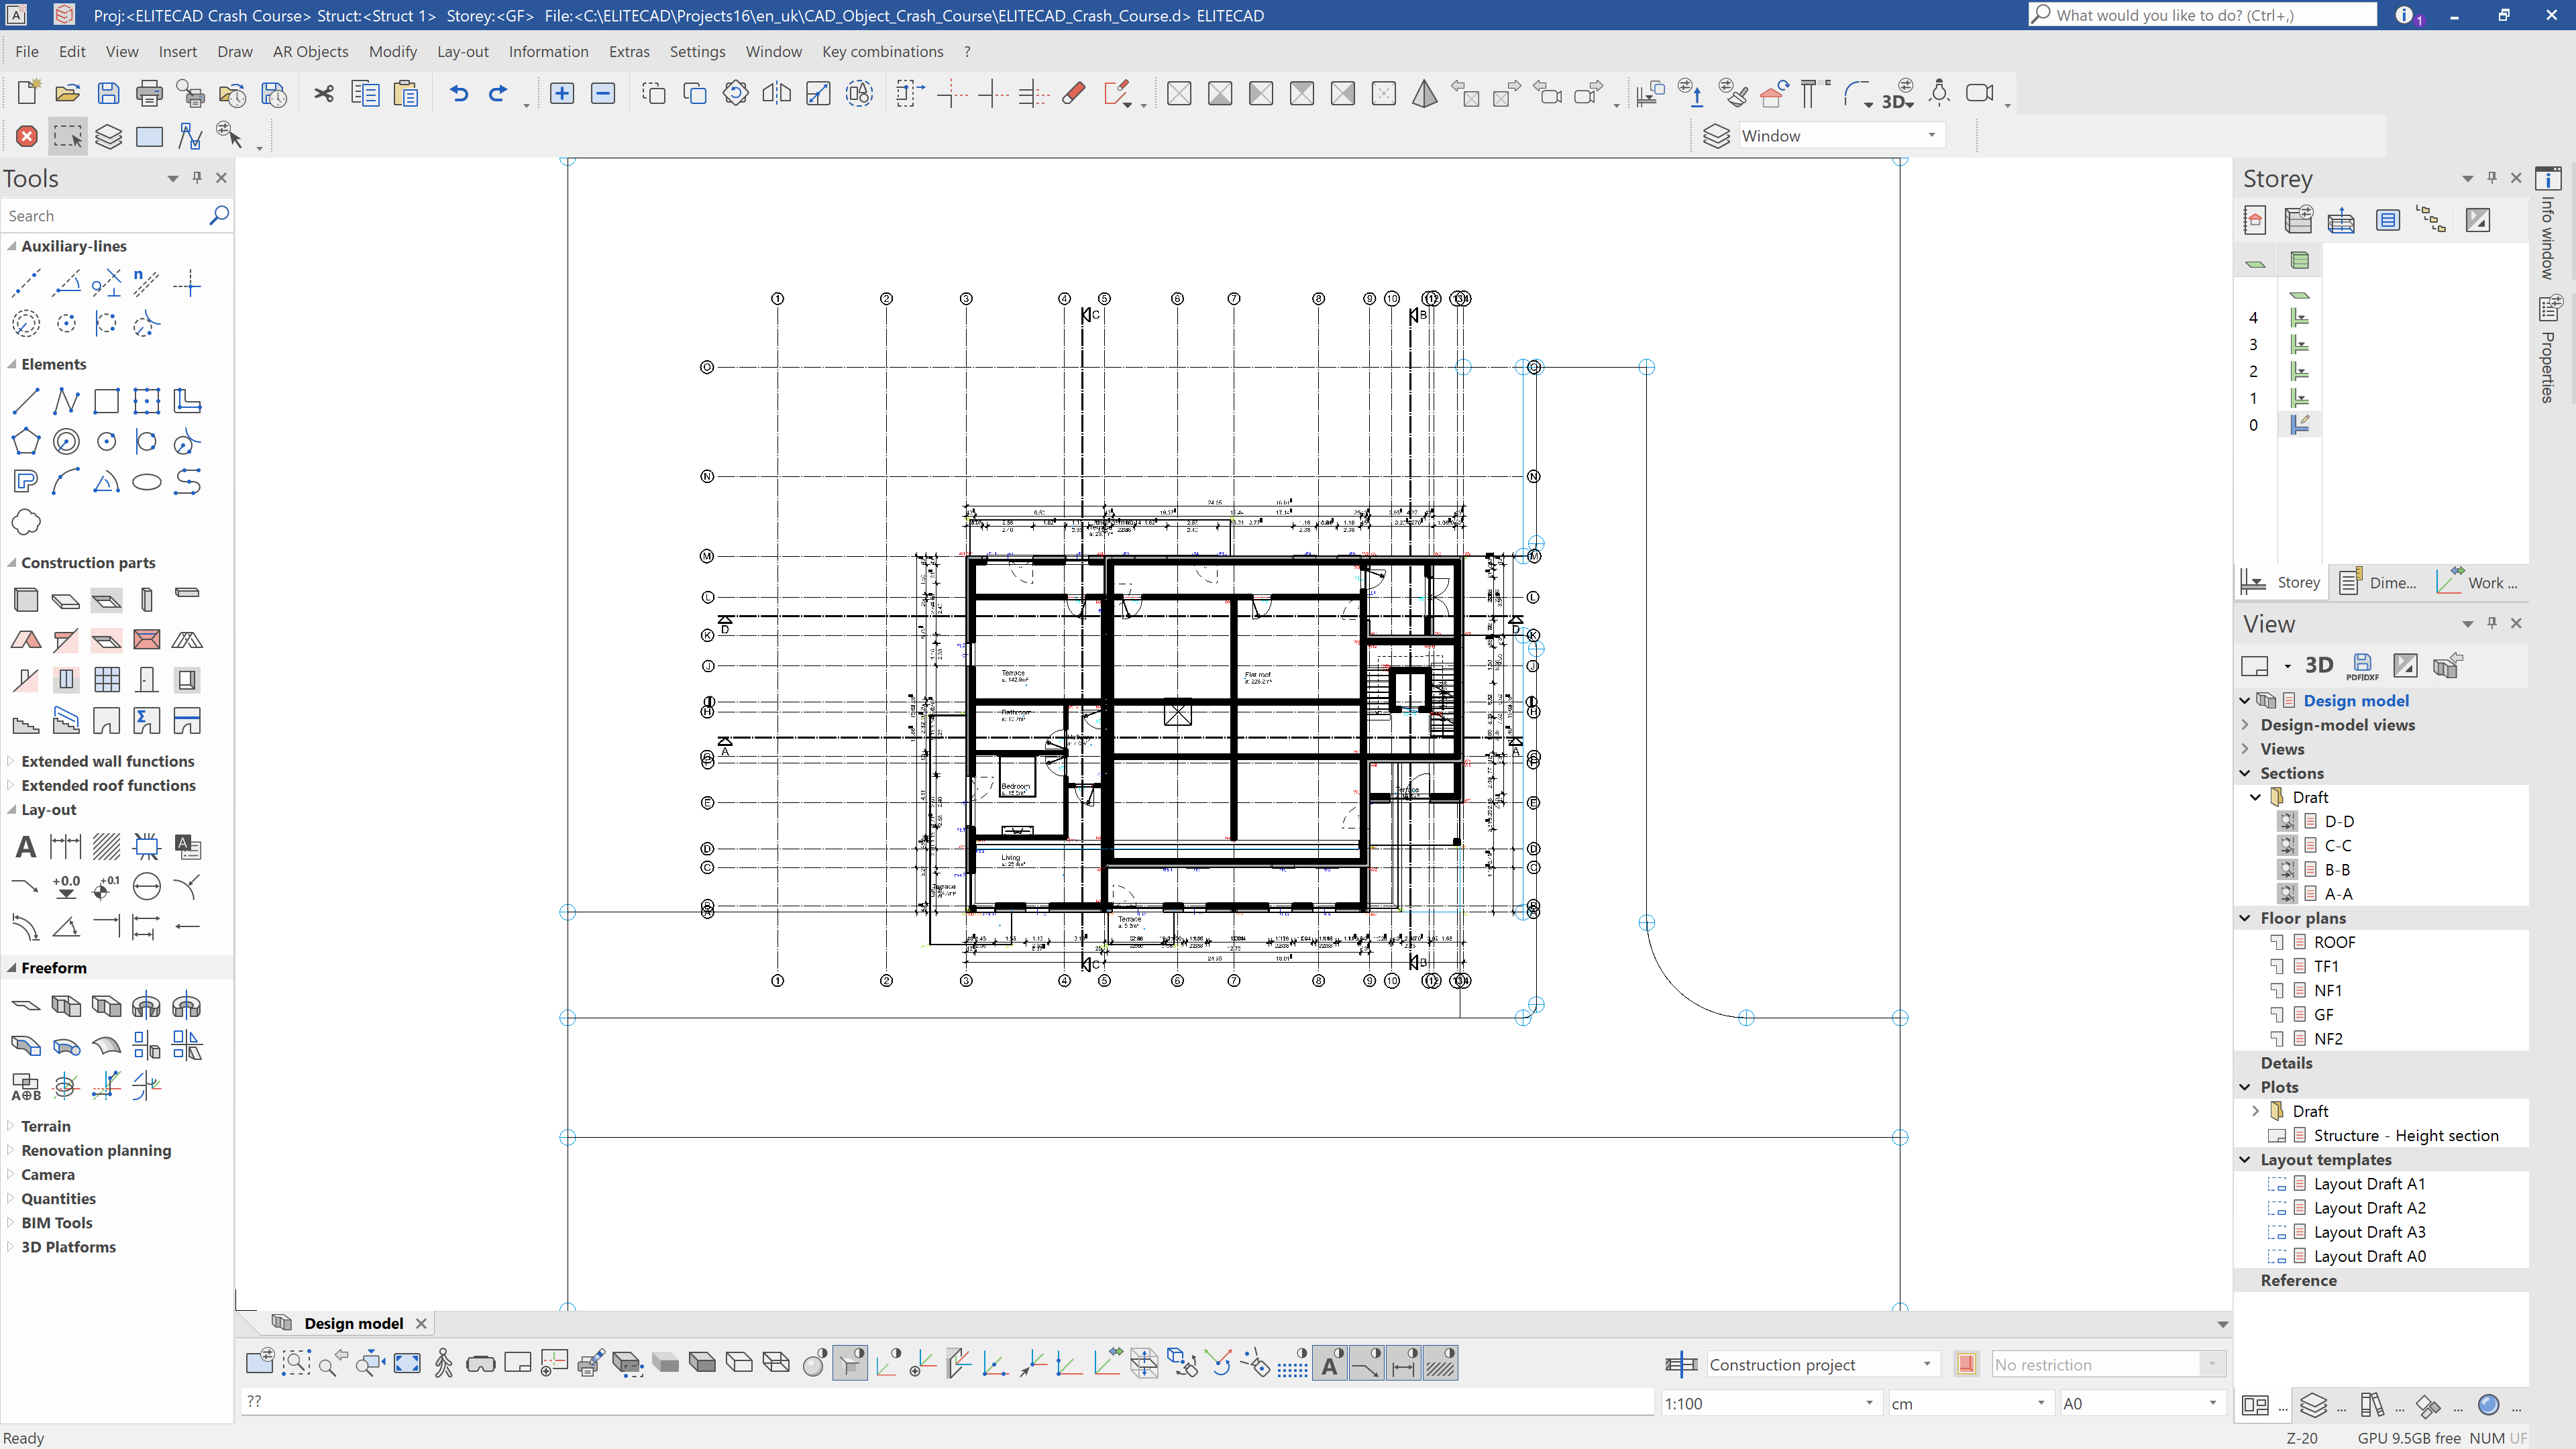
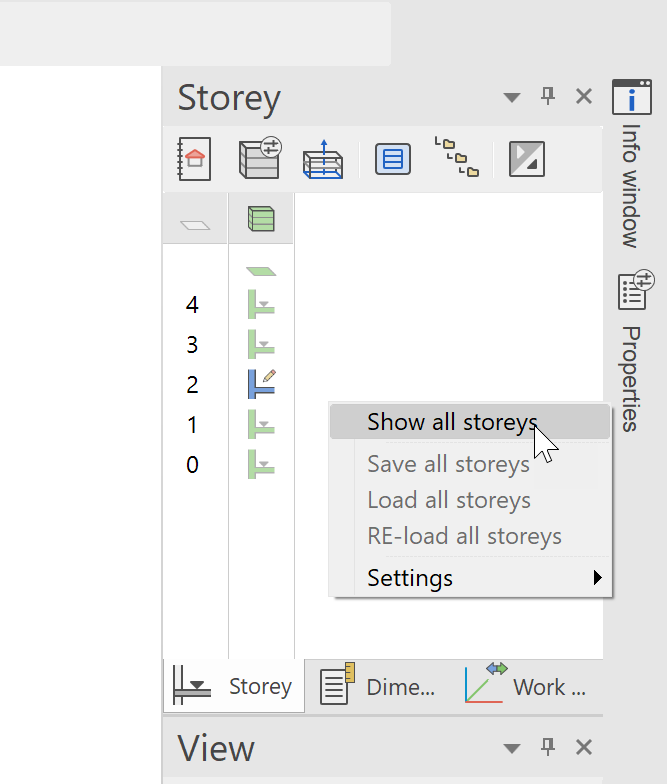
The storey manager is found in the upper right. This controls the visibility of storeys and structures. Every row depicts a storey of the building and each column is it's own structure. Our project has one structure with for storeys. By simply clicking on a storey, it will be added to the depiction. With a double click, it will be shown by itself which allows for more clarity while working on the 3D model. With a right click in the open area of the storey manager, a context menu is opened. From there can, for example, all storeys be depicted at once. When a new object is needed, for example, a new wall should be placed, the desired structure and storey must first be activated. The current storey is always highlighted in blue.

Layer

In addition to the structure and storey allocations, every construction part must be assigned to a specific layer. When planning with ELITECAD, this all happens automatically in the background and a wall is automatically assigned to the wall layer. Should you want to expand the layer definitions or assign construction parts to another layer, this can, of course, be done.
Layers can be switch on and off with the eye symbol. With a double click, the current active layer can be set. With a right click, a context menu is opened from which you can, for example, show a layer alone or invert the visibility.
Visibility filter
The final option for controlling visibility is the visibility filter. This is temporary and will only hold until the next change using the layer or storey manager. If you would like to, for example, modify a detail or construction part, you must only select the specific construction part and then using ![]() , it can be shown alone. And vice versa, you can select the specific construction part and then using
, it can be shown alone. And vice versa, you can select the specific construction part and then using ![]() , it can be set to invisible. In order to show all again, it is enough click
, it can be set to invisible. In order to show all again, it is enough click ![]() without any active selection.
without any active selection.
User interface
The ELITECAD user interface is subdivide into many dialogs and Manager windows that can be individually customised and arranged. Following a standard installation, the user interface should look something like this:
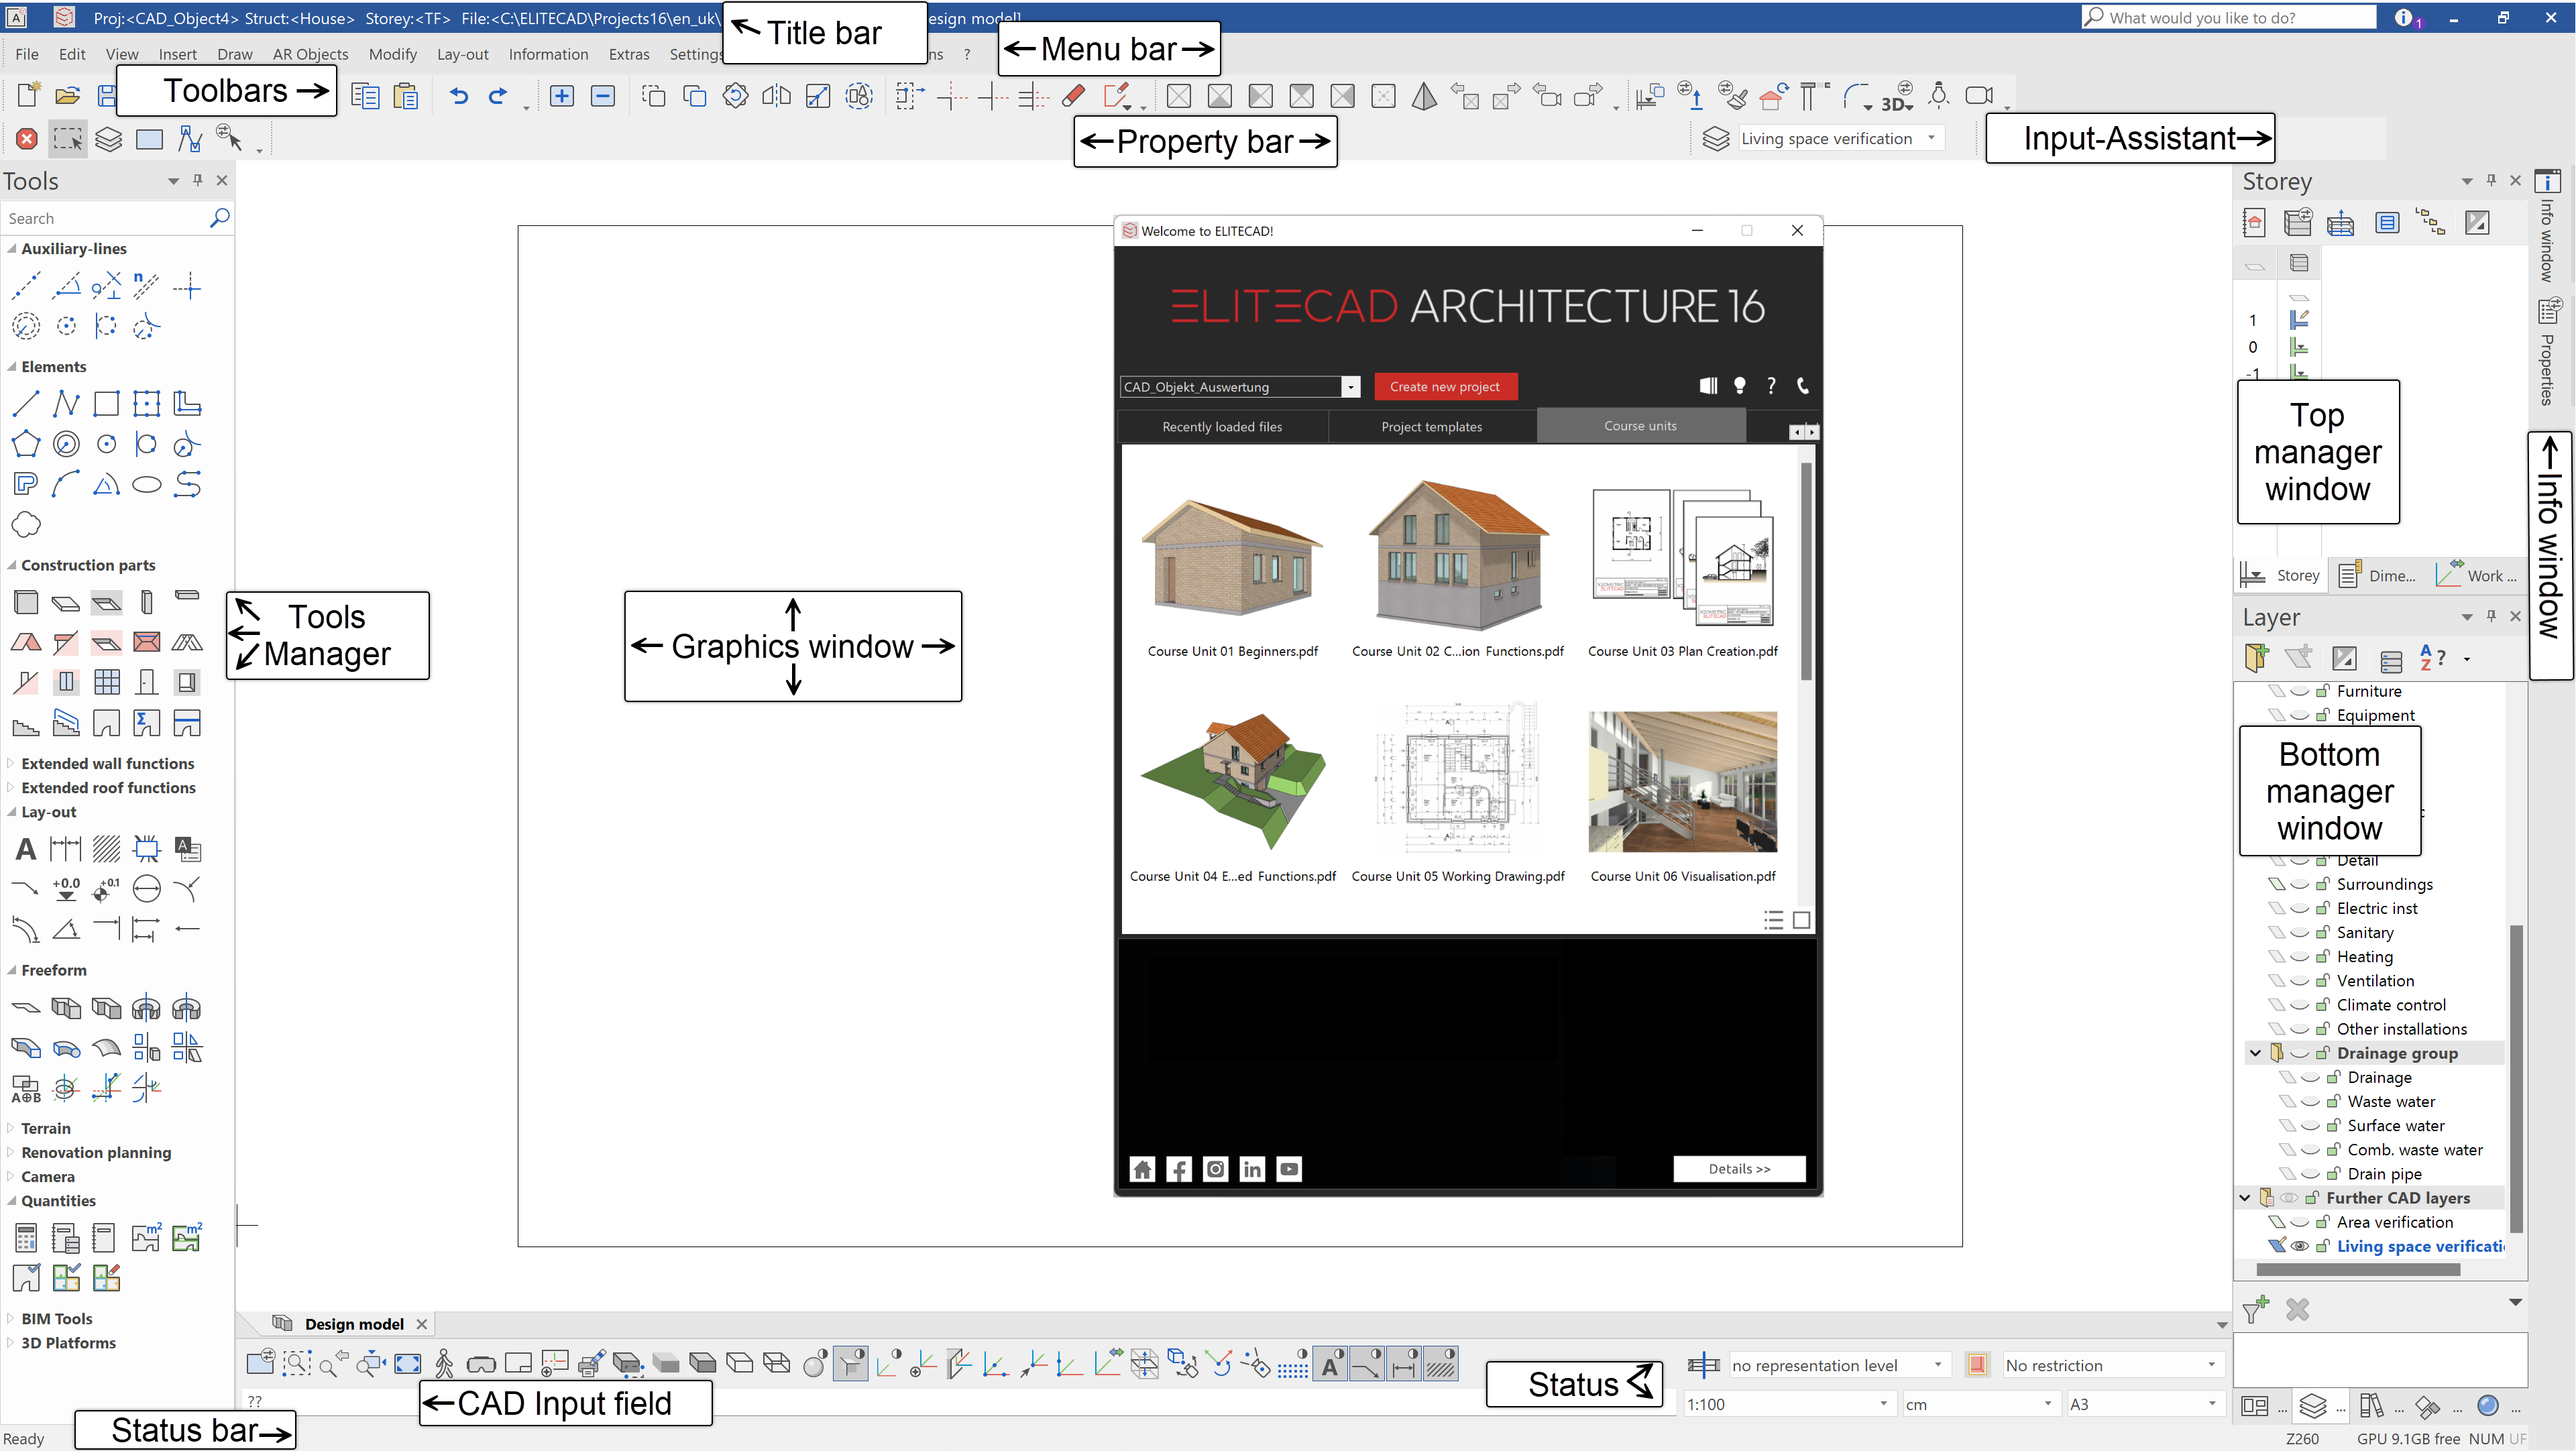
Graphics window
Menu bar
From the Menu bar and its sub-menus, almost every ELITECAD function or setting can be reached.
Toolbars
The toolbars offer quick access to the most important commands. Many of the symbols (also known as icons) are also available with the same meaning in the respective menu entry
Tools manager
Multiple toolbars are combined in the tools manager. These can be opened and closed as required, enabling you to fit many functions into a small space. The order in which the bars appear can be adapted and you can create and add your own customised bars.
Status bar Information from the active function as well as queries for user-input appear in the status bar.
Manger window
On the right side of the screen, the manager windows are docked. Along with the storeys manager, the views manager, layer manager, materials manager, library manager and the dimensions manager can also be found here.
Function assistant

Are you having trouble finding a specific function? The practical function assistant can help you with that. Simply describe what you would like to do in the text field in the upper right. If you type "create wall" as an example,
the function assistant not only finds the function but also initiates it for you!
Options
Do you want to adjust some setting in order to work more efficiently, then you can do this n the menu path "Settings->Options.
Help
With the goal to assist you with your start as well as your daily work with ELITECAD, we have created the ELITECAD Help Center. Here, you will find detailed descriptions of all ELITECAD functions in an interactive web-based platform. The Help Center is also completely integrated into ELITECAD. Do you need help with a specific function and don't want to search through the handbook? Just click on the "?" in the current dialog and the corresponding help page in the ELITECAD Help Center will open in your browser. With the shortcut F1, it is even faster.